

如何在 Azure 容器应用程序上部署具有 Elastic Observability 的 Hello World Web 应用程序-CSDN博客
| 阿里云国内75折 回扣 微信号:monov8 |
| 阿里云国际,腾讯云国际,低至75折。AWS 93折 免费开户实名账号 代冲值 优惠多多 微信号:monov8 飞机:@monov6 |

Elastic Observability 是提供对正在运行的 Web 应用程序的可见性的最佳工具。 Microsoft Azure 容器应用程序是一个完全托管的环境使你能够在无服务器平台上运行容器化应用程序以便你的应用程序可以扩展和缩减。 这使你能够实现双重目标满足每个客户的可用性需求同时满足你尽可能高效地开展工作的需求。
使用 Elastic Observability 和 Azure 容器应用程序是开发人员部署可通过完全可观察操作自动扩展的 Web 应用程序的完美组合。
本博文将向你展示如何将简单的 Hello World Web 应用程序部署到 Azure 容器应用程序然后引导你完成实施 Hello World Web 应用程序的步骤以便能够通过 Elastic Cloud 观察应用程序的操作。
Elastic 可观测性设置
我们将从设置 Elastic Cloud 部署开始这是我们将要部署的 Web 应用程序的可观察性所在。
从 Elastic Cloud 控制台中选择 Create deployment。
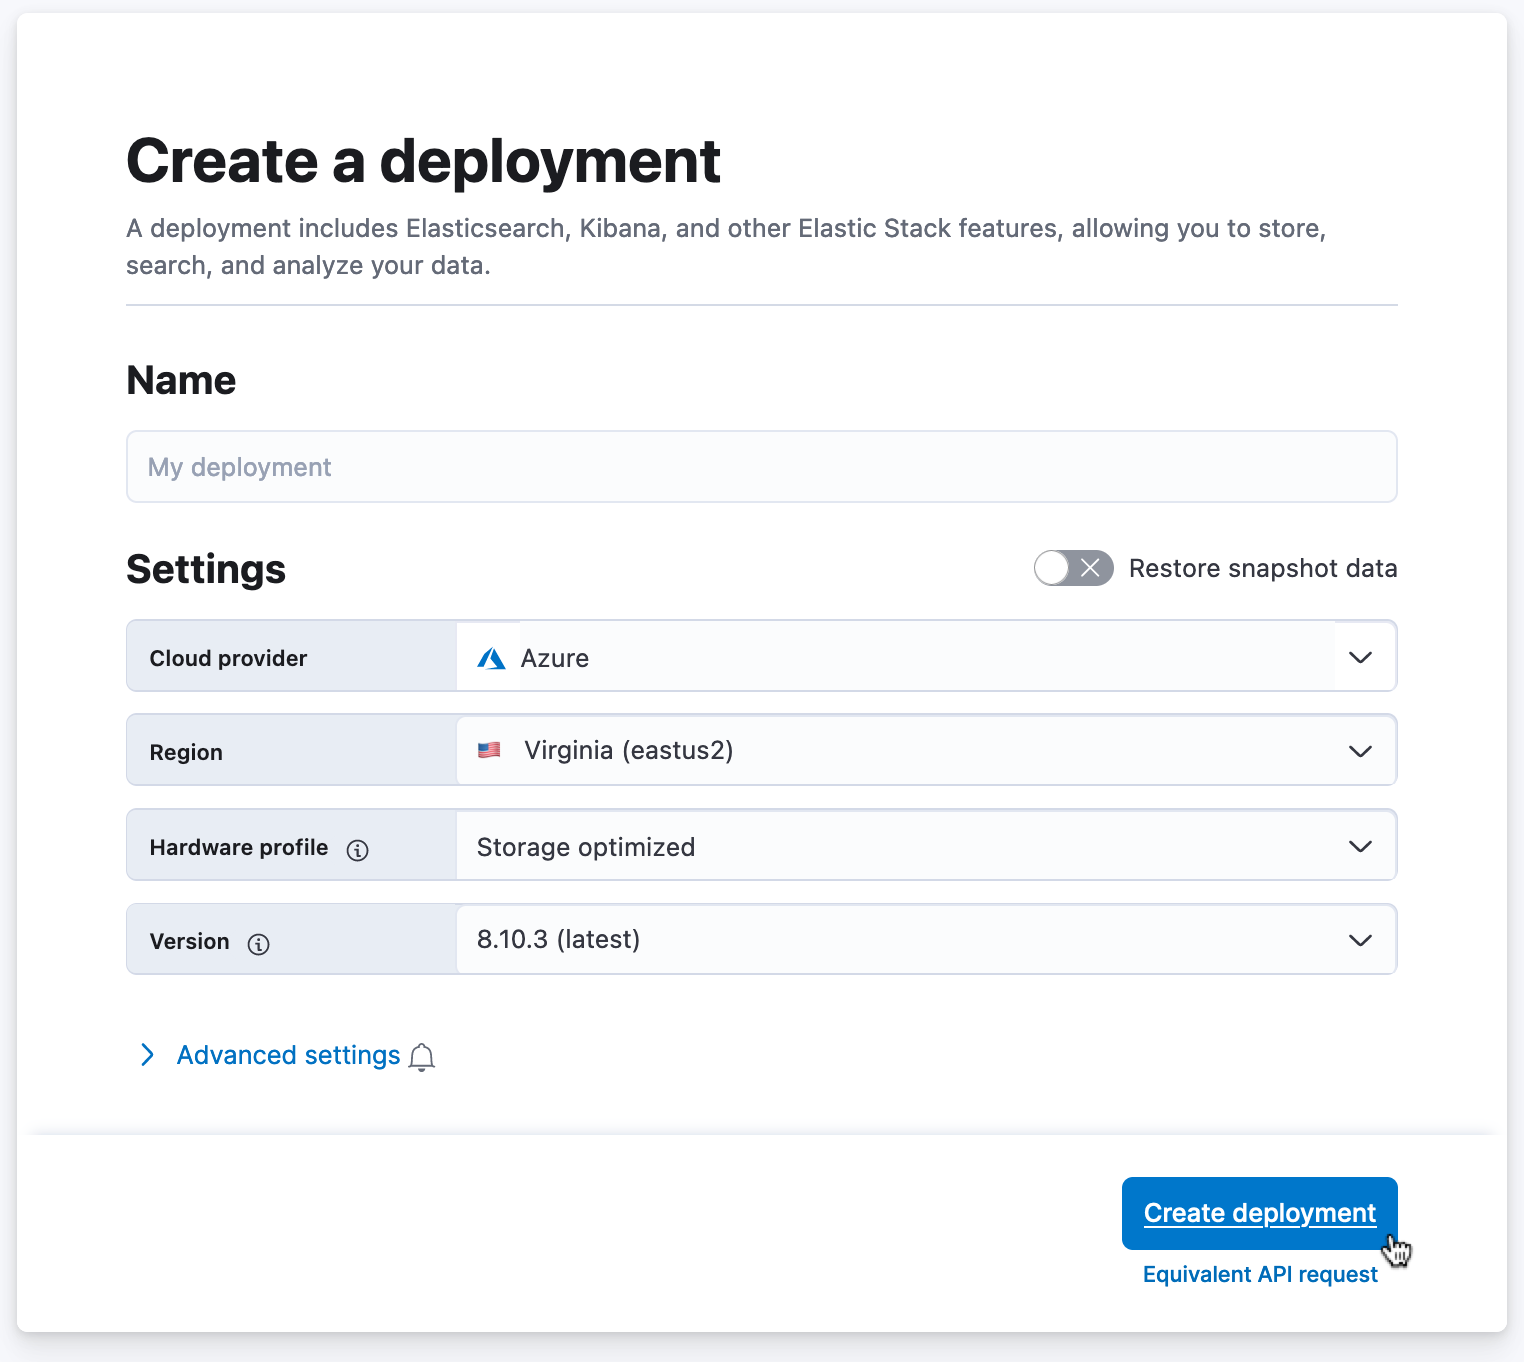
输入部署名称并单击 Create deployment。 创建部署需要几分钟时间。 等待期间系统会提示你保存部署的管理员凭据这为你提供了对 Elastic® 部署的超级用户访问权限。 确保这些凭据的安全因为它们仅显示一次。
Elastic Observability 需要 APM 服务器 URL 和 APM Secret token应用程序才能将可观察性数据发送到 Elastic Cloud。 创建部署后我们将复制 Elastic Observability 服务器 URL 和秘密 token并将它们安全地存储在某个位置以便在后续步骤中添加到我们的 Web 应用程序代码中。
要复制 APM 服务器 URL 和 APM 秘密 token请转到 Elastic Cloud 。 然后转到 “Deployment” 页面其中列出了你已创建的所有部署。 选择你要使用的部署这将打开部署详细信息页面。 在 Kibana 链接行中单击 Open 以打开 Kibana® 进行部署。

从顶级菜单中选择 integrations。 然后单击 APM。
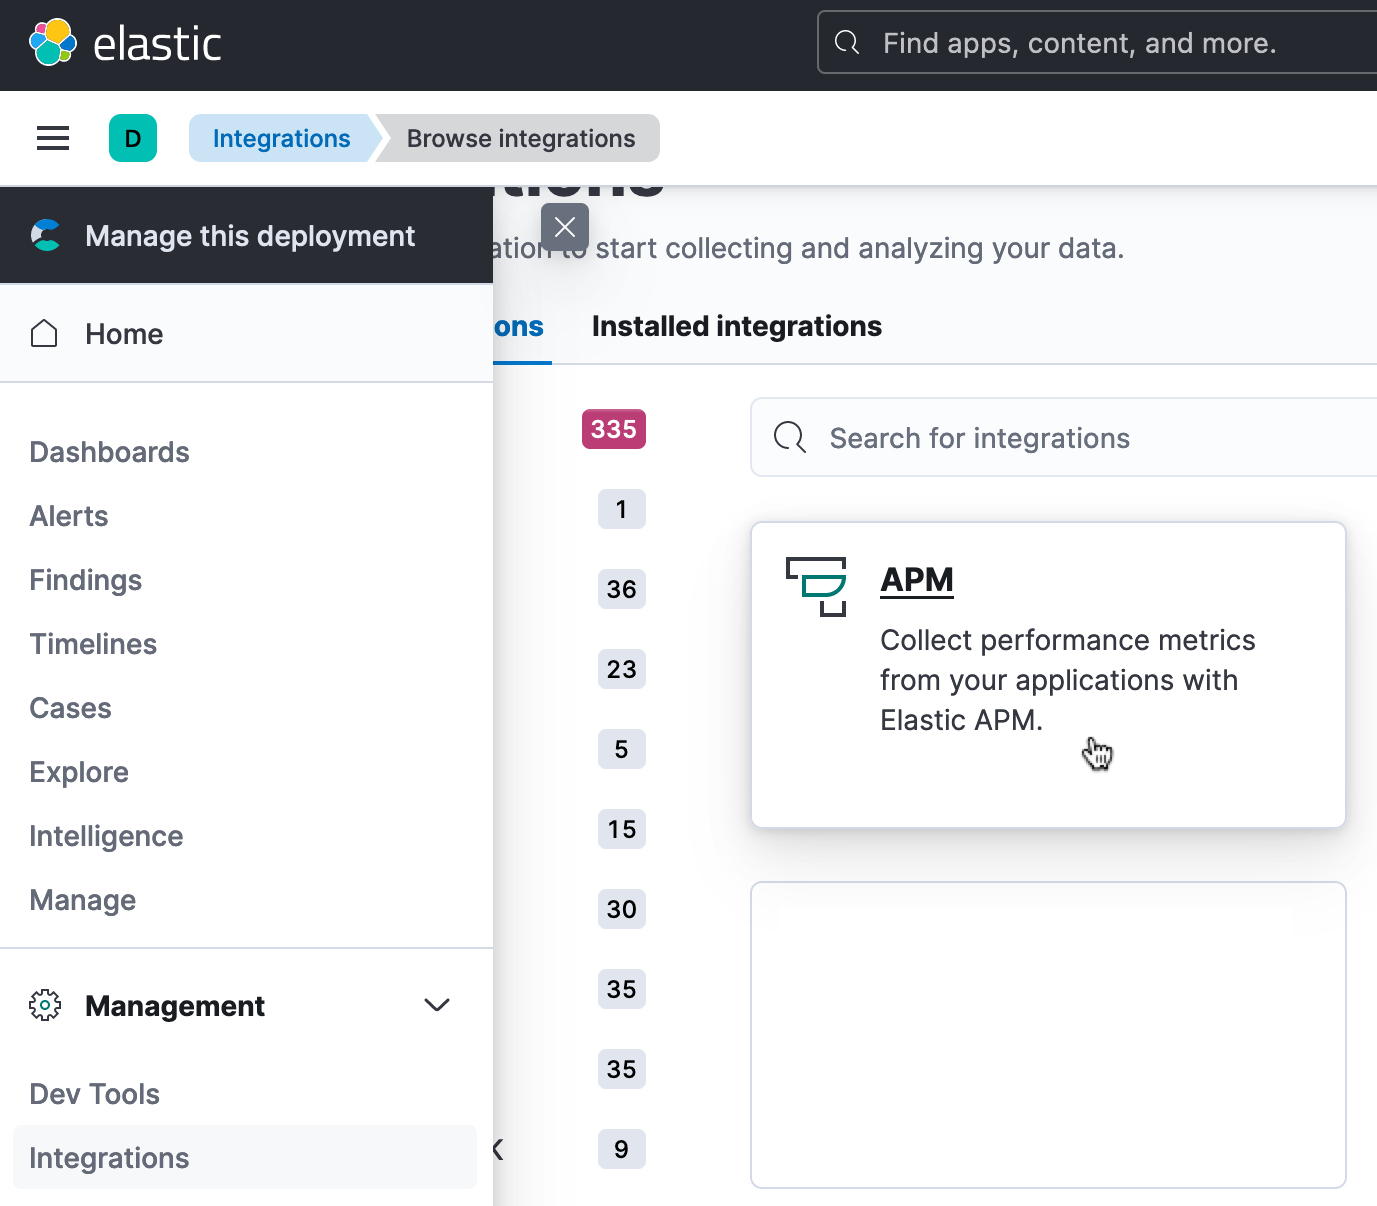
在 APM 代理页面上复制 SecretToken 和 serverUrl 值并保存它们以供后续步骤使用。

现在我们已经完成了 Elastic Cloud 设置下一步是在 Azure 中设置我们的帐户以便将应用程序部署到容器应用程序服务。
Azure 容器应用程序设置
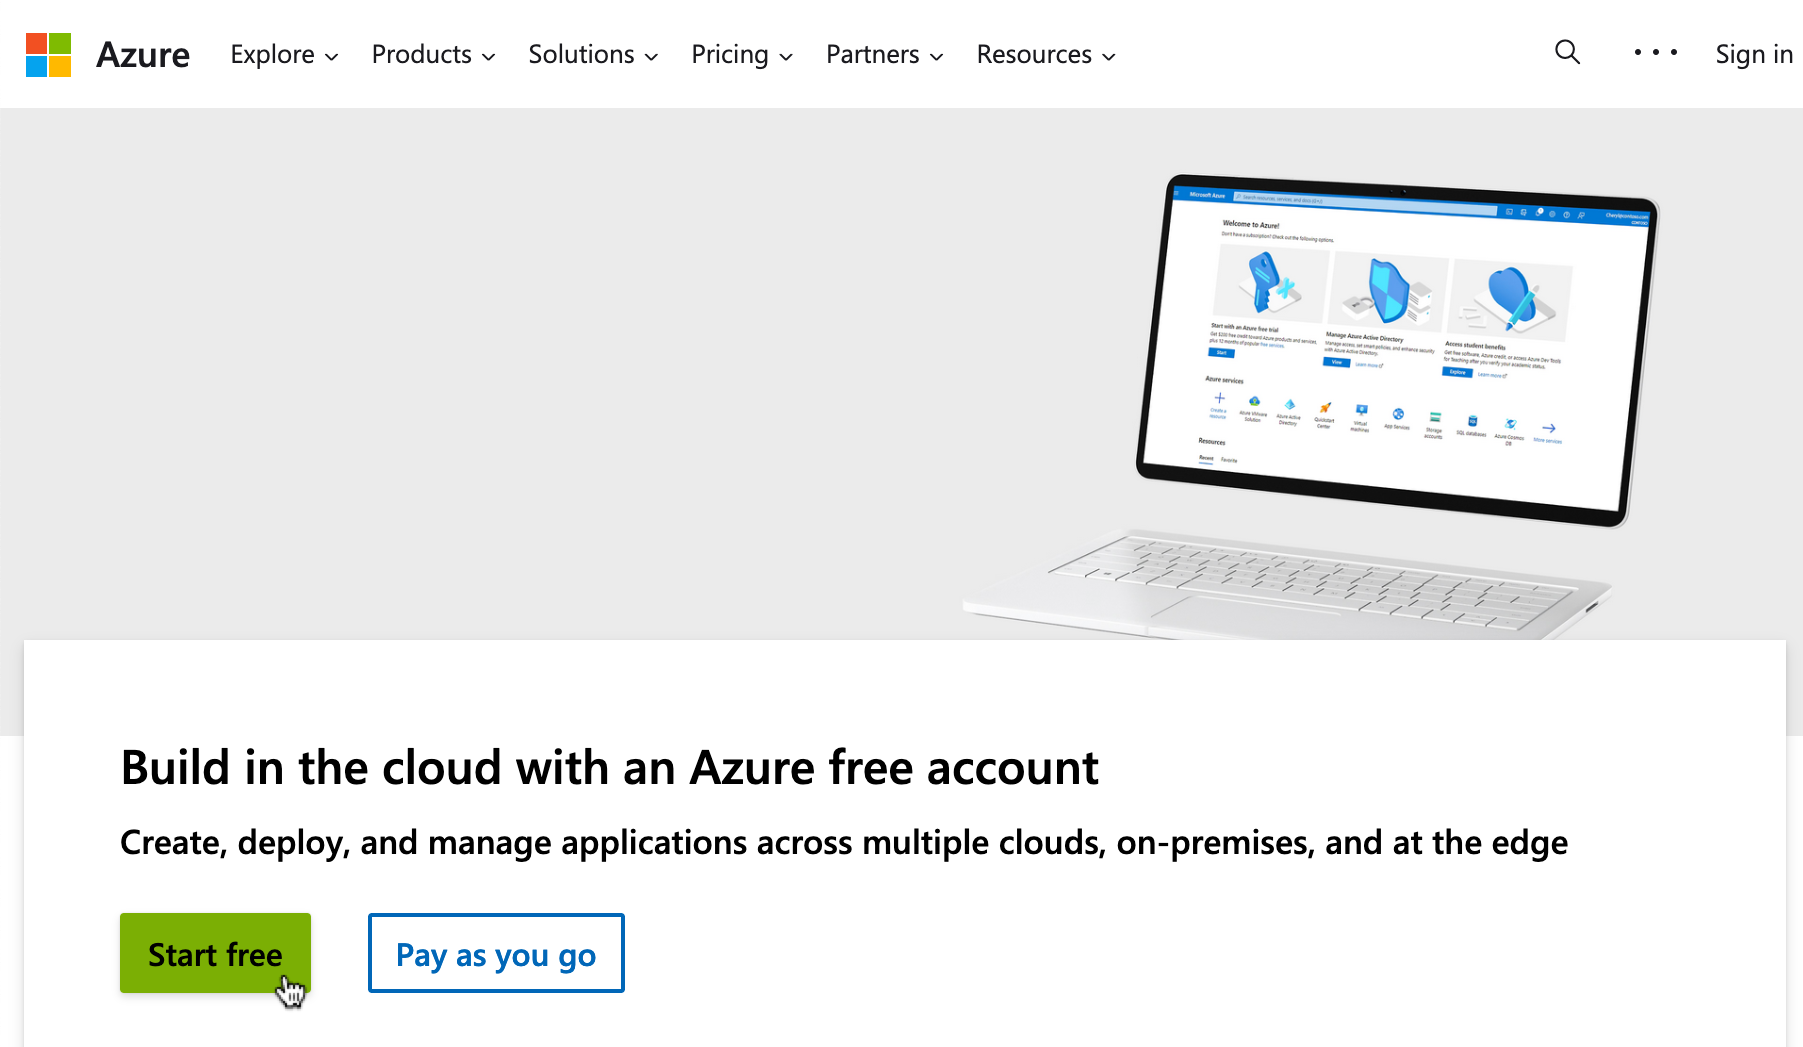
首先我们需要一个 Azure 帐户因此让我们通过转到 Microsoft Azure 门户并创建一个新项目来创建一个帐户。 单击 “Start free” 按钮然后按照步骤登录或创建新帐户。
将 Hello World Web 应用程序部署到容器应用程序
我们将使用名为 Cloud Shell 的便捷 Azure 工具执行将 C# Hello World Web 应用程序部署到容器应用程序的过程。 要部署 Hello World 应用程序我们将执行以下 12 个步骤
1. 在 Azure 门户中单击门户顶部的 Cloud Shell 图标以打开 Cloud Shell...
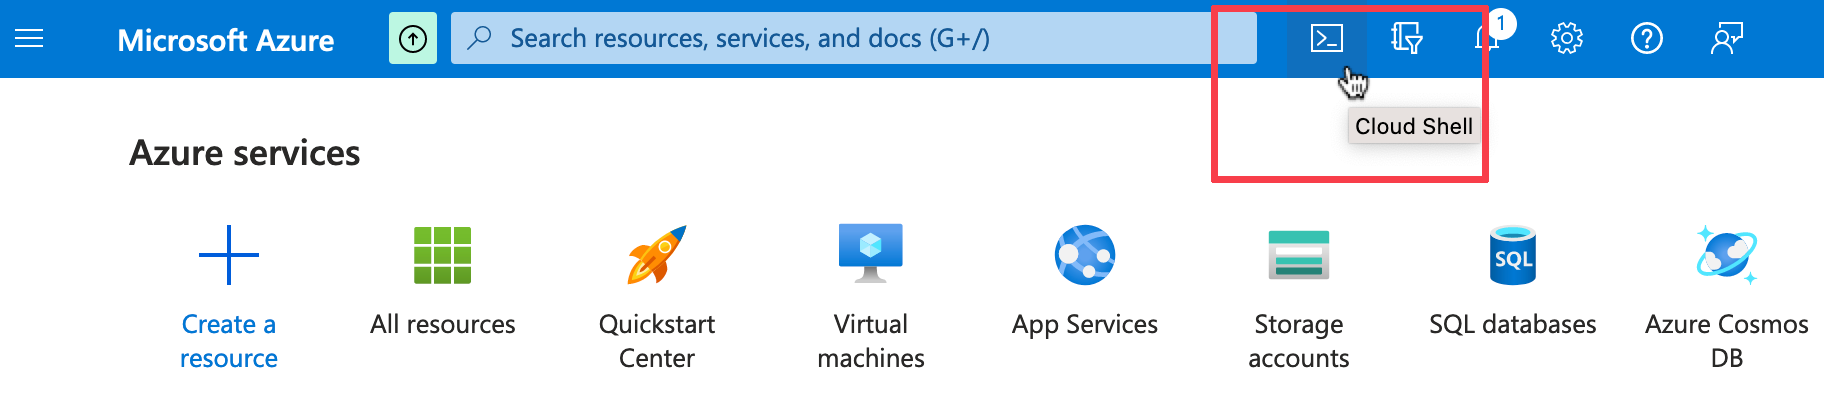
…当 Cloud Shell 首次打开时选择 Bash 作为要使用的 shell 类型。

2. 如果系统提示你 “You have no storage mounted”请单击 Create storage 按钮创建一个文件存储用于从 Cloud Shell 保存和编辑文件。

3. 在 Cloud Shell 中通过输入以下命令从 GitHub 克隆 C# Hello World 示例应用存储库。
git clone https://github.com/elastic/observability-examples4. 将目录更改为 Hello World Web 应用程序代码的位置。
cd observability-examples/azure/container-apps/helloworld5. 定义我们将在本博文中的命令中使用的环境变量。
RESOURCE_GROUP="helloworld-containerapps"
LOCATION="centralus"
ENVIRONMENT="env-helloworld-containerapps"
APP_NAME="elastic-helloworld"
6. 通过运行以下命令定义唯一的注册表容器名称。
ACR_NAME="helloworld"$RANDOM7. 通过运行以下命令创建 Azure 资源组。
az group create --name $RESOURCE_GROUP --location "$LOCATION"8. 运行以下命令在 Azure 容器注册表中创建注册表容器。
az acr create --resource-group $RESOURCE_GROUP \
--name $ACR_NAME --sku Basic --admin-enable true
9. 构建应用程序映像并通过运行以下命令将其推送到 Azure 容器注册表。
az acr build --registry $ACR_NAME --image $APP_NAME .10. 通过运行以下命令将 Microsoft.OperationalInsights 命名空间注册为提供程序。
az provider register -n Microsoft.OperationalInsights --wait11. 运行以下命令创建容器应用程序环境以将你的应用程序部署到其中。
az containerapp env create --name $ENVIRONMENT \
--resource-group $RESOURCE_GROUP --location "$LOCATION"
12. 使用以下命令将 Hello World 应用程序的映像部署到容器应用程序创建新的容器应用程序。
az containerapp create \
  --name $APP_NAME \
  --resource-group $RESOURCE_GROUP \
  --environment $ENVIRONMENT \
  --image $ACR_NAME.azurecr.io/$APP_NAME \
  --target-port 3500 \
  --ingress 'external' \
  --registry-server $ACR_NAME.azurecr.io \
  --query properties.configuration.ingress.fqdn
此命令将输出已部署的 Hello World 应用程序的完全限定域名 (FQDN)。 将 FQDN 复制并粘贴到浏览器中以查看正在运行的 Hello World 应用程序。

使用 Elastic Observability 检测 Hello World Web 应用程序
随着 Web 应用程序在容器应用程序中成功运行我们现在已准备好添加所需的最少代码以启用 Elastic Cloud 中的 Hello World 应用程序的可观察性。 我们将执行以下八个步骤
1. 在 Azure Cloud Shell 中通过键入以下命令创建一个名为 Telemetry.cs 的新文件。
touch Telemetry.cs2. 在 Cloud Shell 中键入以下命令打开 Azure Cloud Shell 文件编辑器。
code .3. 在 Azure Cloud Shell 编辑器中打开 Telemetry.cs 文件并粘贴以下代码。 按键盘上的 [Ctrl] + [s] 键或者如果你使用的是 macOS 计算机请使用 [⌘] + [s] 键将编辑后的文件保存在 Cloud Shell 中。 该类文件用于创建跟踪器 ActivitySource它可以生成跟踪 Activity 跨度以实现可观察性。
using System.Diagnostics;

public static class Telemetry
{
	public static readonly ActivitySource activitySource = new("Helloworld");
}
4. 在 Azure Cloud Shell 编辑器中编辑名为 Dockerfile 的文件以添加以下 Elastic OpenTelemetry 环境变量。 将 ELASTIC_APM_SERVER_URL 文本和 ELASTIC_APM_SECRET_TOKEN 文本替换为你在先前步骤中复制并保存的 APM 服务器 URL 和 APM 秘密 token 值。
按键盘上的 [Ctrl] + [s] 键或者如果你使用的是 macOS 计算机请使用 [⌘] + [s] 键将编辑后的文件保存在 Cloud Shell 中。
更新后的 Dockerfile 应如下所示
FROM ${ARCH}mcr.microsoft.com/dotnet/aspnet:7.0. AS base
WORKDIR /app

FROM mcr.microsoft.com/dotnet/sdk:8.0-preview AS build
ARG TARGETPLATFORM

WORKDIR /src
COPY ["helloworld.csproj", "./"]
RUN dotnet restore "./helloworld.csproj"
COPY . .
WORKDIR "/src/."
RUN dotnet build "helloworld.csproj" -c Release -o /app/build

FROM build AS publish
RUN dotnet publish "helloworld.csproj" -c Release -o /app/publish

FROM base AS final
WORKDIR /app
COPY --from=publish /app/publish .
EXPOSE 3500
ENV ASPNETCORE_URLS=http://+:3500

ENV OTEL_EXPORTER_OTLP_ENDPOINT='https://******.apm.us-east-2.aws.elastic-cloud.com:443'
ENV OTEL_EXPORTER_OTLP_HEADERS='Authorization=Bearer ***********'
ENV OTEL_LOG_LEVEL=info
ENV OTEL_METRICS_EXPORTER=otlp
ENV OTEL_RESOURCE_ATTRIBUTES=service.version=1.0,deployment.environment=production
ENV OTEL_SERVICE_NAME=helloworld
ENV OTEL_TRACES_EXPORTER=otlp

ENTRYPOINT ["dotnet", "helloworld.dll"]
5. 在 Azure Cloud Shell 编辑器中编辑 helloworld.csproj 文件以添加 Elastic APM 和 OpenTelemetry 依赖项。 更新后的 helloworld.csproj 文件应如下所示
<Project Sdk="Microsoft.NET.Sdk.Web">

  <PropertyGroup>
	<TargetFramework>net7.0</TargetFramework>
	<Nullable>enable</Nullable>
	<ImplicitUsings>enable</ImplicitUsings>
  </PropertyGroup>
  <ItemGroup>
	<PackageReference Include="Elastic.Apm" Version="1.24.0" />
	<PackageReference Include="Elastic.Apm.NetCoreAll" Version="1.24.0" />
	<PackageReference Include="OpenTelemetry" Version="1.6.0" />
	<PackageReference Include="OpenTelemetry.Exporter.Console" Version="1.6.0" />
	<PackageReference Include="OpenTelemetry.Exporter.OpenTelemetryProtocol" Version="1.6.0" />
	<PackageReference Include="OpenTelemetry.Extensions.Hosting" Version="1.6.0" />
	<PackageReference Include="OpenTelemetry.Instrumentation.AspNetCore" Version="1.5.0-beta.1" />
  </ItemGroup>

</Project>
6. 在 Azure Cloud Shell 编辑器中编辑 Program.cs
- 在文件顶部添加一条 using 语句来导入 System.Diagnostics该语句用于创建相当于OpenTelemetry中 “spans” 的Activity。 还要导入 OpenTelemetry.Resources 和 OpenTelemetry.Trace 包。
using System.Diagnostics;
using OpenTelemetry.Resources;
using OpenTelemetry.Trace;- 更新 “builder” 初始化代码块以包含启用 Elastic OpenTelemetry 可观察性的配置。
builder.Services.AddOpenTelemetry().WithTracing(builder => builder.AddOtlpExporter()
                	.AddSource("helloworld")
                	.AddAspNetCoreInstrumentation()
                	.AddOtlpExporter()
    	.ConfigureResource(resource =>
        	resource.AddService(
            	serviceName: "helloworld"))
);
builder.Services.AddControllers();- 替换 “Hello World” HTML 输出字符串...
<h1>Hello World!</h1>- ...使用 “Hello Elastic Observability” HTML 输出字符串。
<div style="text-align: center;">
<h1 style="color: #005A9E; font-family:'Verdana'">
Hello Elastic Observability - Azure Container Apps - C#
</h1>
<img src="https://elastichelloworld.blob.core.windows.net/elastic-helloworld/elastic-logo.png">
</div>- 使用遥测类的 ActivitySource 在输出响应周围添加遥测跟踪范围。
using (Activity activity = Telemetry.activitySource.StartActivity("HelloSpan")!)
   	{
   		Console.Write("hello");
   		await context.Response.WriteAsync(output);
   	}
更新后的 Program.cs 文件应如下所示
using System.Diagnostics;
using OpenTelemetry.Resources;
using OpenTelemetry.Trace;

var builder = WebApplication.CreateBuilder(args);
builder.Services.AddOpenTelemetry().WithTracing(builder => builder.AddOtlpExporter()
                	.AddSource("helloworld")
                	.AddAspNetCoreInstrumentation()
                	.AddOtlpExporter()
    	.ConfigureResource(resource =>
        	resource.AddService(
            	serviceName: "helloworld"))
);
builder.Services.AddControllers();
var app = builder.Build();

string output =
"""
<div style="text-align: center;">
<h1 style="color: #005A9E; font-family:'Verdana'">
Hello Elastic Observability - Azure Container Apps - C#
</h1>
<img src="https://elastichelloworld.blob.core.windows.net/elastic-helloworld/elastic-logo.png">
</div>
""";

app.MapGet("/", async context =>
	{
    	using (Activity activity = Telemetry.activitySource.StartActivity("HelloSpan")!)
    		{
        		Console.Write("hello");
        		await context.Response.WriteAsync(output);
    		}
	}
);
app.Run();
7. 重建 Hello World 应用程序映像并通过运行以下命令将该映像推送到 Azure 容器注册表。
az acr build --registry $ACR_NAME --image $APP_NAME .8. 使用以下命令将更新的 Hello World 应用重新部署到 Azure 容器应用。
az containerapp create \
  --name $APP_NAME \
  --resource-group $RESOURCE_GROUP \
  --environment $ENVIRONMENT \
  --image $ACR_NAME.azurecr.io/$APP_NAME \
  --target-port 3500 \
  --ingress 'external' \
  --registry-server $ACR_NAME.azurecr.io \
  --query properties.configuration.ingress.fqdn
此命令将输出已部署的 Hello World 应用程序的完全限定域名 (FQDN)。 将 FQDN 复制并粘贴到浏览器中以查看 Azure 容器应用中运行的更新的 Hello World 应用。
观察 Hello World Web 应用程序
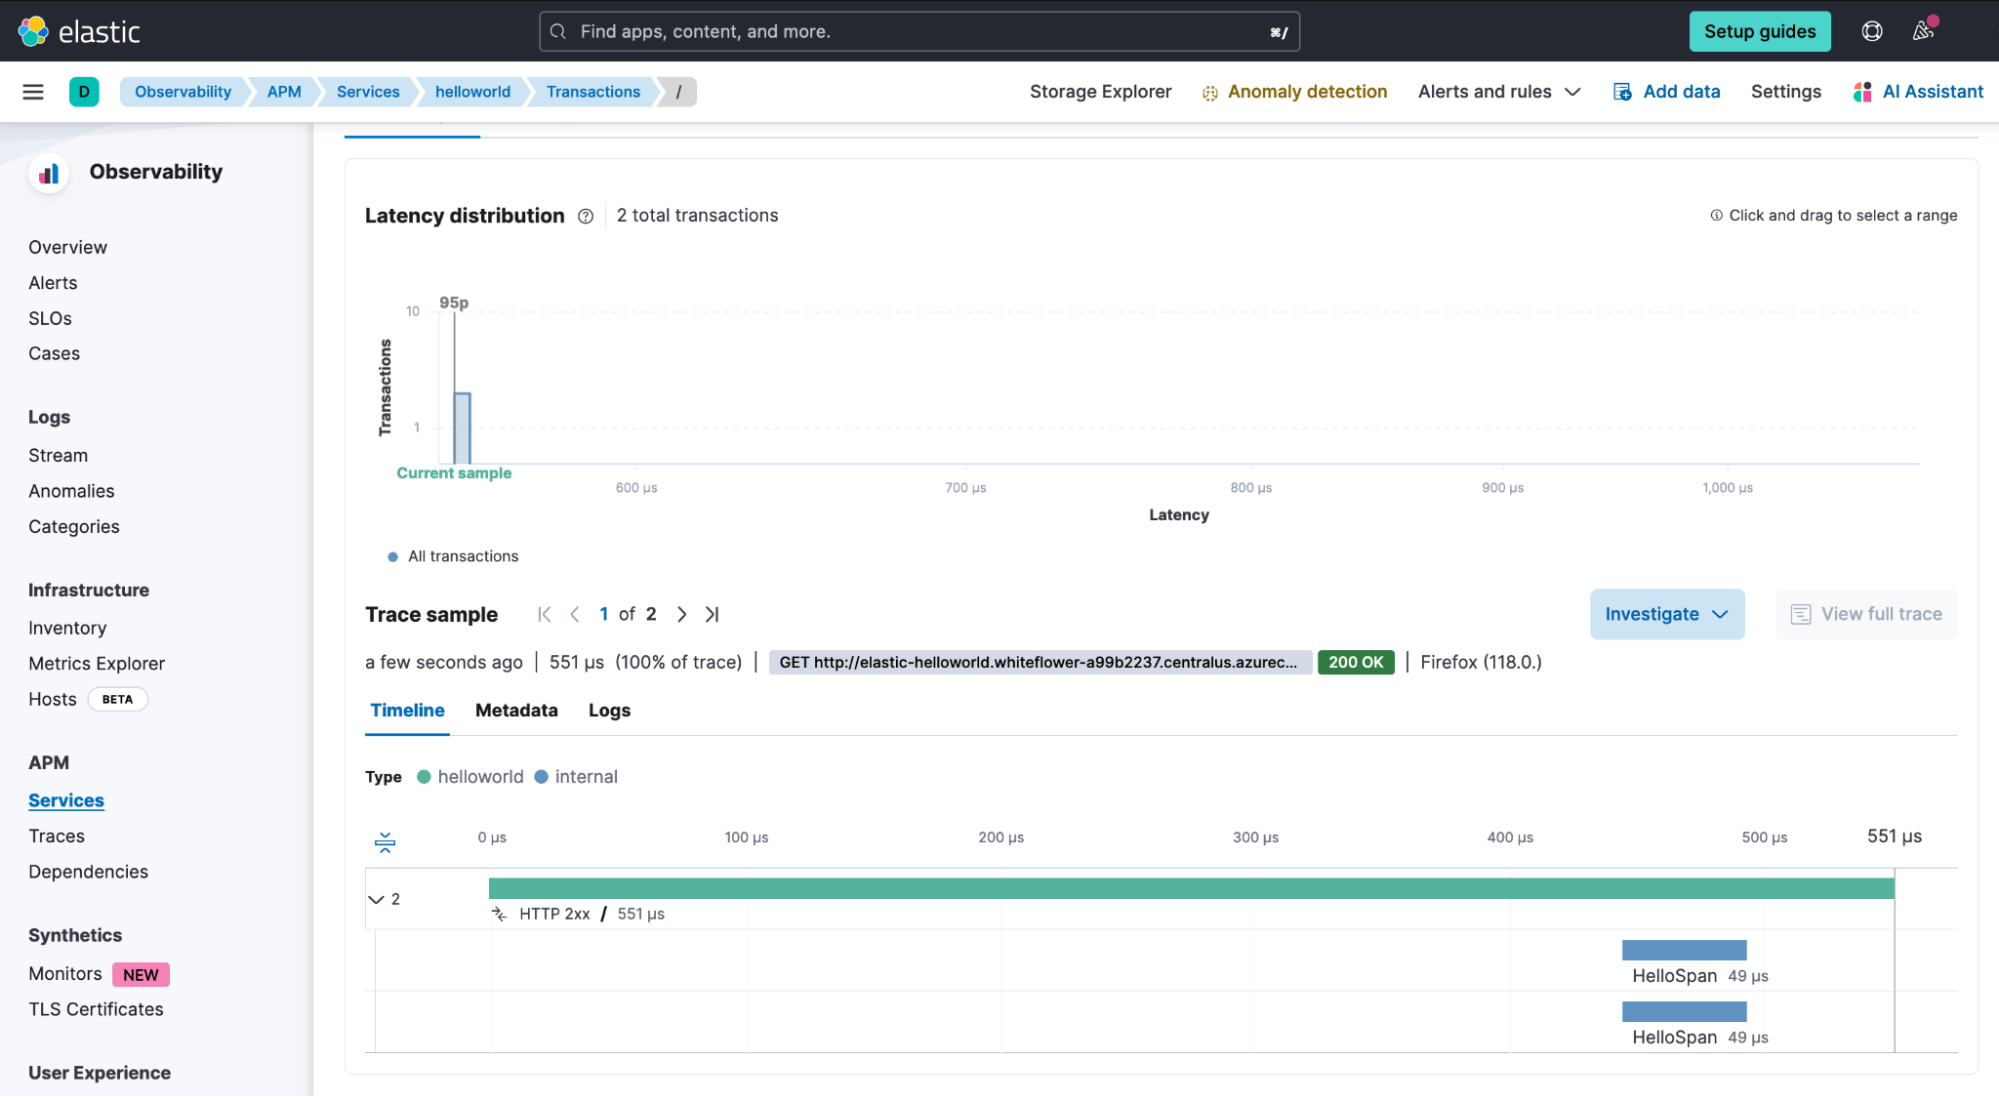
现在我们已经对 Web 应用程序进行了检测将可观测性数据发送到 Elastic Observability现在我们可以使用 Elastic Cloud 来监控 Web 应用程序的操作。
- 在 Elastic Cloud 中选择可观测性 Services 菜单项。
- 单击 helloworld 服务。
- 单击 Transactions 选项卡。
- 向下滚动并单击 GET / transaction。向下滚动到 Trace Sample 部分以查看 GET /、HelloSpan 跟踪示例。
规模化的可观察性
你已经了解了将 Web 应用程序部署到使用 Elastic Observability 进行检测的 Azure 容器应用程序的整个过程。 该网络应用程序现已在网络上完全可用该平台运行在一个平台上该平台将自动扩展以服务全球访问者。 它针对 Elastic Observability APM 进行了检测使用 OpenTelemetry 将数据提取到 Elastic Cloud 的 Kibana 仪表板中。
现在你已经了解了如何使用基本的可观测性设置来部署 Hello World Web 应用程序请访问 Elastic Observability 以了解有关为你的应用程序扩展为全面的可观测性覆盖解决方案的更多信息。 或者访问 Microsoft Azure 上的 Elastic 入门获取更多示例了解如何通过将 Microsoft Azure 的云计算服务与 Elastic 的搜索驱动平台相结合来获得所需的数据洞察。
本文中描述的任何特性或功能的发布和时间安排均由 Elastic 自行决定。 当前不可用的任何特性或功能可能无法按时交付或根本无法交付。