【Python】用Python生成图像特效
| 阿里云国内75折 回扣 微信号:monov8 |
| 阿里云国际,腾讯云国际,低至75折。AWS 93折 免费开户实名账号 代冲值 优惠多多 微信号:monov8 飞机:@monov6 |
1. 引用
本文重点介绍如何使用python进行图像处理,生成各式各样的图像特效。闲话少说,我们直接开始吧!
2. 读入图像
首先我们来读取我们的样例图像,并尝试打印图像中相应元素的像素值。为了实现这一点,我们使用Python中的Pillow子模块进行实现,代码如下:
from PIL import Image

img = Image.open('./landscape.jpg')

width, height = img.size
print(width, height)

for x in range(0, height):
    for y in range(0, width):
        (r, g, b) = img.getpixel((x, y))
        print(r, g, b)
如果我们运行上面的代码片段,我们可以在终端中看到图像的宽和高,以及所有的像素值。其中每个像素值表示为3个整数值的元组,即红色、绿色和蓝色三个通道的对应值。
3. 改变单个通道
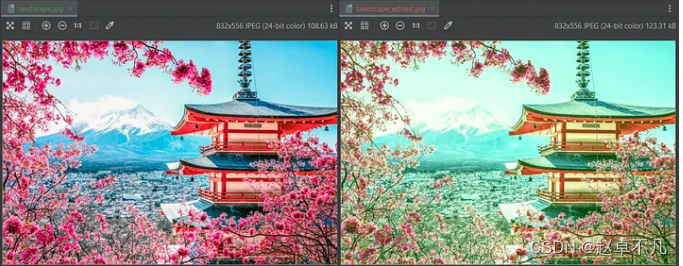
现在,让我们更新代码来展示相应的处理效果。为了实现这一点,我们将首先创建一个相同大小的新的对象。
之后,我们将遍历原始图像的像素,并将它们复制到新图像中。此外,我们将该修改新图像绿色通道的像素值:
from PIL import Image

img = Image.open('./landscape.jpg')

width, height = img.size
print(width, height)

new_img = Image.new('RGB', (width, height))

for row in range(0, height):
    for col in range(0, width):
        (r, g, b) = img.getpixel((col, row))
        new_img.putpixel((col, row), (r, g + 50, b))

new_img.save("landscape_edited.png")
结果如下:

4. 黑白特效
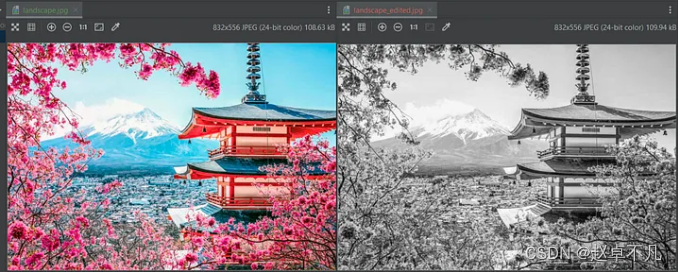
为了实现基本的黑白特效,我们必须确保所有3个通道都具有相同的值。 让我们再次迭代每个像素,并计算三个通道像素值的平均值:
rom PIL import Image

img = Image.open('./landscape.jpg')

width, height = img.size
print(width, height)

new_img = Image.new('RGB', (width, height))

for row in range(0, height):
    for col in range(0, width):
        (r, g, b) = img.getpixel((col, row))

        avg = int((r + g + b) / 3)
        new_img.putpixel((col, row), (avg, avg, avg))

new_img.save("landscape_black_and_white.jpg")
我们知道,像素值 RGB=(0,0,0)表示黑色像素;同时像素值RGB=(255,255,255)表示白色像素;中间其他取值表示灰色像素值;运行上述代码,得到结果如下:

5. 颜色反转
看懂了上述代码,那么颜色反转的实现现在应该会很简单!
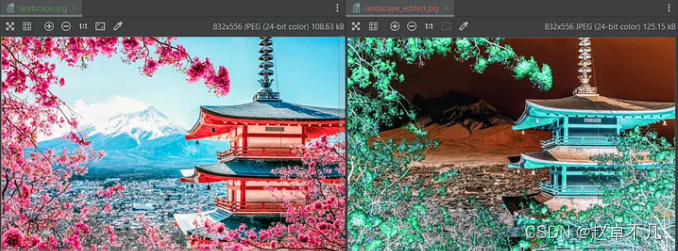
简单来说。我们的目标是将黑色像素(0,0,0)转换为白色像素(255,255,255)。为了实现这一点,我们将通过从255中减去旧像素的值来创建新像素,代码如下:
from PIL import Image

img = Image.open('./landscape.jpg')
width, height = img.size
print(width, height)

new_img = Image.new('RGB', (width, height))
for row in range(0, height):
    for col in range(0, width):
        (r, g, b) = img.getpixel((col, row))

        inverted_pixel = (255 - r, 255-g, 255-b)
        new_img.putpixel((col, row), inverted_pixel)
new_img.save("landscape_edited.jpg")
得到结果如下:

6. 合并
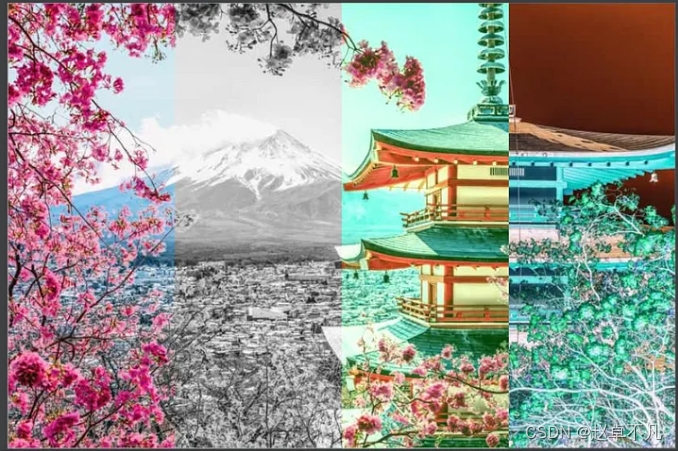
最后,让我们将图像拆分成四个子部分,并将本节所学内容充分利用起来:
from PIL import Image

img = Image.open('./landscape.jpg')

width, height = img.size
print(width, height)

new_img = Image.new('RGB', (width, height))

for row in range(0, height):
    for col in range(0, width):
        (r, g, b) = img.getpixel((col, row))

        if col < width * 0.25:
            (r, g, b) = (r, g, b)

        elif col < width * 0.5:
            avg = int((r + g + b) / 3)
            (r, g, b) = (avg, avg, avg)

        elif col < width * 0.75:
            (r, g, b) = (r, g + 50, b)

        else:
            (r, g, b) = (255 - r, 255 - g, 255 - b)

        new_img.putpixel((col, row), (r, g, b))

new_img.save("landscape_edited.jpg")
得到结果如下:

鼓励大家使用代码,并尝试新的组合和效果。欢迎在评论中分享大家的成果!
7. 总结
本文使用简单的python代码实现了各种各样的图像特效,可以方便大家进行自由组合成更加酷炫的效果。
您学废了嘛?
| 阿里云国内75折 回扣 微信号:monov8 |
| 阿里云国际,腾讯云国际,低至75折。AWS 93折 免费开户实名账号 代冲值 优惠多多 微信号:monov8 飞机:@monov6 |

