FastChat开放,媲美ChatGPT的90%能力——从下载到安装、部署
| 阿里云国内75折 回扣 微信号:monov8 |
| 阿里云国际,腾讯云国际,低至75折。AWS 93折 免费开户实名账号 代冲值 优惠多多 微信号:monov8 飞机:@monov6 |
FastChat开放媲美ChatGPT的90%能力——从下载到安装、部署
前言
- 最近ChatGPT非常火引爆了整个商业市场以及NLP学术界但是ChatGPT很多东西都不开放你也没法个人部署、研究
- 于是很多大语言模型横空出世在开放的大语言模型中最近我认为效果很不错的是FastChat基于LLaMA做了二次调参训练据官方称能达到ChatGPT的90%的能力。具体能否达到这个值可以直接去他们的Demo上试试
- 相关链接
- 注意
- 安装教程时间为
2023年4月8日 2023年4月21日FastChat项目频繁更新后续可能会有不一致的地方 - 删除的部分文字是之前的版本的现在可以不用管他们了
两个前置软件
创建FastChat虚拟环境
安装PyTorch
- 由于FastChat使用的是PyTorch深度学习框架建议提前安装好PyTorch的依赖
- 因为官方的源文件有申明PyTorch的依赖虽然等下安装FastChat时会自动安装PyTorch但是默认安装的不是带CUDA版本的到时候重新弄麻烦
- 而且还不能指定自己需要的PyTorch版本
- 具体怎么安装请参考官方链接 https://pytorch.org/get-started/locally/
- 安装命令样例conda和pip选一个
- conda有时候会卡住
$ conda install pytorch torchvision torchaudio cudatoolkit=11.6 -c pytorch -c conda-forge$ conda install pytorch==1.13.1 torchvision==0.14.1 torchaudio==0.13.1 pytorch-cuda=11.6 -c pytorch -c nvidia
- Pip (这个一般好用点)
$ pip install torch==1.13.1+cu117 torchvision==0.14.1+cu117 torchaudio==0.13.1 --extra-index-url https://download.pytorch.org/whl/cu117 $ pip3 install torch==1.13.1+cu116 torchvision==0.14.1+cu116 torchaudio==0.13.1 --extra-index-url https://download.pytorch.org/whl/cu116我用的这个
- 安装完成后建议进入Python命令行测试一下下面是个样例
(base) PS C:\Users\alion> conda activate fastchat
(fastchat) PS C:\Users\alion> python
Python 3.9.16 (main, Mar  8 2023, 10:39:24) [MSC v.1916 64 bit (AMD64)] on win32
Type "help", "copyright", "credits" or "license" for more information.
>>> import torch
>>> print(torch.__version__)
1.13.1+cu116
>>> print(torch.version.cuda)
11.6
>>>
>>> exit()
(fastchat) PS C:\Users\alion>
安装 FastChat
(fastchat) C:\Users\alion>pip3 install fschat
Collecting fschat
  Downloading fschat-0.2.3-py3-none-any.whl (79 kB)
     ---------------------------------------- 80.0/80.0 kB 371.0 kB/s eta 0:00:00
Collecting accelerate (from fschat)
  Using cached accelerate-0.18.0-py3-none-any.whl (215 kB)
Collecting fastapi (from fschat)
  Using cached fastapi-0.95.1-py3-none-any.whl (56 kB)
Collecting gradio==3.23 (from fschat)
  Using cached gradio-3.23.0-py3-none-any.whl (15.8 MB)
......
Collecting pyrsistent!=0.17.0,!=0.17.1,!=0.17.2,>=0.14.0 (from jsonschema>=3.0->altair>=4.2.0->gradio==3.23->fschat)
  Using cached pyrsistent-0.19.3-cp39-cp39-win_amd64.whl (62 kB)
Collecting uc-micro-py (from linkify-it-py<3,>=1->markdown-it-py[linkify]>=2.0.0->gradio==3.23->fschat)
  Using cached uc_micro_py-1.0.1-py3-none-any.whl (6.2 kB)
Installing collected packages: wcwidth, tokenizers, sentencepiece, pytz, pydub, pathtools, ffmpy, appdirs, zipp, websockets, uc-micro-py, tzdata, toolz, svgwrite, sniffio, smmap, six, shortuuid, setproctitle, sentry-sdk, semantic-version, regex, pyyaml, python-multipart, pyrsistent, pyparsing, pygments, pydantic, psutil, protobuf, prompt-toolkit, packaging, orjson, multidict, mdurl, markupsafe, markdown2, kiwisolver, h11, fsspec, frozenlist, fonttools, filelock, entrypoints, cycler, contourpy, colorama, attrs, async-timeout, aiofiles, yarl, wavedrom, tqdm, python-dateutil, markdown-it-py, linkify-it-py, jsonschema, jinja2, importlib-resources, gitdb, docker-pycreds, click, anyio, aiosignal, accelerate, uvicorn, starlette, rich, pandas, mdit-py-plugins, matplotlib, huggingface-hub, httpcore, GitPython, aiohttp, wandb, transformers, httpx, fastapi, altair, gradio, fschat
Successfully installed GitPython-3.1.31 accelerate-0.18.0 aiofiles-23.1.0 aiohttp-3.8.4 aiosignal-1.3.1 altair-4.2.2 anyio-3.6.2 appdirs-1.4.4 async-timeout-4.0.2 attrs-23.1.0 click-8.1.3 colorama-0.4.6 contourpy-1.0.7 cycler-0.11.0 docker-pycreds-0.4.0 entrypoints-0.4 fastapi-0.95.1 ffmpy-0.3.0 filelock-3.12.0 fonttools-4.39.3 frozenlist-1.3.3 fschat-0.2.3 fsspec-2023.4.0 gitdb-4.0.10 gradio-3.23.0 h11-0.14.0 httpcore-0.17.0 httpx-0.24.0 huggingface-hub-0.13.4 importlib-resources-5.12.0 jinja2-3.1.2 jsonschema-4.17.3 kiwisolver-1.4.4 linkify-it-py-2.0.0 markdown-it-py-2.2.0 markdown2-2.4.8 markupsafe-2.1.2 matplotlib-3.7.1 mdit-py-plugins-0.3.3 mdurl-0.1.2 multidict-6.0.4 orjson-3.8.10 packaging-23.1 pandas-2.0.0 pathtools-0.1.2 prompt-toolkit-3.0.38 protobuf-4.22.3 psutil-5.9.5 pydantic-1.10.7 pydub-0.25.1 pygments-2.15.1 pyparsing-3.0.9 pyrsistent-0.19.3 python-dateutil-2.8.2 python-multipart-0.0.6 pytz-2023.3 pyyaml-6.0 regex-2023.3.23 rich-13.3.4 semantic-version-2.10.0 sentencepiece-0.1.98 sentry-sdk-1.20.0 setproctitle-1.3.2 shortuuid-1.0.11 six-1.16.0 smmap-5.0.0 sniffio-1.3.0 starlette-0.26.1 svgwrite-1.4.3 tokenizers-0.13.3 toolz-0.12.0 tqdm-4.65.0 transformers-4.28.1 tzdata-2023.3 uc-micro-py-1.0.1 uvicorn-0.21.1 wandb-0.15.0 wavedrom-2.0.3.post3 wcwidth-0.2.6 websockets-11.0.2 yarl-1.8.2 zipp-3.15.0

(fastchat) C:\Users\alion>
下载 LLaMA并转换
- 由于FastChat基于LLaMA做的二次调参训练所以我们需要先拿到LLaMA模型文件
- 官方的获取方式比较麻烦需要你先填个表单然后等他们回复认为可以了才会给你文件
- 不过幸运的是国内有人共享了 LLaMA模型文件
- 下载后关于解压或是保存文件的路径中 请记得不要有中文、特殊符号等
- 接下来我们还需要转换一下LLaMA的文件以便于构建FastChat对应的模型Vicuna我资源不够用的7B模型
- 下载 huggingface/transformers 的源码访问其GitHub地址
- 点击绿色的Code按钮选择Download ZIP完成代码下载
- 解压进入到项目下
$ cd transformers-main - 利用 huggingface/transformers 中的代码完成对于LLaMA的转换示例
$ python src/transformers/models/llama/convert_llama_weights_to_hf.py --input_dir D:/code/model/LLaMA --model_size 7B --output_dir D:/code/model/transformer_model_7b
- 参数
--input_dir指定的是刚才你下载好的LLaMA文件地址这个路径下有个tokenizer.model文件请仔细核对一下 - 参数
--model_size指定用哪个参数数量级的模型7B代表的是70亿个参数的那个模型如果你用的种子链接下载的话还有13B/30B/65B的模型 - 参数
--output_dir 是转换后输出的路径等下要用
- 输出信息样例如下
(fastchat) D:\code\transformers-main>python src/transformers/models/llama/convert_llama_weights_to_hf.py --input_dir D:/code/model/LLaMA --model_size 7B --output_dir D:/code/model/transformer_model_7b
Fetching all parameters from the checkpoint at D:/code/model/LLaMA\7B.
Loading the checkpoint in a Llama model.
Loading checkpoint shards: 100%|███████████████████████████████████████████████████████| 33/33 [00:04<00:00,  7.76it/s]
Saving in the Transformers format.
Fetching the tokenizer from D:/code/model/LLaMA\tokenizer.model.

(fastchat) D:\code\transformers-main>
生成FastChat对应的模型Vicuna
- 接下来我们需要生成Vicuna模型将原始的LLaMA weights转为Vicuna weights
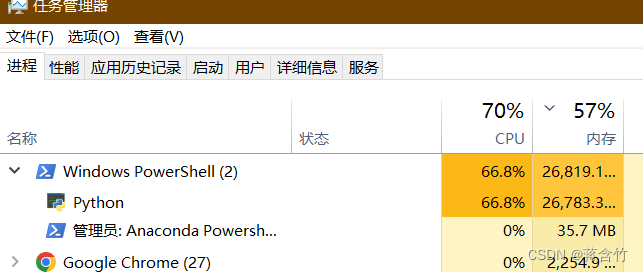
- 这个过程需要消耗大量的内存CPU也是拉满,官方给出的参考值如下
- Vicuna-13B 需要大约60GB内存
- Vicuna-7B 需要大约30GB内存
- 确实需要这么多请准备好足够的内存空间
- 命令样例如
$ python -m fastchat.model.apply_delta --base D:/code/model/transformer_model_7b --target D:/code/model/vicuna-7b --delta lmsys/vicuna-7b-delta-v1.1
- 参数
--base指定的是上一步我们转换好的LLaMA 文件路径 - 参数
--target是接下来生成的Vicuna文件要存放的位置稍后启动FastChat要用 - 参数
--delta不用改 - 注意如果内存不够可以加上
--low-cpu-mem它可以让消耗的内存低于16GB
- 这个过程较长需要等下下面是我的控制台打印信息样例
(fastchat) D:\code\transformers-main>python -m fastchat.model.apply_delta --base D:/code/model/transformer_model_7b --target D:/code/model/vicuna-7b  --delta lmsys/vicuna-7b-delta-v1.1
Loading the base model from D:/code/model/transformer_model_7b
Loading checkpoint shards: 100%|█████████████████████████████████████████████████████████| 2/2 [00:03<00:00,  1.59s/it]
Loading the delta from lmsys/vicuna-7b-delta-v1.1
Downloading (…)lve/main/config.json: 100%|████████████████████████████████████████████| 610/610 [00:00<00:00, 50.6kB/s]
Downloading (…)model.bin.index.json: 100%|█████████████████████████████████████████| 26.8k/26.8k [00:00<00:00, 192kB/s]
Downloading (…)l-00001-of-00002.bin: 100%|████████████████████████████████████████| 9.98G/9.98G [06:34<00:00, 25.3MB/s]
Downloading (…)l-00002-of-00002.bin: 100%|████████████████████████████████████████| 3.50G/3.50G [02:15<00:00, 25.9MB/s]
Downloading shards: 100%|███████████████████████████████████████████████████████████████| 2/2 [08:54<00:00, 267.12s/it]
Loading checkpoint shards: 100%|█████████████████████████████████████████████████████████| 2/2 [00:03<00:00,  1.68s/it]
Downloading (…)neration_config.json: 100%|████████████████████████████████████████████| 137/137 [00:00<00:00, 27.6kB/s]
Applying the delta
Applying delta: 100%|████████████████████████████████████████████████████████████████| 323/323 [00:22<00:00, 14.09it/s]
Saving the target model to D:/code/model/vicuna-7b

(fastchat) D:\code\transformers-main>
启动FastChat的命令行交互
- 前序工作我们已经准备好了接下来可以和Vicuna进行命令行式的交流了
- 执行命令
$ python -m fastchat.serve.cli --model-path D:\code\model\vicuna-7b
- 如果使用CPU
$ python -m fastchat.serve.cli --model-path D:\code\model\vicuna-7b --device cpu - 如果有多张显卡可通过
--num-gpus 2来指定多张显卡 - 官方给出的参考值如下
- 使用显卡的情况下Vicuna-13B大概需要28GB显存Vicuna-7B大概需要14GB显存
- 使用CPU的情况下Vicuna-13B大概需要60GB内存Vicuna-7B大概需要30GB内存
- 内存不够在后面添加
--load-8bit试试
- 稍等一会就可以正式和Vicuna交流了
- 下面是一个样例
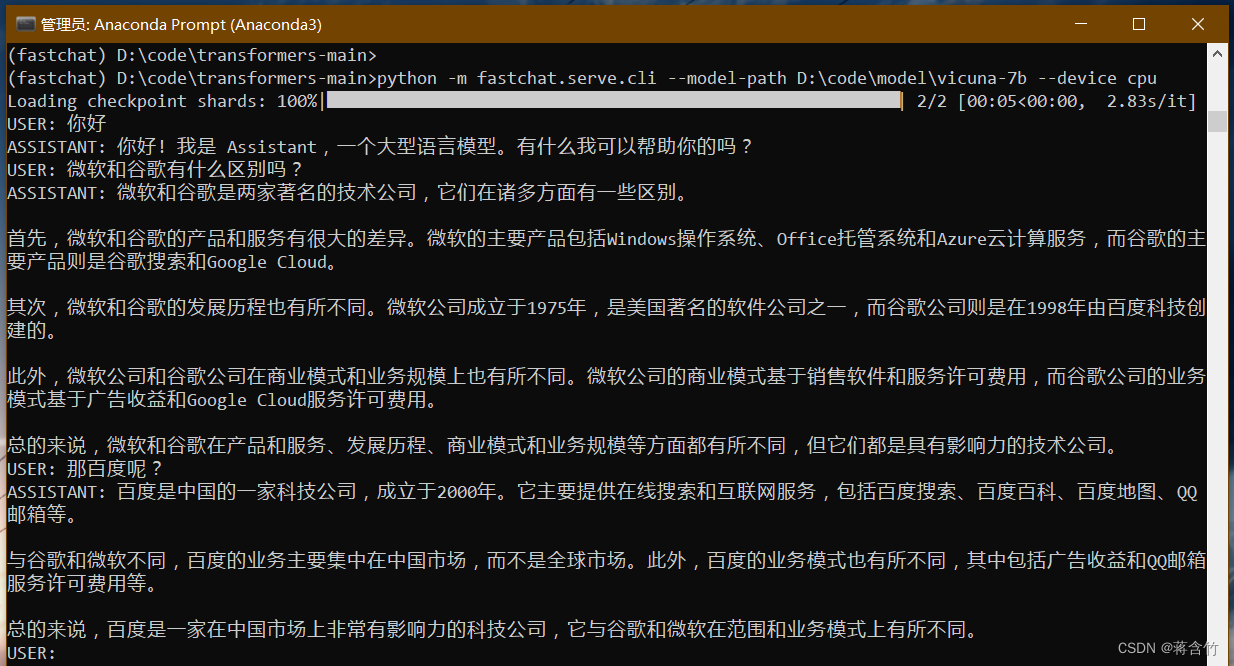
- 可以看出来7B模型还是有较大问题的你可以到官方Demo地址中拿这个问题问问13B模型
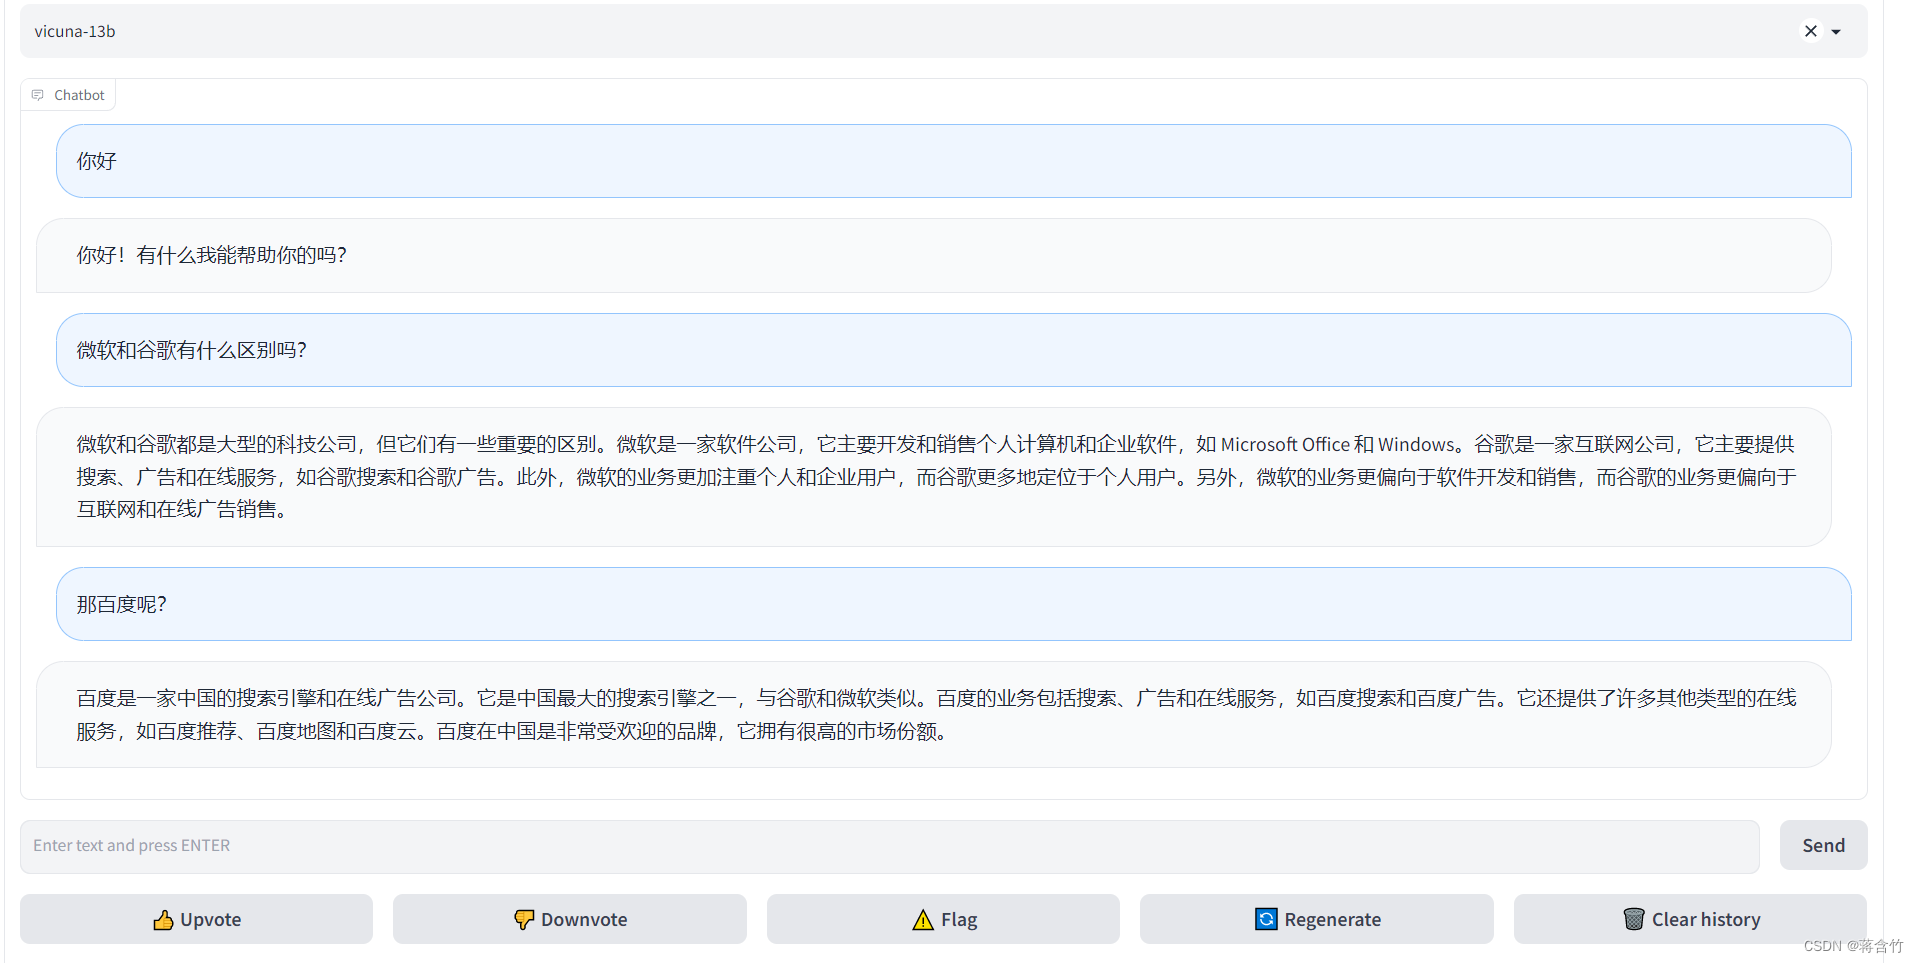
将模型部署为一个服务提供Web GUI
- 启动 controller
- 新打开命令行进入到fastchat环境
$ conda activate fastchat - 执行命令
$ python -m fastchat.serve.controller
- 启动 model worker
- 新打开命令行进入到fastchat环境
$ conda activate fastchat - 执行命令
$ python -m fastchat.serve.model_worker --model-path D:\code\model\vicuna-7b - 同样如果你显卡内存不够需要使用CPU在后面加上参数
--device cpu
- 关于controller和model worker的说明
- controller用来控制协调Webserver的请求将具体的任务转给model worker
- model worker负责执行可以部署多个会自动链接到controller
- 启动前可以测试一下
- 新打开命令行进入到fastchat环境
$ conda activate fastchat - 执行
$ python -m fastchat.serve.test_message --model-name vicuna-7b
- 最后启动 web server执行
$ python -m fastchat.serve.gradio_web_server - 打开浏览器访问地址 http://127.0.0.1:7860/

| 阿里云国内75折 回扣 微信号:monov8 |
| 阿里云国际,腾讯云国际,低至75折。AWS 93折 免费开户实名账号 代冲值 优惠多多 微信号:monov8 飞机:@monov6 |

