

Vue3 – Composition API(二)
| 阿里云国内75折 回扣 微信号:monov8 |
| 阿里云国际,腾讯云国际,低至75折。AWS 93折 免费开户实名账号 代冲值 优惠多多 微信号:monov8 飞机:@monov6 |
1、computed函数使用
1.1、computed
在前面我们讲解过计算属性computed当我们的某些属性是依赖其他状态时我们可以使用计算属性来处理
- 在前面的Options API中我们是使用computed选项来完成的
- 在Composition API中我们可以在 setup 函数中使用 computed 方法来编写一个计算属性
如何使用computed呢
- 方式一接收一个getter函数并为 getter 函数返回的值返回一个不变的 ref 对象
- 方式二接收一个具有 get 和 set 的对象返回一个可变的可读写ref 对象


1.2、示例
App.vue
<template>
  <h2>{{ fullname }}</h2>
  <button @click="setFullname">设置fullname</button>
  <h2>{{ scoreLevel }}</h2>
</template>

<script>
  import {reactive, computed, ref} from 'vue'

  export default {
    setup() {
      // 1.定义数据
      const names = reactive({
        firstName: "kobe",
        lastName: "bryant"
      })

      // const fullname = computed(() => {
      //   return names.firstName + " " + names.lastName
      // })
      const fullname = computed({
        set: function (newValue) {
          const tempNames = newValue.split(" ")
          names.firstName = tempNames[0]
          names.lastName = tempNames[1]
        },
        get: function () {
          return names.firstName + " " + names.lastName
        }
      })

      console.log(fullname)  // 是一个ref对象

      function setFullname() {
        fullname.value = "coder why"
        console.log(names)
      }


      // 2.定义score
      const score = ref(89)
      const scoreLevel = computed(() => {
        return score.value >= 60 ? "及格" : "不及格"
      })

      return {
        names,
        fullname,
        setFullname,
        scoreLevel
      }
    }
  }
</script>

<style scoped>
</style>
2、setup中使用ref
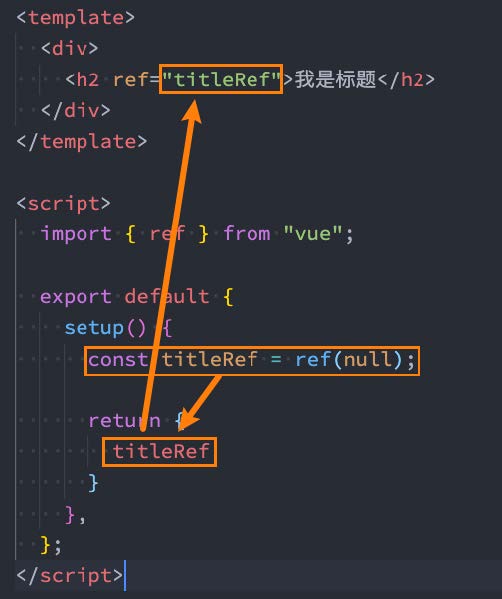
在setup中如何使用ref获取元素或者组件
- 其实非常简单我们只需要定义一个ref对象绑定到元素或者组件的ref属性上即可
示例
ShowInfo.vue
<template>
  <div>ShowInfo</div>
</template>

<script>
  export default {
    // methods: {
    //   showInfoFoo() {
    //     console.log("showInfo foo function")
    //   }
    // }
    setup() {
      function showInfoFoo() {
        console.log("showInfo foo function")
      }

      return {
        showInfoFoo
      }
    }
  }
</script>

<style scoped>
</style>
App.vue
<template>
  <!-- 1.获取元素 -->
  <h2 ref="titleRef">我是标题</h2>
  <button ref="btnRef">按钮</button>

  <!-- 2.获取组件实例 -->
  <show-info ref="showInfoRef"></show-info>

  <button @click="getElements">获取元素</button>
</template>

<script>
  import { ref, onMounted } from 'vue'
  import ShowInfo from './ShowInfo.vue'

  export default {
    components: {
      ShowInfo
    },
    setup() {
      const titleRef = ref()
      const btnRef = ref()
      const showInfoRef = ref()

      // mounted的生命周期函数
      onMounted(() => {
        console.log(titleRef.value)
        console.log(btnRef.value)
        console.log(showInfoRef.value)

        showInfoRef.value.showInfoFoo()
      })

      function getElements() {
        console.log(titleRef.value)
      }

      return {
        titleRef,
        btnRef,
        showInfoRef,
        getElements
      }
    }
  }
</script>

<style scoped>
</style>
3、组件的生命周期函数
3.1、生命周期钩子
- 我们前面说过 setup 可以用来替代 data 、 methods 、 computed 等等这些选项也可以替代 生命周期钩子。
- 那么setup中如何使用生命周期函数呢
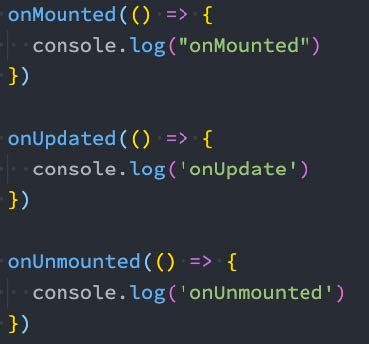
- 可以使用直接导入的 onX 函数注册生命周期钩子
| 选项式 API | Hook inside setup |
| beforecreate | 无 |
| created | 无 |
| beforeMount | onBeforeMount |
| mounted | onMounted |
| beforeupdate | onBeforeupdate |
| updated | onUpdated |
| beforeUnmount | onBeforeUnmount |
| unmounted | onUnmounted |
| activated | onActivated |
| deactivated | onDeactivated |
Tip因为 setup 是围绕 beforeCreate 和 created 生命周期钩子运行的所以不需要显式地定义它们。换句话说在这些钩子中缩写的任何代码都应该直接在 setup 函数中编写。
3.2、示例
App.vue
<template>
  <div>AppContent</div>
</template>

<script>
  import {onMounted, onUpdated, onUnmounted} from 'vue'

  export default {
    beforeCreate() {

    },
    // created() {

    // },
    // beforeMount() {

    // },
    // mounted() {

    // },
    // beforeUpdate() {

    // },
    // updated() {

    // }
    setup() {
      // 在执行setup函数的过程中, 你需要注册别的生命周期函数
      onMounted(() => {
        console.log("onmounted")
      })
    }
  }
</script>

<style scoped>
</style>
4、Provide/Inject使用
4.1、Provide函数
- 事实上我们之前还学习过Provide和InjectComposition API也可以替代之前的 Provide 和 Inject 的选项。
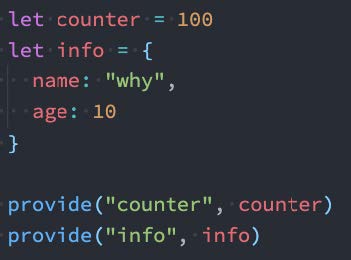
- 我们可以通过 provide来提供数据
- 可以通过 provide 方法来定义每个 Property
- provide可以传入两个参数
- name提供的属性名称
- value提供的属性值
4.2、Inject函数
- 在 后代组件 中可以通过 inject 来注入需要的属性和对应的值
- 可以通过 inject 来注入需要的内容
- inject可以传入两个参数
- 要 inject 的 property 的 name
- 默认值

4.3、数据的响应式
为了增加 provide 值和 inject 值之间的响应性我们可以在 provide 值时使用 ref 和 reactive。

4.4、示例
ShowInfo.vue
<template>
  <div>ShowInfo: {{ name }}-{{ age }}-{{ height }}</div>
</template>

<script>
  import {inject} from 'vue'

  export default {
    // inject的options api注入, 那么依然需要手动来解包
    // inject: ["name", "age"],
    setup() {
      const name = inject("name")
      const age = inject("age")
      const height = inject("height", 1.88)

      return {
        name,
        age,
        height
      }
    }
  }
</script>

<style scoped>
</style>
App.vue
<template>
  <div>AppContent: {{ name }}</div>
  <button @click="name = 'kobe'">app btn</button>
  <show-info></show-info>
</template>

<script>
  import { provide, ref } from 'vue'
  import ShowInfo from './ShowInfo.vue'

  export default {
    components: {
      ShowInfo
    },
    setup() {
      const name = ref("why")

      provide("name", name)
      provide("age", 18)

      return {
        name
      }
    }
  }
</script>

<style scoped>
</style>
5、watch/watchEffect
5.1、侦听数据的变化
- 在前面的Options API中我们可以通过watch选项来侦听data或者props的数据变化当数据变化时执行某一些操作。
- 在Composition API中我们可以使用watchEffect和watch来完成响应式数据的侦听
- watchEffect用于自动收集响应式数据的依赖
- watch需要手动指定侦听的数据源
5.2、Watch的使用
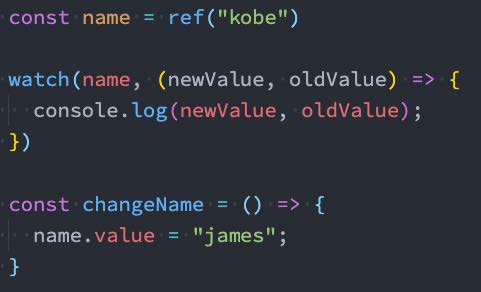
watch的API完全等同于组件watch选项的Property
- watch需要侦听特定的数据源并且执行其回调函数
- 默认情况下它是惰性的只有当被侦听的源发生变化时才会执行回调
5.3、侦听多个数据源
侦听器还可以使用数组同时侦听多个源

5.4、watch的选项
如果我们希望侦听一个深层的侦听那么依然需要设置 deep 为true也可以传入 immediate 立即执行
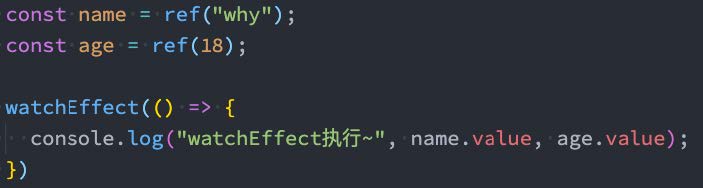
5.5、watchEffect
- 当侦听到某些响应式数据变化时我们希望执行某些操作这个时候可以使用 watchEffect。
- 我们来看一个案例
- 首先watchEffect传入的函数会被立即执行一次并且在执行的过程中会收集依赖
- 其次只有收集的依赖发生变化时watchEffect传入的函数才会再次执行
5.6、watchEffect的停止侦听
- 如果在发生某些情况下我们希望停止侦听这个时候我们可以获取watchEffect的返回值函数调用该函数即可。
- 比如在上面的案例中我们age达到20的时候就停止侦听

5.7、示例
App-watch.vue
<template>
<div>AppContent</div>
<button @click="message = '你好啊,李银河!'">修改message</button>
<button @click="info.friend.name = 'james'">修改info</button>
</template>
<script>
import {reactive, ref, watch} from 'vue'
export default {
setup() {
// 1.定义数据
const message = ref("Hello World")
const info = reactive({
name: "why",
age: 18,
friend: {
name: "kobe"
}
})
// 2.侦听数据的变化
watch(message, (newValue, oldValue) => {
console.log(newValue, oldValue)
})
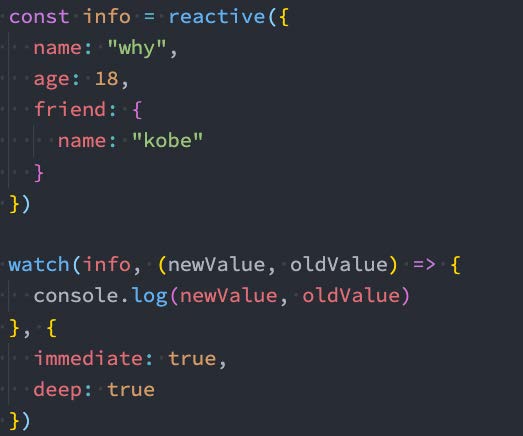
watch(info, (newValue, oldValue) => {
console.log(newValue, oldValue)
console.log(newValue === oldValue) // true两者为同一个对象浅拷贝
}, {
// 这个属性作用就是加载后默认就会执行一次这个console.log回调方法
immediate: true
})
// 3.监听reactive数据变化后, 获取普通对象
watch(() => ({...info}), (newValue, oldValue) => {
console.log(newValue, oldValue)
}, {
immediate: true,
deep: true
})
return {
message,
info
}
}
}
</script>
<style scoped>
</style>
App.vue
<template>
  <div>
    <h2>当前计数: {{ counter }}</h2>
    <button @click="counter++">+1</button>
    <button @click="name = 'kobe'">修改name</button>
  </div>
</template>

<script>
  import { watchEffect, watch, ref } from 'vue'

  export default {
    setup() {
      const counter = ref(0)
      const name = ref("why")

      // watch(counter, (newValue, oldValue) => {})

      // 1.watchEffect传入的函数默认会直接被执行
      // 2.在执行的过程中, 会自动的收集依赖(依赖哪些响应式的数据)
      const stopWatch = watchEffect(() => {
        console.log("-------", counter.value, name.value)

        // 判断counter.value > 10
        if (counter.value >= 10) {
          // 停止监听
          stopWatch()
        }
      })

      return {
        counter,
        name
      }
    }
  }
</script>

<style scoped>
</style>
6、script setup语法糖
6.1、script setup语法
- <script setup> 是在单文件组件 (SFC) 中使用组合式 API 的编译时语法糖当同时使用 SFC 与组合式 API 时则推荐该语法。
- 更少的样板内容更简洁的代码
- 能够使用纯 Typescript 声明 prop 和抛出事件
- 更好的运行时性能
- 更好的 IDE 类型推断性能
- 使用这个语法需要将 setup attribute 添加到 <script> 代码块上

- 里面的代码会被编译成组件 setup() 函数的内容
- 这意味着与普通的 <script> 只在组件被首次引入的时候执行一次不同
- <script setup> 中的代码会在每次组件实例被创建的时候执行。
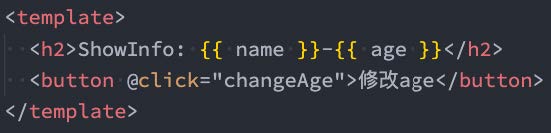
6.2、顶层的绑定会被暴露给模板
当使用 <script setup> 的时候任何在 <script setup> 声明的顶层的绑定 (包括变量函数声明以及 import 引入的内容)都能在模板中直接使用
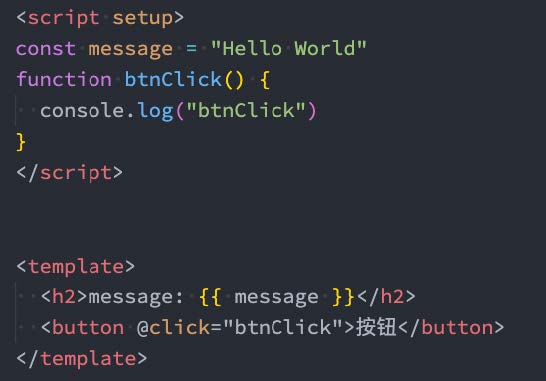
响应式数据需要通过ref、reactive来创建。
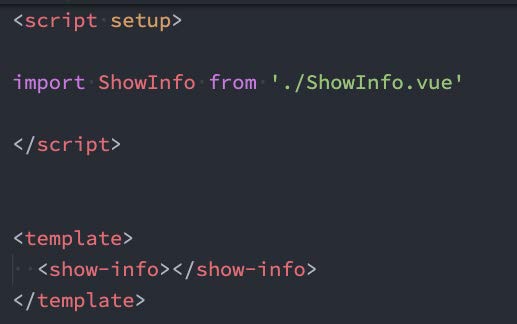
6.3、导入的组件直接使用
<script setup> 范围里的值也能被直接作为自定义组件的标签名使用
6.4、defineProps() 和 defineEmits()
为了在声明 props 和 emits 选项时获得完整的类型推断支持我们可以使用 defineProps 和 defineEmits API它们将自动地在 <script setup> 中可用
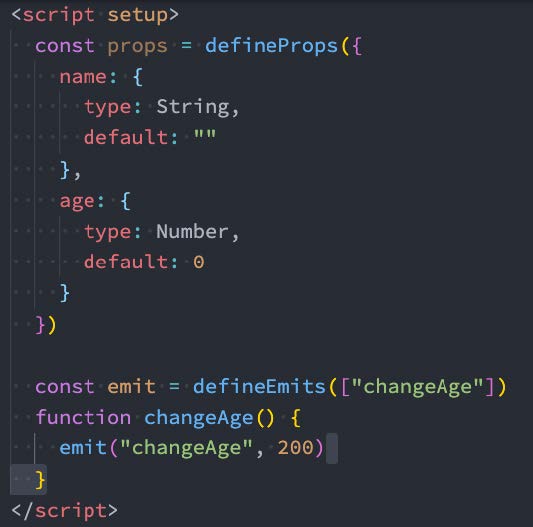
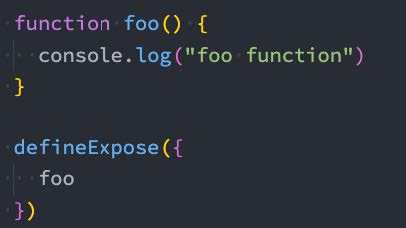
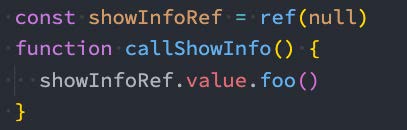
6.5、defineExpose()
- 使用 <script setup> 的组件是默认关闭的
- 通过模板 ref 或者 $parent 链获取到的组件的公开实例不会暴露任何在 <script setup> 中声明的绑定
- 通过 defineExpose 编译器宏来显式指定在 <script setup> 组件中要暴露出去的 property
6.6、示例
ShowInfo.vue
<template>
  <div>ShowInfo: {{ name }}-{{ age }}</div>
  <button @click="showInfoBtnClick">showInfoButton</button>
</template>

<script setup>

  // 定义props
  const props = defineProps({
    name: {
      type: String,
      default: "默认值"
    },
    age: {
      type: Number,
      default: 0
    }
  })

  // 绑定函数, 并且发出事件
  const emits = defineEmits(["infoBtnClick"])

  function showInfoBtnClick() {
    emits("infoBtnClick", "showInfo内部发生了点击")
  }

  // 定义foo的函数
  function foo() {
    console.log("foo function")
  }

  // 暴露实例
  defineExpose({
    foo
  })

</script>

<style scoped>
</style>
App.vue
<template>
  <div>AppContent: {{ message }}</div>
  <button @click="changeMessage">修改message</button>
  <show-info name="why"
             :age="18"
             @info-btn-click="infoBtnClick"
             ref="showInfoRef">
  </show-info>
  <show-info></show-info>
  <show-info></show-info>
</template>

<script setup>
  // 1.所有编写在顶层中的代码, 都是默认暴露给template可以使用
  import {ref, onMounted} from 'vue'

  // 组件不在需要注册直接导入使用即可
  import ShowInfo from './ShowInfo.vue'

  // 2.定义响应式数据
  const message = ref("Hello World")
  console.log(message.value)

  // 3.定义绑定的函数
  function changeMessage() {
    message.value = "你好啊, 李银河!"
  }

  function infoBtnClick(payload) {
    console.log("监听到showInfo内部的点击:", payload)
  }

  // 4.获取组件实例
  const showInfoRef = ref()
  onMounted(() => {
    showInfoRef.value.foo()
  })

</script>

<style scoped>
</style>
7、自定义Hook练习
useCounter.js
import { ref, onMounted } from 'vue'

export default function useCounter() {
  const counter = ref(0)
  function increment() {
    counter.value++
  }
  function decrement() {
    counter.value--
  }
  onMounted(() => {
    setTimeout(() => {
      counter.value = 989
    }, 1000);
  })

  return {
    counter,
    increment,
    decrement
  }
}
useScrollPosition.js
import { reactive } from 'vue'

export default function useScrollPosition() {
  // 1.使用reative记录位置
  const scrollPosition = reactive({
    x: 0,
    y: 0
  })

  // 2.监听滚动
  document.addEventListener("scroll", () => {
    scrollPosition.x = window.scrollX
    scrollPosition.y = window.scrollY
  })


  return {
    scrollPosition
  }
}
useTitle.js
import { ref, watch } from "vue";

export default function useTitle(titleValue) {
  // document.title = title

  // 定义ref的引入数据
  const title = ref(titleValue)

  // 监听title的改变
  watch(title, (newValue) => {
    document.title = newValue
  }, {
    immediate: true
  })

  // 返回ref值
  return {
    title
  }
}
About.vue
<template>
  <h2>About计数: {{ counter }}</h2>
  <button @click="increment">+1</button>
  <button @clcik="decrement">-1</button>
</template>

<script>
  import { onActivated } from 'vue'
  import useCounter from '../hooks/useCounter'
  import useTitle from '../hooks/useTitle'

  export default {
    setup() {

      // 切换标题
      useTitle("关于")

      return {
        ...useCounter()
      }
    }
  }
</script>

<style scoped>
</style>
Home.vue
<template>
  <h2>Home计数: {{ counter }}</h2>
  <button @click="increment">+1</button>
  <button @click="decrement">-1</button>

  <button @click="popularClick">首页-流行</button>
  <button @click="hotClick">首页-热门</button>
  <button @click="songClick">首页-歌单</button>

  <div class="scroll">
    <h2>x: {{ scrollPosition.x }}</h2>
    <h2>y: {{ scrollPosition.y }}</h2>
  </div>
</template>

<script>
  import { onMounted, ref } from 'vue'
  import useCounter from '../hooks/useCounter'
  import useTitle from '../hooks/useTitle'
  import useScrollPosition from '../hooks/useScrollPosition'

  export default {
    setup() {
      // 1.counter逻辑
      const { counter, increment, decrement } = useCounter()

      // 2.修改标题
      const { title } = useTitle("首页")

      // 3.监听按钮的点击
      function popularClick() {
        title.value = "首页-流行"
      }
      function hotClick() {
        title.value = "首页-热门"
      }
      function songClick() {
        title.value = "首页-歌单"
      }

      // 4.获取滚动位置
      const { scrollPosition } = useScrollPosition()
      console.log(scrollPosition)

      return {
        counter,
        increment,
        decrement,
        popularClick,
        hotClick,
        songClick,
        scrollPosition
      }
    }
  }
</script>

<style scoped>
</style>
App.vue
<template>
  <div>AppContent</div>
  <button @click="changeTitle">修改title</button>

  <!-- 1.计数器 -->
  <!-- <hr>
  <home></home>
  <hr>
  <about></about> -->

  <!-- 2.home和about页面的切换 -->
  <button @click="currentPage = 'home'">home</button>
  <button @click="currentPage = 'about'">about</button>

  <component :is="currentPage"></component>

  <div class="content"></div>

  <br><br><br><br><br><br>
  <br><br><br><br><br><br>
  <br><br><br><br><br><br>
  <br><br><br><br><br><br>
  <br><br><br><br><br><br>
  <br><br><br><br><br><br>
  <br><br><br><br><br><br>
  <br><br><br><br><br><br>
  <br><br><br><br><br><br>
  <br><br><br><br><br><br>
  <br><br><br><br><br><br>
</template>

<script>
  import { ref } from 'vue'
  import Home from './views/Home.vue'
  import About from './views/About.vue'

  import useTitle from './hooks/useTitle'

  export default {
    components: {
      Home,
      About
    },
    setup() {
      const currentPage = ref("home")

      function changeTitle() {
        useTitle("app title")
      }

      return {
        changeTitle,
        currentPage
      }
    }
  }
</script>

<style scoped>
  .content {
    width: 3000px;
    height: 100px;
    background-color: orange;
  }
</style>
注意这个案例只是展示了setup中其他函数的搭配使用方式。