

springboot整合Freemarker模板引擎
| 阿里云国内75折 回扣 微信号:monov8 |
| 阿里云国际,腾讯云国际,低至75折。AWS 93折 免费开户实名账号 代冲值 优惠多多 微信号:monov8 飞机:@monov6 |
2.2 模板引擎
2.2.1 什么是模板引擎
根据前边的数据模型分析课程预览就是把课程的相关信息进行整合在课程预览界面进行展示课程预览界面与课程发布的课程详情界面一致保证了教学机构人员发布前看到什么样发布后也会看到什么样。
项目采用模板引擎技术实现课程预览界面。什么是模板引擎
早期我们采用的jsp技术就是一种模板引擎技术如下图

1、浏览器请求web服务器
2、服务器渲染页面渲染的过程就是向jsp页面(模板)内填充数据(模型)。
3、服务器将渲染生成的页面返回给浏览器。
所以模板引擎就是模板+数据=输出Jsp页面就是模板页面中嵌入的jsp标签就是数据两者相结合输出html网页。
常用的java模板引擎还有哪些
Jsp、Freemarker、Thymeleaf 、Velocity 等。
本项目采用Freemarker作为模板引擎技术。
Freemarker官方地址http://freemarker.foofun.cn/
FreeMarker 是一款 模板引擎 即一种基于模板和要改变的数据 并用来生成输出文本(HTML网页电子邮件配置文件源代码等)的通用工具。 它不是面向最终用户的而是一个Java类库是一款程序员可以嵌入他们所开发产品的组件。FreeMarker 是 免费的 基于Apache许可证2.0版本发布。
2.2.2 Freemarker快速入门
下边在内容管理接口层搭建Freemarker的运行环境并进行测试。
在内容管理接口工层 添加Freemarker与SpringBoot的整合包
| XML org.springframework.boot spring-boot-starter-freemarker |
|---|
在nacos为内容管理接口层配置freemarker新加一个freemarker-config-dev.yaml
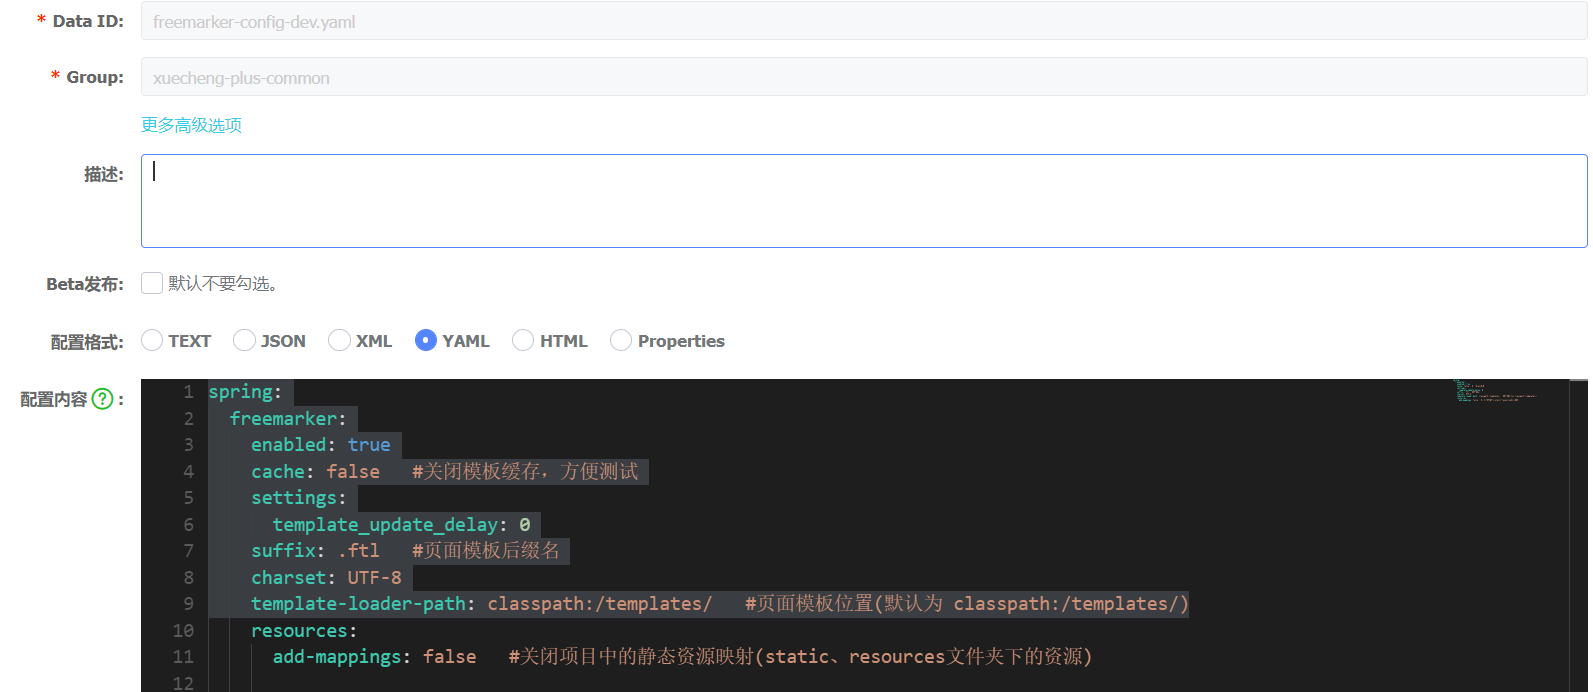
配置信息如下
| YAMLspring: freemarker: enabled: true cache: false #关闭模板缓存方便测试 settings: template_update_delay: 0 suffix: .ftl #页面模板后缀名 charset: UTF-8 template-loader-path: classpath:/templates/ #页面模板位置(默认为 classpath:/templates/) resources: add-mappings: false #关闭项目中的静态资源映射(static、resources文件夹下的资源) |
|---|
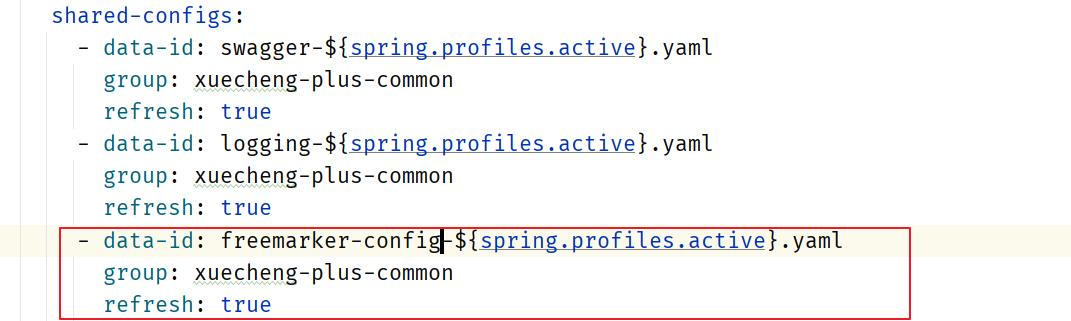
在内容管理接口工程添加freemarker-config-dev.yaml
添加模板在resources下创建templates目录添加test.ftl模板文件
| HTML |
|---|
编写controller方法准备模型数据
| Javapackage com.xuecheng.content.api; import org.bouncycastle.math.raw.Mod; import org.springframework.stereotype.Controller; import org.springframework.web.bind.annotation.GetMapping; import org.springframework.web.servlet.ModelAndView; import java.util.Map; /** * @author Mr.M * @version 1.0 * @description freemarker测试 * @date 2022/9/15 19:20 */ @Controller public class FreemarkerController { @GetMapping(“/testfreemarker”) public ModelAndView test(){ ModelAndView modelAndView = new ModelAndView(); //设置模型数据 modelAndView.addObject(“name”,“小明”); //设置模板名称 modelAndView.setViewName(“test”); return modelAndView; } } |
|---|
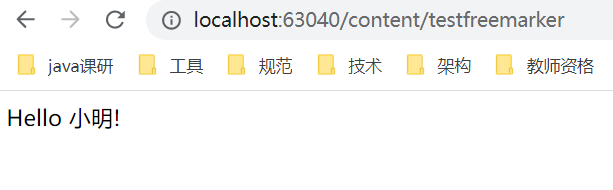
启动内容管理接口工程访问http://localhost:63040/content/testfreemarker
屏幕输出Hello 小明
freemarker提供很多指令用于解析各种类型的数据模型参考地址http://freemarker.foofun.cn/ref_directives.html
2.3 测试静态页面
2.3.1 部署网站门户
在课程预览界面上要加载css、js、图片等内容这里部署nginx来访问这些静态资源对于SpringBoot服务的动态资源由Nginx去代理请求如下图

1、在本机安装 Nginx 从课程资料目录获取nginx-1.23.1.zip并解压。
2、运行nginx-1.23.1目录下的nginx.exe。
默认端口为80如果本机80端口被占用则需要杀掉占用进程后再启动nginx。
如果无法杀掉80端口占用进程则需要修改nginx-1.23.1目录下conf/nginx.conf配置文件

将80端口修改为空闲端口。
启动nginx访问http://localhost 出现下边的网页表示启动成功

下边开始部署前端工程
1、从课程资料目录获取xc-ui-pc-static-portal.zip 并解压。
2、修改本机hosts文件加入127.0.0.1 www.xuecheng-plus.com。
window10操作系统hosts文件在C:\Windows\System32\drivers\etc下
Centos7操作系统的hosts文件在/etc目录下。
在hosts文件加入如下配置
| Plain Text127.0.0.1 www.xuecheng-plus.com file.xuecheng-plus.com ucenter.xuecheng-plus.com teacher.xuecheng-plus.com |
|---|
3、在nginx-1.23.1目录中找到conf目录配置目录下的nginx.conf文件。
配置内容如下
| Plain Textserver { listen 80; server_name www.xuecheng-plus.com localhost; #rewrite ^(.*) https://$server_nameKaTeX parse error: Expected 'EOF', got '#' at position 14: 1 permanent; #̲charset koi8-r;… { # proxy_pass http://127.0.0.1; #} # pass the PHP scripts to FastCGI server listening on 127.0.0.1:9000 # #location ~ .php$ { # root html; # fastcgi_pass 127.0.0.1:9000; # fastcgi_index index.php; # fastcgi_param SCRIPT_FILENAME /scripts$fastcgi_script_name; # include fastcgi_params; #} # deny access to .htaccess files, if Apache’s document root # concurs with nginx’s one # #location ~ /.ht { # deny all; #} } |
|---|
启动nginx:
进入任务管理器杀死nginx的两个进程

杀死后再次双击nginx.exe。
启动成功在任务管理器会出现nginx的进程。
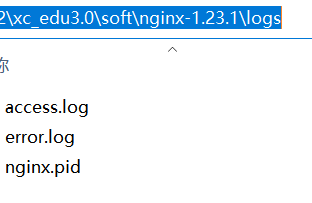
日志文件在nginx安装目录下的logs目录
启动成功访问http://www.xuecheng-plus.com

2.3.2 课程详情页面
course_template.html是一个静态html页面里边还没有添加freemarker标签如果要预览该页面需要借助Nginx进行预览因为页面需要加载一些css样式表、图片等内容。
course_template.html文件在xc-ui-pc-static-portal\course目录下

通过浏览器访问http://www.xuecheng-plus.com/course/course_template.html
效果如下

出现这个画面说明模板文件正常浏览是没有问题的。
2.3.3 文件服务器
在进行课程预览时需要展示课程的图片在线插放课程视频课程图片、视频这些都在MinIO文件系统存储下边统一由Nginx代理通过文件服务域名统一访问。如下图

在hosts文件配置如下内容如果已存在不要重复配置。
| Java127.0.0.1 www.xuecheng-plus.com file.xuecheng-plus.com |
|---|
在nginx.conf中配置文件服务器的代理地址
| Java #文件服务 upstream fileserver{ server 192.168.101.65:9000 weight=10; } server { listen 80; server_name file.xuecheng-plus.com; #charset koi8-r; ssi on; ssi_silent_errors on; #access_log logs/host.access.log main; location /video { proxy_pass http://fileserver; } location /mediafiles { proxy_pass http://fileserver; } } |
|---|
配置完毕重新加载nginx配置文件。
通过cmd进入nginx.exe所在目录,运行如下命令
| Plain Textnginx.exe -s reload |
|---|
通过http://file.xuecheng-plus.com/video/视频文件地址 访问视频
通过http://file.xuecheng-plus.com/mediafiles/图片文件地址 访问图片
在媒资数据库的文件表中找一个视频、图片的地址进行测试。
2.3.4 视频播放页面
进入课程详情页面点击马上学习或课程目录下的小节的名称将打开视频播放页面。
首先在nginx.conf中配置视频播放页面的地址
| Java location /course/preview/learning.html { alias D:/itcast2022/xc_edu3.0/code_1/xc-ui-pc-static-portal/course/learning.html; } location /course/search.html { root D:/itcast2022/xc_edu3.0/code_1/xc-ui-pc-static-portal; } location /course/learning.html { root D:/itcast2022/xc_edu3.0/code_1/xc-ui-pc-static-portal; } |
|---|
加载nginx配置文件
点击课程详情页面上的视频播放链接打开视频播放页面如下图

下边需要配置视频播放路径来测试视频播放页面找到页面中videoObject对象的定义处配置视频的播放地址

配置完成刷新页面观察视频是否可以正常播放。
