

nerfstudio介绍及在windows上的配置、使用
| 阿里云国内75折 回扣 微信号:monov8 |
| 阿里云国际,腾讯云国际,低至75折。AWS 93折 免费开户实名账号 代冲值 优惠多多 微信号:monov8 飞机:@monov6 |
nerfstudio提供了一个简单的API可以简化创建、训练和可视化NeRF的端到端过程。该库通过模块化每个组件来支持可解释的NeRF实现。nerfstudio源码地址: https://github.com/nerfstudio-project/nerfstudio , 通过模块化集成了多个NeRF扩展的实现持续更新带界面license为Apache-2.0。
目前已支持的方法
(1).Nerfacto: facto NeRF将专注于质量的模块和专注于更快渲染的模块相结合
(2).NeRF:《Representing Scenes as Neural Radiance Fields for View Synthesis》;
(3).Instant NGP:《Instant Neural Graphics Primitives with a Multiresolution Hash Encoding》
(4).Mipnerf: 《A Multiscale Representation for Anti-Aliasing Neural Radiance Fields》
(5).NerfW: 《Neural Radiance Fields for Unconstrained Photo Collections》
(6).Semantic NeRF: 《In-Place Scene Labelling and Understanding with Implicit Scene Representation》.
nerfstudio在windows上的配置
1.安装vs2019 + cuda 11.6;
2.通过conda创建虚拟环境nerfstudio,依次执行如下命令
conda create --name nerfstudio -y python=3.8
conda activate nerfstudio
python -m pip install --upgrade pip
3.安装依赖
(1).pytorch 1.13.1, 执行如下命令
pip install torch==1.13.1+cu116 torchvision==0.14.1+cu116 -f https://download.pytorch.org/whl/torch_stable.html(2).tinycudann, 执行如下命令
pip install ninja git+https://github.com/NVlabs/tiny-cuda-nn/#subdirectory=bindings/torch4.安装nerfstudio依次执行如下命令:
git clone git@github.com:nerfstudio-project/nerfstudio.git
cd nerfstudio
pip install --upgrade pip setuptools
pip install -e .
5.安装ffmpeg, 执行如下命令
conda install -c conda-forge ffmpeg6.安装colmap, 执行如下命令
conda install -c conda-forge colmap
conda install -c conda-forge mpir
7.安装hloc,依次执行如下命令: 可选windwos上不支持pycolmap
cd ..
git clone --recursive https://github.com/cvg/Hierarchical-Localization/
cd Hierarchical-Localization/
pip install pycolmap # windows不支持
python -m pip install -e .
使用
1.从https://data.nerf.studio/nerfstudio/ 下载person测试集解压缩并将其拷贝到nerfstudio的data/nerfstudio目录下data/nerfstudio需自己创建;
2.person目录下已有transforms.json,若是自己拍摄的图像序列如lego则执行如下命令生成transforms.json
ns-process-data images --data data/nerfstudio/lego/train --output-dir data/nerfstudio/lego --camera-type perspective --matching-method exhaustive --sfm-tool colmap --crop-factor 0.0 0.0 0.0 0.03.执行如下命令进行训练迭代产生的checkpoint存储在outputs/person/nerfacto目录下
ns-train nerfacto --data data/nerfstudio/person --vis viewer --max-num-iterations 50000训练进度如下图所示
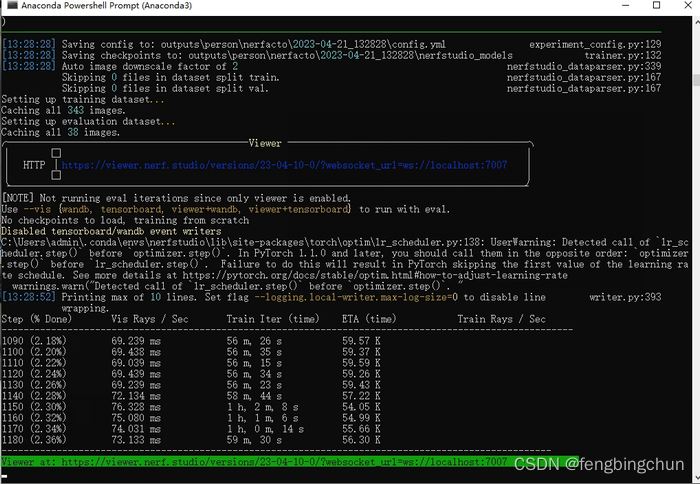
也可打开web实时预览: https://viewer.nerf.studio/versions/23-04-10-0/?websocket_url=ws://localhost:7007 ,如下图所示:

可以加载预训练模型如下命令所示这将自动开始继续训练
ns-train nerfacto --data data/nerfstudio/person --load-dir outputs/person/nerfacto/2023-04-22_171607/nerfstudio_models可以加载预训练模型进行可视化查看
ns-viewer --load-config outputs/person/nerfacto/2023-04-22_171607/config.yml每个命令都有很多参数可以通过--help查看具体支持哪些参数及参数的用处如
ns-render --help
ns-train --help
ns-train nerfacto --help
可将结果导出
(1).导出渲染视频
(2).导出点云
(3).导出mesh.
支持的自定义数据集类型https://docs.nerf.studio/en/latest/quickstart/custom_dataset.html
ns-process-data各参数说明https://docs.nerf.studio/en/latest/reference/cli/ns_process_data.html
官方提供的数据集https://data.nerf.studio/nerfstudio/