

Elasticsearch(二)--Elasticsearch客户端讲解
| 阿里云国内75折 回扣 微信号:monov8 |
| 阿里云国际,腾讯云国际,低至75折。AWS 93折 免费开户实名账号 代冲值 优惠多多 微信号:monov8 飞机:@monov6 |
一、前言
在上一章我们大致了解了下elasticsearch,虽说上次的内容全是八股文但是很多东西还是非常有用的这些哪怕往小说作为面试往大说是可以帮你很快的理解es是个什么玩意儿所以还是非常推荐大家去看一下上一章内容。
这一章我们将对es客户端进行学习在使用ES构建搜索应用时需要使用客户端与ES进行会话。在开发和调试环节使用最广泛的客户端要数Kibana,其提供的强大功能足以满足构建索引、验证结果和调试DSL等各种需求。然后呢虽然ES提供了多种编程语言但是我们本次学习包括后面的学习都将基于java,那么可选的客户端有RestHighLevelClient、Spring Data Elasticsearch和Jest,本章将通过一个搜索需求分别介绍。
二、Kibana客户端简介
Kibana是ELK家族中一个开源、免费的可视化数据搜索和分析平台。借助KIbana用户不需要编码就可以将ES中分析的结果进行可视化呈现如以常用的饼图、柱状图和时序图等方式呈现。除了可视化数据分析功能Kibana还提供了Dev Tools它是一款可以与ES进行交互式请求的工具可以借助它进行DSL调试。
2.1、Kibana的安装
同上一章的ES的安装本节这里也不做过多说明。但是需要注意的是Kibana的版本最好和已经安装的ES保持一致否则容易产生版本不兼容的问题。所以这里下载的Kibana的版本为7.10.2.
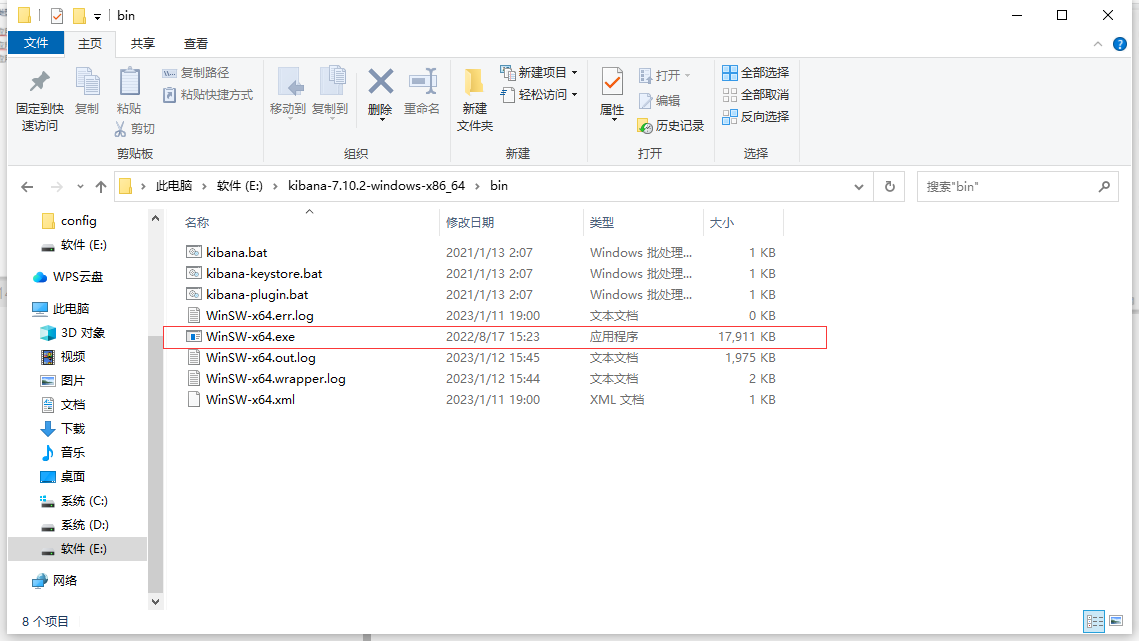
我想提的是如何在windows中将Kibana安装为服务并且开机自启动这里呢需要提到一个软件–Winsw这个软件大家可以搜一下下载下来然后打开软件选择Winsw-x64.exe,有的人可能直接是Winsw.exe这个大家根据自己的环境选择对应的执行文件就好

然后大家将执行文件复制到Kibana的bin目录下
接着在同一目录下创建执行文件同名的xml文件比如我的执行文件叫作Winsw-x64.exe那么我就需要创建Winsw-x64.xml文件那么如果有的人执行文件叫作Winsw.exe,那就取名为Winsw.xml:
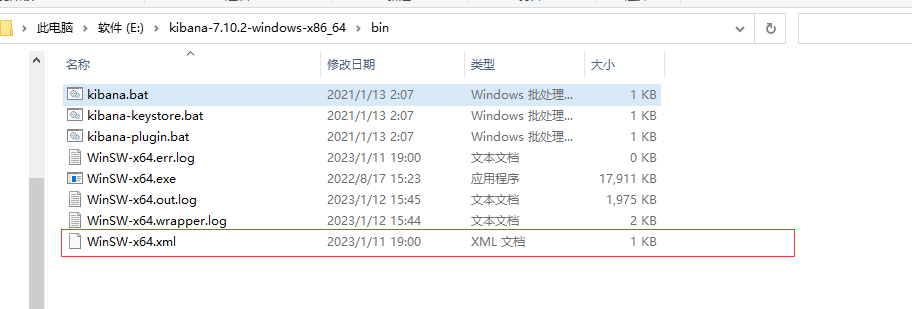
然后在xml文件中添加以下内容
<service>
	<id>kibanaService</id>
	 <!-- 服务名 -->
	<name>kibanaService</name>
	<description>kibana</description>
	 <!-- 开机启动 -->
     <startmode>Automatic</startmode>
     <!-- 启动文件位置kibana.bat就是kibana的启动文件 -->
     <executable>%BASE%\kibana.bat</executable>
     <!-- 日志配置 -->
     <logmode>rotate</logmode>
</service>
创建完后保存文件然后在bin目录下打开cmd终端输入Winsw-x64.exe install即可
安装完可以去任务管理器的服务看到

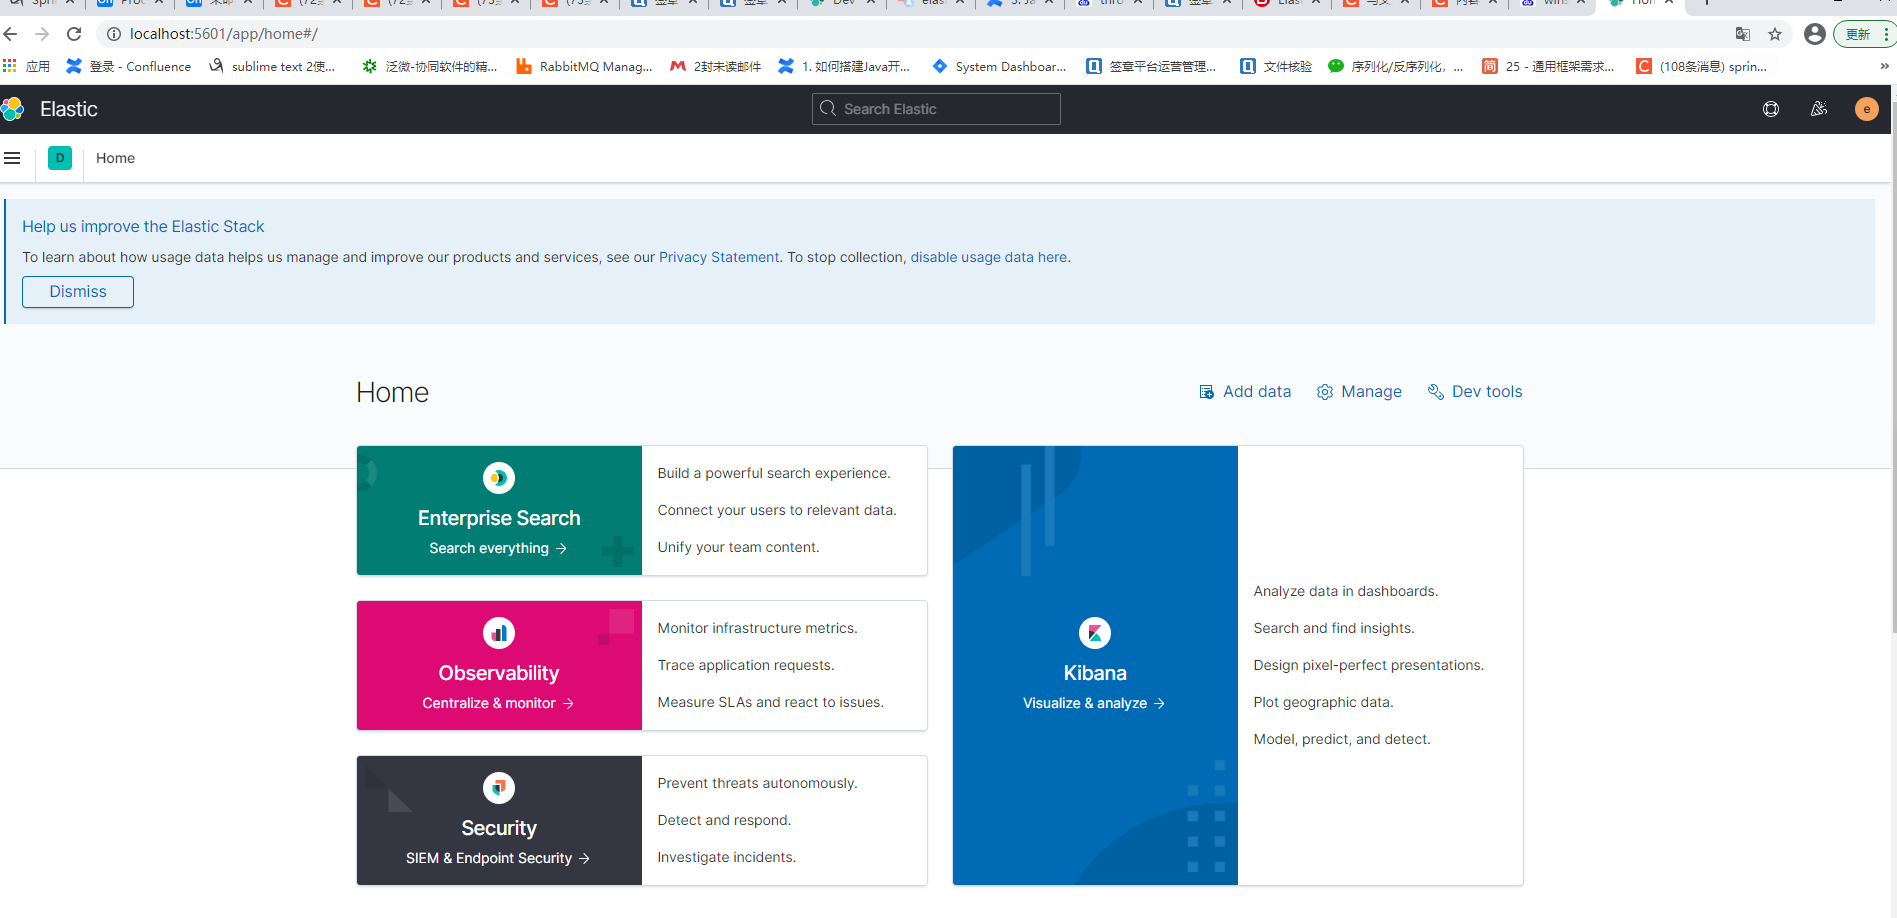
然后安装完服务后启动服务即可接着浏览器输入localhost:5601,运行界面如图所示
2.2、在Kibana中搜索文档
在Kibana首页中单击Dev Tool链接

目前的工具集中包含Console、Search Profile、Grok Debugger和Painless Lab4个工具它们各自的功能如下表
| 工具名称 | 功能 |
|---|---|
| Console | 提供ES REST形式交互的控制台 |
| Search Profile | 可以分析ES响应某一请求的耗时 |
| Grok Debugger | 提供Grokt语言的调试器联合使用Logstash上传数据时用作调试分割文本的表达式 |
| Painless Lab | 提供Painless语言的调试器用户在自定义排序脚本diamante时可以使用 |
本节主要介绍Console(控制台)的使用这是在后面的章节中使用最多的工具。控制台中包含3个区域分别为功能区、请求编辑区和结果反馈区如图所示
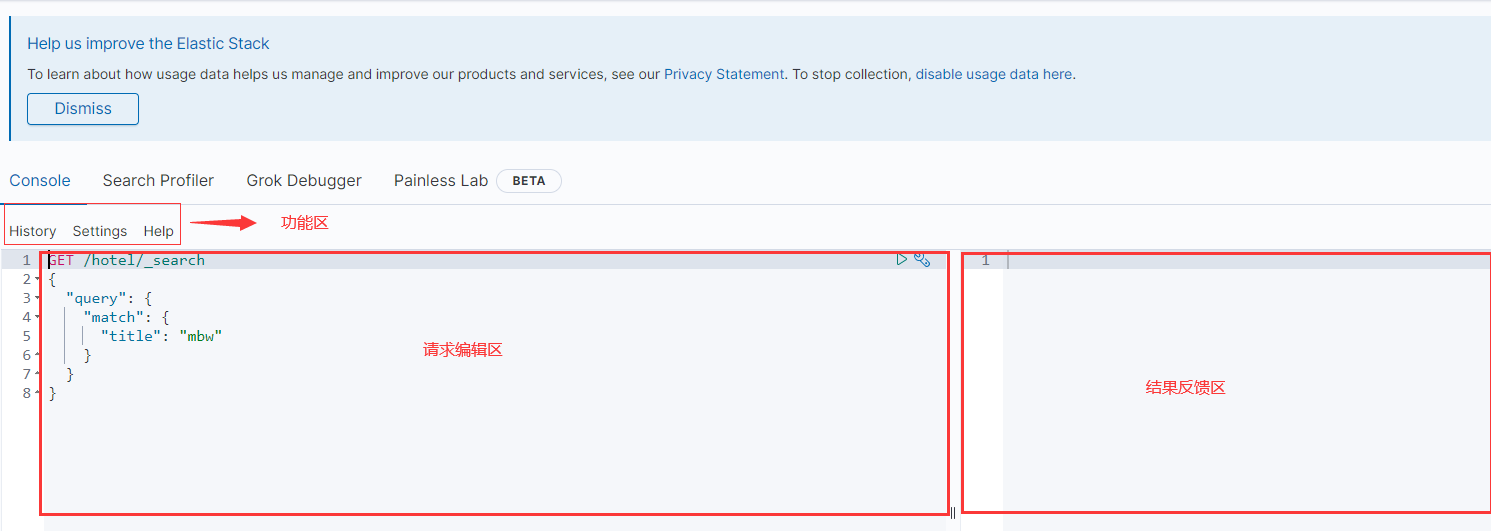
功能区提供的主要是一些辅助功能如请求历史和字体设置等请求编辑区主要是用户编辑REST请求的地方为更好地帮助用户进行开发该区域提供了语法高亮显示、智能提示和自动对齐等功能结果反馈区主要搭配请求编辑区使用运行请求编辑区的请求后在结果反馈区会把ES的响应结果返回同时该区域提供了返回码、请求耗时和语法高亮显示等功能。
现在可以把之前学习的索引操作在Kibana中执行了如在hotel索引中按照title字段搜索"mbw",请求的DSL如下
GET /hotel/_search
{
  "query": {
    "match": {
      "title": "mbw"
    }
  }
}
点击运行后结果反馈区显示搜索结果和之前在Postman中结果是一样的。为方便用户查看数据结果反馈区已经把搜索结果中的字段和值进行了颜色区分。

2.3、Java客户端简介
ES和客户端的通信通过HTTP进行用户可以使用任意语言完成搜索。此外ES提供了多种编程语言的API从客户端连接到搜索DSL构建再到搜索结果的解析使用这些API可以更好地完成搜索。本节主要介绍Java Api的使用。
2.3.1、Java客户端的搭建
Java客户端分为低级客户端和高级客户端两种。低级客户端兼容所有版本的ES但是其需要提供JSON字符串因此这种开发方式比较低效。高级客户端是基于低级客户端开发出来的屏蔽了底层技术使用户可以更专注于搜索业务这是官方推荐的开发方式。本节我们将使用高级客户端–RestHighLevelClient.并且我们后续也只会使用这一种客户端后面介绍的比如Spring-data等只是介绍一下并不会着重使用。
为了演示RestHighLevelClient的使用需要创建一个Spring Boot Web项目。首先我们创建一个父项目pom文件如下
<?xml version="1.0" encoding="UTF-8"?>
<project xmlns="http://maven.apache.org/POM/4.0.0"
         xmlns:xsi="http://www.w3.org/2001/XMLSchema-instance"
         xsi:schemaLocation="http://maven.apache.org/POM/4.0.0 http://maven.apache.org/xsd/maven-4.0.0.xsd">
    <modelVersion>4.0.0</modelVersion>

    <groupId>com.mbw</groupId>
    <artifactId>elaseticSearch-demo-parent</artifactId>
    <version>1.0-SNAPSHOT</version>
    <modules>
        <module>elasticsearch_demo-01</module>
        <module>elasticsearch-demo-02</module>
    </modules>
    <packaging>pom</packaging>
    <properties>
        <project.build.sourceEncoding>UTF-8</project.build.sourceEncoding>
        <maven.compiler.source>1.8</maven.compiler.source>
        <maven.compiler.target>1.8</maven.compiler.target>
        <lombok.version>1.18.20</lombok.version>
        <hutool.version>5.5.8</hutool.version>
    </properties>
    <dependencyManagement>
        <dependencies>
            <dependency>
                <groupId>org.springframework.boot</groupId>
                <artifactId>spring-boot-dependencies</artifactId>
                <version>2.3.0.RELEASE</version>
                <type>pom</type>
                <scope>import</scope>
            </dependency>
        </dependencies>
    </dependencyManagement>
    <dependencies>
        <dependency>
            <groupId>org.projectlombok</groupId>
            <artifactId>lombok</artifactId>
            <version>${lombok.version}</version>
        </dependency>
        <dependency>
            <groupId>cn.hutool</groupId>
            <artifactId>hutool-all</artifactId>
            <version>${hutool.version}</version>
        </dependency>

    </dependencies>
</project>
之后在创建一个子项目名为elasticsearch-demo-01,pom文件如下
<?xml version="1.0" encoding="UTF-8"?>
<project xmlns="http://maven.apache.org/POM/4.0.0"
         xmlns:xsi="http://www.w3.org/2001/XMLSchema-instance"
         xsi:schemaLocation="http://maven.apache.org/POM/4.0.0 http://maven.apache.org/xsd/maven-4.0.0.xsd">
    <parent>
        <artifactId>elaseticSearch-demo-parent</artifactId>
        <groupId>com.mbw</groupId>
        <version>1.0-SNAPSHOT</version>
    </parent>
    <modelVersion>4.0.0</modelVersion>

    <artifactId>elasticsearch_demo-01</artifactId>
    <properties>
        <maven.compiler.source>8</maven.compiler.source>
        <maven.compiler.target>8</maven.compiler.target>
    </properties>
    <dependencies>
        <dependency>
            <groupId>org.springframework.boot</groupId>
            <artifactId>spring-boot-starter-web</artifactId>
        </dependency>
        <dependency>
            <groupId>org.springframework.boot</groupId>
            <artifactId>spring-boot-starter-test</artifactId>
        </dependency>
        <dependency>
            <groupId>com.alibaba</groupId>
            <artifactId>fastjson</artifactId>
            <version>1.2.56</version>
        </dependency>
        <dependency>
            <groupId>org.elasticsearch.client</groupId>
            <artifactId>elasticsearch-rest-high-level-client</artifactId>
            <version>7.10.2</version>
        </dependency>
        <dependency>
            <groupId>org.elasticsearch</groupId>
            <artifactId>elasticsearch</artifactId>
            <version>7.10.2</version>
        </dependency>
    </dependencies>

</project>
之后在application.yaml文件中配置ES的连接信息如下
elasticsearch:
  rest:
    hosts: 127.0.0.1:9200
    username: elastic
    password: 123456
有人可能会好奇这个username和password是什么时候设置的安装过程中好像从来没涉及到那么下面教大家如何设置es的用户名和密码
1需要在es的配置文件中开启x-pack验证, 修改config目录下面的elasticsearch.yml文件在里面添加如下内容,保存后并重启es.
xpack.security.enabled: true
xpack.license.self_generated.type: basic
xpack.security.transport.ssl.enabled: true
2进入es的安装根目录bin下E:\software\es\elasticsearch-7.10.2\bin
执行设置用户名和密码的命令,命令如下
elasticsearch-setup-passwords interactive
这里需要为多个用户分别设置密码elastic, kibana, logstash_system,beats_system用户名默认为各个组件名,我们只需输入密码。
Enter password for [elastic]:
Reenter password for [elastic]:
Enter password for [kibana]:
Reenter password for [kibana]:
Enter password for [logstash_system]:
Reenter password for [logstash_system]:
Enter password for [beats_system]:
Reenter password for [beats_system]:
Changed password for user [kibana]
Changed password for user [logstash_system]
Changed password for user [beats_system]
Changed password for user [elastic]
3在kibana的配置目录confg将kibana.yml添加es的用户名和密码
elasticsearch.username: "elastic"
elasticsearch.password: "xxxx"
4重启即可。
5,修改密码时将第一步配置删除然后重启es将.security-7的索引删除即可。
然后重新1-4步骤。
那么回到项目的yaml文件hosts、username和password需要分别填写协调节点服务地址IP地址+端口号、用户名、密码。当有多个协调节点时可以设置hosts值为多个协调节点服务地址中间用逗号分隔。
为生成RestHighLevelClient的实例这里使用EsClient类注册Bean到Spring Boot的方式。RestHighLevelClient的构造方法接受一个RestClientBuilder实例而调用RestClient.builder()方法可以生成RestClientBuilder实例。RestClient.builder()方法需要传递一个HttpHost对象或者HttpHost数组。
HttpHost是Apache lib 库中对HTTP请求进行封装的一种方法其构造方法接收主机地址、端口和请求协议3个参数。当有多个协调节点时需要读取配置文件的参数构造HttpHost数组。
下面的代码定义了类EsClient,方法initSimpleClient()返回一个RestHighLevelClient并注册到Spring Boot中。
package com.mbw.client;

import java.util.Arrays;

import org.apache.http.HttpHost;
import org.apache.http.auth.AuthScope;
import org.apache.http.auth.UsernamePasswordCredentials;
import org.apache.http.impl.client.BasicCredentialsProvider;
import org.elasticsearch.client.RestClient;
import org.elasticsearch.client.RestHighLevelClient;
import org.springframework.beans.factory.annotation.Value;
import org.springframework.context.annotation.Bean;
import org.springframework.stereotype.Component;

@Component
public class EsClient {
	@Value("${elasticsearch.rest.hosts}")
	private String hosts;

	//配置高级客户端
	@Bean(name = "client")
	public RestHighLevelClient initSimpleClient() {
		HttpHost[] httpHosts = Arrays.stream(hosts.split(",")).map(
				host -> {
					String[] hostParts = host.split(":");
					String hostName = hostParts[0];
					int port = Integer.parseInt(hostParts[1]);
					return new HttpHost(hostName, port, HttpHost.DEFAULT_SCHEME_NAME);
				}).toArray(HttpHost[]::new);
		//返回客户端
		return new RestHighLevelClient(RestClient.builder(httpHosts)));
	}
}
这样就创建了高级的REST客户端。
但是在生产环境下ES一般都会开启安全验证功能由于ES Java客户端使用的也是HTTP标准规范中的认证机制因此在建立客户端和服务端的连接时需要一组凭证用于鉴定用户身份而这组凭证就是用户名和密码。
CredentialsProvider类是一个凭证接口通过CredentialsProvider.setCredentials()方法可以设置凭证。这里我们使用它的一个实现类BasicCredentialsProvider,UsernamePasswordCredentials类可以用明文的形式来表示认证凭证通过CredentialsProvider.setCredentials()方法设置它的实例就可以完成凭证的构建。
当使用RestClient.builder()方法构建完RestClientBuilder实例后需要调用RestClientBuilder.setHttpClientConfigCallback()方法完成认证。RestClientBuilder.setHttpClientConfigCallback()方法需要传入一个RestClientBuilder.HttpClientConfigCallback实例构建完该实例后可以在该实例的customizeHttpClient()方法中传输之前创建的凭证。下面是带验证的客户端的创建过程
package com.mbw.client;

import java.util.Arrays;

import org.apache.http.HttpHost;
import org.apache.http.auth.AuthScope;
import org.apache.http.auth.UsernamePasswordCredentials;
import org.apache.http.impl.client.BasicCredentialsProvider;
import org.elasticsearch.client.RestClient;
import org.elasticsearch.client.RestHighLevelClient;
import org.springframework.beans.factory.annotation.Value;
import org.springframework.context.annotation.Bean;
import org.springframework.stereotype.Component;

@Component
public class EsClient {
	@Value("${elasticsearch.rest.hosts}")
	private String hosts;
	@Value("${elasticsearch.rest.username}")
	private String username;
	@Value("${elasticsearch.rest.password}")
	private String password;

	//配置高级客户端
	@Bean(name = "client")
	public RestHighLevelClient initSimpleClient() {
		HttpHost[] httpHosts = Arrays.stream(hosts.split(",")).map(
				host -> {
					String[] hostParts = host.split(":");
					String hostName = hostParts[0];
					int port = Integer.parseInt(hostParts[1]);
					return new HttpHost(hostName, port, HttpHost.DEFAULT_SCHEME_NAME);
				}).toArray(HttpHost[]::new);
		//生成凭证
		BasicCredentialsProvider credentialsProvider = new BasicCredentialsProvider();
		credentialsProvider.setCredentials(AuthScope.ANY, new UsernamePasswordCredentials(username, password));//参数2是明文凭证
		//返回带验证的客户端
		return new RestHighLevelClient(RestClient.builder(httpHosts).setHttpClientConfigCallback(httpAsyncClientBuilder -> {
			httpAsyncClientBuilder.disableAuthCaching();
			return httpAsyncClientBuilder.setDefaultCredentialsProvider(credentialsProvider);
		}));
	}
}
2.3.2、使用Java客户端搜索文档
就像在介绍Kibana一样我们还是构建一个请求来学习搜索功能。使用Java客户端 API构造一个搜索请求该请求在hotel索引中按照title字段搜索"再来"。
为方便结果展示我们首先封装一个酒店的POJO类
package com.mbw.pojo;

import lombok.Data;

@Data
public class Hotel {
	private String id;    //对应文档_id
	private String index; //对应索引名称
	private Float score;  //对应文档得分
	private String title; //对应索引中的title
	private String city;  //对应索引中的city
	private Double price; //对应索引中的price
}
接着在Service中调用ES的搜索服务并获取搜索结果后需要遍历搜索结果并构成Hotel实例然后将Hotel对应的字段填充为搜索结果的数据。
使用Rest搜索时首先需要创建一个searchSourceBuilder实例然后创建查询实例并将其传送给searchSourceBuilder,此处创建的查询实例相当于构建DSL接着创建SearchRequest实例最后将SearchSourceBuilder传送给SearchRequest。
请求构建完成后需要使用CLient发送请求获取结果。我们知道在使用curl命令和Kibana时ES返回的JSON搜索结果是封装在hits中的。同样Java API获取的返回结果是封装在SearchHits的遍历SearchHits,通过其中的每一个元素可以获取搜索命中的每个文档的信息诸如文档_id、得分和文档内容等。在Service中完整的搜索代码如下
package com.mbw.service;

import java.io.IOException;
import java.util.ArrayList;
import java.util.List;
import java.util.Map;


import org.elasticsearch.action.search.SearchRequest;
import org.elasticsearch.action.search.SearchResponse;
import org.elasticsearch.client.RequestOptions;
import org.elasticsearch.client.RestHighLevelClient;
import org.elasticsearch.index.query.QueryBuilders;
import org.elasticsearch.rest.RestStatus;
import org.elasticsearch.search.SearchException;
import org.elasticsearch.search.SearchHit;
import org.elasticsearch.search.SearchHits;
import org.elasticsearch.search.builder.SearchSourceBuilder;
import org.springframework.beans.factory.annotation.Autowired;
import org.springframework.stereotype.Service;

import com.mbw.pojo.Hotel;

import lombok.extern.slf4j.Slf4j;

@Service
@Slf4j
public class EsService {
	@Autowired
	private RestHighLevelClient client;

	public List<Hotel> getHotelFromTitle(String keyword) throws IOException {
		SearchRequest searchRequest = new SearchRequest("hotel"); //客户端请求
		SearchSourceBuilder searchSourceBuilder = new SearchSourceBuilder();
		//构建query
		searchSourceBuilder.query(QueryBuilders.matchQuery("title", keyword));
		searchRequest.source(searchSourceBuilder);
		ArrayList<Hotel> resultList = new ArrayList<>();
		SearchResponse searchResponse = client.search(searchRequest, RequestOptions.DEFAULT);
		RestStatus status = searchResponse.status();
		if (status != RestStatus.OK) {
			return null;
		}
		SearchHits searchHits = searchResponse.getHits();
		for (SearchHit searchHit : searchHits) {
			Hotel hotel = new Hotel();
			hotel.setId(searchHit.getId());   //文档_id
			hotel.setIndex(searchHit.getIndex());   //索引名称
			hotel.setScore(searchHit.getScore());   //文档得分
			//转换为Map
			Map<String, Object> dataMap = searchHit.getSourceAsMap();
			hotel.setTitle((String) dataMap.get("title"));
			hotel.setCity((String) dataMap.get("city"));
			hotel.setPrice(Double.valueOf((String) dataMap.get("price")));
			resultList.add(hotel);
		}
		return resultList;
	}
}
下面是controller实现部分我这边用结果类封装了下大家也可以随意例如直接返回String类型的结果也是可以的。
package com.mbw.controller;

import java.io.IOException;
import java.util.List;

import org.springframework.beans.factory.annotation.Autowired;
import org.springframework.web.bind.annotation.PostMapping;
import org.springframework.web.bind.annotation.RestController;

import com.mbw.pojo.Hotel;
import com.mbw.result.FoundationResponse;
import com.mbw.service.EsService;

import cn.hutool.core.collection.CollectionUtil;
import lombok.extern.slf4j.Slf4j;

@RestController
@Slf4j
public class TestController {
	@Autowired
	private EsService esService;

	@PostMapping("/test")
	public FoundationResponse<String> getResult(String keyword) {
		try {
			List<Hotel> hotelList = esService.getHotelFromTitle(keyword);
			if (CollectionUtil.isNotEmpty(hotelList)) {
				return FoundationResponse.success(hotelList.toString());
			} else {
				return FoundationResponse.success("no data");
			}
		} catch (IOException e) {
			log.warn("搜索发生异常原因为:{}", e.getMessage());
			return FoundationResponse.error(100, e.getMessage());
		} catch (Exception e) {
			log.error("服务发生异常原因为:{}", e.getMessage());
			return FoundationResponse.error(100, e.getMessage());
		}

	}

}
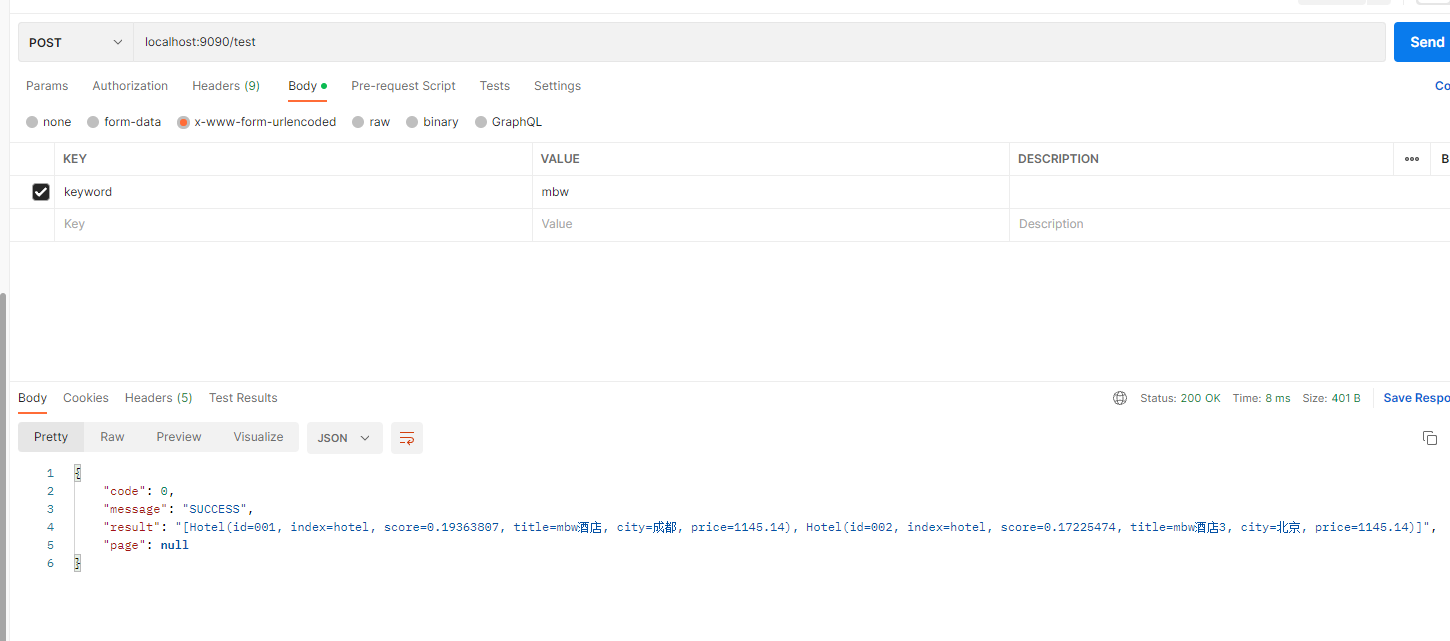
现在启动程序在postman输入localhost:9090/test
2.3.2、SpringBoot客户端简介
Spring Data Elasticsearch是Spring Boot套件中的一个组件在Spring Boot中连接ES可以使用Spring Data Elasticsearch.Spring Data Elasticsearch是Spring Data项目的一部分该项目致力于提供一致的基于Spring的数据查询和存储编程模型。Spring Data Elasticsearch封装了创建客户端的逻辑并与服务端保持长连接让我们不必关注于网络连接问题。并且通过对Repository接口的自动实现Spring Data Elasticsearch可以直接通过方法名的语义实现查询功能如常见的findBy+字段名+操作。此外Spring Data Elasticsearch还具有OR-Mappring功能即查询到数据后可以将数据直接封装到自定义的POJO中方便后续对数据进行加工处理。
但是由于Spring Data Elasticsearch底层采用es官方的TransportClient,es官方计划放弃TransportClient所以我们仍然包括后续学习推荐使用HighLevelClient.这里也不做过多代码展示感兴趣的小伙伴自行了解。
2.3.3、Jest客户端
JestClient是一款基于HTTP实现的ES客户端在RestHighLevelClient出现之前它填补了ES缺少HTTP REST接口客户端的空白。JestClient具有一定的ES服务端版本兼容性支持数据的同步和异步操作同时它也提供了索引时和搜索结果的POJO映射机制即OR-Mapping功能。但是目前主键被RestHighLevelClient取代这里也不做过多讲解。
| 阿里云国内75折 回扣 微信号:monov8 |
| 阿里云国际,腾讯云国际,低至75折。AWS 93折 免费开户实名账号 代冲值 优惠多多 微信号:monov8 飞机:@monov6 |