

React + nestjs + Graphql 学习记录
| 阿里云国内75折 回扣 微信号:monov8 |
| 阿里云国际,腾讯云国际,低至75折。AWS 93折 免费开户实名账号 代冲值 优惠多多 微信号:monov8 飞机:@monov6 |
背景
最近学习了一下 graphql 想结合之前的技术栈React 和 nestjs 来做了全栈的小 demo 总觉得学习东西不做笔记或者记录很容易就忘记虽然做了笔记也很容易忘记但至少到时候回头看的时候方便复习吗至于为啥是选择 React因为公司的技术栈是 React我个人也很喜欢 jsx 这种风格hooks 出来之后写起来更爽了纯纯的个人感情。而选 nestjs 的原因是相比其他的框架 express 和 koa来说我觉得他的架构更完整一些自带支持 typescript 和 es6 语法如果要用 express 或者 koa 去搭这个架子那就有得折腾了。而且 nestjs 有很多新的编程概念当然是相对我来说是新的AOP呀依赖注入和控制反转之类的这些应该部分前端的小伙伴都是比较陌生的概念吧。当然也有学习负担多接触些新的东西不容易感觉自己在原地踏步。话不多说撸起袖子写代码吧。
服务端
- 脚手架创建项目
npm i -g @nestjs/cli
nest new graphql-demo
- 目录整理
删除
app.service.ts、app.controller.ts和app.controller.spec.tssrc 目录就剩下main.ts和app.module.ts就行
- 安装
graphql相关依赖
npm i @nestjs/graphql @nestjs/apollo graphql apollo-server-express
- 导入
GraphQLModule到 app
import { ApolloDriver, ApolloDriverConfig } from '@nestjs/apollo';
import { join } from 'path';

@Module({
  imports: [
  	// 注入到app里头
    GraphQLModule.forRoot<ApolloDriverConfig>({
      driver: ApolloDriver,
      // code-first: 自动生成 gql 文件
      autoSchemaFile: join(process.cwd(), 'src/schema.gql'),
    }),
  ],
  controllers: [],
  providers: [],
})
export class AppModule {}
- 创建用户模块
nest g mo users
执行完上面的脚本就会生成一个
user目录里头有一个文件user.module.ts我们在创建一个use.resolver.ts
import { Args, Mutation, Query, Resolver } from '@nestjs/graphql';
import { UserEntity } from './user.entity';
import { CreateUserInputDto } from './dtos/create-user.dot';

@Resolver(() => UserEntity)
export class UserResolver {
  // 返回字符串
  @Query(() => String)
  getHello(): string {
    return 'hi, nest js';
  }

  // 这里可以根据 service配合 typeorm 来返回数据库数据
  @Query(() => [UserEntity])
  getUserList(@Args('admin') admin: boolean): UserEntity[] {
    if (admin) {
      return [];
    }
    return [];
  }
  // 提交数据主要传递参数的方式
  @Mutation(() => Boolean)
  createUser(@Args('user') createUserInput: CreateUserInputDto): boolean {
    console.log(createUserInput);
    return true;
  }
}
上面的代码还需要创建两个文件
user.entity.ts是用来描述User数据库模型的简单的说就是User在数据库中有哪些数据配合 Orm 可以实现自动创建表create-user.dot这个是用来校验数据的
- 创建
entity和 dtos
// entity.ts
import { Field, ObjectType } from '@nestjs/graphql';

@ObjectType()
export class UserEntity {
  @Field(() => String)
  name: string;

  @Field(() => Boolean)
  admin: boolean;

  @Field(() => String)
  email: string;

  @Field(() => String)
  dep: string;

  @Field(() => String)
  password: string;
}
// create-user.dot.ts
import { Field, InputType } from '@nestjs/graphql';
import { IsBoolean, IsString, IsEmail, Length, IsNotEmpty } from 'class-validator';

@InputType()
export class CreateUserInputDto {
  @Field(() => String)
  @IsString()
  @IsNotEmpty()
  name: string;

  @Field(() => Boolean)
  @IsBoolean()
  admin: boolean;

  @Field(() => String)
  @IsEmail()
  email: string;

  @Field(() => String)
  @IsString()
  dep: string;

  @Field(() => String)
  @IsString()
  @Length(6, 32)
  password: string;
}
- 开启全局校验
npm i class-transformer class-validator
在 main.ts 中使用 useGlobalPipes
import { NestFactory } from '@nestjs/core';
import { AppModule } from './app.module';
import { ValidationPipe } from '@nestjs/common';

async function bootstrap() {
  const app = await NestFactory.create(AppModule);
  // 如果不写这一句dtos 那里的校验是不会生效的
  app.useGlobalPipes(new ValidationPipe());
  // 这个是访问的端口
  await app.listen(4000);
}
bootstrap();
目录结构大致是这样的

后面接 orm 和 数据的部分就不添加了本质上和 graphql 也没啥关系
- 访问
://localhost:4000/graphql
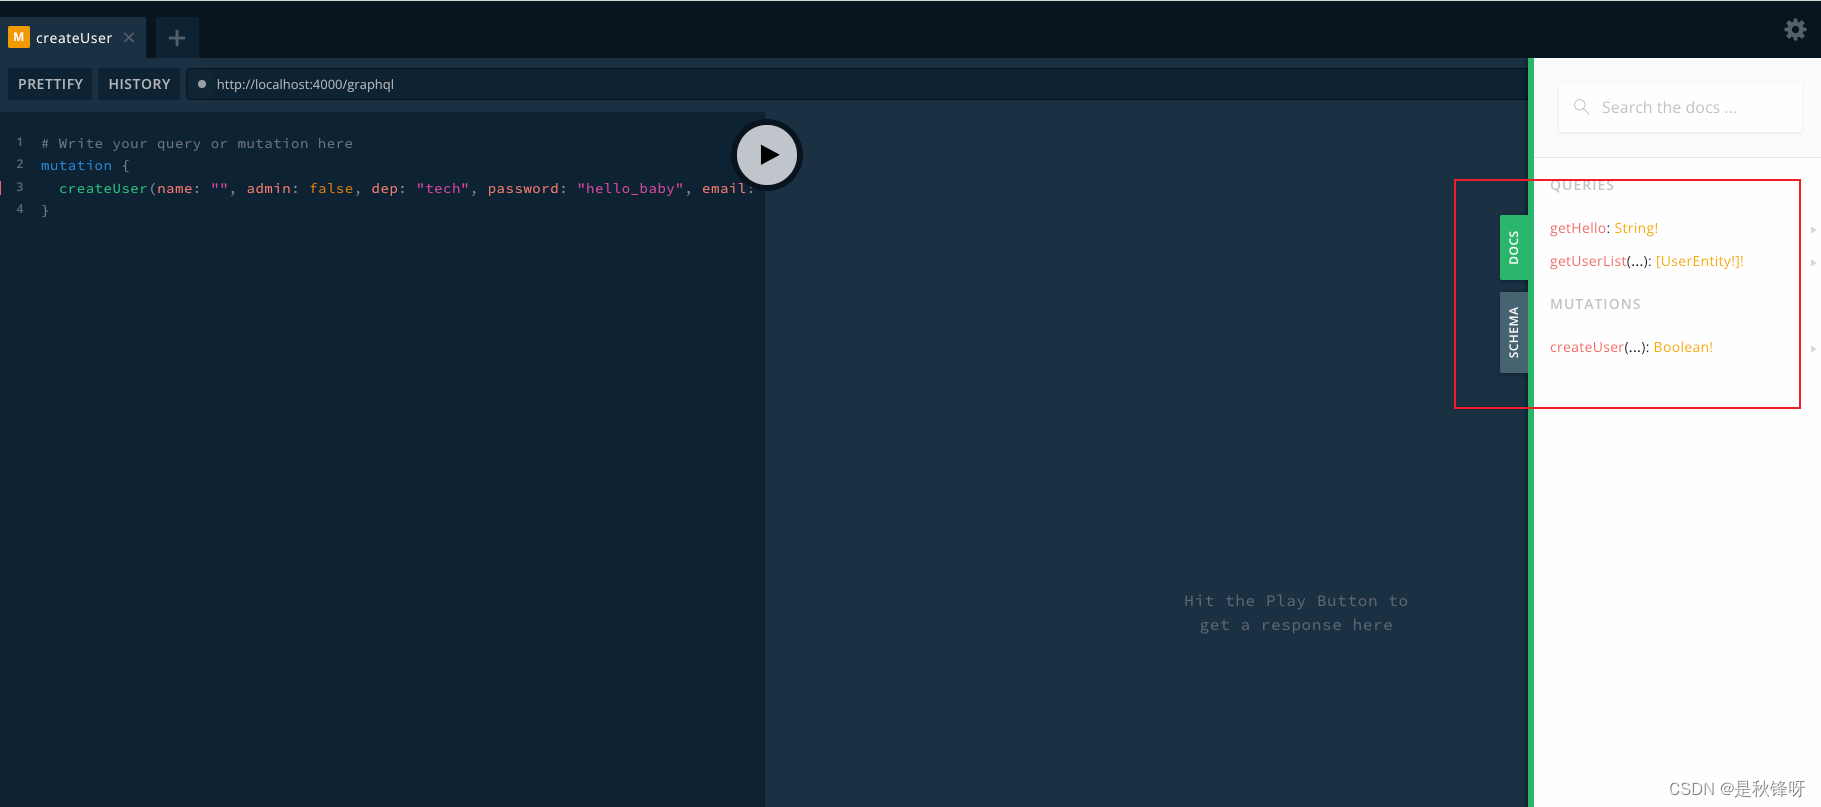
右侧可以查看文档和schema。
还有就是自动生成的这个schema.gql文件可以给前端作为类似接口的文档的作用来使用不过做这个好像都是前端后端一起写的

客户端
create-react-app
我们就用最简单的方式创建项目吧直接使用
Create-react-app这里就不用typescript了方便一点我是参照 Apollo Client 文档 来的。
- 安装
apollo/client和graphql
npm install @apollo/client graphql
- 初始化
ApolloClient
// 在 `src/index.js` 中做初始化就添加这一句导入
import { ApolloClient, InMemoryCache, ApolloProvider } from '@apollo/client'
// react 相关的和 graphql 无关初始化就有的
import React from 'react'
import ReactDOM from 'react-dom/client'
import './index.css'
import App from './App'

// 做初始化
const client = new ApolloClient({
  // 我们自己的后端地址
  uri: 'http://localhost:4000/graphql',
  cache: new InMemoryCache(),
})

const root = ReactDOM.createRoot(document.getElementById('root'))
root.render(
  <React.StrictMode>
    <ApolloProvider client={client}>
      <App />
    </ApolloProvider>
  </React.StrictMode>
)
- 发送请求查询数据
// 查询数据用 useQuery提交数据用 useMutation
import { gql, useQuery } from '@apollo/client'
import logo from './logo.svg'
import './App.css'

// 这个就是查询 graphql 语句
const GET_HELLO_STRING = gql`
  query GetHelloString {
    getHello
  }
`

function App() {
  const { loading, error, data } = useQuery(GET_HELLO_STRING)

  if (error) {
    return <h1>Error happened</h1>
  }

  if (!loading && data) {
    console.log(data)
  }

  return (
    <div className="App">
      <header className="App-header">
        <img src={logo} className="App-logo" alt="logo" />
        <p>
          Edit <code>src/App.js</code> and save to reload.
        </p>
      </header>
    </div>
  )
}

export default App