

React脚手架应用(二)
| 阿里云国内75折 回扣 微信号:monov8 |
| 阿里云国际,腾讯云国际,低至75折。AWS 93折 免费开户实名账号 代冲值 优惠多多 微信号:monov8 飞机:@monov6 |
1、react脚手架
脚手架简介
用来帮助程序员快速创建一个基于xxx库的模板项目
1、包含了所有需要的配置(语法检查、jsx编译、devServer…;
2、下载好了所有相关的依赖;
3、可以直接运行一个简单效果;
create-react-app
1、react提供了一个用于创建react项目的脚手架库: create-react-app;
2、项目的整体技术架构为:react + webpack + es6 + eslint;
3、使用脚手架开发的项目的特点:模块化、组件化、工程化;
创建项目并启动
第一步全局安装:npm i -g create-react-app;
第二步切换到想创项目的目录使用命令:create-react-app hello-react;
第三步进入项目文件夹:cd hello-react;
第四步启动项目:npm start;
react脚手架项目结构

2、React样式隔离
2.1、样式问题叙述
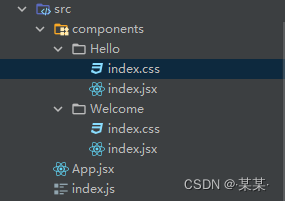
在components下创建两个文件Hello和Welcone分别在两个文件夹内创建index.js和index.css文件;
App.js注册引入Hello和Welcone组件
//App.js
import './App.css';
import Hello from './components/Hello'  //引入Hello组件
import Welcome from './components/Welcome' //引入Welcome组件
function App() {
  return (
    <div className="App">
      <Hello/>    //注册Hello组件  这里hello是先注册的
      <Welcome/>     //注册Welcome组件    welcome是后注册的 记住这是要考的哦
    </div>
  );
}

export default App;
Hello组件
//Hello/index.js文件
import React, {Component} from "react";
import "./index.css"
export default class Hello extends Component {
    render() {
        return <h2 className="title"> Hello React</h2>
    }
}

//Hello/index.css文件
.title{
    background-color: red;
}
Welcome组件同理除了h2标签中文字不同 及 title的背景色为蓝色
启动项目
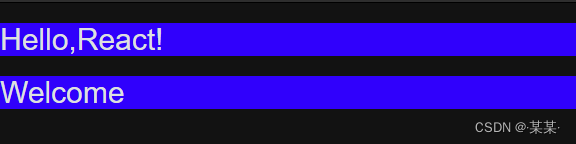
预期结果:上面为红色下面为蓝色;
实际结果:都是蓝色产生样式污染;
因为react组件在页面渲染的前会将组件的样式“集合”到一起因为引用组件时<Welcome/>组件在<Home/>下面因此<Welcome/>组件的蓝色会覆盖<Home/>组件的红色。
2.2、样式问题处理
1、Css Modules
Css Modules 并不是React专用解决方法适用于所有使用 webpack 等打包工具的开发环境。
使用如下:
// 1、更改index.css文件名为index.module.css
//index.module.css文件
.bg {
	padding: 20px;
    background-color: red;
}

// 驼峰命名
.headName {
    background-color: green;
}

// 下划线
.head_age {
	background-color: skyblue;
}

// 连接符
.head-gender {
	background-color: orange;
}

.size {
    font-size: 20px;
}

// ':global' 表示该类为全局作用域下的
:global .text-left {
	color: pink;
    float: left;
}


// 2、修改Hello/index.js文件引入方式
import React, {Component} from "react";
//不可以import "./index.module.css" 这样引入
import hello from "./index.module.css"  //改变引入方法
export default class Hello extends Component {
    render() {
        return (
	        <div className={hello.bg}>
				<h2 className={hello.headName}>我叫张三</h2>
				<h2 className={hello.head_age}>年龄19</h2>

				// 类名使用 - 连接符写法如下:
				<h2 className={hello.headGender}>性别男</h2>
				// 或
				<h2 className={hello['head-gender']}>性别男</h2>

				// 多类名用法
				<div className={`${hello['head-gender']} ${hello.size}`}></div>

				// className="text-left" 这种形式则表示全局下的选择器
		        <p className="text-left">全局样式---全局样式</p>
			</div>
		)
    }
}
css-modules方案每个className都需要写一个styles.实在是麻烦
2、scss的嵌套语法和CSS 属性选择器
安装sass:npm install node-sass --save-dev
Person组件
// 1、Person/index.js文件
import React, {Component} from "react";
import './index.scss'

export default class Person extends React.Component{
  render() {
    return (
      <div data-component='person'>
        <p className="name">person组件</p>
        <p className="text">隔离css</p>
      </div>
    )
  }
}

// 2、Person/index.scss文件
[data-component=person] {
  padding: 20px;
  background-color: #761c19;
  .name{
    font-size: 18px;
    color: #1b6d85;
  }
  .text {
    color: #3c763d;
  }
}
data-component可以限制为每个组件的名字因为className可能会出现重复但是组件名字在同一个项目中基本不会重复。
这样就解决了css class全局污染的问题。简单易用不用引入新的概念和扩展。
3、React代理配置
前端本地端口3000 后端服务本地端口5000配置代理
3.1、方法一
在package.json中追加如下配置
"proxy": "http://localhost:5000"
优点:配置简单前端请求资源时可以不加任何前缀。
缺点:不能配置多个代理。
工作方式:上述方式配置代理当请求了3000不存在的资源时那么该请求会转发给5000 (优先匹配前端资源
import React, { Component } from 'react'
import axios from 'axios'

export default class App extends Component {

	getStudentData = ()=>{
		axios.get('http://localhost:3000/students').then(
			response => {console.log('成功了',response.data);},
			error => {console.log('失败了',error);}
		)
	}

	getCarData = ()=>{
		axios.get('http://localhost:3000/cars').then(
			response => {console.log('成功了',response.data);},
			error => {console.log('失败了',error);}
		)
	}

	render() {
		return (
			<div>
				<button onClick={this.getStudentData}>点我获取学生数据</button>
				<button onClick={this.getCarData}>点我获取汽车数据</button>
			</div>
		)
	}
}
3.2、方法二
第一步:在src下创建配置文件:src/setupProxy.js
编写setupProxy.js配置具体代理规则:
const proxy = require('http-proxy-middleware')

module.exports = function(app) {
  app.use(
    proxy('/api1', {  //api1是需要转发的请求(所有带有/api1前缀的请求都会转发给5000)
      target: 'http://localhost:5000', //配置转发目标地址(能返回数据的服务器地址)
      changeOrigin: true, //控制服务器接收到的请求头中host字段的值
      /*
      	changeOrigin设置为true时服务器收到的请求头中的host为:localhost:5000
      	changeOrigin设置为false时服务器收到的请求头中的host为:localhost:3000
      	changeOrigin默认值为false但我们一般将changeOrigin值设为true
      */
      pathRewrite: {'^/api1': ''} //去除请求前缀保证交给后台服务器的是正常请求地址(必须配置)
    }),
    proxy('/api2', {
      target: 'http://localhost:5001',
      changeOrigin: true,
      pathRewrite: {'^/api2': ''}
    })
  )
}
优点:可以配置多个代理可以灵活的控制请求是否走代理。
缺点:配置繁琐前端请求资源时必须加前缀。
import React, { Component } from 'react'
import axios from 'axios'

export default class App extends Component {

	getStudentData = ()=>{
		axios.get('http://localhost:3000/api1/students').then(
			response => {console.log('成功了',response.data);},
			error => {console.log('失败了',error);}
		)
	}

	getCarData = ()=>{
		axios.get('http://localhost:3000/api2/cars').then(
			response => {console.log('成功了',response.data);},
			error => {console.log('失败了',error);}
		)
	}

	render() {
		return (
			<div>
				<button onClick={this.getStudentData}>点我获取学生数据</button>
				<button onClick={this.getCarData}>点我获取汽车数据</button>
			</div>
		)
	}
}
4、消息订阅-发布机制
工具库:PubSubJS
下载:npm install pubsub-js --save
使用:
1、import PubSub from 'pubsub-js' 引入依赖
2、PubSub.publish('delete', data) 发布消息
3、PubSub.subscribe('delete', function(data){}) 订阅消息
Search组件与List组件为同级组件当Search组件中点击获取数据时发布消息在List组件中接收消息中数据渲染界面;
Search组件
import React, { Component } from 'react'
import PubSub from 'pubsub-js'
import axios from 'axios'
export default class Search extends Component {
search = ()=>{
//获取用户的输入(连续解构赋值+重命名)
const {keyWordElement:{value:keyWord}} = this
//发送请求前通知List更新状态
PubSub.publish('atguigu',{isFirst:false,isLoading:true})
//发送网络请求
axios.get(`/api1/search/users?q=${keyWord}`).then(
response => {
//请求成功后通知List更新状态
PubSub.publish('atguigu',{isLoading:false,users:response.data.items})
},
error => {
//请求失败后通知App更新状态
PubSub.publish('atguigu',{isLoading:false,err:error.message})
}
)
}
render() {
return (
<section className="jumbotron">
<h3 className="jumbotron-heading">搜索github用户</h3>
<div>
<input ref={c => this.keyWordElement = c} type="text" placeholder="输入关键词点击搜索"/>
<button onClick={this.search}>搜索</button>
</div>
</section>
)
}
}
List组件
import React, { Component } from 'react'
import PubSub from 'pubsub-js'
import './index.css'

export default class List extends Component {

	state = { //初始化状态
		users:[], //users初始值为数组
		isFirst:true, //是否为第一次打开页面
		isLoading:false,//标识是否处于加载中
		err:'',//存储请求相关的错误信息
	}

	componentDidMount(){
		this.token = PubSub.subscribe('atguigu',(_,stateObj)=>{
			this.setState(stateObj)
		})
	}

	componentWillUnmount(){
		PubSub.unsubscribe(this.token)
	}

	render() {
		const {users,isFirst,isLoading,err} = this.state
		return (
			<div className="row">
				{
					isFirst ? <h2>欢迎使用输入关键字随后点击搜索</h2> :
					isLoading ? <h2>Loading......</h2> :
					err ? <h2 style={{color:'red'}}>{err}</h2> :
					users.map((userObj)=>{
						return (
							<div key={userObj.id} className="card">
								<a rel="noreferrer" href={userObj.html_url} target="_blank">
									<img alt="head_portrait" src={userObj.avatar_url} style={{width:'100px'}}/>
								</a>
								<p className="card-text">{userObj.login}</p>
							</div>
						)
					})
				}
			</div>
		)
	}
}
5、React路由
5.1、相关理解
SPA的理解
1、单页Web应用(single page web applicationSPA;
2、整个应用只有一个完整的页面;
3、点击页面中的链接不会刷新页面只会做页面的局部更新;
4、数据都需要通过ajax请求获取并在前端异步展现;
后端路由
1、理解: value是function用来处理客户端提交的请求;
2、注册路由: router.get(path, function(req, res));
3、工作过程:当node接收到一个请求时根据请求路径找到匹配的路由调用路由中的函数来处理请求返回响应数据;
前端路由
1、浏览器端路由value是component用于展示页面内容;
2、注册路由:<Route path="/test" component={Test}>
3、工作过程:当浏览器的path变为/test时, 当前路由组件就会变为Test组件
5.2、react-router-dom
react的一个插件库专门用来实现一个SPA应用基于react的项目基本都会用到此库。
使用:
下载react-router-dom:npm install --save react-router-dom
引入bootstrap.css:<link rel="stylesheet" href="/css/bootstrap.css">
5.3、路由基本使用
1、导航区的a标签改为Link标签<Link to="/xxxxx">Demo</Link>
2、展示区写Route标签进行路径的匹配<Route path='/xxxx' component={Demo}/>
3、<App>的最外侧包裹了一个<BrowserRouter>或<HashRouter>
App组件
import React, { Component } from 'react'
import {Link,Route} from 'react-router-dom'
import Home from './components/Home'
import About from './components/About'

export default class App extends Component {
	render() {
		return (
			<div>
				<div className="row">
					<div className="col-xs-2 col-xs-offset-2">
						<div className="list-group">

							{/* 原生html中靠<a>跳转不同的页面 */}
							{/* <a className="list-group-item" href="./about.html">About</a>
							<a className="list-group-item active" href="./home.html">Home</a> */}

							{/* 在React中靠路由链接实现切换组件--编写路由链接 */}
							<Link className="list-group-item" to="/about">About</Link>
							<Link className="list-group-item" to="/home">Home</Link>
						</div>
					</div>
					<div className="col-xs-6">
						<div className="panel">
							<div className="panel-body">
								{/* 注册路由 */}
								<Route path="/about" component={About}/>
								<Route path="/home" component={Home}/>
							</div>
						</div>
					</div>
				</div>
			</div>
		)
	}
}
src/index.js
//引入react核心库
import React from 'react'
//引入ReactDOM
import ReactDOM from 'react-dom'
import {BrowserRouter} from 'react-router-dom'
//引入App
import App from './App'

ReactDOM.render(
	<BrowserRouter>
		<App/>
	</BrowserRouter>,
	document.getElementById('root')
)
5.4、NavLink与封装NavLink
NavLink可以实现当前路由标签高亮效果Link标签无法实现高亮效果
1、通过activeClassName指定高亮效果样式名;
2、标签体内容是一个特殊的标签属性;
3、通过this.props.children可以获取标签体内容;
MyNavLink组件
import React, { Component } from 'react'
import {NavLink} from 'react-router-dom'

export default class MyNavLink extends Component {
	render() {
		// console.log(this.props);

		// this.props.children可以获取标签体内容
		// {to: "/about", children: "About"}
		return (
			<NavLink activeClassName="aaabbb" className="list-group-item" {...this.props}/>
		)
	}
}
App组件
import React, { Component } from 'react'
import {Route} from 'react-router-dom'
import Home from './pages/Home' //Home是路由组件
import About from './pages/About' //About是路由组件
import Header from './components/Header' //Header是一般组件
import MyNavLink from './components/MyNavLink'

export default class App extends Component {
	render() {
		return (
			<div>
				<div className="row">
					<div className="col-xs-2 col-xs-offset-2">
						<div className="list-group">
							{/* 在React中靠路由链接实现切换组件--编写路由链接 */}
							<MyNavLink to="/about">About</MyNavLink>
							<MyNavLink to="/home">Home</MyNavLink>
						</div>
					</div>
					<div className="col-xs-6">
						<div className="panel">
							<div className="panel-body">
								{/* 注册路由 */}
								<Route path="/about" component={About}/>
								<Route path="/home" component={Home}/>
							</div>
						</div>
					</div>
				</div>
			</div>
		)
	}
}
5.5、Switch的使用
1、通常情况下path和component是一一对应的关系;
2、Switch可以提高路由匹配效率(单一匹配);
import React, { Component } from 'react'
import {Route,Switch} from 'react-router-dom'
import Home from './pages/Home' //Home是路由组件
import About from './pages/About' //About是路由组件
import Header from './components/Header' //Header是一般组件
import MyNavLink from './components/MyNavLink'
import Test from './pages/Test'

export default class App extends Component {
	render() {
		return (
			<div>
				<div className="row">
					<div className="col-xs-2 col-xs-offset-2">
						<div className="list-group">
							{/* 在React中靠路由链接实现切换组件--编写路由链接 */}
							<MyNavLink to="/about">About</MyNavLink>
							<MyNavLink to="/home">Home</MyNavLink>
						</div>
					</div>
					<div className="col-xs-6">
						<div className="panel">
							<div className="panel-body">
								{/* Switch包裹时路由匹配到路径时直接加载对应的组件;
								    Switch未包裹时路由会一直向下匹配。如有相同的路径不同的组件加载最下面的组件*/}
								{/* 注册路由 */}
								<Switch>
									<Route path="/about" component={About}/>
									<Route path="/home" component={Home}/>
									<Route path="/home" component={Test}/>
								</Switch>
							</div>
						</div>
					</div>
				</div>
			</div>
		)
	}
}
5.6、多级路径刷新页面样式丢失问题
路由多级路径切换跳转后点击浏览器刷新出现样式丢失问题。
...
// 路由多级路径/atguigu/about
<MyNavLink to="/atguigu/about">About</MyNavLink>
<MyNavLink to="/atguigu/home">Home</MyNavLink>

...

<Switch>
	<Route path="/atguigu/about" component={About}/>
	<Route path="/atguigu/home" component={Home}/>
</Switch>

...
原因:在public/index.html中加载样式路径出现问题
<!DOCTYPE html>
<html>
	<head>
		<meta charset="UTF-8" />
		<title>react脚手架</title>
		<link rel="icon" href="%PUBLIC_URL%/favicon.ico" />
		<!--
		<link rel="stylesheet" href="./css/bootstrap.css">

		前端本地服务http://localhost:3000默认加载的是public下的内容;
		正常请求样式路径:http://localhost:3000/css/bootstrap.css
		多级路由刷新路径:http://localhost:3000/atguigu/css/bootstrap.css
		当请求发送不存在的路径时返回public下的index.html中的内容
		-->
		<link rel="stylesheet" href="./css/bootstrap.css">
		<style>
			.atguigu{
				background-color: rgb(209, 137, 4) !important;
				color: white !important;
			}
		</style>
	</head>
	<body>
		<div id="root"></div>
	</body>
</html>
解决方案:
1、public/index.html中引入样式时不写./写 / (常用;
2、public/index.html中引入样式时不写./写 %PUBLIC_URL% (常用;
3、public/index.html中引入样式时写./但是使用HashRouter代替BrowserRouter包裹App组件;
5.7、路由的严格匹配与模糊匹配
默认使用的是模糊匹配(简单记:【输入的路径】必须包含要【匹配的路径】且顺序要一致
开启严格匹配:<Route exact={true} path="/about" component={About}/>
注意:严格匹配不要随便开启需要再开。有些时候开启会导致无法继续匹配二级路由
<MyNavLink to="/about">About</MyNavLink>
<MyNavLink to="/home/a/b">Home</MyNavLink>

......

<Switch>
	// 开启严格模式
	<Route exact path="/about" component={About}/>
	<Route exact path="/home" component={Home}/>
</Switch>
5.8、Redirect的使用
一般写在所有路由注册的最下方当所有路由都无法匹配时跳转到Redirect指定的路由
import {Route,Switch,Redirect} from 'react-router-dom'
......
<Switch>
	<Route path="/about" component={About}/>
	<Route path="/home" component={Home}/>
	<Redirect to="/about"/>
</Switch>
5.9、嵌套路由
注册子路由时要写上父路由的path值路由的匹配是按照注册路由的顺序进行的
Home组件下的News与Message组件
import React, { Component } from 'react'
import MyNavLink from '../../components/MyNavLink'
import {Route,Switch,Redirect} from 'react-router-dom'
import News from './News'
import Message from './Message'

export default class Home extends Component {
	render() {
		return (
				<div>
					<h3>我是Home的内容</h3>
					<div>
						<ul className="nav nav-tabs">
							<li>
								<MyNavLink to="/home/news">News</MyNavLink>
							</li>
							<li>
								<MyNavLink to="/home/message">Message</MyNavLink>
							</li>
						</ul>
						{/* 注册路由 */}
						<Switch>
							<Route path="/home/news" component={News}/>
							<Route path="/home/message" component={Message}/>
							<Redirect to="/home/news"/>
						</Switch>
					</div>
				</div>
			)
	}
}
5.10、向路由组件传递参数
params传参
使用方式:
1、路由链接(携带参数):<Link to='/demo/test/tom/18'}>详情</Link>
2、注册路由(声明接收):<Route path="/demo/test/:name/:age" component={Test}/>
3、接收参数:this.props.match.params
search传参(query传参
使用方式:
1、路由链接(携带参数):<Link to='/demo/test?name=tom&age=18'}>详情</Link>
2、注册路由(无需声明正常注册即可):<Route path="/demo/test" component={Test}/>
3、接收参数:this.props.location.search
备注:获取到的search是urlencoded编码字符串需要借助querystring解析
state传参
使用方式:
1、路由链接(携带参数):<Link to={{pathname:'/demo/test',state:{name:'tom',age:18}}}>详情</Link>
2、注册路由(无需声明正常注册即可):<Route path="/demo/test" component={Test}/>
3、接收参数:this.props.location.state
备注:刷新也可以保留住参数
import React, { Component } from 'react'
import {Link,Route} from 'react-router-dom'
import Detail from './Detail'

export default class Message extends Component {
	state = {
		messageArr:[
			{id:'01',title:'消息1'},
			{id:'02',title:'消息2'},
			{id:'03',title:'消息3'},
		]
	}
	render() {
		const {messageArr} = this.state
		return (
			<div>
				<ul>
					{
						messageArr.map((msgObj)=>{
							return (
								<li key={msgObj.id}>
									{/* 第一步:传递参数 */}

									{/* 向路由组件传递params参数 */}
									{/* <Link to={`/home/message/detail/${msgObj.id}/${msgObj.title}`}>{msgObj.title}</Link> */}

									{/* 向路由组件传递search参数 */}
									{/* <Link to={`/home/message/detail/?id=${msgObj.id}&title=${msgObj.title}`}>{msgObj.title}</Link> */}

									{/* 向路由组件传递state参数 */}
									<Link to={{pathname:'/home/message/detail',state:{id:msgObj.id,title:msgObj.title}}}>{msgObj.title}</Link>

								</li>
							)
						})
					}
				</ul>
				<hr/>
				{/* 第二步:路由组件接受参数 */}

				{/* 声明接收params参数 */}
				{/* <Route path="/home/message/detail/:id/:title" component={Detail}/> */}

				{/* search参数无需声明接收正常注册路由即可 */}
				{/* <Route path="/home/message/detail" component={Detail}/> */}

				{/* state参数无需声明接收正常注册路由即可 */}
				<Route path="/home/message/detail" component={Detail}/>

			</div>
		)
	}
}
import React, { Component } from 'react'
// import qs from 'querystring'

const DetailData = [
	{id:'01',content:'你好中国'},
	{id:'02',content:'你好尚硅谷'},
	{id:'03',content:'你好未来的自己'}
]
export default class Detail extends Component {
	render() {
		console.log(this.props);
		{/* 第三步:props中读取参数 */}

		// 接收params参数
		// match: {..., params: {id: "01", title: "消息1"}}
		// const {id,title} = this.props.match.params

		// 接收search参数
		// location: {..., search: "?id=01&title=消息1"}
		// const {search} = this.props.location
		// const {id,title} = qs.parse(search.slice(1))

		// 接收state参数
		// location: {..., state: {id: "01", title: "消息1"}}
		const {id,title} = this.props.location.state || {}

		const findResult = DetailData.find((detailObj)=>{
			return detailObj.id === id
		}) || {}
		return (
			<ul>
				<li>ID:{id}</li>
				<li>TITLE:{title}</li>
				<li>CONTENT:{findResult.content}</li>
			</ul>
		)
	}
}
5.11、路由组件与一般组件
1、写法不同:
一般组件:<Demo/>
路由组件:<Route path="/demo" component={Demo}/>
2、存放位置不同:
一般组件:components文件夹
路由组件:pages文件夹
3、接收到的props不同:
一般组件:写组件标签时传递了什么就能收到什么
路由组件:接收到三个固定的属性
history:    go: ƒ go(n)
			goBack: ƒ goBack()
			goForward: ƒ goForward()
			push: ƒ push(path, state)
			replace: ƒ replace(path, state)

location:  pathname: "/about"
			search: ""
			state: undefined

match:     params: {}
			path: "/about"
			url: "/about"
4、编程式路由导航
借助this.prosp.history对象上的API对操作路由跳转、前进、后退
- this.prosp.history.push()
- this.prosp.history.replace()
- this.prosp.history.goBack()
- this.prosp.history.goForward()
- this.prosp.history.go()
5.12、withRouter使用
import React, { Component } from 'react'
import {withRouter} from 'react-router-dom'
class Header extends Component {
back = ()=>{
this.props.history.goBack()
}
forward = ()=>{
this.props.history.goForward()
}
go = ()=>{
this.props.history.go(-2)
}
render() {
console.log('Header组件收到的props是',this.props);
return (
<div className="page-header">
<h2>React Router Demo</h2>
<button onClick={this.back}>回退</button>
<button onClick={this.forward}>前进</button>
<button onClick={this.go}>go</button>
</div>
)
}
}
export default withRouter(Header)
//withRouter可以加工一般组件让一般组件具备路由组件所特有的API
//withRouter的返回值是一个新组件
5.13、BrowserRouter与HashRouter的区别
1、底层原理不一样:
BrowserRouter使用的是H5的history API不兼容IE9及以下版本;
HashRouter使用的是URL的哈希值;
2、path表现形式不一样
BrowserRouter的路径中没有#例如:localhost:3000/demo/test;
HashRouter的路径包含#例如:localhost:3000/#/demo/test;
3、刷新后对路由state参数的影响
BrowserRouter没有任何影响因为state保存在history对象中;
HashRouter刷新后会导致路由state参数的丢失;
4、HashRouter可以用于解决一些路径错误相关的问题;
6、第三方组件库
6.1、React UI组件库
material-ui(国外)
官网:http://www.material-ui.com/#/
github:https://github.com/callemall/material-ui
ant-design(国内蚂蚁金服)
官网:https://ant.design/index-cn
Github:https://github.com/ant-design/ant-design/
6.2、antd的按需引入+自定主题
1、安装依赖:yarn add react-app-rewired customize-cra babel-plugin-import less less-loader
2、修改package.json
"scripts": {
	"start": "react-app-rewired start",
	"build": "react-app-rewired build",
	"test": "react-app-rewired test",
	"eject": "react-scripts eject"
},
3、根目录下创建config-overrides.js
// 配置具体的修改规则
const { override, fixBabelImports,addLessLoader} = require('customize-cra');
module.exports = override(
	fixBabelImports('import', {
		libraryName: 'antd',
		libraryDirectory: 'es',
		style: true,
	}),
	addLessLoader({
		lessOptions:{
			javascriptEnabled: true,
			modifyVars: { '@primary-color': 'green' },
		}
	}),
);
4、不用在组件里亲自引入样式了即:import 'antd/dist/antd.css’应该删掉