

nodejs中express 入门小实例
| 阿里云国内75折 回扣 微信号:monov8 |
| 阿里云国际,腾讯云国际,低至75折。AWS 93折 免费开户实名账号 代冲值 优惠多多 微信号:monov8 飞机:@monov6 |
express结构:MVC
开发版本:express4.0
安装方法:不再累赘,请点击这里
目录结构:
入门实例①:Hello World!
Hello World的实现较简单,只需要在 app.js中插入一下代码:
// 对网站首页的访问返回 "Hello World!" 字样
app.get('/', function (req, res) {
    res.send('Hello World!');
});然后运行
 npm start 程序就能跑起来,这时候在网址输入
 localhost:3000  就先显示如下结果:

注:app.get('/',function(){ });需要放在代码前面,大概放在app.set('view engine', 'ejs');即ejs模板引擎下就OK了入门实例②:MVC的简单实现
一、控制器
首先我们在实例①中的代码下一行添加如下代码:
app.get('/test',  test.me);
然后在该行代码上面用require引入test控制器,代码如下:
var test = require('./routes/test');
注:require引入的路由文件必须在app.get方法之前。
以上完成后的参考图片如下: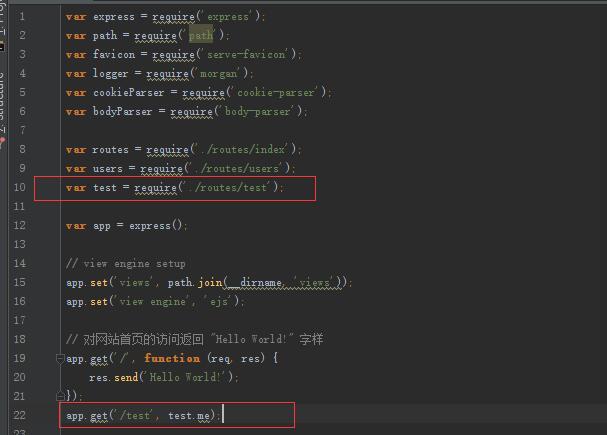
然后就是在 routes 目录下建立对应的test.js 控制器:
/*test测试例子*/
exports.me = function (req, res) {
    //首先输出个hello world
    res.send('Hello World!');
};接下来用
 Ctrl+C终止程序并且
 npm start 运行程序,在浏览器中输入xxx.xx.xx.xx:3000/test,出现效果如下:
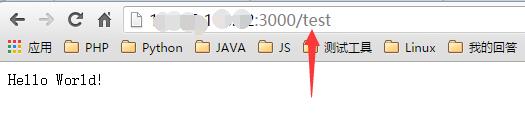
到这里,我们简单的控制器就写完了,接来下写的是视图文件。
二、视图
在 views目录下新建 test.ejs,然后写入代码如下:
<!doctype html>
<html lang="en">
<head>
    <meta charset="UTF-8">
    <title>test小实例</title>
</head>
<body>
    <div style="color: aquamarine;"><%=test%></div>
</body>
</html>
 注:<%=xxx%>为ejs模板引擎的用法。

然后修改./routes目录下的 test.js控制器代码,修改后的代码如下:
/*test测试例子*/
exports.me = function (req, res) {
    //res.send('Hello World!');
    res.render('test', {test:'Hello World View!'});
};
 注: 这里使用了
  res.render();  方法给视图传递了
 test 参数

接下来用 Ctrl+C终止程序并且npm start 运行程序,在浏览器中输入xxx.xx.xx.xx:3000/test,出现效果如下: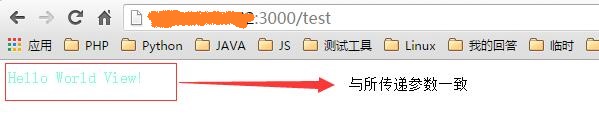
到这里,我们简单的视图就写完了,接来下写的是模型。
三、模型
前面控制器只用了模拟数据传进了实现,接下来我们用控制器从数据库中获取数据并传到视图。
首先在根目录下新建 models目录,并在models下新建 tests.js 模型文件,然后再app.js文件中引入tests.js:
var testModel  =require('./models/tests');然后修改./models/tests.js 文件,代码如下:

var mongoose = require("mongoose");
var Schema = mongoose.Schema;
//定义一个Schema
var orderSchema = new Schema({
    date: Date
});
var Orders = mongoose.model('text', orderSchema);
mongoose.connect('mongodb://localhost:27017/myDatabase');


exports.findMess = function (callback) {
    Orders.find({}, function (e, docs) {
        if (e) throw e;
        exports.html = "<p> 查询到的数据为:" + JSON.stringify(docs);
    });
    callback();
};

/***
 * 插入时间
 */
exports.insert = function(date, callback) {
    var test = new Orders({
        date: date
    });
    test.save(function(e, product, numberAffected) {
        if (e) throw e;
        callback();
    });
}

 注:数据 connect连接需要在
 方法外,这样才能避免多次重复连接,其中
 exports.html表该参数可对外使用,即可在控制器中引用。
 然后修改视图  ./views/test.ejs 代码如下:
<!doctype html>
<html lang="en">
<head>
    <meta charset="UTF-8">
    <title>test小实例</title>
</head>
<body>
<a href="/addTest"><button>插入当前时间</button></a>
<div style="color: aquamarine;"><%= test %></div>
<div><%=html%></div>
</body>
</html>修改视图后,由于需要插入数据,所以在app.js下添加一个数据插入路由,代码如下:

app.get('/addTest', test.addTest);
完成上述工作后,修改./routes/test.js控制器,修改后的代码如下:
var testModel = require('../models/tests');

/*test测试例子*/
exports.me = function (req, res) {
    testModel.findMess(function () {
        res.render('test', {test: 'Hello World View!', html:testModel.html});
    });
};

/**
 * 添加数据
 * */
exports.addTest = function (req, res) {
    testModel.insert(new Date(), function(){
        res.redirect('/test/');   //返回检索主页
    });
};注:其中testModel.html 即是对模型中
 exports.html 的引用 ,redirect 在控制器中控制重定向。
以上就是所有的代码,重新运行,效果图如下:

参考资料: http://www.runoob.com/mongodb/mongodb-remove.html(菜鸟教程)
http://qianduanblog.com/post/nodejs-learning-7-express-mongoose.html(前端博客)
http://www.expressjs.com.cn/guide/routing.html(nodejs学习文档)
源码下载:https://yunpan.cn/c6HIDhDhNdvy7 访问密码 286d
| 阿里云国内75折 回扣 微信号:monov8 |
| 阿里云国际,腾讯云国际,低至75折。AWS 93折 免费开户实名账号 代冲值 优惠多多 微信号:monov8 飞机:@monov6 |