

【CANN训练营第三季】AI目标属性编辑应用
| 阿里云国内75折 回扣 微信号:monov8 |
| 阿里云国际,腾讯云国际,低至75折。AWS 93折 免费开户实名账号 代冲值 优惠多多 微信号:monov8 飞机:@monov6 |
文章目录
1、参考样例进行运行stargan
下载stargan后查看readme进行复现。
# 为了方便下载在这里直接给出原始模型下载及模型转换命令,可以直接拷贝执行。
cd $HOME/samples/cplusplus/level2_simple_inference/6_other/StarGAN/model/
总是报错找不到这个文件那我们直接上传到家目录也很方便。

wget https://sharedata.obs.cn-north-4.myhuaweicloud.com/StarGAN.zip
unzip StarGAN.zip
cd $HOME/StarGAN/StarGAN/StarGAN/model/
wget https://sharedata.obs.cn-north-4.myhuaweicloud.com/StarGAN.onnx
wget https://sharedata.obs.cn-north-4.myhuaweicloud.com/aipp_nv12.cfg
atc --framework=5 --model=StarGAN.onnx --output=StarGAN_aipp --input_format=NCHW --input_shape="real_img:1,3,128,128;attr:1,5" --soc_version=Ascend310 --insert_op_conf=aipp_nv12.cfg

cd $HOME/StarGAN/StarGAN/StarGAN/scripts/
bash sample_build.sh

bash sample_run.sh

遇到了这样一个报错
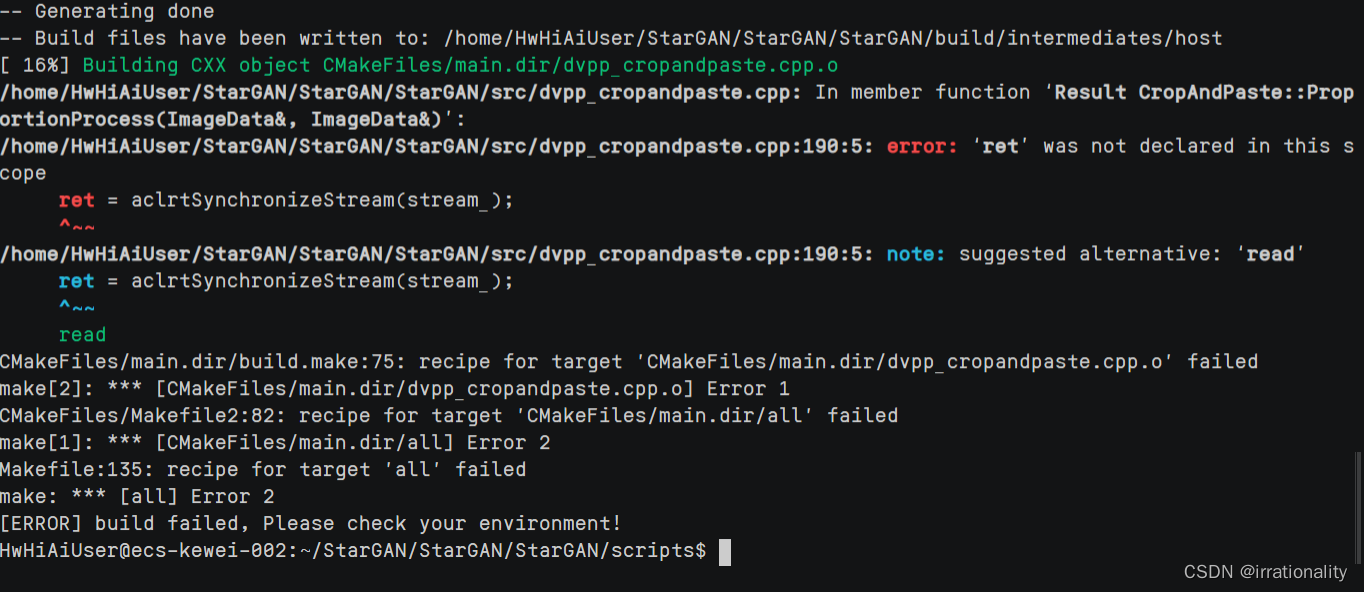
我猜想是不是对目录项有所依赖呢
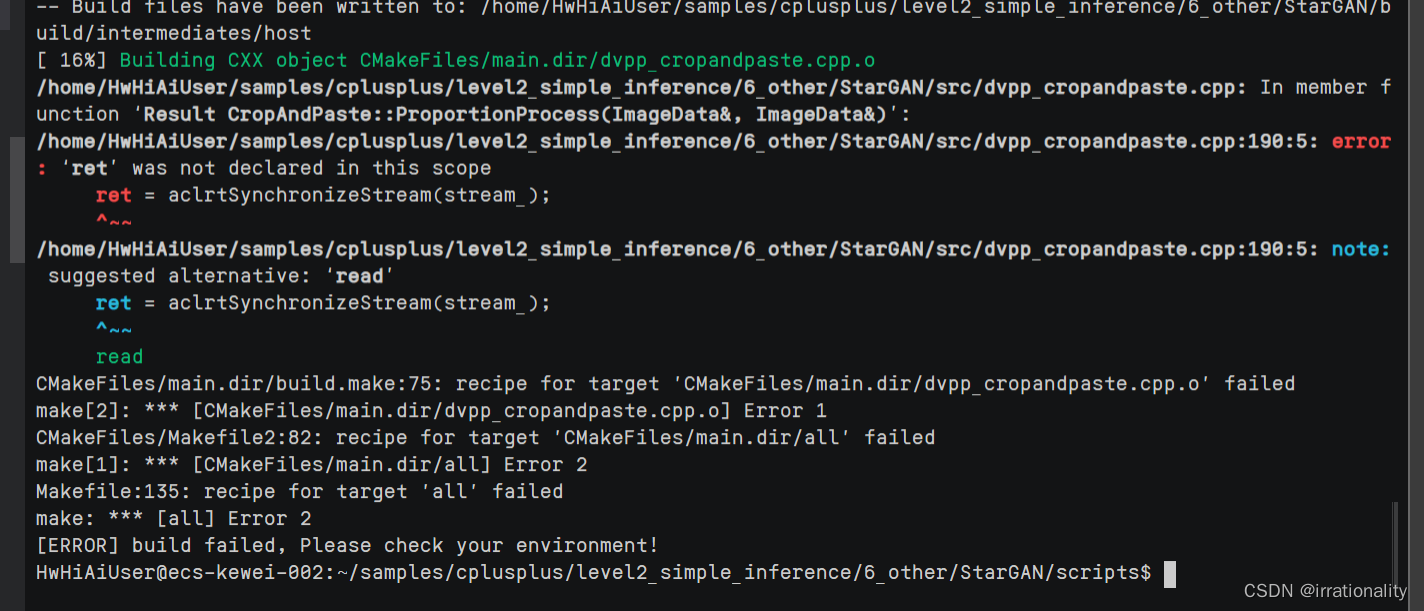
于是我选择了把这个文件复制到level2下。
cp -r $HOME/StarGAN/StarGAN/StarGAN/ $HOME/samples/cplusplus/level2_simple_inference/6_other/StarGAN/
看来倒不是这个原因
那参考一下配置环境变量的文件
https://gitee.com/ascend/samples/blob/master/cplusplus/environment/environment_variable_configuration_CN.md
我以为是DDK和NPU_HOST的问题结果却不是。
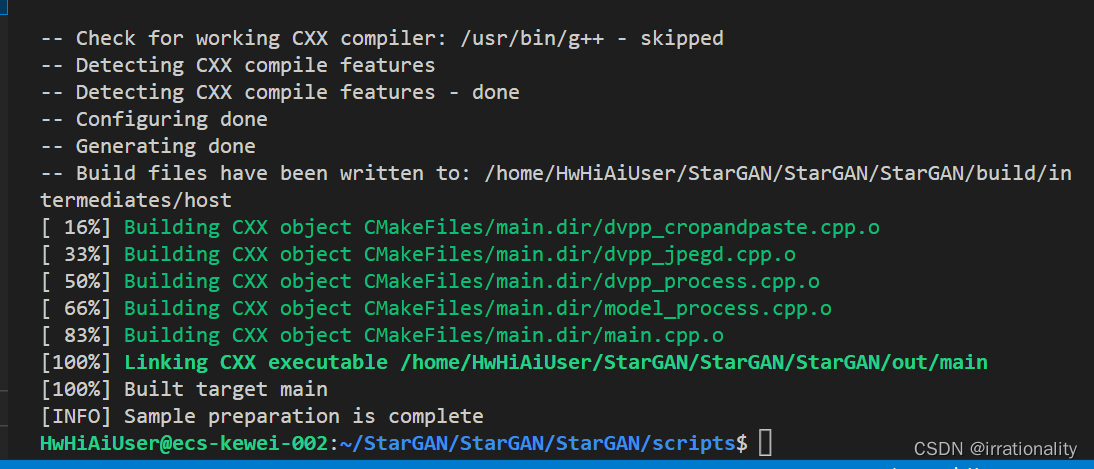
我又研究了一番代码补全终于使得编译通过了。
遇到不会的地方完全可以看下B站Ascend主讲老师的代码然后和自己的代码进行对比调试特别是TODO的部分要仔细研究错误代码和错误原因。

2、dvpp媒体数据处理
jpegd参考https://gitee.com/ascend/samples/tree/master/cplusplus/level2_simple_inference/0_data_process/jpegd
resize参考
https://gitee.com/ascend/samples/tree/master/cplusplus/level2_simple_inference/0_data_process/resize
这里就不再赘述过程。
只需要注意jpegd是图片编码
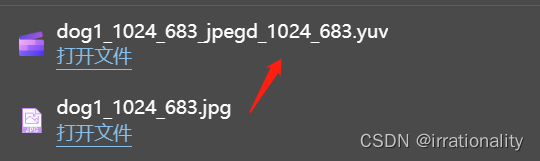
resize可以通过命令修改有关参数输入和得到的必须是yuv
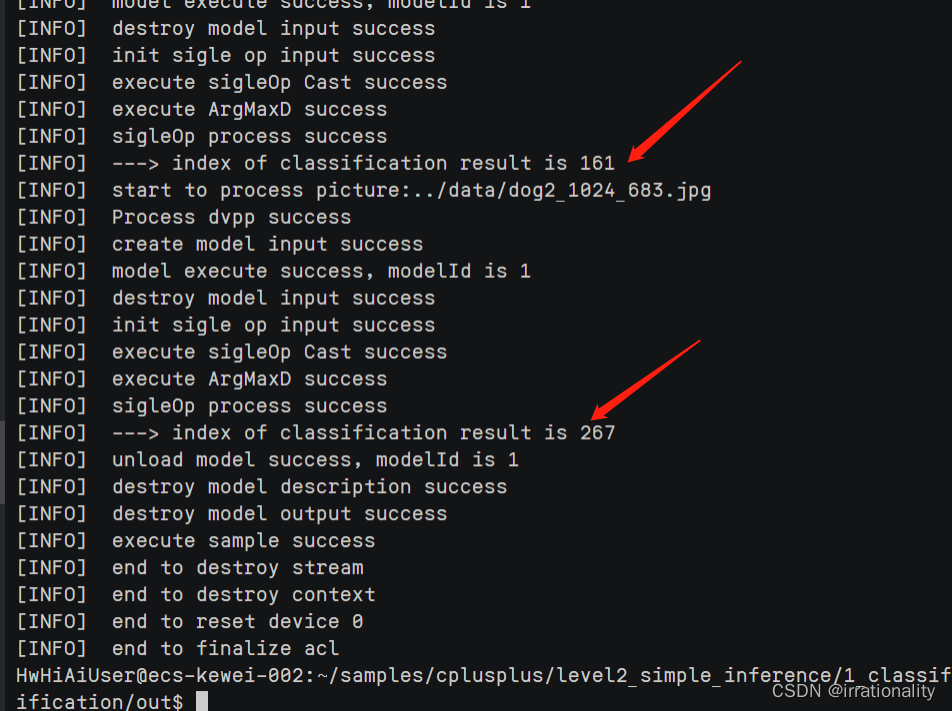
同步推理参考https://gitee.com/ascend/samples/tree/master/cplusplus/level2_simple_inference/1_classification/resnet50_imagenet_classification


export DDK_PATH=$HOME/Ascend/ascend-toolkit/latest
export NPU_HOST_LIB=$DDK_PATH/runtime/lib64/stub
**参考**https://blog.csdn.net/weixin_44676081/article/details/106755135
得到对应标签
结业考核
题目1、
目标
让学员根据讲师讲解的内容、在样例代码基础上补充关键步骤的代码以便学员了解整体开发流程、掌握关键代码逻辑。
实战场景
单击Link获取AI目标属性编辑应用的源码包补充缺失步骤的代码。
评分细则
使用atc工具转换模型提供转换命令及转换成功的截图。5分
cd model/
wget https://sharedata.obs.cn-north-4.myhuaweicloud.com/StarGAN.onnx
wget https://sharedata.obs.cn-north-4.myhuaweicloud.com/aipp_nv12.cfg
atc --framework=5 --model=StarGAN.onnx --output=StarGAN_aipp --input_format=NCHW --input_shape="real_img:1,3,128,128;attr:1,5" --soc_version=Ascend310 --insert_op_conf=aipp_nv12.cfg

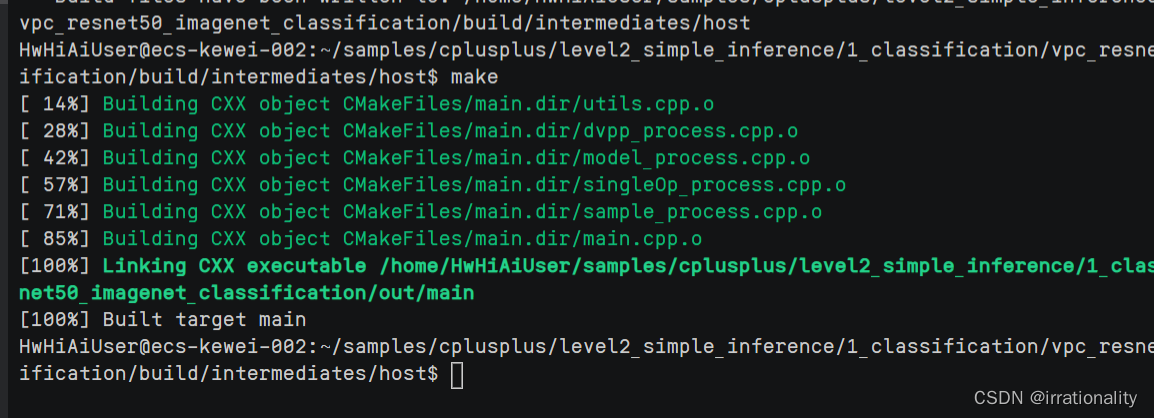
完成样例代码补充提供提交成功编译应用源码以及成功运行应用的截图。15分
参考VPC的整个流程代码。
参考https://gitee.com/ascend/samples/tree/master/cplusplus/level1_single_api/7_dvpp
cd $HOME/StarGAN/StarGAN/StarGAN/data/
wget https://sharedata.obs.cn-north-4.myhuaweicloud.com/input_1.jpg
wget https://sharedata.obs.cn-north-4.myhuaweicloud.com/input_2.jpg
cd $HOME/StarGAN/StarGAN/StarGAN/scripts/
bash sample_build.sh
bash sample_run.sh
看来最后对loadmodel的迁移还有一部分问题。
提个issue看看。
终于编译成功。

代码提交https://gitee.com/qmckw/star-gan-ascend
总结实战过程中遇到的问题及解决方法并提交总结。5分
只需要在有关的案例中找到类似的例子适配即可同时认真看视频对比不同之处。
题目2、
目标
让学员掌握DVPP图片处理的开发流程便于在应用中对图片数据进行预处理或后处理。
实战场景
开发一个图片数据处理的应用支持对JPEG、PNG格式的图片进行解码再对解码后的图片进行缩放使得输入和输出图片的分辨率不同。
JPEG图片解码、PNG图片解码、图片缩放等处理后的输出图片由于图片宽、高的对齐约束可能存在绿边该实战中学员可以不关注绿边。
开发应用时可从Sample仓查找更多样例源码。
评分细则
开发一个“JPEG图片解码+图片缩放”功能串联的图片处理应用提交成功编译应用源码以及成功运行应用的截图。10分
开发一个“PNG图片解码+图片缩放”功能串联的图片处理应用提交成功编译应用源码以及成功运行应用的截图。10分
开发图片处理应用时在一个应用中实现既支持“JPEG图片解码+图片缩放”又支持“PNG图片解码+图片缩放”根据用户输入的图片格式JPEG或PNG来判断走哪个分支提交成功编译应用源码以及成功运行应用的截图。10分
串联功能时如果实现内存复用例如JPEG图片的输出可以作为图片缩放的输入、图片缩放的输出可以作为JPEG图片编码的输入提交成功编译应用源码以及成功运行应用的截图。5分
总结实战过程中遇到的问题及解决方法或优化Sample仓中的样例源码包括优化代码逻辑、优化代码注释、补充代码注释等并提交问题总结、优化后的源码、优化思路说明、优化位置说明。5分
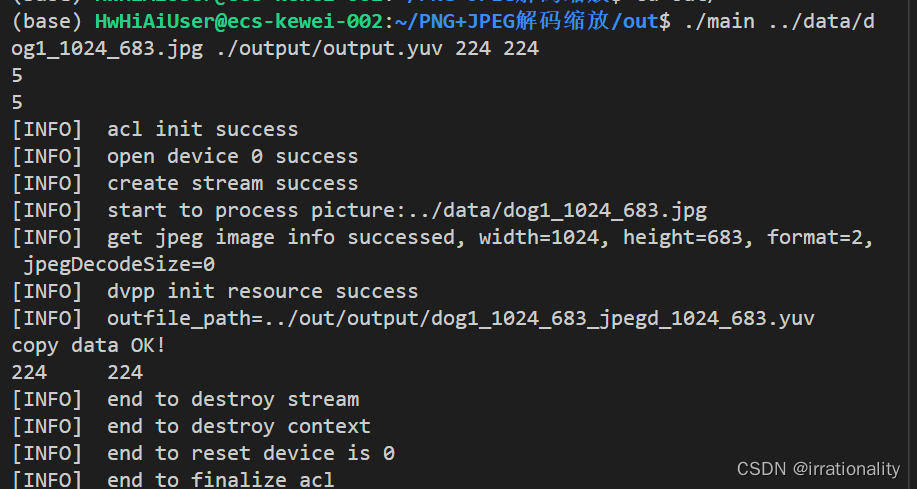
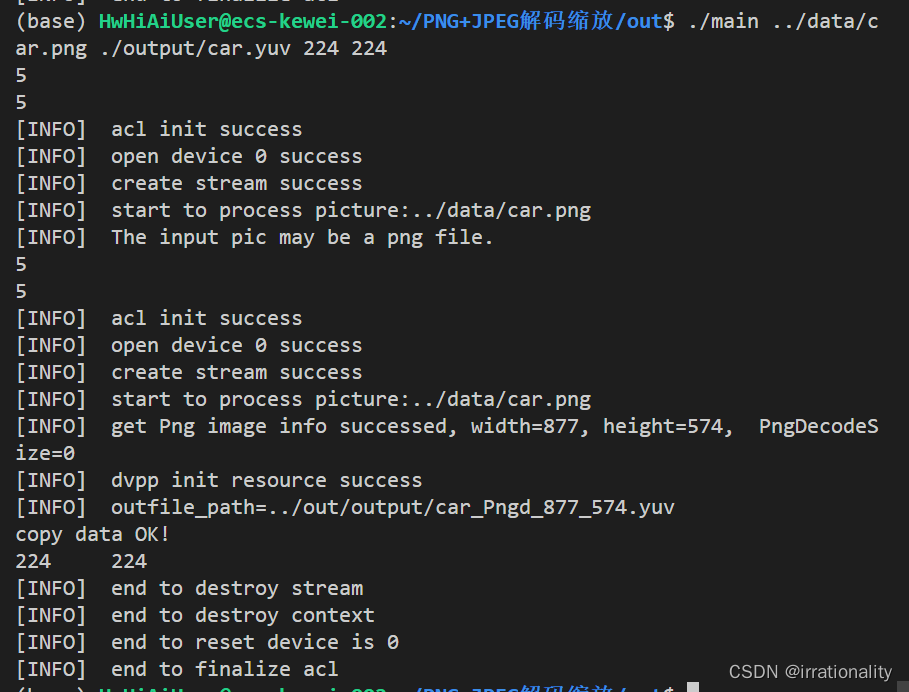
PNG+JPEG解码缩放https://gitee.com/qmckw/png-jpeg-decoding-scaling
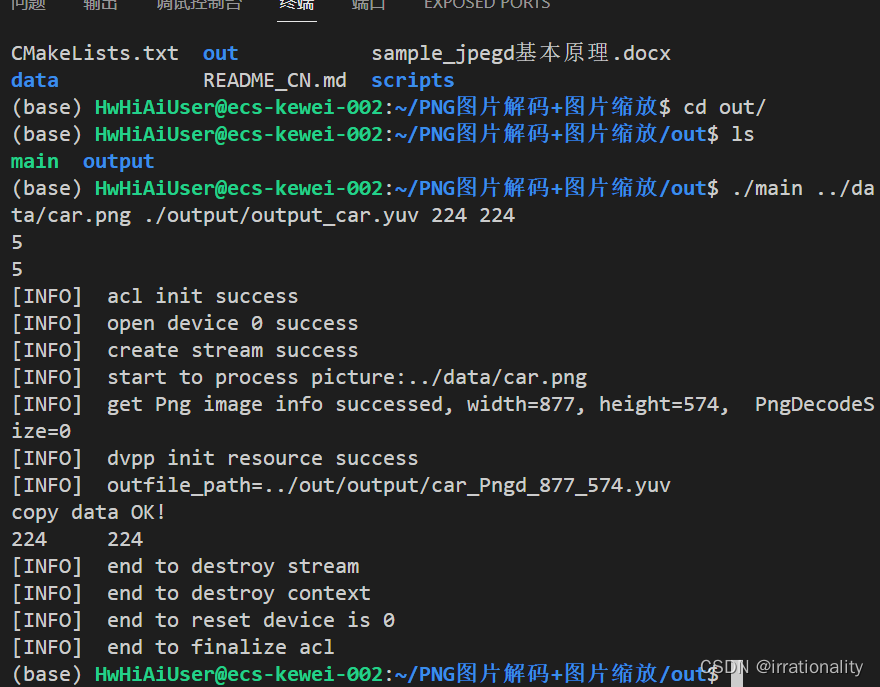
PNG图片解码+图片缩放https://gitee.com/qmckw/PNGD-resize
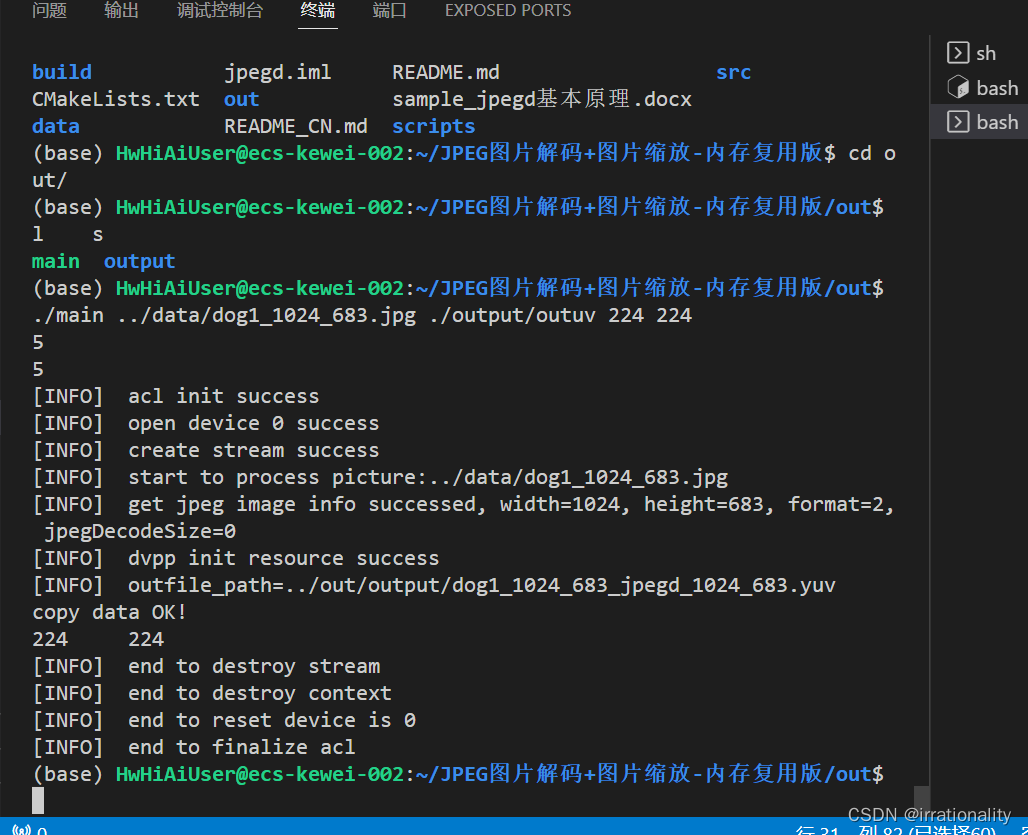
JPEG图片解码+图片缩放:https://gitee.com/qmckw/JPEGD-resize
主要问题是串联时可以有一个内存复用以JPEG图片解码+图片缩放为例
JPEG图片的输出可以作为图片缩放的输入、图片缩放的输出可以作为JPEG图片编码的输入。
如果不内存复用就copy_data
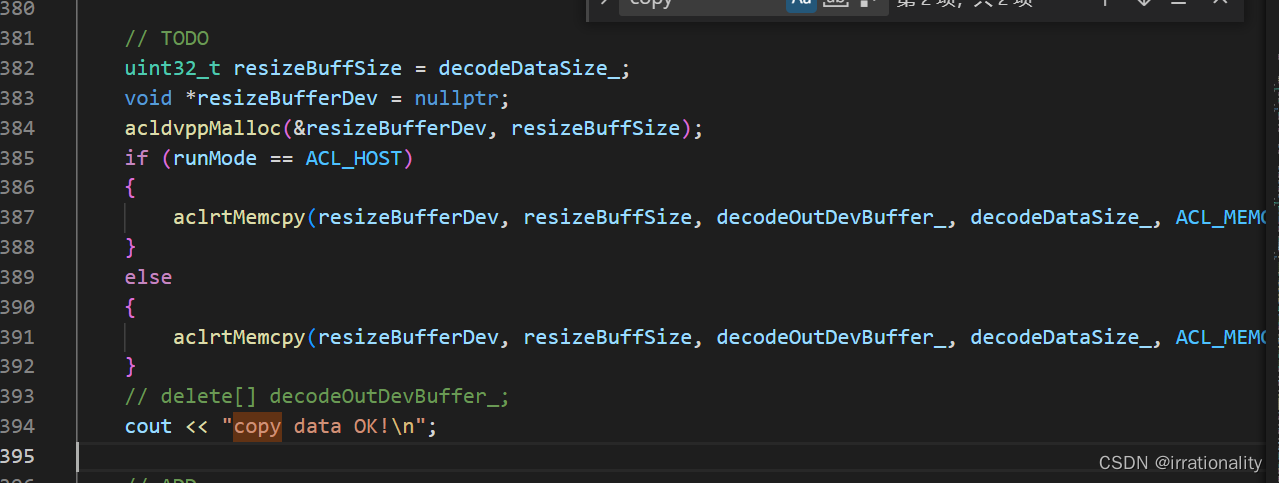
如果内存复用直接用decodeData作为resize的输入直接在后续过程使用decodeOutDevBuffer_不用aclrtMemcpy.

-
JPEGD-resize运行成功截图
-
-
PNGD-resize运行成功截图
-
-
混合png、jpeg判断逻辑截图-运行成功截图包括png、jpeg由输入自动判断
-
题目3
3、目标
让学员掌握图片数据预处理+模型推理的完整开发流程便于根据实际场景开发更多AI应用。
实战场景
下载ResNet18模型或从ModelZoo仓中自选模型开发一个包含图像数据预处理的推理应用。
开发应用时可从Sample仓查找更多样例源码。
评分细则
根据所下载的模型提交应用的整体分析、设计思路包含模型的输入和输出数据情况、需要什么样的数据预处理功能、关键代码逻辑是什么等。5分
具体的预处理功能我写了个markdown到gitee
我选择的模型是ATC SSD-Resnet34(FP16)
https://www.hiascend.com/zh/software/modelzoo/models/detail/1/324b0ca450184da99130d5d9c56baf4a/1

使用atc工具转换模型提供转换命令及转换成功的截图。5分
atc --model=caffe_model/ssdresnet34_1batch_tf.pb --framework=3 --output=model/resnet34_tf --output_type=FP32 --soc_version=Ascend310 --input_shape="input:1,300,300,3" --log=info
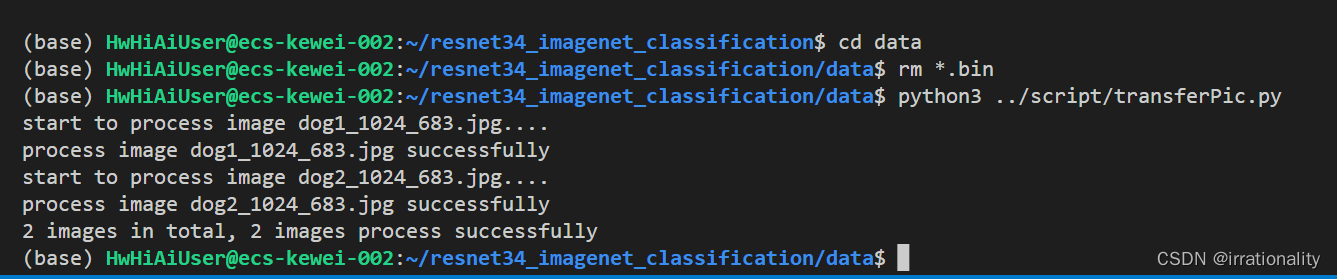
根据所选模型开发对应的图像数据预处理功能代码能成功编译运行输出处理后的图片提交成功编译应用源码以及成功运行应用的截图。10分
import numpy as np
import os
from PIL import Image

def process(input_path):
    try:
        input_image = Image.open(input_path)
        #resnet34 输入大小为224*224
        input_image = input_image.resize((300,300))
        # 默认h为0, w为1,
        # hwc
        img = np.array(input_image)
        height = img.shape[0]
        width = img.shape[1]
        h_off = int((height-300)/2)
        w_off = int((width-300)/2)
        crop_img = img[h_off:height-h_off, w_off:width-w_off, :]
        # rgb to bgr 不需要直接用rgb在resnet101
        # img = crop_img[:, :, ::-1]
        # shape = img.shape
        img = crop_img
        shape = img.shape
        #数据类型为RGB_FP32
        img = img.astype("float32")
        img[:, :, 0] -= 104
        img[:, :, 1] -= 117
        img[:, :, 2] -= 123
        img = img.reshape([1] + list(shape))
        # nhwc PIL默认就是NHWC
        result = img
        # nchw
        # result = img.transpose([0, 3, 1, 2])
        output_name = input_path.split('.')[0] + ".bin"
        result.tofile(output_name)
    except Exception as except_err:
        print(except_err)
        return 1
    else:
        return 0
if __name__ == "__main__":
    count_ok = 0
    count_ng = 0
    images = os.listdir(r'./')
    for image_name in images:
        if not image_name.endswith("jpg"):
            continue
        print("start to process image {}....".format(image_name))
        ret = process(image_name)
        if ret == 0:
            print("process image {} successfully".format(image_name))
            count_ok = count_ok + 1
        elif ret == 1:
            print("failed to process image {}".format(image_name))
            count_ng = count_ng + 1
    if count_ng == 0:
        print("{} images in total, {} images process successfully" .format(count_ok + count_ng, count_ok))
    else:
        print("{} images in total, {} images process successfully, {} images process failed"
            .format(count_ok + count_ng, count_ok, count_ng))
在第3步开发的代码中根据所选模型串接模型推理的代码提交成功编译应用源码以及成功运行应用的截图。10分
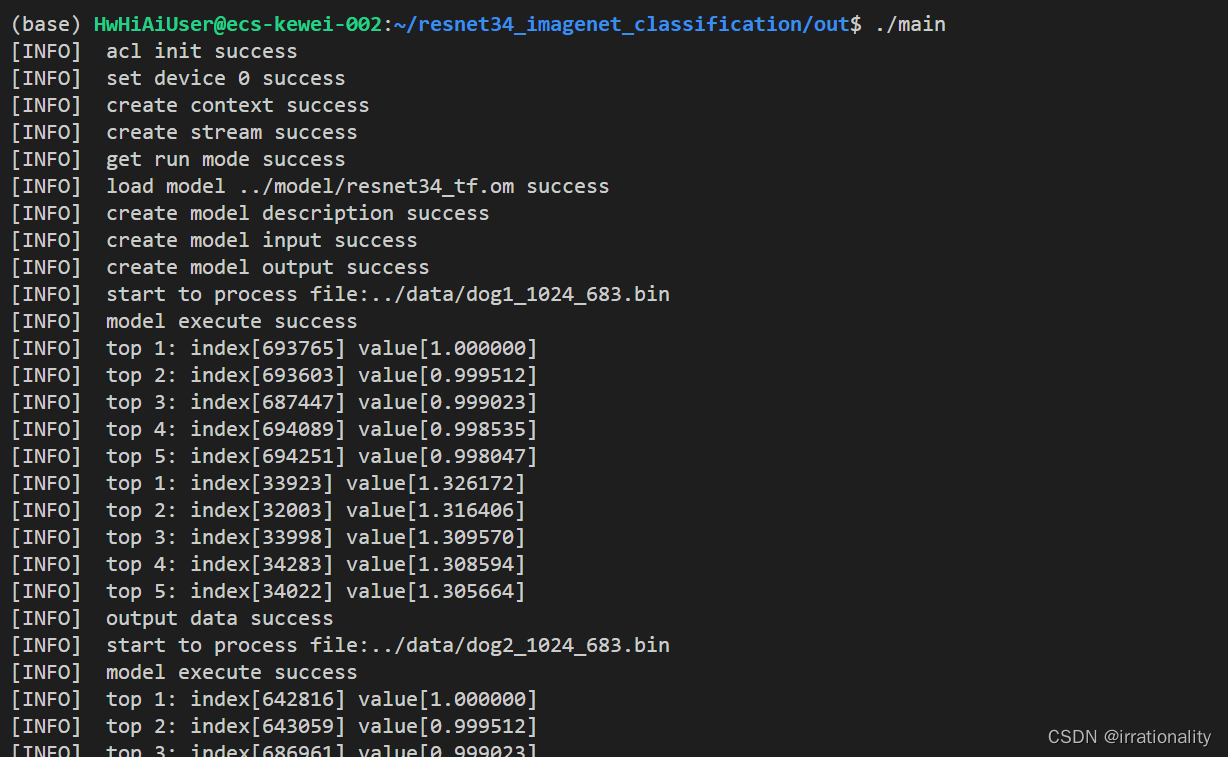
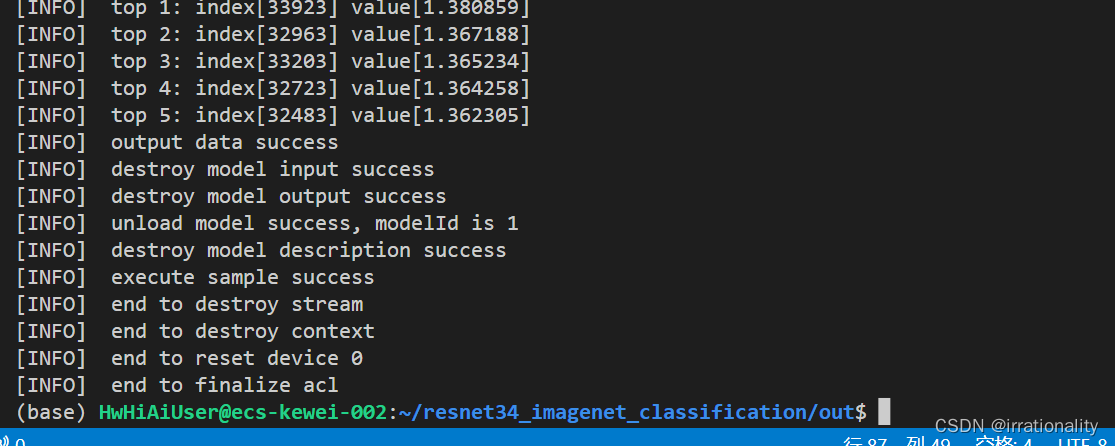
运行成功
总结实战过程中遇到的问题及解决方法并提交总结。5分
这个题和之前做过的resnet101很相似有几个修改点
- 修改预处理转换为模型需要的输入格式
- 修改载入模型的步骤因为均为resnet系列模型大部分可以复用
- 修改模型转换命令
代码链接https://gitee.com/qmckw/resnet34-ascend310