

FFmpeg编译安装(windows环境)以及在vs2022中调用-CSDN博客
| 阿里云国内75折 回扣 微信号:monov8 |
| 阿里云国际,腾讯云国际,低至75折。AWS 93折 免费开户实名账号 代冲值 优惠多多 微信号:monov8 飞机:@monov6 |
文章目录
下载源码
直接在官网下载压缩包
这个应该是目前2023/10/24最新的一个版本。下载之后是这个样子

我打算添加外部依赖x264也直接去官网下载一个压缩包来。
环境准备
下载msys
我这里选择用msys2+mingw的方式来编译源码。首先去msys官网下载一下exe文件。可以傻瓜式安装。默认是装到c盘目录下可以直接修改c为D等。避免后续出现问题。我装到了E盘下

换源
因为需要下载东西所以换一下源。在这里
 =
=
用记事本软件比如vscode之类打开这几个 .xxx32/64的文件找到清华和中科大的源移动到最上方即可
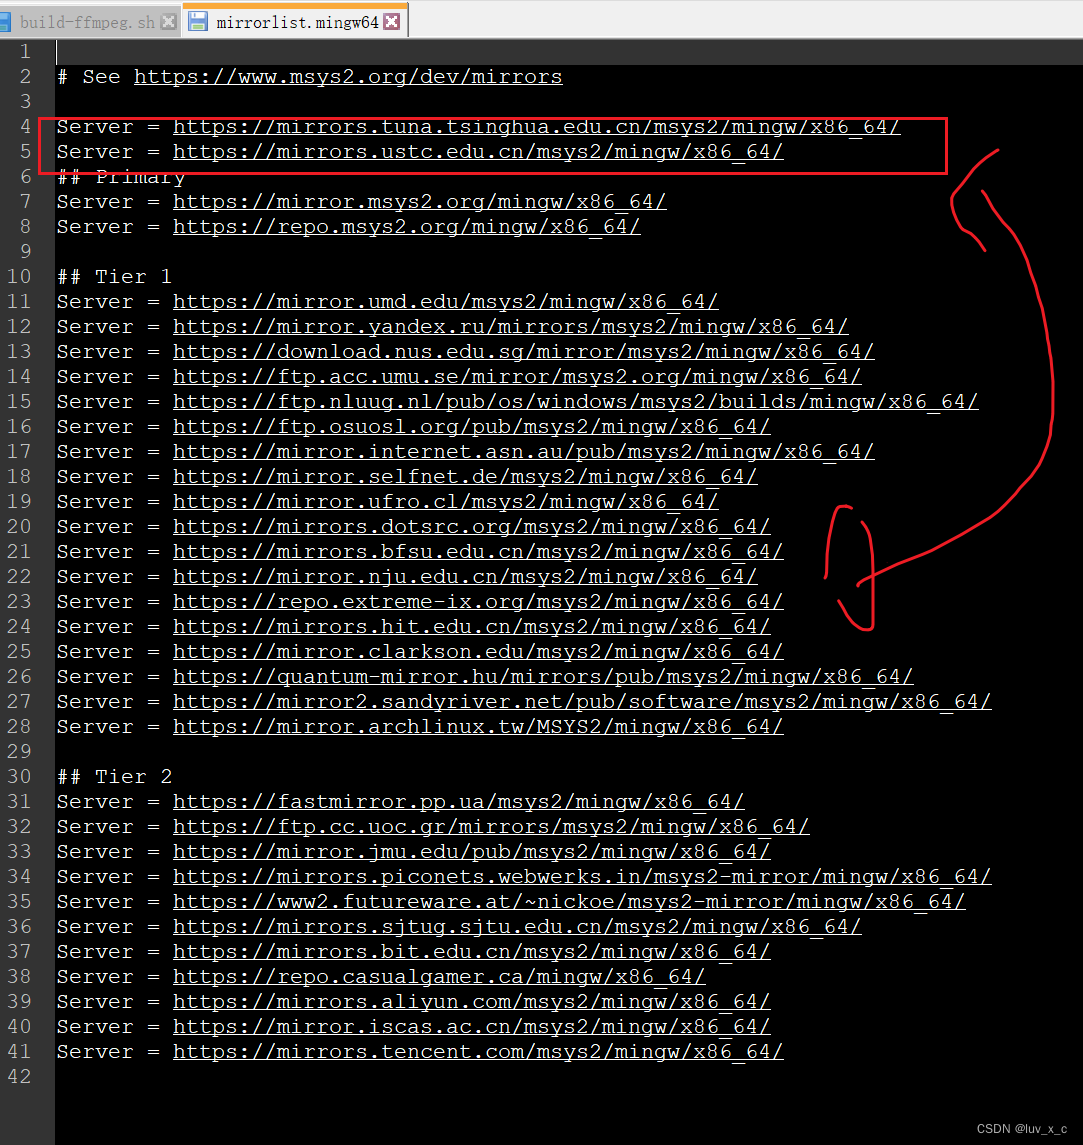
以某一个为例大概就是在圈的地方找到这两个移动到箭头的位置。
下载依赖
接着就可以下载一些待会用到的依赖。打开msys中的这个终端可以在开始菜单找到

先更新一下包
pacman -Syu # 更新所有库
然后好像是会重启一下忘了再来一下这个
pacman -Sy
接着就可以下载依赖
pacman -S mingw-w64-x86_64-toolchain  # mingw64编译工具链win下的gcc
pacman -S base-devel    # 一些基本的编译工具
pacman -S yasm nasm     # 汇编器
pacman -S mingw-w64-x86_64-SDL2 # SDL2 是ffmpeg依赖的因为没有它ffpaly不能用
补充一下更新库时候直接enter全部更新一路YYY同意。pacman的使用可自行查询这里不再赘述。
mingw下载成功之后终端输入命令查看验证一下
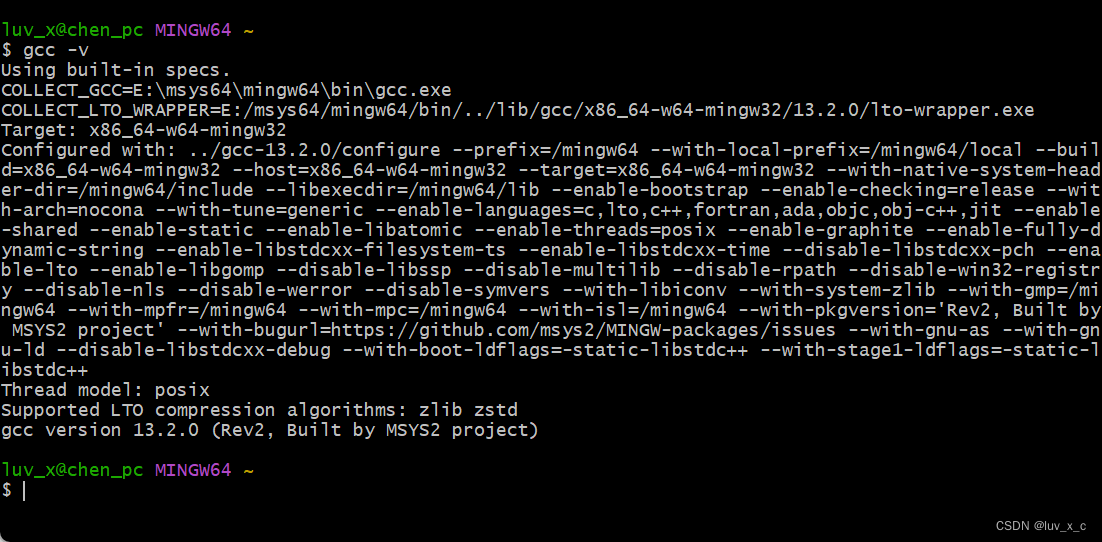
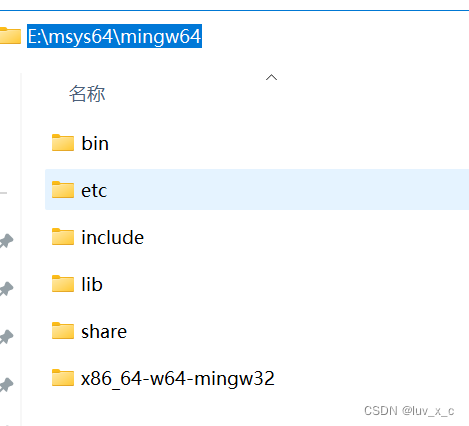
接下来可以把mingw的bin目录配置到环境变量自行操作注意是msys文件夹里面的mingw一开始应该是空的在我们下载好上面的工具之后就会看到有东西。
源码位置
搜寻n多个网上的教程之后我选择这样安排
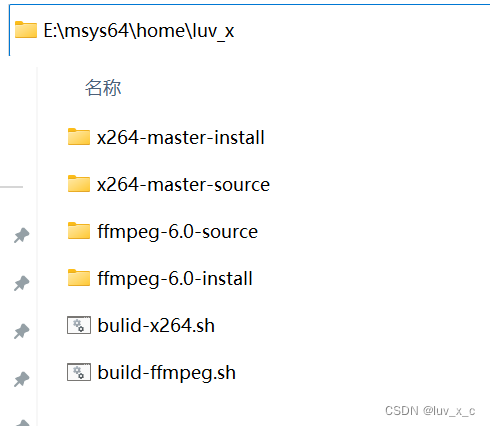
把ffmpeg和x264的源码解压到msys路径下的home路径下的名字为你的电脑用户名的看路径下再新建俩空文件夹用来安装ffmpeg和x264。如图所示source文件夹是源码install是准备安装的文件夹。
开始编译
编译x264
可以看到上面图中有两个sh脚本文件
#!/bin/sh
basepath=$(cd `dirname $0`;pwd)
echo ${basepath}

cd ${basepath}/x264-master-source   # 根据路径名称自行修改
pwd

./configure --prefix=${basepath}/x264-master-install --enable-shared
make -j10  这个数字是线程数根据自己电脑自行选择
make install
./configure命令它的参数会指导编译器应该如何编译代码。这里 --prefix 参数指定了编译好的库文件的安装路径可以自己任意指定。 --enable-shared 代表编译动态库。如果你需要静态库那么需要加入 -enable-static 参数。
编写好脚本之后用mingw64终端进入到这个目录下可以通过以下命令执行
./build-x264.sh
成功之后便可以在我们设置的安装目录下看到编译好的文件
编译ffmpeg
同样的搞一个脚本文件
#!/bin/sh
basepath=$(cd `dirname $0`;pwd)
echo ${basepath}

cd ${basepath}/ffmpeg-6.0-source
pwd

export PKG_CONFIG_PATH=${PKG_CONFIG_PATH}:/E/msys64/home/luv_x/x264-master-install/lib/pkgconfig
echo ${PKG_CONFIG_PATH}

./configure --prefix=${basepath}/ffmpeg-6.0-install \
--enable-sdl2 --enable-nonfree --enable-muxer=mp4 --enable-debug \
--enable-gpl --enable-libx264 \
--disable-static --enable-shared \
--extra-cflags=-I${basepath}/x264-master-install/include --extra-ldflags=-L${basepath}/x264-master-install/lib

make -j16
make install
因为要把x264搞进去所以最后一行的的功能就事找到它。
但不要急着执行脚本6.0版本似乎有点小bug需要替换掉一个源代码文件
路径大概是这
msys64\home\luv_x\ffmpeg-6.0-source\libavcodec\x86\mathops.h
就是这个.h文件打开之后替换为下代码。如下
/*
 * simple math operations
 * Copyright (c) 2006 Michael Niedermayer <michaelni@gmx.at> et al
 *
 * This file is part of FFmpeg.
 *
 * FFmpeg is free software; you can redistribute it and/or
 * modify it under the terms of the GNU Lesser General Public
 * License as published by the Free Software Foundation; either
 * version 2.1 of the License, or (at your option) any later version.
 *
 * FFmpeg is distributed in the hope that it will be useful,
 * but WITHOUT ANY WARRANTY; without even the implied warranty of
 * MERCHANTABILITY or FITNESS FOR A PARTICULAR PURPOSE.  See the GNU
 * Lesser General Public License for more details.
 *
 * You should have received a copy of the GNU Lesser General Public
 * License along with FFmpeg; if not, write to the Free Software
 * Foundation, Inc., 51 Franklin Street, Fifth Floor, Boston, MA 02110-1301 USA
 */

#ifndef AVCODEC_X86_MATHOPS_H
#define AVCODEC_X86_MATHOPS_H

#include "config.h"

#include "libavutil/common.h"
#include "libavutil/x86/asm.h"

#if HAVE_INLINE_ASM

#if ARCH_X86_32

#define MULL MULL
static av_always_inline av_const int MULL(int a, int b, unsigned shift)
{
    int rt, dummy;
    if (__builtin_constant_p(shift))
    __asm__ (
        "imull %3               \n\t"
        "shrdl %4, %%edx, %%eax \n\t"
        :"=a"(rt), "=d"(dummy)
        :"a"(a), "rm"(b), "i"(shift & 0x1F)
    );
    else
        __asm__ (
            "imull %3               \n\t"
            "shrdl %4, %%edx, %%eax \n\t"
            :"=a"(rt), "=d"(dummy)
            :"a"(a), "rm"(b), "c"((uint8_t)shift)
        );
    return rt;
}

#define MULH MULH
static av_always_inline av_const int MULH(int a, int b)
{
    int rt, dummy;
    __asm__ (
        "imull %3"
        :"=d"(rt), "=a"(dummy)
        :"a"(a), "rm"(b)
    );
    return rt;
}

#define MUL64 MUL64
static av_always_inline av_const int64_t MUL64(int a, int b)
{
    int64_t rt;
    __asm__ (
        "imull %2"
        :"=A"(rt)
        :"a"(a), "rm"(b)
    );
    return rt;
}

#endif /* ARCH_X86_32 */

#if HAVE_I686
/* median of 3 */
#define mid_pred mid_pred
static inline av_const int mid_pred(int a, int b, int c)
{
    int i=b;
    __asm__ (
        "cmp    %2, %1 \n\t"
        "cmovg  %1, %0 \n\t"
        "cmovg  %2, %1 \n\t"
        "cmp    %3, %1 \n\t"
        "cmovl  %3, %1 \n\t"
        "cmp    %1, %0 \n\t"
        "cmovg  %1, %0 \n\t"
        :"+&r"(i), "+&r"(a)
        :"r"(b), "r"(c)
    );
    return i;
}

#if HAVE_6REGS
#define COPY3_IF_LT(x, y, a, b, c, d)\
__asm__ volatile(\
    "cmpl  %0, %3       \n\t"\
    "cmovl %3, %0       \n\t"\
    "cmovl %4, %1       \n\t"\
    "cmovl %5, %2       \n\t"\
    : "+&r" (x), "+&r" (a), "+r" (c)\
    : "r" (y), "r" (b), "r" (d)\
);
#endif /* HAVE_6REGS */

#endif /* HAVE_I686 */

#define MASK_ABS(mask, level)                   \
    __asm__ ("cdq                    \n\t"      \
             "xorl %1, %0            \n\t"      \
             "subl %1, %0            \n\t"      \
             : "+a"(level), "=&d"(mask))

// avoid +32 for shift optimization (gcc should do that ...)
#define NEG_SSR32 NEG_SSR32
static inline  int32_t NEG_SSR32( int32_t a, int8_t s){
    if (__builtin_constant_p(s))
    __asm__ ("sarl %1, %0\n\t"
         : "+r" (a)
         : "i" (-s & 0x1F)
    );
    else
        __asm__ ("sarl %1, %0\n\t"
               : "+r" (a)
               : "c" ((uint8_t)(-s))
        );
    return a;
}

#define NEG_USR32 NEG_USR32
static inline uint32_t NEG_USR32(uint32_t a, int8_t s){
    if (__builtin_constant_p(s))
    __asm__ ("shrl %1, %0\n\t"
         : "+r" (a)
         : "i" (-s & 0x1F)
    );
    else
        __asm__ ("shrl %1, %0\n\t"
               : "+r" (a)
               : "c" ((uint8_t)(-s))
        );
    return a;
}

#endif /* HAVE_INLINE_ASM */
#endif /* AVCODEC_X86_MATHOPS_H */
这是从官网的github源码里嫖的大致三个月前更新的换成这个之后就可以安心编译了。可能编译时间比较久一些也可以裁剪一些功能小白就不多赘述了可以自行查阅资料了解。
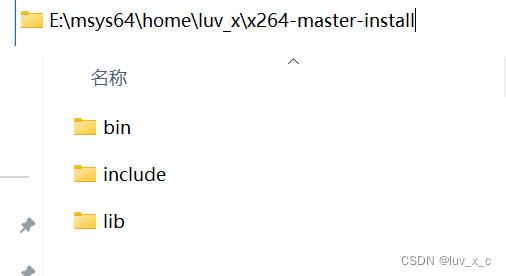
成功后安装目录应该是这样的

bin目录下有dll,lib,exe文件include里是头文件不知为什么lib里面没有库文件我选择从bin目录下粘贴过去。
还要从x264的bin目录粘到这边bin目录一个
然后在终端验证一下
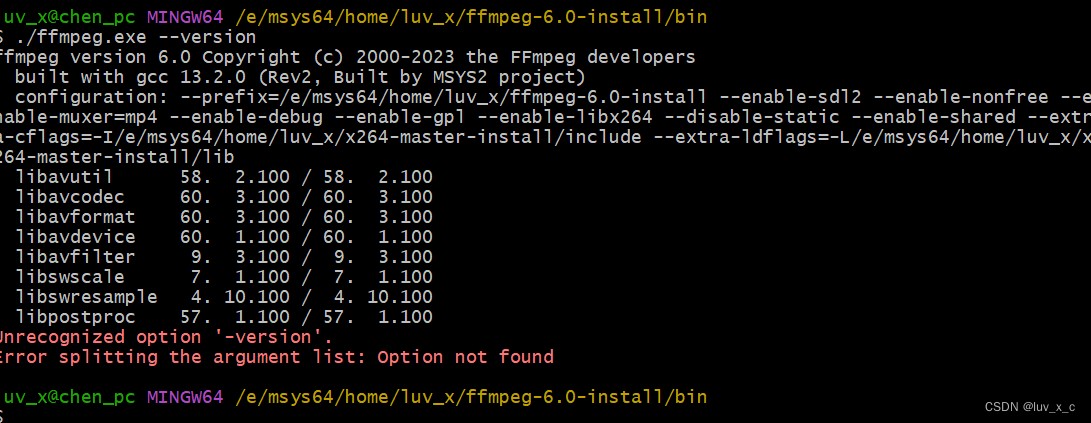
至此编译安装工作就完成了后续如果需要安装别的扩展格式再配置编译就可以了。
在VS2022写cpp调用ffmpeg
新建一个空项目后

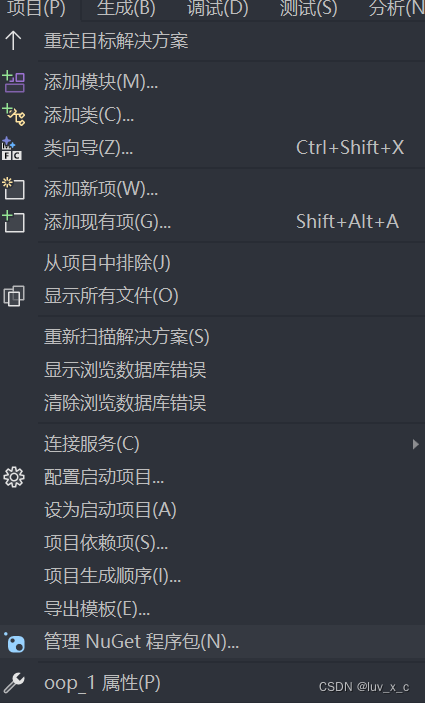
点击上方菜单中的项目然后属性
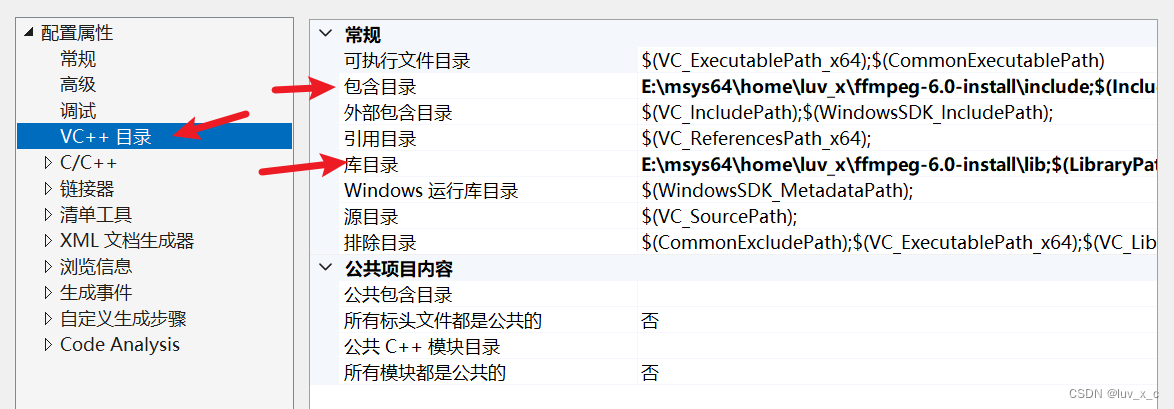
然后在包含目录中添加ffmpeg安装目录下的include文件夹库目录添加lib文件夹接着添加依赖项
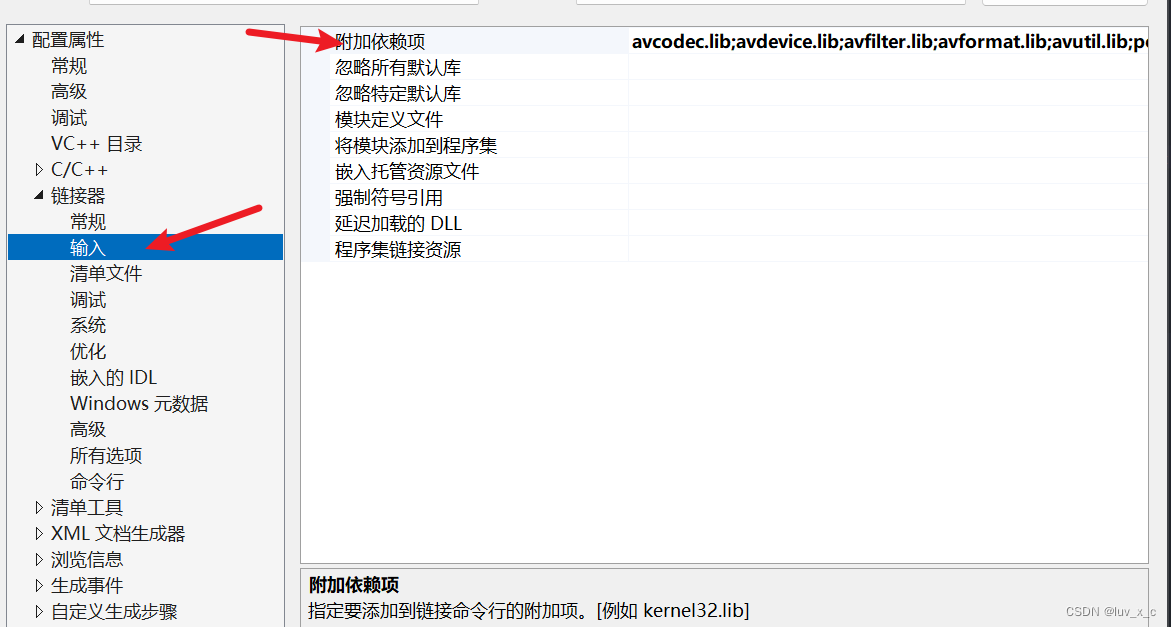
其实就是生成的lib文件名字都加进去
avcodec.lib
avdevice.lib
avfilter.lib
avformat.lib
avutil.lib
postproc.lib
swscale.lib
swresample.lib
然后点击确定因为我新建的是cpp文件所以要用extern添加头文件
extern "C" {
#include "libavcodec/avcodec.h"
#include <libavformat/avformat.h>
}
然后用这两行代码测试一下
cout << avcodec_configuration() << endl;
cout << "FFmpeg 版本 " << av_version_info() << endl;

运行结果出现我们的配置情况和版本信息大功告成
| 阿里云国内75折 回扣 微信号:monov8 |
| 阿里云国际,腾讯云国际,低至75折。AWS 93折 免费开户实名账号 代冲值 优惠多多 微信号:monov8 飞机:@monov6 |