

Android 内容提供者和内容观察者:数据共享和实时更新的完美组合
| 阿里云国内75折 回扣 微信号:monov8 |
| 阿里云国际,腾讯云国际,低至75折。AWS 93折 免费开户实名账号 代冲值 优惠多多 微信号:monov8 飞机:@monov6 |
任务要求
- 一个作为ContentProvider提供联系人数据
- 另一个作为Observer监听联系人数据的变化
1、创建ContactProvider项目
2、在ContactProvider项目中用Sqlite数据库实现联系人的读写功能
3、在ContactProvider项目中通过ContentProvider提供联系人数据
4、创建ContactObserver项目
5、在ContactObserver项目中注册ContentObserver监听联系人数据库的变化。
当创建一个 Android 联系人应用包括 ContactProvider 项目和 ContactObserver 项目你需要实现增删改查方法以及两个页面的布局文件。以下是更详细的步骤
步骤 1: 创建 ContactProvider 项目
-
创建一个新的 Android 项目命名为 ContactProvider。
-
在 ContactProvider 项目中创建一个名为 ContactContract 的 Java 类用于定义数据库表结构和内容提供者的 URI。
package com.leo.contactprovider;

import android.net.Uri;
import android.provider.BaseColumns;

public class ContactContract {
    public static final String AUTHORITY = "com.leo.contactprovider";
    public static final Uri BASE_CONTENT_URI = Uri.parse("content://" + AUTHORITY);

    public static final String PATH_CONTACTS = "contacts";

    public static final class ContactEntry implements BaseColumns {
        public static final Uri CONTENT_URI = BASE_CONTENT_URI.buildUpon().appendPath(PATH_CONTACTS).build();

        public static final String TABLE_NAME = "contacts";
        public static final String COLUMN_NAME = "name";
        public static final String COLUMN_PHONE = "phone";
    }
}}
- 创建一个名为 ContactDbHelper 的数据库帮助类用于创建和管理联系人数据库。
package com.example.contactprovider;
package com.leo.contactprovider;

import android.content.Context;
import android.database.sqlite.SQLiteDatabase;
import android.database.sqlite.SQLiteOpenHelper;

public class ContactDbHelper extends SQLiteOpenHelper {
    private static final String DATABASE_NAME = "contacts.db";
    private static final int DATABASE_VERSION = 1;

    public ContactDbHelper(Context context) {
        super(context, DATABASE_NAME, null, DATABASE_VERSION);
    }

    @Override
    public void onCreate(SQLiteDatabase db) {
        final String SQL_CREATE_CONTACTS_TABLE = "CREATE TABLE " +
                ContactContract.ContactEntry.TABLE_NAME + " (" +
                ContactContract.ContactEntry._ID + " INTEGER PRIMARY KEY AUTOINCREMENT, " +
                ContactContract.ContactEntry.COLUMN_NAME + " TEXT NOT NULL, " +
                ContactContract.ContactEntry.COLUMN_PHONE + " TEXT NOT NULL" +
                ");";

        db.execSQL(SQL_CREATE_CONTACTS_TABLE);
    }

    @Override
    public void onUpgrade(SQLiteDatabase db, int oldVersion, int newVersion) {
        db.execSQL("DROP TABLE IF EXISTS " + ContactContract.ContactEntry.TABLE_NAME);
        onCreate(db);
    }
}
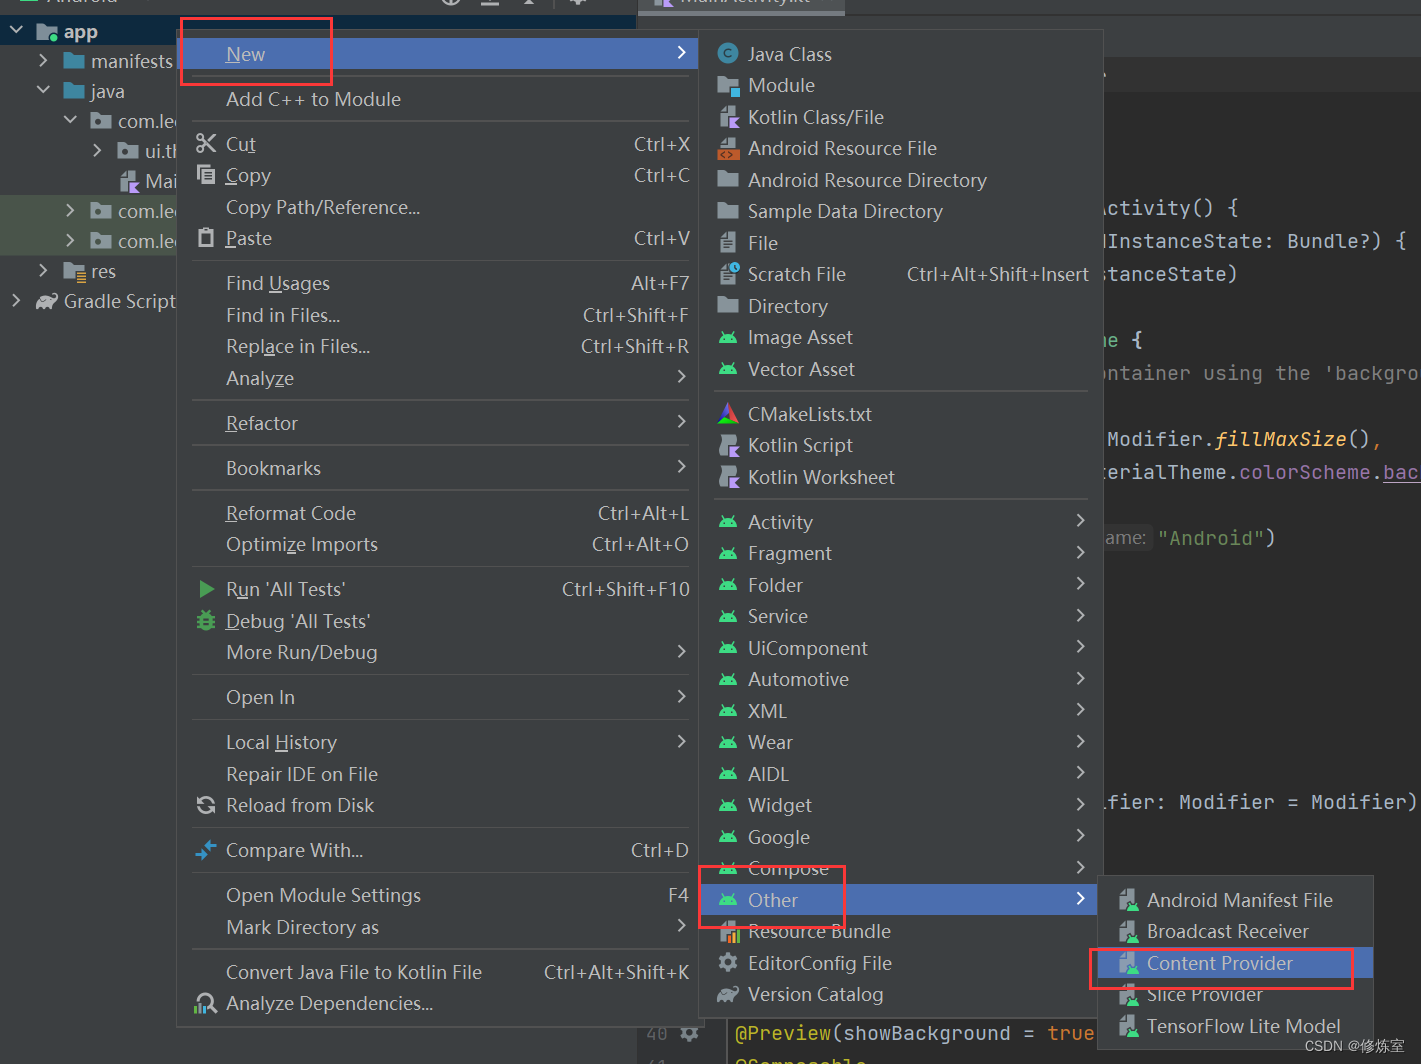
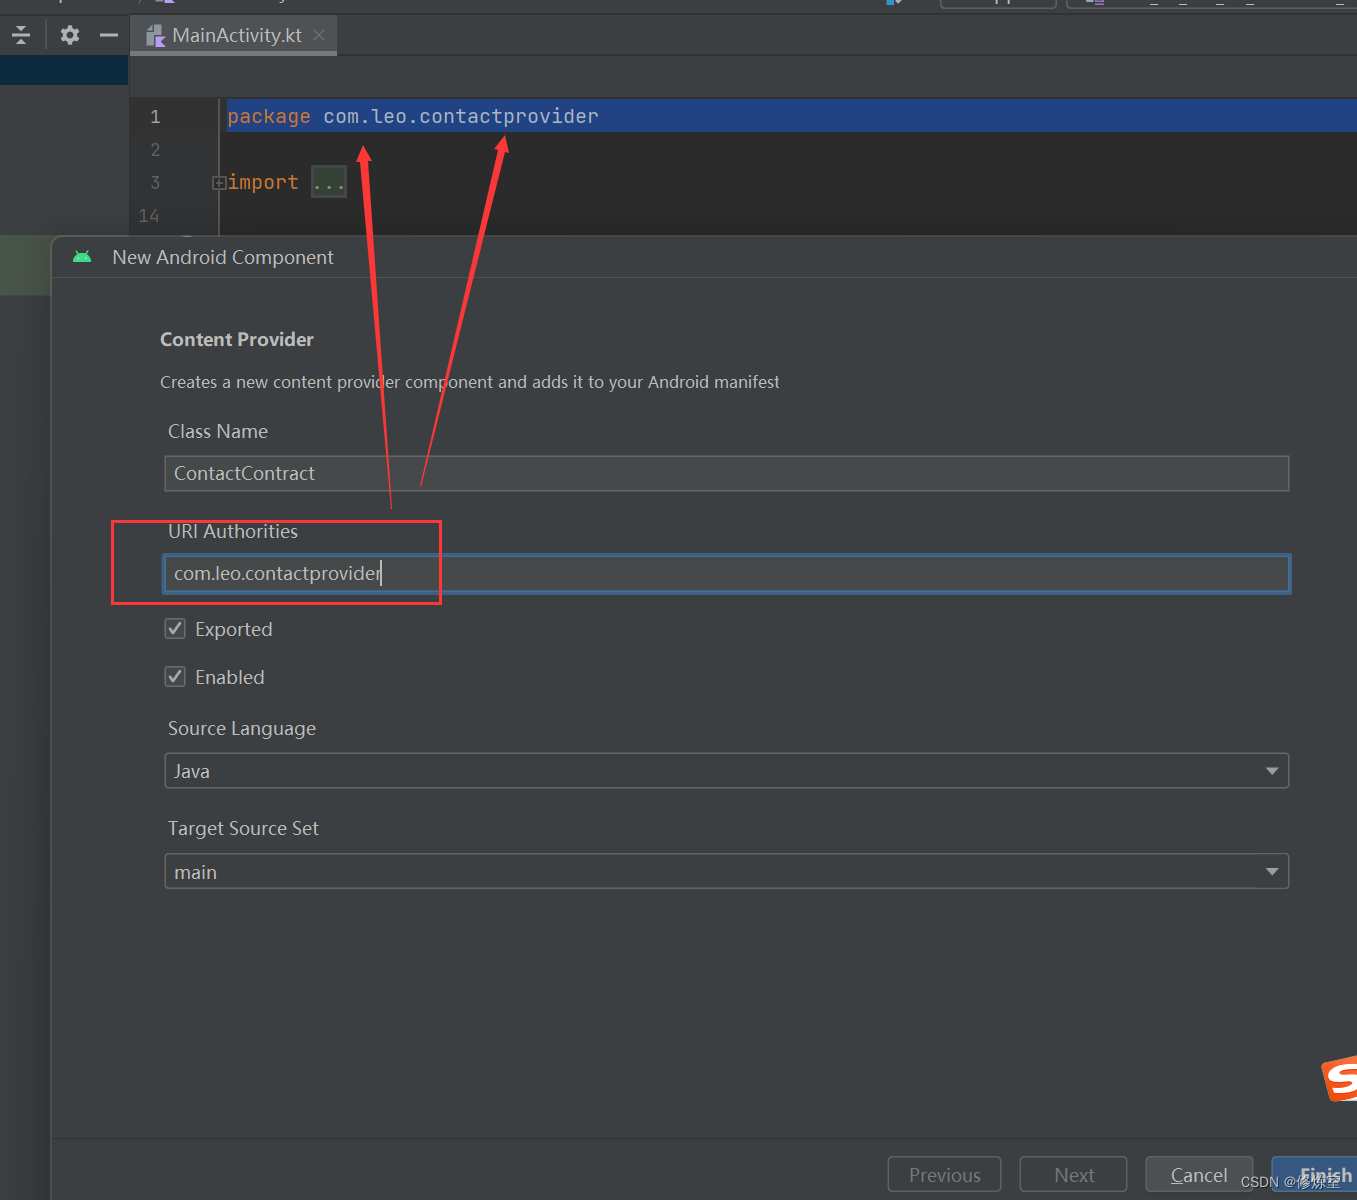
- 创建一个名为 ContactProvider 的内容提供者类实现联系人数据的增删改查功能。
“New” —> “Other” —> “Cotent Provider”
package com.leo.contactprovider;

import static com.leo.contactprovider.ContactContract.AUTHORITY;

import android.content.ContentProvider;
import android.content.ContentValues;
import android.content.UriMatcher;
import android.database.Cursor;
import android.database.sqlite.SQLiteDatabase;
import android.net.Uri;

import androidx.annotation.NonNull;
import androidx.annotation.Nullable;

public class ContactProvider extends ContentProvider {
    private static final UriMatcher uriMatcher = new UriMatcher(UriMatcher.NO_MATCH);
    // Define integer constants for the URIs
    private static final int CONTACTS = 100;
    private static final int CONTACT_ID = 101;

    static {
        uriMatcher.addURI(AUTHORITY, "contacts", CONTACTS);
        uriMatcher.addURI(AUTHORITY, "contacts/#", CONTACT_ID);
    }
    private ContactDbHelper dbHelper;

    @Override
    public boolean onCreate() {
        dbHelper = new ContactDbHelper(getContext());
        return true;
    }

    // 实现数据的增删改查方法
    @Override
    public Uri insert(Uri uri, ContentValues values) {
        SQLiteDatabase db = dbHelper.getWritableDatabase();
        long id = db.insert(ContactContract.ContactEntry.TABLE_NAME, null, values);
        if (id > 0) {
            getContext().getContentResolver().notifyChange(uri, null);
            return ContactContract.ContactEntry.CONTENT_URI.buildUpon().appendPath(String.valueOf(id)).build();
        }
        return null;
    }

    @Override
    public int delete(Uri uri, String selection, String[] selectionArgs) {
        SQLiteDatabase db = dbHelper.getWritableDatabase();
        int rowsDeleted;

        switch (uriMatcher.match(uri)) {
            case CONTACTS:
                rowsDeleted = db.delete(ContactContract.ContactEntry.TABLE_NAME, selection, selectionArgs);
                break;
            case CONTACT_ID:
                String contactId = uri.getLastPathSegment();
                rowsDeleted = db.delete(ContactContract.ContactEntry.TABLE_NAME,
                        ContactContract.ContactEntry._ID + "=?", new String[]{contactId});
                break;
            default:
                throw new IllegalArgumentException("Unknown URI: " + uri);
        }

        if (rowsDeleted > 0) {
            getContext().getContentResolver().notifyChange(uri, null);
        }
        return rowsDeleted;
    }

    @Override
    public int update(Uri uri, ContentValues values, String selection, String[] selectionArgs) {
        SQLiteDatabase db = dbHelper.getWritableDatabase();
        int rowsUpdated;

        switch (uriMatcher.match(uri)) {
            case CONTACTS:
                rowsUpdated = db.update(ContactContract.ContactEntry.TABLE_NAME, values, selection, selectionArgs);
                break;
            case CONTACT_ID:
                String contactId = uri.getLastPathSegment();
                rowsUpdated = db.update(ContactContract.ContactEntry.TABLE_NAME, values,
                        ContactContract.ContactEntry._ID + "=?", new String[]{contactId});
                break;
            default:
                throw new IllegalArgumentException("Unknown URI: " + uri);
        }

        if (rowsUpdated > 0) {
            getContext().getContentResolver().notifyChange(uri, null);
        }
        return rowsUpdated;
    }

    @Override
    public Cursor query(Uri uri, String[] projection, String selection, String[] selectionArgs, String sortOrder) {
        SQLiteDatabase db = dbHelper.getReadableDatabase();
        Cursor cursor;

        switch (uriMatcher.match(uri)) {
            case CONTACTS:
                cursor = db.query(ContactContract.ContactEntry.TABLE_NAME, projection, selection, selectionArgs, null, null, sortOrder);
                break;
            case CONTACT_ID:
                String contactId = uri.getLastPathSegment();
                cursor = db.query(ContactContract.ContactEntry.TABLE_NAME, projection,
                        ContactContract.ContactEntry._ID + "=?", new String[]{contactId}, null, null, sortOrder);
                break;
            default:
                throw new IllegalArgumentException("Unknown URI: " + uri);
        }

        // Set notification URI on the cursor
        cursor.setNotificationUri(getContext().getContentResolver(), uri); // 添加这行代码

        return cursor;
    }


    @Nullable
    @Override
    public String getType(@NonNull Uri uri) {
        return null;
    }

    // ...
}
-
UriMatcher:
UriMatcher用于匹配传入的URI以确定执行哪种操作例如查询、插入、删除或更新。你的代码使用静态初始化块初始化了uriMatcher并为两种不同类型的URI“contacts” 和 “contacts/#”分配了常量整数。 -
onCreate方法: 这是内容提供者的初始化方法。在这里你初始化了数据库帮助类
ContactDbHelper以及将其与内容提供者关联。内容提供者的初始化是在应用启动时完成的。 -
insert方法: 这是用于插入数据的方法。当应用通过内容提供者插入新数据时
insert方法会打开数据库执行插入操作并使用notifyChange通知任何对数据感兴趣的内容观察者。 -
delete方法: 此方法用于删除数据。它会检查URI然后根据URI的类型执行删除操作。如果成功删除了一些行它会使用
notifyChange通知内容观察者。 -
update方法: 用于更新数据。与
delete方法类似它检查URI执行相应的更新操作并使用notifyChange通知内容观察者。 -
query方法: 用于查询数据。这是内容提供者最常见的方法用于检索数据。它根据传入的URI执行查询然后使用
setNotificationUri通知关联的内容观察者。 -
setNotificationUri: 此方法将查询结果与特定URI关联起来以便在数据更改时通知观察者。
这段代码涵盖了内容提供者的核心功能包括处理插入、删除、更新和查询操作以及在这些操作完成后通知相关内容观察者。内容提供者允许应用之间共享数据并通过内容观察者模式实现实时数据更新。
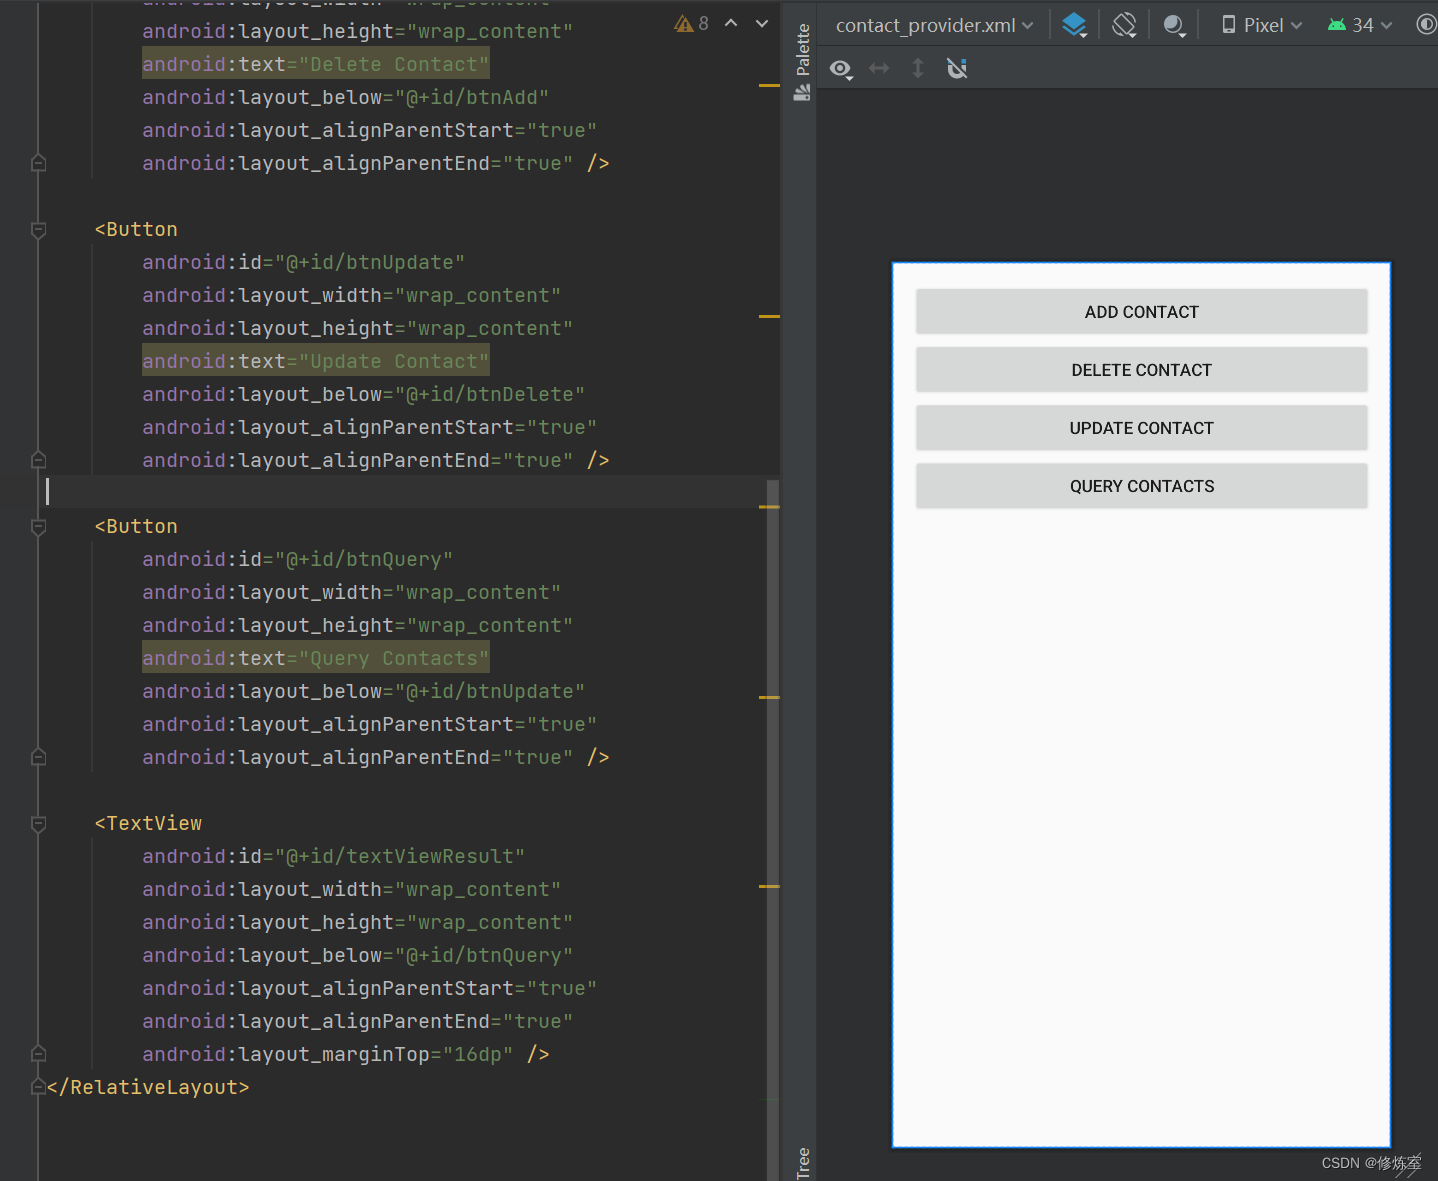
- 创建布局文件-
contact_provider

<?xml version="1.0" encoding="utf-8"?>
<RelativeLayout xmlns:android="http://schemas.android.com/apk/res/android"
    xmlns:app="http://schemas.android.com/apk/res-auto"
    xmlns:tools="http://schemas.android.com/tools"
    android:layout_width="match_parent"
    android:layout_height="match_parent"
    android:padding="16dp"
    tools:context=".MainActivity">

    <Button
        android:id="@+id/btnAdd"
        android:layout_width="wrap_content"
        android:layout_height="wrap_content"
        android:text="Add Contact"
        android:layout_alignParentTop="true"
        android:layout_alignParentStart="true"
        android:layout_alignParentEnd="true" />

    <Button
        android:id="@+id/btnDelete"
        android:layout_width="wrap_content"
        android:layout_height="wrap_content"
        android:text="Delete Contact"
        android:layout_below="@+id/btnAdd"
        android:layout_alignParentStart="true"
        android:layout_alignParentEnd="true" />

    <Button
        android:id="@+id/btnUpdate"
        android:layout_width="wrap_content"
        android:layout_height="wrap_content"
        android:text="Update Contact"
        android:layout_below="@+id/btnDelete"
        android:layout_alignParentStart="true"
        android:layout_alignParentEnd="true" />

    <Button
        android:id="@+id/btnQuery"
        android:layout_width="wrap_content"
        android:layout_height="wrap_content"
        android:text="Query Contacts"
        android:layout_below="@+id/btnUpdate"
        android:layout_alignParentStart="true"
        android:layout_alignParentEnd="true" />

    <TextView
        android:id="@+id/textViewResult"
        android:layout_width="wrap_content"
        android:layout_height="wrap_content"
        android:layout_below="@+id/btnQuery"
        android:layout_alignParentStart="true"
        android:layout_alignParentEnd="true"
        android:layout_marginTop="16dp"
        android:textSize="20sp"
 />
</RelativeLayout>
实现效果
在 ContactProvider 项目中为每个按钮添加相应的功能。
package com.leo.contactprovider;

import android.content.ContentValues;
import android.database.Cursor;
import android.net.Uri;
import android.os.Bundle;
import android.view.View;
import android.widget.Button;
import android.widget.TextView;

import androidx.appcompat.app.AppCompatActivity;

public class MainActivity extends AppCompatActivity {
    private TextView textViewResult;

    @Override
    protected void onCreate(Bundle savedInstanceState) {
        super.onCreate(savedInstanceState);
        setContentView(R.layout.contact_provider);

        textViewResult = findViewById(R.id.textViewResult);

        Button btnAdd = findViewById(R.id.btnAdd);
        Button btnDelete = findViewById(R.id.btnDelete);
        Button btnUpdate = findViewById(R.id.btnUpdate);
        Button btnQuery = findViewById(R.id.btnQuery);

        btnAdd.setOnClickListener(new View.OnClickListener() {
            @Override
            public void onClick(View view) {
                // 添加联系人示例
                ContentValues values = new ContentValues();
                values.put(ContactContract.ContactEntry.COLUMN_NAME, "John Doe");
                values.put(ContactContract.ContactEntry.COLUMN_PHONE, "123-456-7890");
                Uri insertUri = getContentResolver().insert(ContactContract.ContactEntry.CONTENT_URI, values);
                textViewResult.setText("Contact added with URI: " + insertUri.toString());
            }
        });

        btnDelete.setOnClickListener(new View.OnClickListener() {
            @Override
            public void onClick(View view) {
                // 删除联系人示例
                String selection = ContactContract.ContactEntry.COLUMN_NAME + " = ?";
                String[] selectionArgs = {"John Doe"};
                int deletedRows = getContentResolver().delete(ContactContract.ContactEntry.CONTENT_URI, selection, selectionArgs);
                textViewResult.setText("Deleted " + deletedRows + " contacts.");
            }
        });

        btnUpdate.setOnClickListener(new View.OnClickListener() {
            @Override
            public void onClick(View view) {
                // 更新联系人示例
                ContentValues values = new ContentValues();
                values.put(ContactContract.ContactEntry.COLUMN_PHONE, "987-654-3210");
                String selection = ContactContract.ContactEntry.COLUMN_NAME + " = ?";
                String[] selectionArgs = {"John Doe"};
                int updatedRows = getContentResolver().update(ContactContract.ContactEntry.CONTENT_URI, values, selection, selectionArgs);
                textViewResult.setText("Updated " + updatedRows + " contacts.");
            }
        });

        btnQuery.setOnClickListener(new View.OnClickListener() {
            @Override
            public void onClick(View view) {
                // 查询联系人示例
                String[] projection = {
                        ContactContract.ContactEntry._ID,
                        ContactContract.ContactEntry.COLUMN_NAME,
                        ContactContract.ContactEntry.COLUMN_PHONE
                };
                Cursor cursor = getContentResolver().query(ContactContract.ContactEntry.CONTENT_URI, projection, null, null, null);

                StringBuilder result = new StringBuilder();
                while (cursor.moveToNext()) {
                    String name = cursor.getString(cursor.getColumnIndexOrThrow(ContactContract.ContactEntry.COLUMN_NAME));
                    String phone = cursor.getString(cursor.getColumnIndexOrThrow(ContactContract.ContactEntry.COLUMN_PHONE));
                    result.append("Name: ").append(name).append(", Phone: ").append(phone).append("\n");
                }

                cursor.close();
                textViewResult.setText(result.toString());
            }
        });
    }
}
整体实现效果
步骤 2: 创建 ContactObserver 项目
-
创建一个新的 Android 项目命名为 ContactObserver。
-
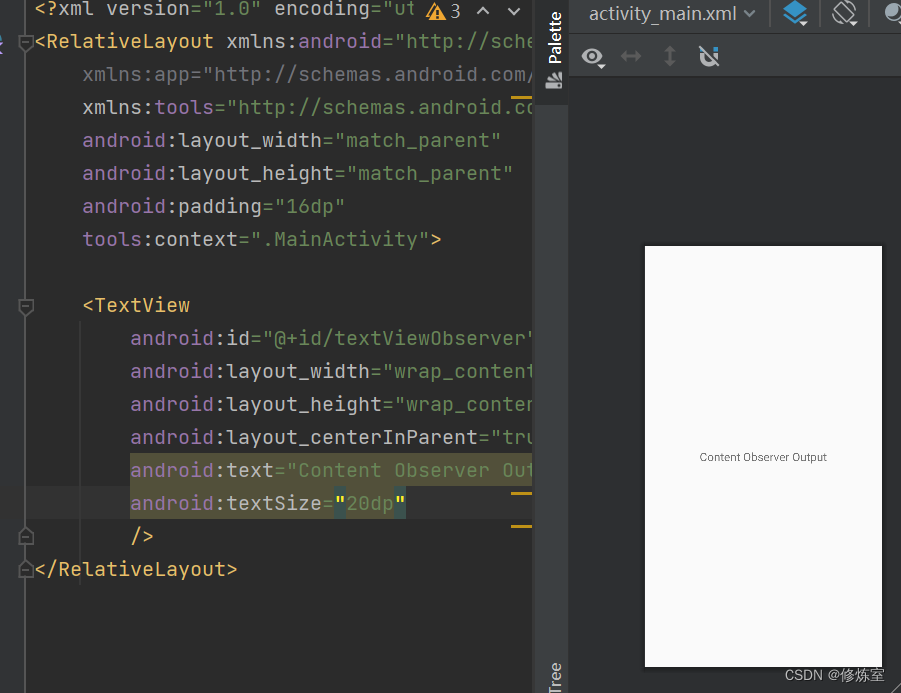
创建
activity_main.xml布局文件用于显示监听到的内容。
<?xml version="1.0" encoding="utf-8"?>
<RelativeLayout xmlns:android="http://schemas.android.com/apk/res/android"
    xmlns:app="http://schemas.android.com/apk/res-auto"
    xmlns:tools="http://schemas.android.com/tools"
    android:layout_width="match_parent"
    android:layout_height="match_parent"
    android:padding="16dp"
    tools:context=".MainActivity">

    <TextView
        android:id="@+id/textViewObserver"
        android:layout_width="wrap_content"
        android:layout_height="wrap_content"
        android:layout_centerInParent="true"
        android:text="Content Observer Output" />
</RelativeLayout>
- 创建
MainActivity.java用于显示监听到的内容。
package com.leo.contactobserver;

import android.database.ContentObserver;
import android.net.Uri;
import android.os.Bundle;
import android.os.Handler;
import android.util.Log;
import android.widget.TextView;

import androidx.appcompat.app.AppCompatActivity;

public class ContactObserverActivity extends AppCompatActivity {
    private TextView textViewObserver;
    private ContentObserver contentObserver;

    @Override
    protected void onCreate(Bundle savedInstanceState) {
        super.onCreate(savedInstanceState);
        setContentView(R.layout.activity_main);

        textViewObserver = findViewById(R.id.textViewObserver);

        // 创建 ContentObserver 实例
        contentObserver = new ContentObserver(new Handler()) {
            @Override
            public void onChange(boolean selfChange, Uri uri) {
                super.onChange(selfChange, uri);
                // 处理内容变化时的逻辑
                Log.i("Content Changed: ", "URI: " + uri.toString());
                Log.i("Content Changed: ", "Self Change: " + selfChange);

                // 你可以在这里更新 textViewObserver 中的内容
                textViewObserver.setText("Content Changed: " + uri.toString());
            }

        };
    }

    @Override
    protected void onResume() {
        super.onResume();
        // 注册 ContentObserver 监听内容变化
        getContentResolver().registerContentObserver(
                Uri.parse("content://com.leo.contactprovider/contacts"),
                true, contentObserver);
    }

    @Override
    protected void onDestroy() {
        super.onDestroy();
        // 在活动销毁时取消注册 ContentObserver
        getContentResolver().unregisterContentObserver(contentObserver);
    }

}
下面是关键部分的解释和强调
-
ContentObserver
ContentObserver是一个用于监听特定URI上数据变化的类。在代码中我们创建了一个ContentObserver的实例用于监听特定内容提供者的数据变化。 -
onChange方法
onChange方法是ContentObserver的回调方法当所监听的URI的数据发生变化时被调用。在这个方法内你可以处理数据变化的逻辑。在代码中通过Log记录了URI的变化以及selfChange的值。 -
onResume方法在
onResume方法中注册了ContentObserver以监听特定URI上的内容变化。这样只有当活动处于前台时ContentObserver才会生效。 -
onDestroy方法在
onDestroy方法中取消了ContentObserver的注册。因为在活动被销毁时不再需要监听内容变化。通过取消注册可以避免潜在的内存泄漏。
工作原理
- 当内容提供者的数据发生变化时内容提供者内部会调用
ContentResolver的notifyChange方法并通知所有注册了监听的ContentObserver。 ContentObserver会触发onChange回调方法其中包括了变化的URI和一个标志指示是否是自身发起的变化 (selfChange)。- 你可以在
onChange方法中处理数据的变化例如更新UI或记录日志。
- 修改配置文件
添加查询监听的authorities
<?xml version="1.0" encoding="utf-8"?>
<manifest xmlns:android="http://schemas.android.com/apk/res/android"
    xmlns:tools="http://schemas.android.com/tools">

    <application
        android:allowBackup="true"
        android:dataExtractionRules="@xml/data_extraction_rules"
        android:fullBackupContent="@xml/backup_rules"
        android:icon="@mipmap/ic_launcher"
        android:label="@string/app_name"
        android:roundIcon="@mipmap/ic_launcher_round"
        android:supportsRtl="true"
        android:theme="@style/Theme.AppCompat.DayNight"
        tools:targetApi="31">

        <activity
            android:name=".ContactObserverActivity"
            android:exported="true"
            android:label="@string/app_name"
            android:theme="@style/Theme.AppCompat.DayNight">
            <intent-filter>
                <action android:name="android.intent.action.MAIN" />

                <category android:name="android.intent.category.LAUNCHER" />
            </intent-filter>
        </activity>
    </application>

    <queries>
        <provider android:authorities="com.leo.contactprovider"
            android:exported="true" />
    </queries>


</manifest>
确保你的 ContactObserverService 正确注册和注销 ContentObserver以及广播消息的发送和接收。
实现效果
provider对数据进行修改observe监听到数据修改
| 阿里云国内75折 回扣 微信号:monov8 |
| 阿里云国际,腾讯云国际,低至75折。AWS 93折 免费开户实名账号 代冲值 优惠多多 微信号:monov8 飞机:@monov6 |