

SpringBoot+Redis+@Cacheable实现缓存功能
| 阿里云国内75折 回扣 微信号:monov8 |
| 阿里云国际,腾讯云国际,低至75折。AWS 93折 免费开户实名账号 代冲值 优惠多多 微信号:monov8 飞机:@monov6 |
SpringBoot+Redis+@Cacheable实现缓存功能
一、pom文件加入Redis与cache的依赖和yml配置
<dependency>
            <groupId>org.springframework.boot</groupId>
            <artifactId>spring-boot-starter-cache</artifactId>
        </dependency>

        <!-- 如果需要集成redis,需要再加入redis包 -->
        <dependency>
            <groupId>org.springframework.boot</groupId>
            <artifactId>spring-boot-starter-data-redis</artifactId>
        </dependency>
        <!-- spring2.X集成redis所需common-pool2-->
        <dependency>
            <groupId>org.apache.commons</groupId>
            <artifactId>commons-pool2</artifactId>
        </dependency>

        <!-- 数据库驱动 -->
        <!-- 如果是springboot项目可以不用自己指定版本号,spring boot给我们定义了 -->
        <dependency>
            <groupId>mysql</groupId>
            <artifactId>mysql-connector-java</artifactId>
           <!-- <version>5.1.47</version> -->
        </dependency>
        <!-- mybatis-plus -->
        <dependency>
            <groupId>com.baomidou</groupId>
            <artifactId>mybatis-plus-boot-starter</artifactId>
            <version>3.1.1</version>
        </dependency>
        <!--spring-boot起步依赖-->
        <dependency>
            <groupId>org.springframework.boot</groupId>
            <artifactId>spring-boot-starter</artifactId>
        </dependency>
        <!-- lombok -->
        <dependency>
            <groupId>org.projectlombok</groupId>
            <artifactId>lombok</artifactId>
        </dependency>
server:
  port: 9003
spring:
  datasource:
    username: root
    password: root1234
    url: jdbc:mysql://localhost:3306/test2?useUnicode=true&characterEncoding=utf-8&useSSL=false&serverTimezone=UTC
    driver-class-name: com.mysql.jdbc.Driver
  redis:
    host: 127.0.0.1
    port: 6379
  cache:
    type: redis
    redis:
      # 缓存超时时间毫秒ms
      time-to-live: 60000
      # 是否缓存空值
      cache-null-values: true
# mybatis-plu配置
mybatis-plus:
  configuration:
    # map-underscore-to-camel-case为true可以将数据库的带下划线“”给去掉然后映射到实体类的属性上去。
    # sql执行的日志(包含sql操作的参数日志)
    log-impl: org.apache.ibatis.logging.stdout.StdOutImpl
  #指定xml映射位置
  mapper-locations: classpath*:mapper/*.xml
  #指是否对MyBatis xml 配置文件进行存在检查/默认值为false
  check-config-location: true
  #设置别名包扫描路径通过该属性可以给包中的类注册别名,多个包以逗号分隔
  type-aliases-package: com.it.pojo
二、EnableCaching允许使用注解进行缓存
/**
 * 主启动类
 * EnableCaching允许使用注解进行缓存
 * @author shaohua
 */
@EnableCaching
@SpringBootApplication
@MapperScan(basePackages = "com.it.mapper")
public class Application {
    public static void main(String[] args) {
        SpringApplication.run(Application.class, args);
    }
}
三、Redis配置
1.配置RedisConfig及设置过期时间
@Configuration
public class RedisConfig {
    /**
     * 注册自定义RedisCacheConfiguration组件解决@Cacheable @Cacheput注解在向Redis中保存的Value是java序列化乱码的问题
     */
    @Bean
    public RedisCacheConfiguration redisCacheConfiguration() {
        RedisCacheConfiguration config = RedisCacheConfiguration.defaultCacheConfig();
        config.entryTtl(Duration.ofSeconds(30));
        config=config.serializeValuesWith(RedisSerializationContext.SerializationPair.fromSerializer(RedisSerializer.json()));
        return config;
    }
}
2.key生成策略
对于@Cacheable注解有两个参数用于组装缓存的key
1cacheNames/value: 类似于缓存前缀
2key: SpEL表达式通常根据传参来生成最终的缓存key
默认的redisKey = cacheNames::key (注意中间的两个冒号)
/**
 * 没有指定key时采用默认策略 {@link org.springframework.cache.interceptor.SimpleKeyGenerator } 生成key
 * <p>
 * 对应的key为: k1::id
 * value --> 等同于 cacheNames
 * @param id
 * @return
 */
@Cacheable(value = "k1")
public String key1(int id) {
    return "defaultKey:" + id;
}
缓存key默认采用SimpleKeyGenerator来生成比如上面的调用如果id=1 那么对应的缓存key为 k1::1。
如果没有参数或者多个参数呢
/**
 * redis_key :  k2::SimpleKey[]
 *
 * @return
 */
@Cacheable(value = "k0")
public String key0() {
    return "key0";
}

/**
 * redis_key :  k2::SimpleKey[id,id2]
 *
 * @param id
 * @param id2
 * @return
 */
@Cacheable(value = "k2")
public String key2(Integer id, Integer id2) {
    return "key1" + id + "_" + id2;
}


@Cacheable(value = "k3")
public String key3(Map map) {
    return "key3" + map;
}
然后写一个测试case
@RestController
@RequestMapping(path = "extend")
public class ExtendRest {
    @Autowired
    private RedisTemplate redisTemplate;

    @Autowired
    private ExtendDemo extendDemo;

    @GetMapping(path = "default")
    public Map<String, Object> key(int id) {
        Map<String, Object> res = new HashMap<>();
        res.put("key0", extendDemo.key0());
        res.put("key1", extendDemo.key1(id));
        res.put("key2", extendDemo.key2(id, id));
        res.put("key3", extendDemo.key3(res));

        // 这里将缓存key都捞出来
        Set<String> keys = (Set<String>) redisTemplate.execute((RedisCallback<Set<String>>) connection -> {
            Set<byte[]> sets = connection.keys("k*".getBytes());
            Set<String> ans = new HashSet<>();
            for (byte[] b : sets) {
                ans.add(new String(b));
            }
            return ans;
        });

        res.put("keys", keys);
        return res;
    }
}
访问之后输出结果如下
{
    "key1": "defaultKey:1",
    "key2": "key11_1",
    "key0": "key0",
    "key3": "key3{key1=defaultKey:1, key2=key11_1, key0=key0}",
    "keys": [
        "k2::SimpleKey [1,1]",
        "k1::1",
        "k3::{key1=defaultKey:1, key2=key11_1, key0=key0}",
        "k0::SimpleKey []"
    ]
}
结论
单参数cacheNames::arg
无参数: cacheNames::SimpleKey [], 后面使用 SimpleKey []来补齐
多参数: cacheNames::SimpleKey [arg1, arg2…]
非基础对象cacheNames::obj.toString()
3.自定义key生成策略
如果希望使用自定义的key生成策略只需继承KeyGenerator并声明为一个bean。
/**
 * 自定义key生成策略
 *
 * @author hua
 */
@Component
public class SelfKeyGenerate implements KeyGenerator {
    @Override
    public Object generate(Object target, Method method, Object... params) {
        return target.getClass().getSimpleName() + "#" + method.getName() + "(" + JSON.toJSONString(params) + ")";
    }
}
然后在使用的地方利用注解中的keyGenerator来指定key生成策略。
 /**
     * 优先从redis缓存中读取发现控制台并未执行sql。如果缓存过期则重新查数据重新写入缓存
     * 自定义key,注意这里是keyGenerator= 而不是key=
     */
    @Override
    @Cacheable(value = "user", keyGenerator = "selfKeyGenerate")
    public User findUserSelfKey(Integer userId) {
        User user = this.getById(userId);
        return user;
    }
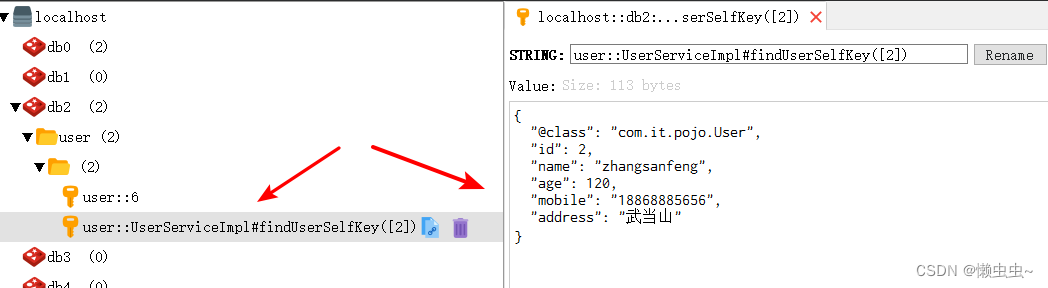
测试结果第一次查询缓存中没有则从数据库中查询
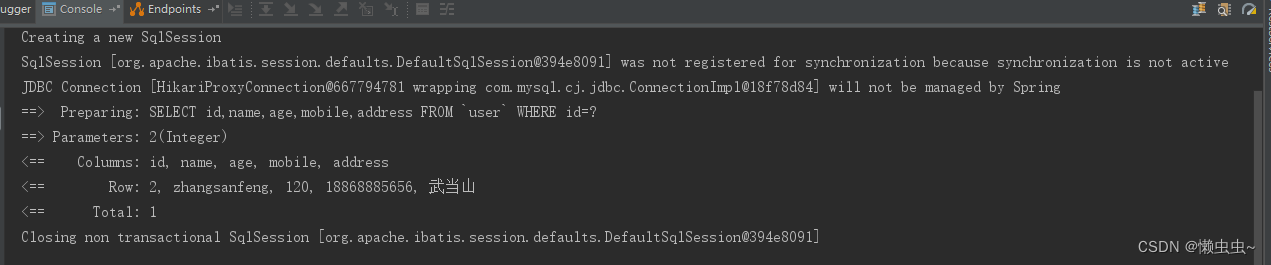
将查询的结果存入redis中其中key已经是自定义的了
四、业务逻辑
1.UserController
/**
 * 用户控制层
 *
 * @author hua
 */
@RestController
@RequestMapping(value = "/user")
public class UserController {
    private final UserService userService;

    public UserController (UserService userService) {
        this.userService = userService;
    }

    @PostMapping("/saveUser")
    public User saveUser(@RequestBody User user) {
        return userService.insert(user);
    }

    @GetMapping(value = "/{userId}")
    public ResponseEntity<User> getUser(@PathVariable Integer userId) {
        User user = userService.findUser(userId);
        HttpStatus status = user == null ? HttpStatus.NOT_FOUND: HttpStatus.OK;
        return new ResponseEntity<>(user, status);
    }

    @DeleteMapping(value = "/{userId}")
    public ResponseEntity deleteUser(@PathVariable Integer userId) {
        userService.delete(userId);
        return new ResponseEntity<>(HttpStatus.NO_CONTENT);
    }
}
2.UserService
**
 * UserService
 *
 * @author hua
 */
public interface UserService extends IService<User>{

    /**
     * save use, put redis cache
     * @param user user data
     * @return saved user data
     */
     User insert(User user);

    /**
     * find user by id,redis cacheable
     * @param userId user id
     * @return if exist return the user, else return null
     */
     User findUser(Integer userId);

    /**
     * delete user by id, and remove redis cache
     * @param userId user id
     */
     void delete(Integer userId);
}
3.UserServiceImpl
/**
 * 实现类
 *
 * @author hua
 */
@Service
public class UserServiceImpl extends ServiceImpl<UserMapper, User> implements UserService {

    @Autowired
    private RedisTemplate redisTemplate;

    /**
     * 存储数据库的同时存储到缓存
     */
    @Override
    @CachePut(value = "user", key = "#result.id", unless = "#result eq null")
    public User insert(User user) {
        this.save(user);
        return user;
    }

    /**
     * 优先从redis缓存中读取发现控制台并未执行sql。如果缓存过期则重新查数据重新写入缓存
     */
    @Override
    @Cacheable(value = "user", key = "#userId", unless = "#result eq null")
    public User findUser(Integer userId) {
        User user = this.getById(userId);
        return user;
    }

    /**
     * 删除数据时同样清除缓存
     */
    @Override
    @CacheEvict(value = "user", key = "#userId")
    public void delete(Integer userId) {
        this.removeById(userId);
    }
}
4.AdminServiceImpl
/**
 * 用户实现类
 *
 * @author hua
 */
@Service
public class AdminServiceImpl implements AdminService {

    @Autowired
    UserService userService;

    /**
     * 保存String类型的数据,
     */
    @Override
    @CachePut(value = "张三")
    public void insert1() {
    }

    /**
     * 保存对象 形参方式保存
     */
    @Override
    @CachePut(value = "user", key = "#user.id", unless = "#user eq null")
    public void insert2(User user) {
    }
    // key = "#user.id" 取形参user中的id值, 作为key名称
    // value = "user": 形参user, 作为value值
    // unless = "#user eq null 判断 形参user对象是空的,若unless的结果为true则(方法执行后的功能)不生效若unless的结果为false则(方法执行后的)功能生效。
    // 生效则会将形参user对象以json格式字符串保存到redis

    /**
     * 保存对象 返回值方式保存
     */
    @Override
    @CachePut(value = "user", key = "#result.id", unless = "#result eq null")
    public User insert3() {
        LambdaQueryWrapper<User> wrapper = Wrappers.<User>lambdaQuery();
        wrapper.eq(User::getName,"小花花");
        User user = userService.getOne(wrapper);
        return user;
    }
    // key = "#result.id" 取返回值user中的id值, 作为key名称
    // value = "user": 取返回值user, 作为value值
    // unless = "#result eq null 判断 方法返回值是空的, 若unless的结果为true则(方法执行后的功能)不生效若unless的结果为false则(方法执行后的)功能生效。
    // 生效则会将返回值user对象以json格式字符串保存到redis

    @Override
    @Cacheable(value = CacheTimes.D1, key = "#root.methodName", unless = "#result == null || #result.size() < 1", condition = "#skip != null")
    public List<String> getList(String skip) {
        return Arrays.stream(UUID.randomUUID().toString().split("-")).collect(Collectors.toList());
    }

    /*
        说明@Cacheable注解有三个参数value是必须的还有key和condition。
        第一个参数value指明了缓存将被存到什么地方.上面的代码保证findPersonByName的返回值Person对象将被存储在"employee"中。
        第二个参数key指定key,任何存储在缓存中的数据为了高速访问都需要一个key。Spring默认使用被@Cacheable注解的方法的签名来作为key, 当然你可以重写key, 自定义key可以使用SpEL表达式。
        在findEmployee()的注解中"#name"是一个SpEL表达式他将使用findPersonByName()方法中的name参数作为key。
        第三个参数condition(可选)
        功能1缓存的条件, 决定是否缓存。@Cacheable的最后一个参数是condition可选同样的也是引用一个SpEL表达式。但是这个参数将指明方法的返回结果是否被缓存。
        功能2condition则判定了是否走换成逻辑。如果age<25即condition是false就不去读取缓存而是直接执行当前目标方法返回结果。
        上面的例子中只有年龄小于25的时候才被缓存
     */
    @Cacheable(value = "employee", key = "#name" ,condition = "#age < 25")
    public User findEmployee(String name, int age) {
        return new User();
    }
}
5.@Cacheable和@CachePut区别
相同点
都是Spring的缓存注解。
不同点
@Cacheable只会执行一次当标记在一个方法上时表示该方法是支持缓存的Spring会在其被调用后将其返回值缓存起来以保证下次利用同样的参数来执行该方法时可以直接从缓存中获取结果。
@CachePut标注的方法在执行前不会去检查缓存中是否存在之前执行过的结果而是每次都会执行该方法并将执行结果以键值对的形式存入指定的缓存中。
五、测试
1.执行saveUser方法
利用@CachePut存储数据库的同时存储到缓存
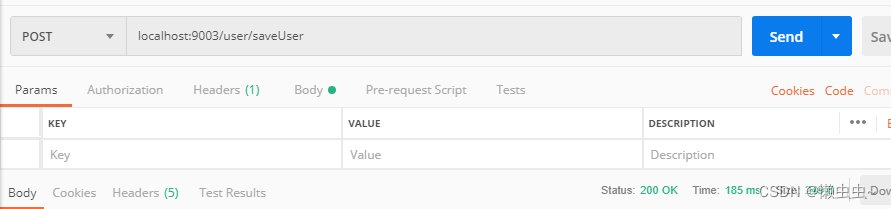
第一次和第二次执行saveUser方法发现控制台打印了SQL语句说明执行了SQL存储到MySQL数据了。

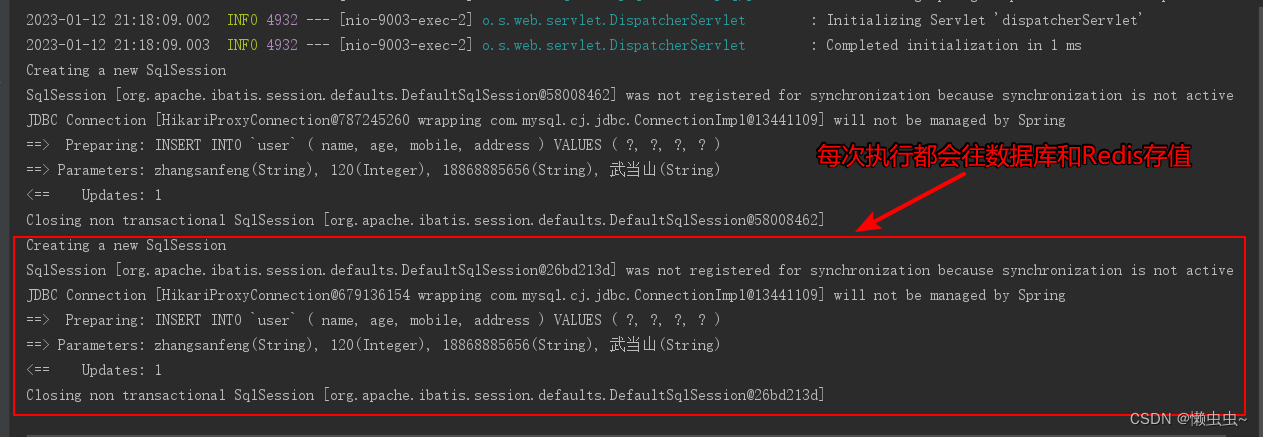
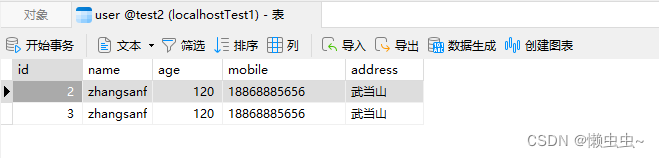
观察MySQL数据存储情况存储了2条数据主键id自增。

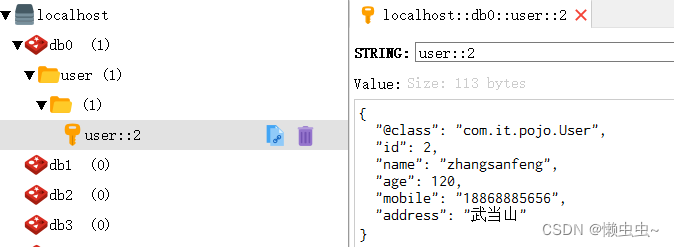
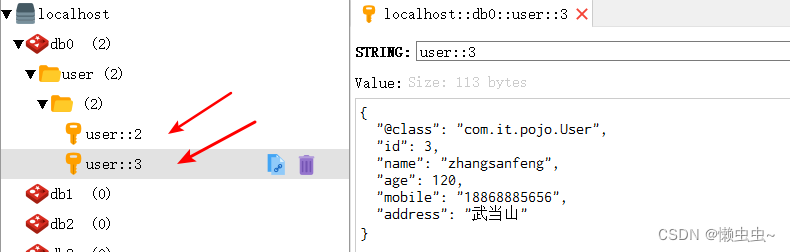
观察Redis数据存储情况存储了2条数据主键id自增。
2.执行getUser方法
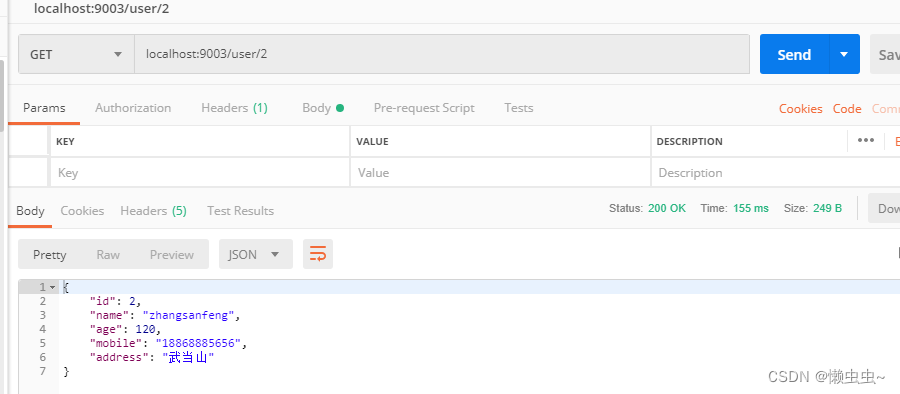
利用@Cacheable优先从redis缓存中读取发现控制台并未执行sql。如果缓存过期则重新查数据重新写入缓存。
发现执行多次控制台均未打印SQL说明均是从Redis读取数据(前提是Redis缓存未过期)。

六、项目目录及源码下载
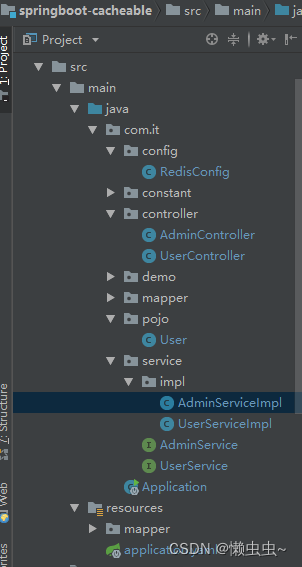
源码下载欢迎Star哦~ springboot-cacheable
参考资料
Spring 缓存的使用
SpringBoot通过@Cacheable注解实现缓存功能
Springboot+redis+@Cacheable实现缓存
SpringBoot2使用@Cacheable注解时Redis中保存的Value为java序列化乱码问题的解决办法及源码分析
@Cacheable和@CachePut区别
Redis系列三 - Spring boot如何使用redis做缓存及缓存注解的用法总结
org.springframework.cache.interceptor.CacheExpressionRootObject- maybe not public or not valid解决方案