

OpenStack(T版)基础环境准备
| 阿里云国内75折 回扣 微信号:monov8 |
| 阿里云国际,腾讯云国际,低至75折。AWS 93折 免费开户实名账号 代冲值 优惠多多 微信号:monov8 飞机:@monov6 |
文章目录
OpenStack(T版)基础环境准备
使用OpenStack T(Train)版搭建
centos硬件安装版本
使用的是Centos7.9.2009镜像 下载地址 阿里云开源镜像站
安装两台centos7服务器
都开启虚拟化
使用最小化安装
compute添加额外的一块硬盘给CinderSwift服务使用
建议做完几步拍个快照(出错的时候易恢复)
controller

compute


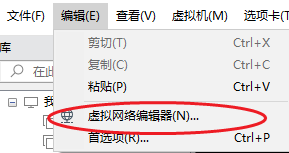
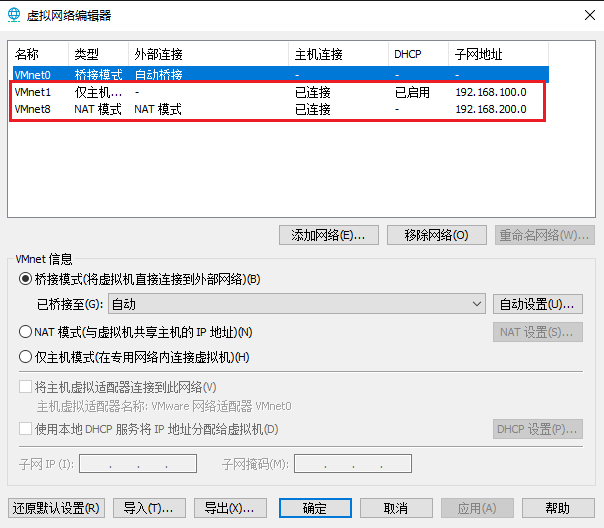
虚拟网络编辑器
开启这两台虚拟机
配置网络
controller
IP192.168.200.10
NETMASK255.255.255.0
GATEWAY192.168.200.2
DNS1=114.114.114.114
compute
IP192.168.200.20
NETMASK255.255.255.0
GATEWAY192.168.200.2
DNS1=114.114.114.114
# 配置两台虚拟机的NAT网卡
vi /etc/sysconfig/network-scripts/ifcfg-ens34
# 添加或修改如下内容
BOOTPROTO=static         # 静态IP地址
IPADDR=192.168.200.10    # IP
PREIFX=24                # 网络位
GATEWAY=192.168.200.2    # 网关(查看虚拟网络编辑器里面配置错会连不上网)
DNS1=114.114.114.114     # DNS
ONBOOT=yes               # 启用这张网卡
# 重启两台虚拟机网络生效配置
systemctl restart network
# ip a 查看是否设置成功两台主机都查看一下
[root@localhost ~]# ip a | grep ens34 |grep inet
inet 192.168.200.10/24 brd 192.168.200.255 scope global noprefixroute ens34
# 试试能否连上网
[root@localhost ~]# ping -c 4 baidu.com
PING baidu.com (110.242.68.66) 56(84) bytes of data.
64 bytes from 110.242.68.66 (110.242.68.66): icmp_seq=1 ttl=128 time=32.9 ms
64 bytes from 110.242.68.66 (110.242.68.66): icmp_seq=2 ttl=128 time=33.4 ms
64 bytes from 110.242.68.66 (110.242.68.66): icmp_seq=3 ttl=128 time=33.3 ms
64 bytes from 110.242.68.66 (110.242.68.66): icmp_seq=4 ttl=128 time=33.3 ms

--- baidu.com ping statistics ---
4 packets transmitted, 4 received, 0% packet loss, time 3001ms
rtt min/avg/max/mdev = 32.927/33.281/33.453/0.276 ms
修改主机名
# 修改完成重新连接
[root@localhost ~]# hostnamectl set-hostname controller;logout
[root@controller ~]#
[root@localhost ~]# hostnamectl set-hostname compute;logout
[root@compute ~]#
主机名映射
[root@controller ~]# vi /etc/hosts
127.0.0.1   localhost localhost.localdomain localhost4 localhost4.localdomain4
::1         localhost localhost.localdomain localhost6 localhost6.localdomain6
# 添加如下两行
192.168.200.10 controller
192.168.200.20 compute
[root@compute ~]# vi /etc/hosts
127.0.0.1   localhost localhost.localdomain localhost4 localhost4.localdomain4
::1         localhost localhost.localdomain localhost6 localhost6.localdomain6
# 添加如下两行
192.168.200.10 controller
192.168.200.20 compute
关闭防火墙和SElinux
[root@controller ~]# sed -i "s/SELINUX=enforcing/SELINUX=disabled/g" /etc/selinux/config && \
> systemctl stop firewalld && systemctl disable firewalld
Removed symlink /etc/systemd/system/multi-user.target.wants/firewalld.service.
Removed symlink /etc/systemd/system/dbus-org.fedoraproject.FirewallD1.service.
[root@controller ~]# setenforce 0
[root@controller ~]# getenforce
Permissive

[root@compute ~]# sed -i "s/SELINUX=enforcing/SELINUX=disabled/g" /etc/selinux/config && \
> systemctl stop firewalld && systemctl disable firewalld
Removed symlink /etc/systemd/system/multi-user.target.wants/firewalld.service.
Removed symlink /etc/systemd/system/dbus-org.fedoraproject.FirewallD1.service.
[root@compute ~]# setenforce 0
[root@compute ~]# getenforce
Permissive
配置时间服务器
controller节点
[root@controller ~]# vi /etc/chrony.conf
# Use public servers from the pool.ntp.org project.
# Please consider joining the pool (http://www.pool.ntp.org/join.html).
# server 0.centos.pool.ntp.org iburst  # 注释掉默认的ntp服务器共4条
# server 1.centos.pool.ntp.org iburst
# server 2.centos.pool.ntp.org iburst
# server 3.centos.pool.ntp.org iburst
server ntp.aliyun.com iburst           # 添加阿里云ntp服务器
...(省略)...
# Allow NTP client access from local network.
allow 192.168.200.0/24            # 开放网段
...(省略)...
# Serve time even if not synchronized to a time source.
#local stratum 10
...(省略)...
[root@controller ~]# systemctl restart chronyd # 重启
[root@controller ~]# chronyc sources   # 显示 chrony NTP 守护程序当前正在使用的时间源
210 Number of sources = 1
MS Name/IP address         Stratum Poll Reach LastRx Last sample
===============================================================================
^* 203.107.6.88                  2   6    77    54  -2772us[-4806us] +/-   25ms
[root@controller ~]# date   # 同步完成
2023年 06月 25日 星期日 14:37:43 CST
compute节点
# Use public servers from the pool.ntp.org project.
# Please consider joining the pool (http://www.pool.ntp.org/join.html).
#server 0.centos.pool.ntp.org iburst
#server 1.centos.pool.ntp.org iburst
#server 2.centos.pool.ntp.org iburst
#server 3.centos.pool.ntp.org iburst
server controller iburst   # 同步controller主机的时间
...(省略)...
[root@compute ~]# systemctl restart chronyd # 重启
[root@compute ~]# chronyc sources           # 显示 chrony NTP 守护程序当前正在使用的时间源
210 Number of sources = 1
MS Name/IP address         Stratum Poll Reach LastRx Last sample
===============================================================================
^* controller                    3   6    17     8  +8121ns[  +35us] +/-   37ms
[root@compute ~]# date
2023年 06月 25日 星期日 14:38:23 CST
安装openstack(T版)包
列出所有包含 “openstack” 字符串的软件包
找到我们要安装的T版然后进行安装
[root@controller ~]# yum list |grep openstack*
centos-release-openstack-queens.noarch      1-2.el7.centos             extras
centos-release-openstack-rocky.noarch       1-1.el7.centos             extras
centos-release-openstack-stein.noarch       1-1.el7.centos             extras
centos-release-openstack-train.noarch       1-1.el7.centos             extras
安装
[root@controller ~]# yum install -y centos-release-openstack-train.noarch
[root@compute ~]# yum install -y centos-release-openstack-train.noarch
安装完成后可以选择升级所有节点上的软件包
[root@controller ~]#yum upgrade -y
[root@compute ~]# yum upgrade -y
安装合适的OpenStack客户端
[root@controller ~]# yum install -y python-openstackclient openstack-selinux
[root@compute ~]# yum install -y python-openstackclient openstack-selinux
安装SQL数据库(controller)
安装
[root@controller ~]# yum install -y mariadb mariadb-server python2-PyMySQL
创建并编辑/etc/my.cnf.d/openstack.cnf文件
创建一个[mysqld]部分并将绑定地址密钥设置为controller节点的管理IP地址以允许其他节点通过管理网络进行访问。设置 MySQL 服务器的默认字符集为 utf8也就是使用 UTF-8 编码来存储和处理所有的字符数据。
[root@controller ~]# vi /etc/my.cnf.d/openstack.cnf
[mysqld]
bind-address = 192.168.200.10

default-storage-engine = innodb
innodb_file_per_table = on
max_connections = 4096
collation-server = utf8_general_ci
character-set-server = utf8
完成安装启动数据库并设置开机自启
[root@controller ~]# systemctl start mariadb.service && systemctl enable mariadb.service
通过运行mysql_Secure_installation脚本来保护数据库服务。
[root@controller ~]# mysql_secure_installation

NOTE: RUNNING ALL PARTS OF THIS SCRIPT IS RECOMMENDED FOR ALL MariaDB
      SERVERS IN PRODUCTION USE!  PLEASE READ EACH STEP CAREFULLY!

In order to log into MariaDB to secure it, we'll need the current
password for the root user.  If you've just installed MariaDB, and
you haven't set the root password yet, the password will be blank,
so you should just press enter here.

Enter current password for root (enter for none):   # 按下回车设置面膜
OK, successfully used password, moving on...

Setting the root password ensures that nobody can log into the MariaDB
root user without the proper authorisation.

Set root password? [Y/n] y   # 问你是否设置root密码
New password:                # 输入root密码
Re-enter new password:       # 再次输入密码
Password updated successfully!
Reloading privilege tables..
 ... Success!


By default, a MariaDB installation has an anonymous user, allowing anyone
to log into MariaDB without having to have a user account created for
them.  This is intended only for testing, and to make the installation
go a bit smoother.  You should remove them before moving into a
production environment.

Remove anonymous users? [Y/n] y    # 是否移除匿名用户
 ... Success!

Normally, root should only be allowed to connect from 'localhost'.  This
ensures that someone cannot guess at the root password from the network.

Disallow root login remotely? [Y/n] n  # 是否禁止远程主机登录MySQL
 ... skipping.

By default, MariaDB comes with a database named 'test' that anyone can
access.  This is also intended only for testing, and should be removed
before moving into a production environment.

Remove test database and access to it? [Y/n] y  # 是否阐述测试数据库"test"
 - Dropping test database...
 ... Success!
 - Removing privileges on test database...
 ... Success!

Reloading the privilege tables will ensure that all changes made so far
will take effect immediately.

Reload privilege tables now? [Y/n] y    # 重新加载权限表使更改立即生效。
 ... Success!

Cleaning up...

All done!  If you've completed all of the above steps, your MariaDB
installation should now be secure.

Thanks for using MariaDB!
执行 mysql_secure_installation 命令时系统会提示用户输入 MySQL root 用户的密码根据提示进行相应的设置即可。
- 设置 root 用户密码即设置 root 用户的密码
- 移除匿名用户账户即删除没有密码的 MySQL 用户账户。
- 禁用远程 root 登录即禁用 root 用户从远程主机登录 MySQL。
- 删除测试数据库即删除 MySQL 中的测试数据库。
- 重新加载权限表即重新加载 MySQL 的权限表使更改立即生效。
登录测试
[root@controller ~]# mysql -uroot -p000000
Welcome to the MariaDB monitor.  Commands end with ; or \g.
Your MariaDB connection id is 15
Server version: 10.3.20-MariaDB MariaDB Server

Copyright (c) 2000, 2018, Oracle, MariaDB Corporation Ab and others.

Type 'help;' or '\h' for help. Type '\c' to clear the current input statement.

MariaDB [(none)]> quit  # 登录成功 退出
Bye
安装消息队列rabbitmq(controller)
OpenStack使用消息队列来协调服务之间的操作和状态信息。消息队列服务通常在controller节点上运行。
安装软件包
[root@controller ~]# yum install -y rabbitmq-server
启动消息队列服务并设置开机自启
[root@controller ~]# systemctl start rabbitmq-server.service && systemctl enable rabbitmq-server.service
Created symlink from /etc/systemd/system/multi-user.target.wants/rabbitmq-server.service to /usr/lib/systemd/system/rabbitmq-server.service.
在 RabbitMQ 消息队列服务中创建一个新的用户并设置该用户的密码。
[root@controller ~]# rabbitmqctl add_user openstack 000000
Creating user "openstack"
允许openstack用户进行配置、写入和读取访问
[root@controller ~]# rabbitmqctl set_permissions openstack ".*" ".*" ".*"
Setting permissions for user "openstack" in vhost "/"
#  ".*" 表示授予完全权限
列出所有已启用的插件和未启用的插件
[root@controller ~]# rabbitmq-plugins list
启用 RabbitMQ Web 界面
# 该命令用于启用 RabbitMQ 的管理插件
# 包括 RabbitMQ Management 和 RabbitMQ Management Agent
# RabbitMQ Management 提供了一个 Web 界面
# 用于管理 RabbitMQ 服务器和监控消息队列的状态。

[root@controller ~]# rabbitmq-plugins enable rabbitmq_management rabbitmq_management_agent

# 通过执行该命令可以启用 RabbitMQ 的管理插件
# 以便管理员可以使用 Web 界面或 REST API 进行管理和监控 RabbitMQ 服务器和消息队列。
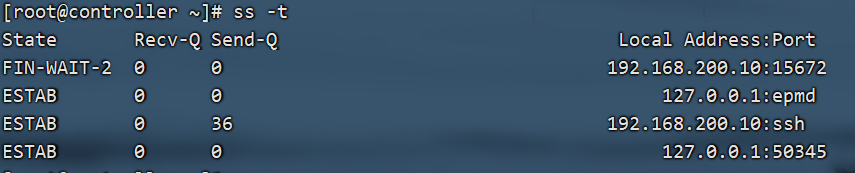
访问
192.168.200.10:15672
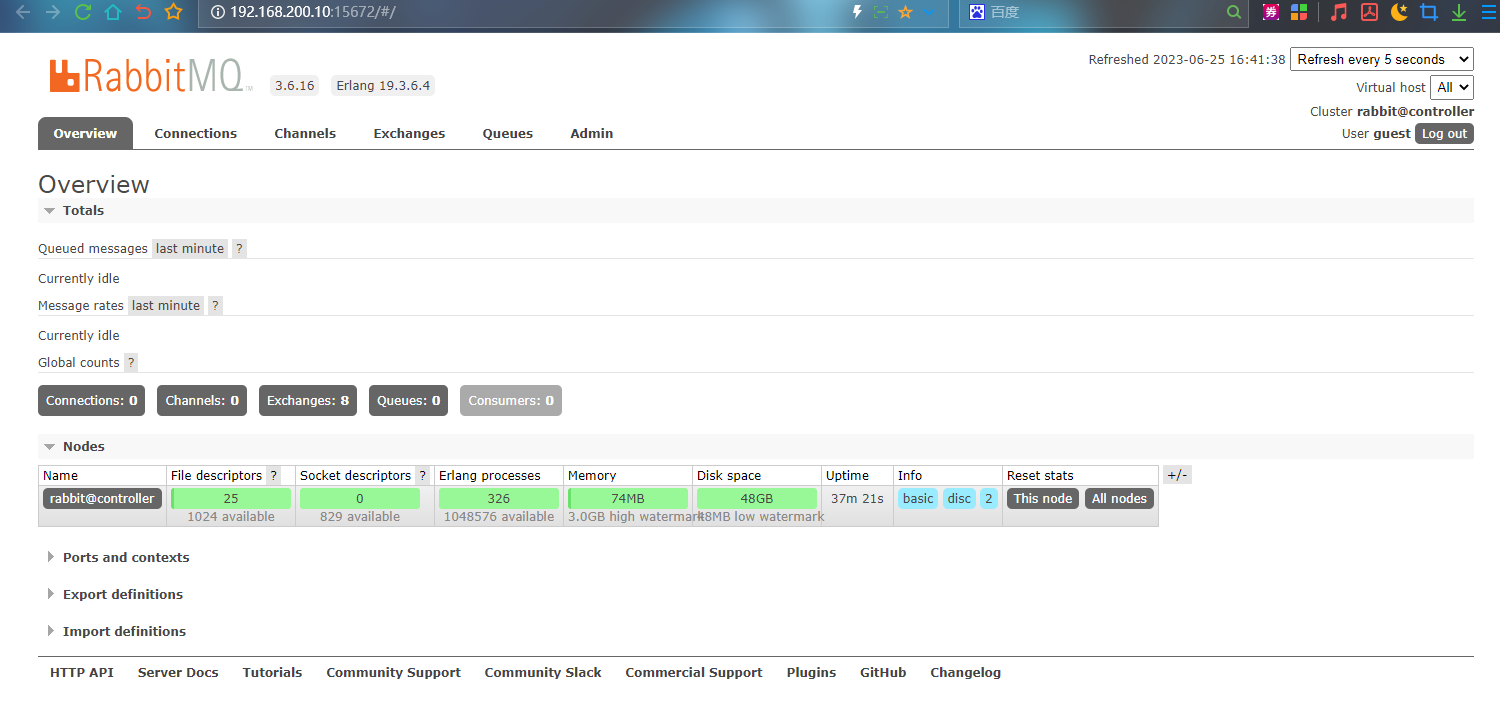
账号密码都是guest当然这个是可以改的
[root@controller ~]# vi /etc/rabbitmq/rabbitmq.config
# 重启 RabbitMQ 服务器以使配置生效
# 可以通过执行以下命令来重启 RabbitMQ 服务器
# systemctl restart rabbitmq-server

安装分布式内存对象缓存系统memcached(controller)
服务的身份服务身份验证机制使用Memcached来缓存令牌。memcached服务通常在controller节点上运行。
安装软件包
[root@controller ~]# yum install -y memcached python-memcached
编辑/etc/sysconfig/memcached文件并完成以下操作
将服务配置为使用controller节点的管理IP地址。这是为了使其他节点能够通过管理网络进行访问
[root@controller ~]# vi /etc/sysconfig/memcached
PORT="11211"
USER="memcached"
MAXCONN="1024"
CACHESIZE="1024"
OPTIONS="-l 127.0.0.1,::1,controller"
# 选项详解
# PORTMemcached 服务器监听的端口号默认为 11211
# USERMemcached 服务器运行的用户默认为 memcached
# MAXCONNMemcached 服务器同时处理的最大连接数默认为 1024。
# CACHESIZEMemcached 服务器使用的内存大小单位为 MB默认为 64。
# OPTIONS其他的一些选项例如 "-l" 表示监听所有网络接口
# 修改 /etc/sysconfig/memcached 文件后需要重启 Memcached 服务器才能使配置生效。
生效配置
[root@controller ~]# systemctl start  memcached.service
[root@controller ~]# systemctl enable  memcached.service
Created symlink from /etc/systemd/system/multi-user.target.wants/memcached.service to /usr/lib/systemd/system/memcached.service.
安装分布式的键值存储系统Etcd(controller)
OpenStack服务可以使用Etcd这是一种用于分布式密钥锁定、存储配置、跟踪服务实时性等场景的分布式可靠密钥值存储。
安装软件包
[root@controller ~]# yum install -y etcd
编辑/etc/etcd/etcd.conf文件并将ETCD_INITIAL_CLUSTER、ETCD_IINITIAL_AVERTISE_PEER_URLS、ETCD_ADVERTISE_CLIENT_URLS、ETDC_LISTEN_CLIENT.URLS设置为控制器节点的管理IP地址以允许其他节点通过管理网络进行访问
# 建议先安装vim不然全是白的看的眼花
[root@controller ~]# yum install -y vim
[root@controller ~]# cat /etc/etcd/etcd.conf
#[Member]
#ETCD_CORS=""
ETCD_DATA_DIR="/var/lib/etcd/default.etcd" # Etcd 服务器存储数据的目录
#ETCD_WAL_DIR=""
ETCD_LISTEN_PEER_URLS="http://192.168.200.10:2380"
# Etcd 服务器监听的客户端地址列表用于接收来自客户端的请求
ETCD_LISTEN_CLIENT_URLS="http://192.168.200.10:2379"
# Etcd 服务器监听的客户端地址列表用于接收来自客户端的请求
#ETCD_MAX_SNAPSHOTS="5"
#ETCD_MAX_WALS="5"
ETCD_NAME="controller"  # Etcd 服务器的节点名称
#ETCD_SNAPSHOT_COUNT="100000"
#ETCD_HEARTBEAT_INTERVAL="100"
#ETCD_ELECTION_TIMEOUT="1000"
#ETCD_QUOTA_BACKEND_BYTES="0"
#ETCD_MAX_REQUEST_BYTES="1572864"
#ETCD_GRPC_KEEPALIVE_MIN_TIME="5s"
#ETCD_GRPC_KEEPALIVE_INTERVAL="2h0m0s"
#ETCD_GRPC_KEEPALIVE_TIMEOUT="20s"
#
#[Clustering]
ETCD_INITIAL_ADVERTISE_PEER_URLS="http://192.168.200.10:2380"
# Etcd 服务器广播自己的对等节点地址列表用于告知其他节点自己的存在
ETCD_ADVERTISE_CLIENT_URLS="http://192.168.200.10:2379"
#  Etcd 服务器广播自己的客户端地址列表用于告知客户端自己的存在
#ETCD_DISCOVERY=""
#ETCD_DISCOVERY_FALLBACK="proxy"
#ETCD_DISCOVERY_PROXY=""
#ETCD_DISCOVERY_SRV=""
ETCD_INITIAL_CLUSTER="controller=http://192.168.200.10:2380"
# Etcd 服务器的初始集群配置信息
ETCD_INITIAL_CLUSTER_TOKEN="etcd-cluster-01"
# Etcd 服务器的初始集群令牌用于标识同一个集群中的节点
ETCD_INITIAL_CLUSTER_STATE="new"
# Etcd 服务器的初始集群状态默认为 "new"表示新建集群或加入已有集群
#ETCD_STRICT_RECONFIG_CHECK="true"
#ETCD_ENABLE_V2="true"
#
#[Proxy]
#ETCD_PROXY="off"
#ETCD_PROXY_FAILURE_WAIT="5000"
#ETCD_PROXY_REFRESH_INTERVAL="30000"
#ETCD_PROXY_DIAL_TIMEOUT="1000"
#ETCD_PROXY_WRITE_TIMEOUT="5000"
#ETCD_PROXY_READ_TIMEOUT="0"
#
#[Security]
#ETCD_CERT_FILE=""
#ETCD_KEY_FILE=""
#ETCD_CLIENT_CERT_AUTH="false"
#ETCD_TRUSTED_CA_FILE=""
#ETCD_AUTO_TLS="false"
#ETCD_PEER_CERT_FILE=""
#ETCD_PEER_KEY_FILE=""
#ETCD_PEER_CLIENT_CERT_AUTH="false"
#ETCD_PEER_TRUSTED_CA_FILE=""
#ETCD_PEER_AUTO_TLS="false"
#
#[Logging]
#ETCD_DEBUG="false"
#ETCD_LOG_PACKAGE_LEVELS=""
#ETCD_LOG_OUTPUT="default"
#
#[Unsafe]
#ETCD_FORCE_NEW_CLUSTER="false"
#
#[Version]
#ETCD_VERSION="false"
#ETCD_AUTO_COMPACTION_RETENTION="0"
#
#[Profiling]
#ETCD_ENABLE_PPROF="false"
#ETCD_METRICS="basic"
#
#[Auth]
#ETCD_AUTH_TOKEN="simple"
生效配置并开机自启
[root@controller ~]# systemctl start etcd && systemctl enable etcd
Created symlink from /etc/systemd/system/multi-user.target.wants/etcd.service to /usr/lib/systemd/system/etcd.service.
此内容参考视频https://www.bilibili.com/video/BV1fL4y1i7NZ?p=1&vd_source=7c7cb4224e0c273f28886e581838b110
| 阿里云国内75折 回扣 微信号:monov8 |
| 阿里云国际,腾讯云国际,低至75折。AWS 93折 免费开户实名账号 代冲值 优惠多多 微信号:monov8 飞机:@monov6 |