

《JavaSE-第二十章》之线程 的创建与Thread类
| 阿里云国内75折 回扣 微信号:monov8 |
| 阿里云国际,腾讯云国际,低至75折。AWS 93折 免费开户实名账号 代冲值 优惠多多 微信号:monov8 飞机:@monov6 |
文章目录
前言
在你立足处深挖下去,就会有泉水涌出!别管蒙昧者们叫嚷:“下边永远是地狱!”
博客主页KC老衲爱尼姑的博客主页
共勉talk is cheap, show me the code
作者是爪哇岛的新手水平很有限如果发现错误一定要及时告知作者哦感谢感谢
什么是进程
我们平时安装的程序都放在硬盘上,当我们在windows上双击可执行程序(exe)时才会将其运行起来。本质上就是将这个程序加载到内存中,然后CPU才会对该程序的数据和代码进行读取并逐行的执行一旦将程加载到内存后,此时程序从静态的趟在硬盘上到动态的运行在内存中,我们就将在内存中的程序,称之为进程。
什么是线程
在一个程序里的一个执行路线就叫做线程。更准确的定义是:线程是进程内部的执行序列。这就好比整个银行就是用一个进程,里面每个柜台的工作人员就是一个线程。
为什么需要线程
并发编程使我们可以将程序划分为多个分离的、独立运行的任务。通过使用多线程机制这些独立任务也被称为子任务中的每一个都将由执行线程来驱动。一个线程就是在进程中的一个单一的顺序控制流因此单个进程可以拥有多个并发执行的任务但是你的程序使得每个任务都好像有其自己的CPU一样。其底层机制是切分CPU时间但通常你不需要考虑它。
创建线程
1.实现 Runnable 接口
线程可以驱动任务因此需要一个描述任务的方式,这个由Runnable接口提供,想定义任务,只需要实现Runnable接口并重写run()方法。
public class LiftOff implements Runnable{
    protected int countDown  = 10;
    private static  int taskCount=0;
    private final int id = taskCount++;

    public LiftOff(int countDown) {
        this.countDown = countDown;
    }
    public String status() {
        return "#"+id+"("
                +(countDown>0?countDown:"Liftoff!")+")";
    }
    public LiftOff() {
    }
    @Override
    public void run() {
        while (countDown-- >0){
            System.out.println(status());
            //建议CPU从一个线程切换到另一线程
            Thread.yield();
        }
    }

    public static void main(String[] args) {
        LiftOff l = new LiftOff();
        l.run();//启动线程
    }
}
2.继承 Thread 类
public class MyThread extends Thread{
    protected int countDown  = 10;
    private static  int taskCount=0;
    private final int id = taskCount++;

    public MyThread(int countDown) {
        this.countDown = countDown;
    }
    public String status() {
        return "#"+id+"("
                +(countDown>0?countDown:"MyThreadOff!")+")";
    }
    public MyThread() {
    }
    @Override
    public void run() {
        while (countDown-- >0){
            System.out.println(status());
            Thread.yield();
        }
    }

    public static void main(String[] args) {
        MyThread l = new MyThread();
        l.start();  // 线程开始运行
    }
}
3.其他变形
- 匿名内部类创建 Thread 子类对象
Thread t = new Thread(){
    @Override
    public void run() {
        System.out.println("Hello World!");
    }
};
t.start();
- 匿名内部类创建 Runnable 子类对象
Thread t = new Thread(new Runnable() {
    @Override
    public void run() {
        System.out.println("Hello World");
    }
});
t.start();
- lambda 表达式创建 Runnable 子类对象
Thread t = new Thread(() -> System.out.println("Hello World"));
t.start();
Thread t2  = new Thread(() -> System.out.println("Hello World"))
t2.start();
多线程的优势-增加运行速度
我们使用多线程和单线程分别来完成a和b两个变量都自增20亿次,并统计所需时间。
public class ThreadAdvantage {
    private static final long count = 10_0000_0000;

    public static void main(String[] args) throws InterruptedException {
        //并发
        concurrency();
        //串行
        serial();
    }

    private static void concurrency() throws InterruptedException {
        long start = System.currentTimeMillis();
        Thread t = new Thread(() -> {
            int a = 0;
            for (int i = 0; i < count; i++) {
                a--;
            }
        });
        Thread t2 = new Thread(() -> {
            int b = 0;
            for (int i = 0; i < count; i++) {
                b--;
            }
        });
        t.start();
        t2.start();
        t.join();
        t2.join();
        long end = System.currentTimeMillis();
        System.out.println("串行:毫秒:" +(end - start) + "ms");
    }

    private static void serial() {
        long start = System.currentTimeMillis();
        int a = 0;
        for (int i = 0; i < count; i++) {
            a--;
        }
        int b = 0;
        for (int i = 0; i < count; i++) {
            b--;
        }
        long end = System.currentTimeMillis();
        System.out.println("串行:毫秒:" +(end - start) + "ms");
    }
    }
串行和并发所需时间

Thread
常见构造方法
1. Thread()
public class Demo {
    public static void main(String[] args) {
        Thread t = new Thread();
        t.start();
    }
}
该构造方法创建了一个Thread对象,并没有添加任务,所以启动后啥也没做就正常退出了。
2. Thread(Runnable target)
public class Demo {
    public static void main(String[] args) {
        Thread t = new Thread(new Runnable() {
            @Override
            public void run() {
                System.out.println("Hello World");
            }
        });
        t.start();
    }
}
控制台输出

该构造方法使用 Runnable 对象创建线程对象
3. Thread(String name)
public class Demo {
    public static void main(String[] args) {
        Thread t = new Thread("thread1"){
            @Override
            public void run() {
	            //得到这个线程的名字
                System.out.println(Thread.currentThread().getName());
            }
        };
        t.start();
    }
}
控制台输出

该构造方法创建线程对象并命名。
4. Thread(Runnable target, String name)
public class Demo {
    public static void main(String[] args) {
        Thread t = new Thread(new Runnable() {
            @Override
            public void run() {
                System.out.println(Thread.currentThread().getName());
            }
        },"thread1");
        t.start();
    }
}
运行结果:

常见属性
| 属性 | 方法 |
|---|---|
| ID | getId() |
| 名称 | getName() |
| 转态 | getStatus() |
| 优先级 | getPriorigy() |
| 是否是后台线程 | isDaemon() |
| 是否存活 | isAive() |
| 是否中断 | isInterrupted() |
| ID 是线程的唯一标识不同线程不会重复 |
示例代码
public class ThreadDemo {
    public static void main(String[] args) {
        Thread thread = new Thread(() -> {
            for (int i = 0; i < 10; i++) {
                try {
                    System.out.println(Thread.currentThread().getName() + ": 我还活着");
                    Thread.sleep(1 * 1000);
                } catch (InterruptedException e) {
                    e.printStackTrace();
                }
            }
            System.out.println(Thread.currentThread().getName() + ": 我即将死去");
        });
        System.out.println(Thread.currentThread().getName()
                + ": ID: " + thread.getId());
        System.out.println(Thread.currentThread().getName()
                + ": 名称: " + thread.getName());
        System.out.println(Thread.currentThread().getName() + ": 状态: " + thread.getState());
        System.out.println(Thread.currentThread().getName()
                + ": 优先级: " + thread.getPriority());
        System.out.println(Thread.currentThread().getName()
                + ": 后台线程: " + thread.isDaemon());
        System.out.println(Thread.currentThread().getName()
                + ": 活着: " + thread.isAlive());
        System.out.println(Thread.currentThread().getName()
                + ": 被中断: " + thread.isInterrupted());
        thread.start();
        while (thread.isAlive()) {
        }        System.out.println(Thread.currentThread().getName() + ": 状态: " + thread.getState());
    }
}
运行结果:
main: ID: 20
main: 名称: Thread-0
main: 状态: NEW
main: 优先级: 5
main: 后台线程: false
main: 活着: false
main: 被中断: false
Thread-0: 我还活着
Thread-0: 我还活着
Thread-0: 我还活着
Thread-0: 我还活着
Thread-0: 我还活着
Thread-0: 我还活着
Thread-0: 我还活着
Thread-0: 我还活着
Thread-0: 我还活着
Thread-0: 我还活着
Thread-0: 我即将死去
main: 状态: TERMINATED
Process finished with exit code 0
从任务中产生返回值
Runnable是执行工作的独立任务但是它不返回任何值。如果你希望任务在完成时能够返回一个值那么可以实现Callable接口而不是Runnable接口。在Java SE5中引入的Callabel是一种具有类型参数的泛型它的类型参数表示的是从方法call而不是run中返回的值并且必须使用ExecutorService.submit方法调用它下面是一个简单示例
import java.util.concurrent.Callable;
public class TaskWithResult implements Callable<String> {
    private int id;
    public TaskWithResult(int id){
        this.id = id;
    }
    @Override
    public String call() throws Exception {
        return "result of TaskWithResult"+id;
    }
}
测试代码
import java.util.ArrayList;
import java.util.List;
import java.util.concurrent.ExecutionException;
import java.util.concurrent.ExecutorService;
import java.util.concurrent.Executors;
import java.util.concurrent.Future;

public class CallableDemo {
    public static void main(String[] args) {
        ExecutorService executorService = Executors.newSingleThreadExecutor();
        List<Future> list = new ArrayList<Future>();
        for (int i = 0; i < 10; i++) {
            //executorService.submit()会返回Future对象
            list.add(executorService.submit(new TaskWithResult(i) ));
        }
        for (Future<String> future : list) {
            try {
                System.out.println(future.get());
                System.out.println(future.isDone());
            } catch (InterruptedException e) {
                throw new RuntimeException(e);
            } catch (ExecutionException e) {
                throw new RuntimeException(e);
            }finally {
                executorService.shutdown();
            }
        }
    }
}
运行结果:
result of TaskWithResult0
true
result of TaskWithResult1
true
result of TaskWithResult2
true
result of TaskWithResult3
true
result of TaskWithResult4
true
result of TaskWithResult5
true
result of TaskWithResult6
true
result of TaskWithResult7
true
result of TaskWithResult8
true
result of TaskWithResult9
true
Process finished with exit code 0
常用方法
休眠
影响任务行为的一种简单方法是调用sleep这将使任务中止执行给定的时间。
import java.util.concurrent.TimeUnit;
public class SleepingTask implements Runnable {
    private static long count = 10;

    @Override
    public void run() {
        while (count-- > 0) {
            try {
		        //JavaSE5引入了更加通俗的sleep()版本作为TimeUnit类的一部分。
                //Thread.sleep(1000);
                TimeUnit.MILLISECONDS.sleep(100);
                System.out.println("线程名字:" + Thread.currentThread().getName() + " 线程Id:" + Thread.currentThread().getId());
            } catch (InterruptedException e) {
                e.printStackTrace();
            }
        }
    }

    public static void main(String[] args) {
        for (int i = 0; i < 5; i++) {
            Thread t = new Thread(new SleepingTask());
            t.start();
        }
    }
}
对sleep的调用可以抛出InterruptedException异常并且你可以看到它在run中被捕获。因为异常不能跨线程传播回main所以你必须在本地处理所有在任务内部产生的异常。
优先级
线程的优先级是将告诉调度器这个线程重不重要,重要的话调度器会倾向于优先权最高的线程执行。但是.这个不意味 着优先级低的就得不到执行只不过就是优先级低的被执行的频率比较低。这个所谓的优先级也不过是语言级别给操作系统的建议,操作系统听不听这还难整~~~ 。在大多数时间里,所有的线程都应该以默认的优先级执行,尝试去通过优先级去影响线程的执行是比较鸡肋的。
下面是一个演示优先级等级的示例,我们可以通过getpriority()来读取现有线程的优先级,并且在任何时刻都可以通过setPriority()来修改优先级。
public class SimpleProiorities implements Runnable {
    private int countDown = 5;
    //避免编译器优化
    private volatile double d;
    private int priority;

    public SimpleProiorities(int priority) {
        this.priority = priority;
    }

    @Override
    public String toString() {
        return Thread.currentThread() + ":" + countDown;
    }

    @Override
    public void run() {
        Thread.currentThread().setPriority(priority);
        while (true) {
            for (int i = 1; i < 100000; i++) {
                d = (Math.PI + Math.E) / (double) i;
                if (i % 1000 == 0) {
                    Thread.yield();
                }
            }
            System.out.println(this);
            if (--countDown == 0) {
                return;
            }
        }
    }

    public static void main(String[] args) {
        for (int i = 0; i < 5; i++) {
	        //最小优先级是1
            Thread t = new Thread(new SimpleProiorities(Thread.MIN_PRIORITY));
            //最大的优先级是10
            Thread t1 = new Thread(new SimpleProiorities(Thread.MAX_PRIORITY));
            t.start();
            t1.start();
        }
    }
}
运行结果:
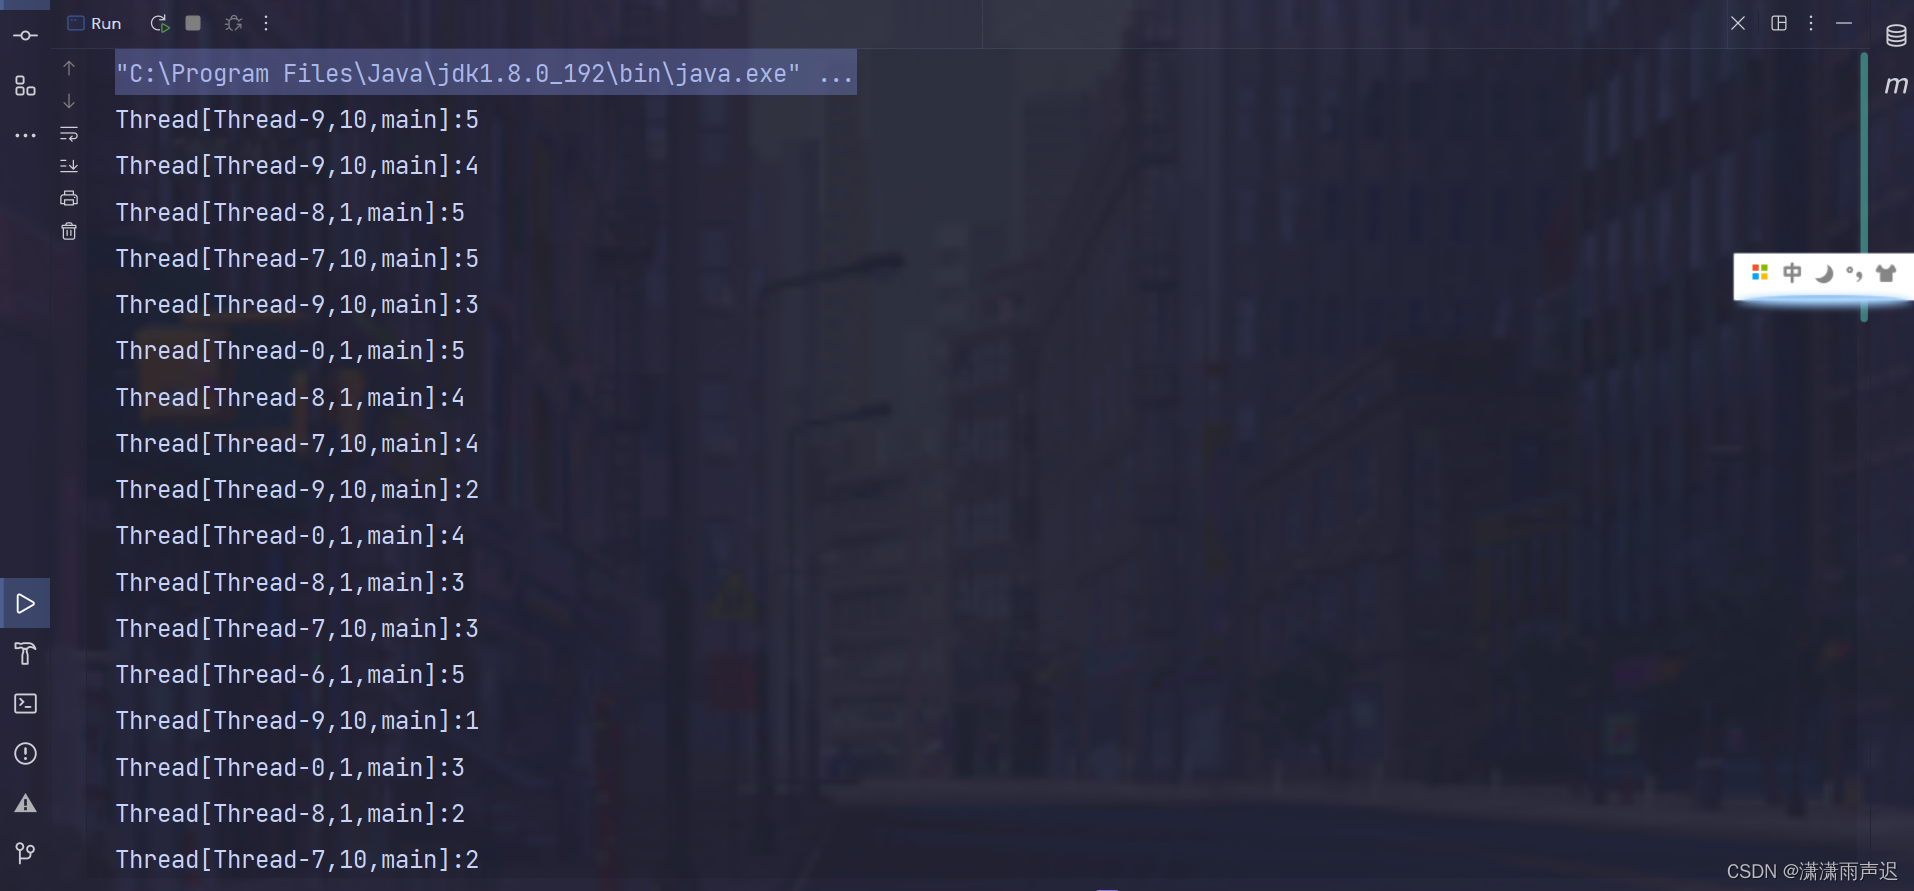
可以看出,优先级高的运行的频率要高一些。在Java中一共有10个优先级,即从1-10。但它与多数操作系统都不能映射得很好。比如Windows有7个优先级且不是固定的所以这种映射关系也是不确定的。Sun的Solaris有231个优先级。唯一可移植的方法是当调整优先级的时候只使用MAX_PRIORITY(10)、NORM_PRIORITY(5)和MIN_PRIORITY(1)三种级别。
让步
当一个线程的主要任务基本完成时,就可以给线程调度机制一个暗示:该线程的活干的差不多了.可以让别的线程使用CPU。这个暗示通过yield()方法作出,不过这也是个鸡肋的操作因为无法保证百分之百调度机制就会采纳。
示例代码
public class YieLdDemo {
    private static int count1 = 0;
    private static int count2 = 0;
    public static void main(String[] args) {
        Thread t1 = new Thread(() -> {
            while (true) {
                System.out.println("张三:"+count1++);
                //Thread.yield();
            }
        },"t1");
        Thread t2 = new Thread(() -> {
            while (true) {
                System.out.println("王五:"+count2++);
            }
        },"t2");
        t1.start();
        t2.start();
    }
}
t1不使用Thread.yield()方法的运行结果:
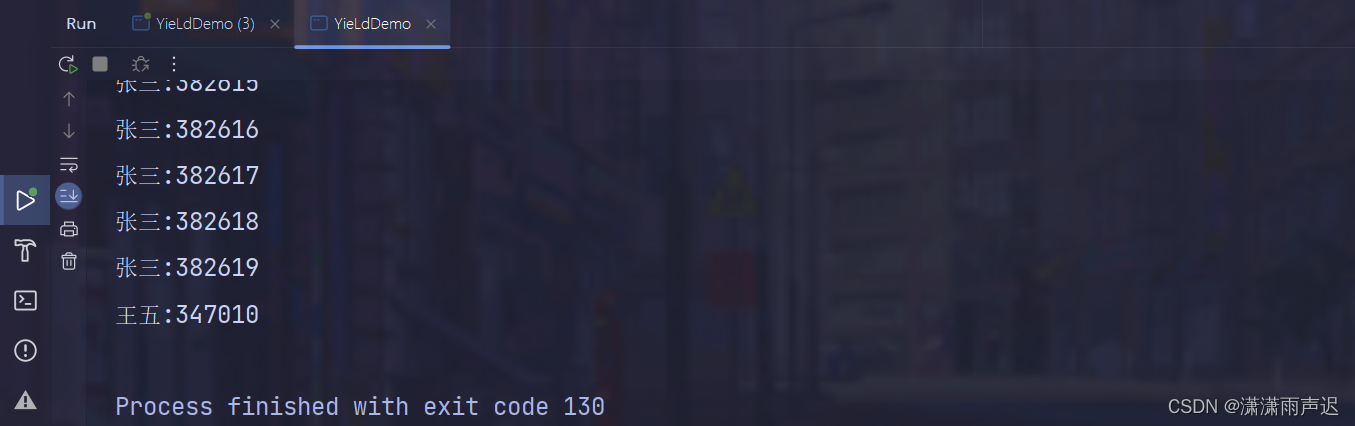
t1使用Thread.yield()方法的运行结果:

可以看出:
- 不使用yidId的时候,张三和王五基本五五开
- 使用yieId时,王五的数量远远大于张三。
结论:
yield 不改变线程的状态, 但是会重新排队。
后台线程
后台线程是程序运行时在后台提供的一种通用服务的线程,并且这种线程并不属于程序必不可少的部分。因此,当所有的非后台线程退出时,程序就会终止,并且会杀死进程中的所有非后台线程。比如我们常用的main就是一个非后台线程,其中后台线程退出时不会影响进程的退出前台线程退出时会影响进程的退出。
示例代码
import java.util.concurrent.TimeUnit;

public class SimpleDaemons implements  Runnable{
    @Override
    public void run() {
        while (true) {
            try {
                TimeUnit.MILLISECONDS.sleep(100);
                System.out.println(Thread.currentThread()+" " + this);
            } catch (InterruptedException e) {
                System.out.println(e.getMessage());
            }
        }
    }

    public static void main(String[] args) throws InterruptedException {
        //main为非后台线程
        int i=0;
        for (i=0;i<100;i++) {
            Thread th = new Thread(new SimpleDaemons());
            th.setDaemon(true);//设置为后台线程
            th.start();
        }
        System.out.println("All daemons started");
        Thread.sleep(100);
    }
}
运行结果:
All daemons started
Thread[Thread-38,5,main] org.example.thread.SimpleDaemons@1eec3130
Thread[Thread-23,5,main] org.example.thread.SimpleDaemons@63ee6746
Thread[Thread-17,5,main] org.example.thread.SimpleDaemons@22867941
Thread[Thread-22,5,main] org.example.thread.SimpleDaemons@2de94878
Thread[Thread-62,5,main] org.example.thread.SimpleDaemons@63158364
Thread[Thread-5,5,main] org.example.thread.SimpleDaemons@7f25713
Thread[Thread-15,5,main] org.example.thread.SimpleDaemons@72139b8
Thread[Thread-16,5,main] org.example.thread.SimpleDaemons@5c7b595c
Thread[Thread-19,5,main] org.example.thread.SimpleDaemons@8242116
Thread[Thread-20,5,main] org.example.thread.SimpleDaemons@5658172e
Thread[Thread-25,5,main] org.example.thread.SimpleDaemons@31f176f0
Thread[Thread-30,5,main] org.example.thread.SimpleDaemons@234fbf7
Thread[Thread-32,5,main] org.example.thread.SimpleDaemons@365fee59
Thread[Thread-27,5,main] org.example.thread.SimpleDaemons@2f524b71
Process finished with exit code 0
线程等待
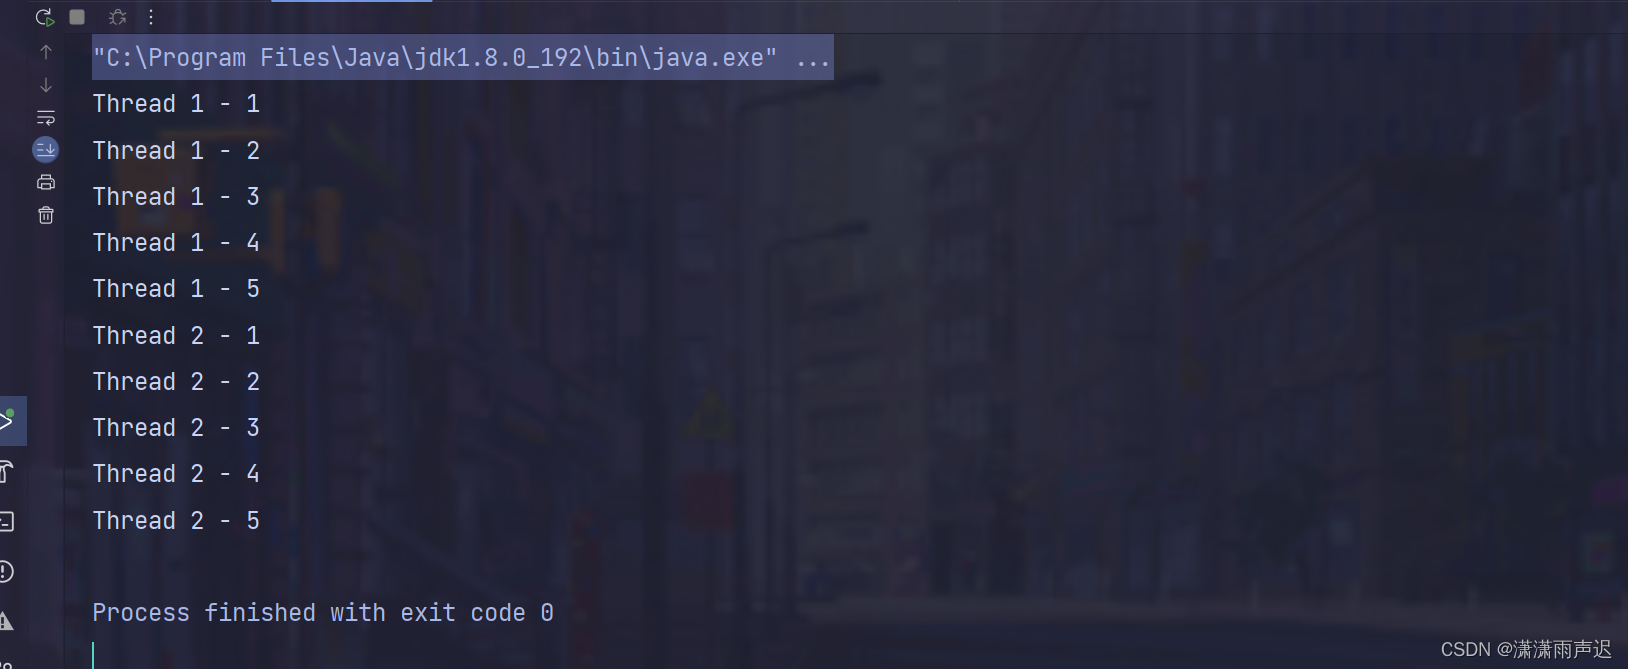
线程A可以在线程B上调join()方法,结果就是B线程挂起等待A线程执行结束才能继续执行。
示例代码
public class JoinExample {
    public static void main(String[] args) {
        Thread thread1 = new Thread(() -> {
            for (int i = 1; i <= 5; i++) {
                System.out.println("Thread 1 - " + i);
            }
        });
        Thread thread2 = new Thread(() -> {
            try {
                thread1.join(); // 等待Thread 1结束
            } catch (InterruptedException e) {
                e.printStackTrace();
            }

            for (int i = 1; i <= 5; i++) {
                System.out.println("Thread 2 - " + i);
            }
        });
        thread1.start();
        thread2.start();
    }
}
运行结果
| 阿里云国内75折 回扣 微信号:monov8 |
| 阿里云国际,腾讯云国际,低至75折。AWS 93折 免费开户实名账号 代冲值 优惠多多 微信号:monov8 飞机:@monov6 |