

一文吃透接口调用神器RestTemplate
| 阿里云国内75折 回扣 微信号:monov8 |
| 阿里云国际,腾讯云国际,低至75折。AWS 93折 免费开户实名账号 代冲值 优惠多多 微信号:monov8 飞机:@monov6 |
文末可以领取所有系列高清 pdf。
大家好我是路人这是 SpringMVC 系列第 21 篇。
本文介绍 Spring web 中特别牛逼的一个类 RestTemplate。
目录
1、RestTemplate 概述
2、案例代码
2.1、git 地址
2.2、关键代码位置
2.3、如何运行测试用例
3、发送 Get 请求
3.1、普通请求
3.2、url 中含有动态参数
3.3、接口返回值为泛型
3.4、下载小文件
3.5、下载大文件
3.6、传递头
3.7、综合案例含头、url 动态参数
4、POST 请求
4.1、post 请求常见的 3 种类型
4.2、普通表单请求
4.3、上传本地文件
4.4、通过流或字节数组的方式上传文件
4.5、复杂表单多个普通元素+多文件上传
4.6、发送 json 格式数据传递 java 对象
4.7、发送 json 格式数据传递 java 对象返回值为泛型
4.8、发送 json 字符串格式数据
5、DELETE、PUT、OPTION 请求
5.1、DELETE 请求
5.2、PUT 请求
5.3、OPTIONS 请求
6、集成 HttpClient
7、集成 okhttp
8、总结
9、SpringMVC 系列目录
10、更多好文章
11、【路人甲 Java】所有系列高清 PDF
1、RestTemplate 概述
发送 http 请求估计很多人用过 httpclient 和 okhttp确实挺好用的而 Spring web 中的 RestTemplate 和这俩的功能类似也是用来发送 http 请求的不过用法上面比前面的 2 位要容易很多。
spring 框架提供的 RestTemplate 类可用于在应用中调用 rest 服务它简化了与 http 服务的通信方式统一了 RESTful 的标准封装了 http 链接 我们只需要传入 url 及返回值类型即可。相较于之前常用的 HttpClientRestTemplate 是一种更优雅的调用 RESTful 服务的方式。
在 Spring 应用程序中访问第三方 REST 服务与使用 Spring RestTemplate 类有关。RestTemplate 类的设计原则与许多其他 Spring 模板类(例如 JdbcTemplate、JmsTemplate)相同为执行复杂任务提供了一种具有默认行为的简化方法。
RestTemplate 默认依赖 JDK 提供 http 连接的能力HttpURLConnection如果有需要的话也可以通过 setRequestFactory 方法替换为例如 Apache HttpComponents、Netty 或 OkHttp 等其它 HTTP library。
考虑到 RestTemplate 类是为调用 REST 服务而设计的因此它的主要方法与 REST 的基础紧密相连就不足为奇了后者是 HTTP 协议的方法:HEAD、GET、POST、PUT、DELETE 和 OPTIONS。例如RestTemplate 类具有 headForHeaders()、getForObject()、postForObject()、put()和 delete()等方法。
下面给大家上案例案例是重点通过案例把我知道的用法都给盘出来。
2、案例代码
2.1、git 地址
https://gitee.com/javacode2018/springmvc-series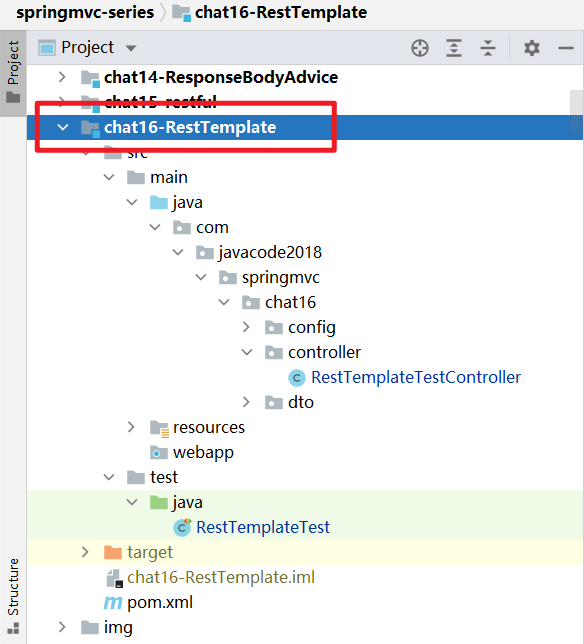
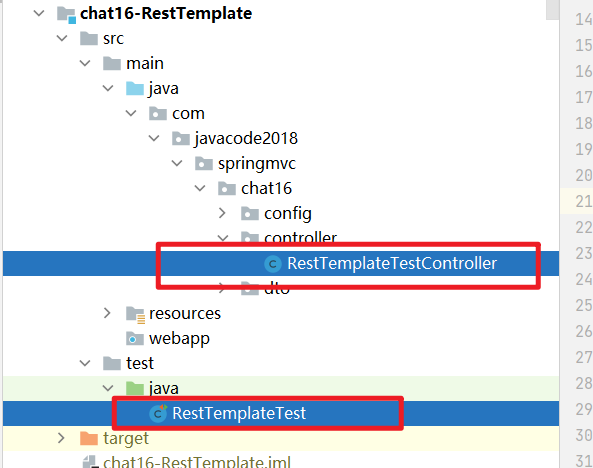
2.2、关键代码位置
文中的所有 controller 代码在RestTemplateTestController类中。
所有@Test 用例的代码在RestTemplateTest。
2.3、如何运行测试用例
拉取项目
将 chat16-RestTemplate 模块发布到 tomcat9 中
运行 RestTemplateTest 中对应的用例即可
下面咱们来看 RestTemplate 常见的用法汇总。
3、发送 Get 请求
3.1、普通请求
接口代码
@GetMapping("/test/get")
@ResponseBody
public BookDto get() {
    return new BookDto(1, "SpringMVC系列");
}
使用 RestTemplate 调用上面这个接口通常有 2 种写法如下
@Test
public void test1() {
    RestTemplate restTemplate = new RestTemplate();
    String url = "http://localhost:8080/chat16/test/get";
    //getForObject方法获取响应体将其转换为第二个参数指定的类型
    BookDto bookDto = restTemplate.getForObject(url, BookDto.class);
    System.out.println(bookDto);
}

@Test
public void test2() {
    RestTemplate restTemplate = new RestTemplate();
    String url = "http://localhost:8080/chat16/test/get";
    //getForEntity方法返回值为ResponseEntity类型
    // ResponseEntity中包含了响应结果中的所有信息比如头、状态、body
    ResponseEntity<BookDto> responseEntity = restTemplate.getForEntity(url, BookDto.class);
    //状态码
    System.out.println(responseEntity.getStatusCode());
    //获取头
    System.out.println("头" + responseEntity.getHeaders());
    //获取body
    BookDto bookDto = responseEntity.getBody();
    System.out.println(bookDto);
}
test1 输出
BookDto{id=1, name='SpringMVC系列'}test2 输出
200 OK
头[Content-Type:"application/json;charset=UTF-8", Transfer-Encoding:"chunked", Date:"Sat, 02 Oct 2021 07:05:15 GMT", Keep-Alive:"timeout=20", Connection:"keep-alive"]
BookDto{id=1, name='SpringMVC系列'}
3.2、url 中含有动态参数
接口代码
@GetMapping("/test/get/{id}/{name}")
@ResponseBody
public BookDto get(@PathVariable("id") Integer id, @PathVariable("name") String name) {
    return new BookDto(id, name);
}
使用 RestTemplate 调用上面这个接口通常有 2 种写法如下
@Test
public void test3() {
    RestTemplate restTemplate = new RestTemplate();
    //url中有动态参数
    String url = "http://localhost:8080/chat16/test/get/{id}/{name}";
    Map<String, String> uriVariables = new HashMap<>();
    uriVariables.put("id", "1");
    uriVariables.put("name", "SpringMVC系列");
    //使用getForObject或者getForEntity方法
    BookDto bookDto = restTemplate.getForObject(url, BookDto.class, uriVariables);
    System.out.println(bookDto);
}

@Test
public void test4() {
    RestTemplate restTemplate = new RestTemplate();
    //url中有动态参数
    String url = "http://localhost:8080/chat16/test/get/{id}/{name}";
    Map<String, String> uriVariables = new HashMap<>();
    uriVariables.put("id", "1");
    uriVariables.put("name", "SpringMVC系列");
    //getForEntity方法
    ResponseEntity<BookDto> responseEntity = restTemplate.getForEntity(url, BookDto.class, uriVariables);
    BookDto bookDto = responseEntity.getBody();
    System.out.println(bookDto);
}
test3 输出
BookDto{id=1, name='SpringMVC系列'}test4 输出
BookDto{id=1, name='SpringMVC系列'}3.3、接口返回值为泛型
接口代码
@GetMapping("/test/getList")
@ResponseBody
public List<BookDto> getList() {
    return Arrays.asList(
            new BookDto(1, "Spring高手系列"),
            new BookDto(2, "SpringMVC系列")
    );
}
当接口的返回值为泛型的时候这种情况比较特殊使用 RestTemplate 调用上面这个接口代码如下需要用到restTemplate.exchange的方法这个方法中有个参数是ParameterizedTypeReference类型通过这个参数类指定泛型类型
@Test
public void test5() {
    RestTemplate restTemplate = new RestTemplate();
    //返回值为泛型
    String url = "http://localhost:8080/chat16/test/getList";
    //若返回结果是泛型类型的需要使用到exchange方法
    //这个方法中有个参数是ParameterizedTypeReference类型通过这个参数类指定泛型类型
    ResponseEntity<List<BookDto>> responseEntity =
            restTemplate.exchange(url,
                    HttpMethod.GET,
                    null,
                    new ParameterizedTypeReference<List<BookDto>>() {
                    });
    List<BookDto> bookDtoList = responseEntity.getBody();
    System.out.println(bookDtoList);
}
输出
[BookDto{id=1, name='Spring高手系列'}, BookDto{id=2, name='SpringMVC系列'}]3.4、下载小文件
接口代码如下这个接口会下载服务器端的 1.txt 文件。
/**
 * 下载文件
 *
 * @return
 */
@GetMapping("/test/downFile")
@ResponseBody
public HttpEntity<InputStreamResource> downFile() {
    //将文件流封装为InputStreamResource对象
    InputStream inputStream = this.getClass().getResourceAsStream("/1.txt");
    InputStreamResource inputStreamResource = new InputStreamResource(inputStream);
    //设置header
    MultiValueMap<String, String> headers = new HttpHeaders();
    headers.add(HttpHeaders.CONTENT_DISPOSITION, "attachment;filename=1.txt");
    HttpEntity<InputStreamResource> httpEntity = new HttpEntity<>(inputStreamResource);
    return httpEntity;
}
使用 RestTemplate 调用这个接口代码如下目前这个文件的内容比较少可以直接得到一个数组。
@Test
public void test6() {
    RestTemplate restTemplate = new RestTemplate();
    String url = "http://localhost:8080/chat16/test/downFile";
    //文件比较小的情况直接返回字节数组
    ResponseEntity<byte[]> responseEntity = restTemplate.getForEntity(url, byte[].class);
    //获取文件的内容
    byte[] body = responseEntity.getBody();
    String content = new String(body);
    System.out.println(content);
}
注意如果文件大的时候这种方式就有问题了会导致 oom要用下面的方式了。
3.5、下载大文件
接口代码继续使用上面下载 1.txt 的代码
/**
 * 下载文件
 *
 * @return
 */
@GetMapping("/test/downFile")
@ResponseBody
public HttpEntity<InputStreamResource> downFile() {
    //将文件流封装为InputStreamResource对象
    InputStream inputStream = this.getClass().getResourceAsStream("/1.txt");
    InputStreamResource inputStreamResource = new InputStreamResource(inputStream);
    //设置header
    MultiValueMap<String, String> headers = new HttpHeaders();
    headers.add(HttpHeaders.CONTENT_DISPOSITION, "attachment;filename=1.txt");
    HttpEntity<InputStreamResource> httpEntity = new HttpEntity<>(inputStreamResource);
    return httpEntity;
}
此时使用 RestTemplate 调用这个接口代码如下
文件比较大的时候比如好几个 G就不能返回字节数组了会把内存撑爆导致 OOM需要使用 execute 方法了这个方法中有个 ResponseExtractor 类型的参数restTemplate 拿到结果之后会回调{@link ResponseExtractor#extractData}这个方法在这个方法中可以拿到响应流然后进行处理这个过程就是变读边处理不会导致内存溢出
@Test
public void test7() {
    RestTemplate restTemplate = new RestTemplate();
    String url = "http://localhost:8080/chat16/test/downFile";
    /**
     * 文件比较大的时候比如好几个G就不能返回字节数组了会把内存撑爆导致OOM
     * 需要这么玩
     * 需要使用execute方法了这个方法中有个ResponseExtractor类型的参数
     * restTemplate拿到结果之后会回调{@link ResponseExtractor#extractData}这个方法
     * 在这个方法中可以拿到响应流然后进行处理这个过程就是变读边处理不会导致内存溢出
     */
    String result = restTemplate.execute(url,
            HttpMethod.GET,
            null,
            new ResponseExtractor<String>() {
                @Override
                public String extractData(ClientHttpResponse response) throws IOException {
                    System.out.println("状态"+response.getStatusCode());
                    System.out.println("头"+response.getHeaders());
                    //获取响应体流
                    InputStream body = response.getBody();
                    //处理响应体流
                    String content = IOUtils.toString(body, "UTF-8");
                    return content;
                }
            }, new HashMap<>());

    System.out.println(result);
}
3.6、传递头
接口代码
@GetMapping("/test/header")
@ResponseBody
public Map<String, List<String>> header(HttpServletRequest request) {
    Map<String, List<String>> header = new LinkedHashMap<>();
    Enumeration<String> headerNames = request.getHeaderNames();
    while (headerNames.hasMoreElements()) {
        String name = headerNames.nextElement();
        Enumeration<String> values = request.getHeaders(name);
        List<String> list = new ArrayList<>();
        while (values.hasMoreElements()) {
            list.add(values.nextElement());
        }
        header.put(name, list);
    }
    return header;
}
使用 RestTemplate 调用接口请求头中传递数据代码如下注意代码①和②这两处是关键用到了HttpHeaders和RequestEntity
请求头放在 HttpHeaders 对象中
RequestEntity请求实体请求的所有信息都可以放在 RequestEntity 中比如 body 部分、头、请求方式、url 等信息
@Test
public void test8() {
    RestTemplate restTemplate = new RestTemplate();
    String url = "http://localhost:8080/chat16/test/header";
    //①请求头放在HttpHeaders对象中
    MultiValueMap<String, String> headers = new HttpHeaders();
    headers.add("header-1", "V1");
    headers.add("header-2", "Spring");
    headers.add("header-2", "SpringBoot");
    //②RequestEntity请求实体请求的所有信息都可以放在RequestEntity中比如body部分、头、请求方式、url等信息
    RequestEntity requestEntity = new RequestEntity(
            null, //body部分数据
            headers, //头
            HttpMethod.GET,//请求方法
            URI.create(url) //地址
    );
    ResponseEntity<Map<String, List<String>>> responseEntity = restTemplate.exchange(requestEntity,
            new ParameterizedTypeReference<Map<String, List<String>>>() {
            });
    Map<String, List<String>> result = responseEntity.getBody();
    System.out.println(result);
}
输出
{accept=[application/json, application/*+json], header-1=[V1], header-2=[Spring, SpringBoot], user-agent=[Java/1.8.0_121], host=[localhost:8080], connection=[keep-alive]}3.7、综合案例含头、url 动态参数
接口
@GetMapping("/test/getAll/{path1}/{path2}")
@ResponseBody
public Map<String, Object> getAll(@PathVariable("path1") String path1,
                                  @PathVariable("path2") String path2,
                                  HttpServletRequest request) {
    Map<String, Object> result = new LinkedHashMap<>();
    result.put("path1", path1);
    result.put("path2", path2);
    //头
    Map<String, List<String>> header = new LinkedHashMap<>();
    Enumeration<String> headerNames = request.getHeaderNames();
    while (headerNames.hasMoreElements()) {
        String name = headerNames.nextElement();
        Enumeration<String> values = request.getHeaders(name);
        List<String> list = new ArrayList<>();
        while (values.hasMoreElements()) {
            list.add(values.nextElement());
        }
        header.put(name, list);
    }
    result.put("header", header);
    return result;
}
如下使用 RestTemplate 调用接口GET 方式、传递 header、path 中动态参数。
@Test
public void test9() {
    RestTemplate restTemplate = new RestTemplate();
    String url = "http://localhost:8080/chat16/test/getAll/{path1}/{path2}";
    //①请求头
    MultiValueMap<String, String> headers = new HttpHeaders();
    headers.add("header-1", "V1");
    headers.add("header-2", "Spring");
    headers.add("header-2", "SpringBoot");
    //②url中的2个参数
    Map<String, String> uriVariables = new HashMap<>();
    uriVariables.put("path1", "v1");
    uriVariables.put("path2", "v2");
    //③HttpEntityHTTP实体内部包含了请求头和请求体
    HttpEntity requestEntity = new HttpEntity(
        null,//body部分get请求没有body所以为null
        headers //头
    );
    //④使用exchange发送请求
    ResponseEntity<Map<String, Object>> responseEntity = restTemplate.exchange(
        url, //url
        HttpMethod.GET, //请求方式
        requestEntity, //请求实体头、body
        new ParameterizedTypeReference<Map<String, Object>>() {
        },//返回的结果类型
        uriVariables //url中的占位符对应的值
    );
    Map<String, Object> result = responseEntity.getBody();
    System.out.println(result);
}
输出
{path1=v1, path2=v2, header={accept=[application/json, application/*+json], header-1=[V1], header-2=[Spring, SpringBoot], user-agent=[Java/1.8.0_121], host=[localhost:8080], connection=[keep-alive]}}4、POST 请求
4.1、post 请求常见的 3 种类型
http 请求头中的 Content-Type 用来指定请求的类型常见的有 3 种
| Content-Type | 说明 |
|---|---|
| application/x-www-form-urlencoded | 页面中普通的 form 表单提交时就是这种类型表单中的元素会按照名称和值拼接好然后之间用&连接格式如p1=v1&p2=v2&p3=v3 然后通过 urlencoded 编码之后丢在 body 中发送 |
| multipart/form-data | 页面中表单上传文件的时候用到的就是这种格式 |
| application/json | 将发送的数据转换为 json 格式丢在 http 请求的 body 中发送后端接口通常用@RequestBody 配合对象来接收。 |
下面看则种方式的案例。
4.2、普通表单请求
普通表单默认为 application/x-www-form-urlencoded 类型的请求。
接口代码
@PostMapping("/test/form1")
@ResponseBody
public BookDto form1(BookDto bookDto) {
    return bookDto;
}
使用 RestTemplate 调用接口
@Test
public void test10() {
    RestTemplate restTemplate = new RestTemplate();
    String url = "http://localhost:8080/chat16/test/form1";
    //①表单信息需要放在MultiValueMap中MultiValueMap相当于Map<String,List<String>>
    MultiValueMap<String, String> body = new LinkedMultiValueMap<>();
    //调用add方法填充表单数据(表单名称:值)
    body.add("id","1");
    body.add("name","SpringMVC系列");
    //②发送请求(url,请求体返回值需要转换的类型)
    BookDto result = restTemplate.postForObject(url, body, BookDto.class);
    System.out.println(result);
}
如果想携带头信息代码如下
@Test
public void test11() {
    RestTemplate restTemplate = new RestTemplate();
    String url = "http://localhost:8080/chat16/test/form1";
    //①表单信息需要放在MultiValueMap中MultiValueMap相当于Map<String,List<String>>
    MultiValueMap<String, String> body = new LinkedMultiValueMap<>();
    //调用add方法放入表单元素(表单名称:值)
    body.add("id","1");
    body.add("name","SpringMVC系列");
    //②请求头
    HttpHeaders headers = new HttpHeaders();
    //调用set方法放入请求头
    headers.set(HttpHeaders.CONTENT_TYPE, MediaType.APPLICATION_FORM_URLENCODED_VALUE);
    //③请求实体包含了请求体和请求头
    HttpEntity<MultiValueMap<String, String>> httpEntity = new HttpEntity<>(body, headers);
    //④发送请求(url,请求实体返回值需要转换的类型)
    BookDto result = restTemplate.postForObject(url, httpEntity, BookDto.class);
    System.out.println(result);
}
4.3、上传本地文件
上传文件 Content-Type 为 multipart/form-data 类型。
接口如下上传上传单个文件返回值为一个 Map 类型是泛型类型
@PostMapping(value = "/test/form2")
@ResponseBody
public Map<String, String> form2(@RequestParam("file1") MultipartFile file1) {
    Map<String, String> fileMetadata = new LinkedHashMap<>();
    fileMetadata.put("文件名", file1.getOriginalFilename());
    fileMetadata.put("文件类型", file1.getContentType());
    fileMetadata.put("文件大小(byte)", String.valueOf(file1.getSize()));
    return fileMetadata;
}
使用 RestTemplate 调用接口主要下面代码②上传的文件需要包装为org.springframework.core.io.Resource常用的有 3 中[FileSystemResource、InputStreamResource、ByteArrayResource]这里案例中我们用到的是 FileSystemResource 来上传本地文件另外 2 种InputStreamResource、ByteArrayResource用法就比较特殊了见下个案例。
@Test
public void test12() {
    RestTemplate restTemplate = new RestTemplate();
    String url = "http://localhost:8080/chat16/test/form2";
    //①表单信息需要放在MultiValueMap中MultiValueMap相当于Map<String,List<String>>
    MultiValueMap<String, Object> body = new LinkedMultiValueMap<>();
    //调用add方法放入表单元素(表单名称:值)
    //②文件对应的类型需要是org.springframework.core.io.Resource类型的常见的有[FileSystemResource、InputStreamResource、ByteArrayResource]
    body.add("file1", new FileSystemResource(".\\src\\main\\java\\com\\javacode2018\\springmvc\\chat16\\dto\\UserDto.java"));
    //③头
    HttpHeaders headers = new HttpHeaders();
    headers.add("header1", "v1");
    headers.add("header2", "v2");
    //④请求实体
    RequestEntity<MultiValueMap<String, Object>> requestEntity = new RequestEntity<>(body, headers, HttpMethod.POST, URI.create(url));
    //⑤发送请求(请求实体返回值需要转换的类型)
    ResponseEntity<Map<String, String>> responseEntity = restTemplate.exchange(
        requestEntity,
        new ParameterizedTypeReference<Map<String, String>>() {
        });
    Map<String, String> result = responseEntity.getBody();
    System.out.println(result);
}
4.4、通过流或字节数组的方式上传文件
有时候上传的文件是通过流的方式或者字节数组的方式那么就需要用到 InputStreamResource、ByteArrayResource 这俩了。
**注意**使用这俩的时候需要重写 2 个方法否则会上传失败
getFilename文件名称
contentLength长度
@Test
public void test13() {
    RestTemplate restTemplate = new RestTemplate();
    String url = "http://localhost:8080/chat16/test/form2";
    //①表单信息需要放在MultiValueMap中MultiValueMap相当于Map<String,List<String>>
    MultiValueMap<String, Object> body = new LinkedMultiValueMap<>();
    /**
     * ②通过流的方式上传文件流的方式需要用到InputStreamResource类需要重写2个方法
     * getFilename文件名称
     * contentLength长度
     */
    InputStream inputStream = RestTemplateTest.class.getResourceAsStream("/1.txt");
    InputStreamResource inputStreamResource = new InputStreamResource(inputStream) {
        @Override
        public String getFilename() {
            return "1.txt";
        }

        @Override
        public long contentLength() throws IOException {
            return inputStream.available();
        }
    };
    body.add("file1", inputStreamResource);
    //③头
    HttpHeaders headers = new HttpHeaders();
    headers.add("header1", "v1");
    headers.add("header2", "v2");
    //④请求实体
    RequestEntity<MultiValueMap<String, Object>> requestEntity = new RequestEntity<>(body, headers, HttpMethod.POST, URI.create(url));
    //⑤发送请求(请求实体返回值需要转换的类型)
    ResponseEntity<Map<String, String>> responseEntity = restTemplate.exchange(
            requestEntity,
            new ParameterizedTypeReference<Map<String, String>>() {
            });
    Map<String, String> result = responseEntity.getBody();
    System.out.println(result);
}
4.5、复杂表单多个普通元素+多文件上传
接口
/**
 * 复杂的表单包含了普通元素、多文件
 *
 * @param userDto
 * @return
 */
@PostMapping("/test/form3")
@ResponseBody
public Map<String, String> form3(UserDto userDto) {
    Map<String, String> result = new LinkedHashMap<>();
    result.put("name", userDto.getName());
    result.put("headImg", userDto.getHeadImg().getOriginalFilename());
    result.put("idImgList", Arrays.toString(userDto.getIdImgList().stream().
                                            map(MultipartFile::getOriginalFilename).toArray()));
    return result;
}
UserDto包含了多个元素姓名、头像、多张证件照这种可以模拟复杂的表单
public class UserDto {
    //姓名
    private String name;
    //头像
    private MultipartFile headImg;
    //多张证件照
    private List<MultipartFile> idImgList;

    //get set 省略了...
}
用 RestTemplate 调用这个接口代码如下
@Test
public void test14() {
    RestTemplate restTemplate = new RestTemplate();
    String url = "http://localhost:8080/chat16/test/form3";
    //①表单信息需要放在MultiValueMap中MultiValueMap相当于Map<String,List<String>>
    MultiValueMap<String, Object> body = new LinkedMultiValueMap<>();
    body.add("name", "路人");
    body.add("headImg", new FileSystemResource(".\\src\\main\\resources\\1.jpg"));
    //来2张证件照元素名称一样
    body.add("idImgList", new FileSystemResource(".\\src\\main\\resources\\2.jpg"));
    body.add("idImgList", new FileSystemResource(".\\src\\main\\resources\\3.jpg"));
    //③头
    HttpHeaders headers = new HttpHeaders();
    headers.add("header1", "v1");
    headers.add("header2", "v2");
    //④请求实体
    RequestEntity<MultiValueMap<String, Object>> requestEntity = new RequestEntity<>(body, headers, HttpMethod.POST, URI.create(url));
    //⑤发送请求(请求实体返回值需要转换的类型)
    ResponseEntity<Map<String, String>> responseEntity = restTemplate.exchange(
            requestEntity,
            new ParameterizedTypeReference<Map<String, String>>() {
            });
    Map<String, String> result = responseEntity.getBody();
    System.out.println(result);
}
输出
{name=路人, headImg=1.jpg, idImgList=[2.jpg, 3.jpg]}4.6、发送 json 格式数据传递 java 对象
接口
/**
 * body中json格式的数据返回值非泛型
 *
 * @param bookDto
 * @return
 */
@PostMapping("/test/form4")
@ResponseBody
public BookDto form4(@RequestBody BookDto bookDto) {
    return bookDto;
}
RestTemplate 调用接口
@Test
public void test15() {
    RestTemplate restTemplate = new RestTemplate();
    String url = "http://localhost:8080/chat16/test/form4";
    BookDto body = new BookDto(1, "SpringMVC系列");
    BookDto result = restTemplate.postForObject(url, body, BookDto.class);
    System.out.println(result);
}
输出
BookDto{id=1, name='SpringMVC系列'}4.7、发送 json 格式数据传递 java 对象返回值为泛型
接口
/**
 * body中json格式的数据返回值为泛型
 *
 * @param bookDtoList
 * @return
 */
@PostMapping("/test/form5")
@ResponseBody
public List<BookDto> form5(@RequestBody List<BookDto> bookDtoList) {
    return bookDtoList;
}
用 RestTemplate 调用这个接口代码如下
@Test
public void test16() {
    RestTemplate restTemplate = new RestTemplate();
    String url = "http://localhost:8080/chat16/test/form5";
    //①请求体发送的时候会被转换为json格式数据
    List<BookDto> body = Arrays.asList(
            new BookDto(1, "SpringMVC系列"),
            new BookDto(2, "MySQL系列"));
    //②头
    HttpHeaders headers = new HttpHeaders();
    headers.add("header1", "v1");
    headers.add("header2", "v2");
    //③请求实体
    RequestEntity requestEntity = new RequestEntity(body, headers, HttpMethod.POST, URI.create(url));
    //④发送请求(请求实体返回值需要转换的类型)
    ResponseEntity<List<BookDto>> responseEntity = restTemplate.exchange(
            requestEntity,
            new ParameterizedTypeReference<List<BookDto>>() {
            });
    //⑤获取结果
    List<BookDto> result = responseEntity.getBody();
    System.out.println(result);
}
输出
[BookDto{id=1, name='SpringMVC系列'}, BookDto{id=2, name='MySQL系列'}]4.8、发送 json 字符串格式数据
上面 2 个 json 案例 body 都是 java 对象RestTemplate 默认自动配上 Content-Type=application/json
但是如果 body 的值是 json 格式字符串的时候调用的时候需要在头中明确指定 Content-Type=application/json写法如下
@Test
public void test17() {
    RestTemplate restTemplate = new RestTemplate();
    String url = "http://localhost:8080/chat16/test/form5";
    //①请求体为一个json格式的字符串
    String body = "[{\"id\":1,\"name\":\"SpringMVC系列\"},{\"id\":2,\"name\":\"MySQL系列\"}]";
    /**
     * ②若请求体为json字符串的时候需要在头中设置Content-Type=application/json
     * 若body是普通的java类的时候无需指定这个RestTemplate默认自动配上Content-Type=application/json
     */
    HttpHeaders headers = new HttpHeaders();
    headers.setContentType(MediaType.APPLICATION_JSON);
    //③请求实体body头、请求方式uri
    RequestEntity requestEntity = new RequestEntity(body, headers, HttpMethod.POST, URI.create(url));
    //④发送请求(请求实体返回值需要转换的类型)
    ResponseEntity<List<BookDto>> responseEntity = restTemplate.exchange(
            requestEntity,
            new ParameterizedTypeReference<List<BookDto>>() {
            });
    //⑤获取结果
    List<BookDto> result = responseEntity.getBody();
    System.out.println(result);
}
输出
[BookDto{id=1, name='SpringMVC系列'}, BookDto{id=2, name='MySQL系列'}]5、DELETE、PUT、OPTION 请求
5.1、DELETE 请求
public void delete(String url, Object... uriVariables);
public void delete(String url, Map<String, ?> uriVariables);
public void delete(URI url);
5.2、PUT 请求
PUT 请求和 POST 请求类似将类型改为 PUT 就可以了。
5.3、OPTIONS 请求
OPTIONS 请求用来探测接口支持哪些 http 方法
public Set<HttpMethod> optionsForAllow(String url, Object... uriVariables);
public Set<HttpMethod> optionsForAllow(String url, Map<String, ?> uriVariables);
public Set<HttpMethod> optionsForAllow(URI url);
6、集成 HttpClient
RestTemplate 内部默认用的是 jdk 自带的 HttpURLConnection 发送请求的性能上面并不是太突出。
可以将其替换为 httpclient 或者 okhttp。
先来看下如何替换为 HttpClient。
引入 maven 配置
<dependency>
    <groupId>org.apache.httpcomponents</groupId>
    <artifactId>httpclient</artifactId>
    <version>4.5.7</version>
</dependency>
创建 RestTemplate 时指定 HttpClient 配置代码如下
public HttpClient httpClient() {
    HttpClientBuilder httpClientBuilder = HttpClientBuilder.create();
    try {
        //设置信任ssl访问
        SSLContext sslContext = new SSLContextBuilder().loadTrustMaterial(null, (arg0, arg1) -> true).build();
        httpClientBuilder.setSSLContext(sslContext);
        HostnameVerifier hostnameVerifier = NoopHostnameVerifier.INSTANCE;
        SSLConnectionSocketFactory sslConnectionSocketFactory = new SSLConnectionSocketFactory(sslContext, hostnameVerifier);
        Registry<ConnectionSocketFactory> socketFactoryRegistry = RegistryBuilder.<ConnectionSocketFactory>create()
                // 注册http和https请求
                .register("http", PlainConnectionSocketFactory.getSocketFactory())
                .register("https", sslConnectionSocketFactory).build();

        //使用Httpclient连接池的方式配置(推荐)同时支持nettyokHttp以及其他http框架
        PoolingHttpClientConnectionManager poolingHttpClientConnectionManager = new PoolingHttpClientConnectionManager(socketFactoryRegistry);
        // 最大连接数
        poolingHttpClientConnectionManager.setMaxTotal(1000);
        // 同路由并发数
        poolingHttpClientConnectionManager.setDefaultMaxPerRoute(100);
        //配置连接池
        httpClientBuilder.setConnectionManager(poolingHttpClientConnectionManager);
        // 重试次数
        httpClientBuilder.setRetryHandler(new DefaultHttpRequestRetryHandler(0, true));
        //设置默认请求头
        List<Header> headers = new ArrayList<>();
        httpClientBuilder.setDefaultHeaders(headers);
        return httpClientBuilder.build();
    } catch (Exception e) {
        throw new RuntimeException(e);
    }
}

public ClientHttpRequestFactory clientHttpRequestFactory() {
    HttpComponentsClientHttpRequestFactory clientHttpRequestFactory = new HttpComponentsClientHttpRequestFactory(httpClient());
    // 连接超时(毫秒)这里设置10秒
    clientHttpRequestFactory.setConnectTimeout(10 * 1000);
    // 数据读取超时时间(毫秒)这里设置60秒
    clientHttpRequestFactory.setReadTimeout(60 * 1000);
    // 从连接池获取请求连接的超时时间(毫秒)不宜过长必须设置比如连接不够用时时间过长将是灾难性的
    clientHttpRequestFactory.setConnectionRequestTimeout(10 * 1000);
    return clientHttpRequestFactory;
}

public RestTemplate restTemplate(){
    //创建RestTemplate的时候指定ClientHttpRequestFactory
    return new RestTemplate(this.clientHttpRequestFactory());
}

@Test
public void test18() {
    RestTemplate restTemplate = this.restTemplate();
    String url = "http://localhost:8080/chat16/test/get";
    //getForObject方法获取响应体将其转换为第二个参数指定的类型
    BookDto bookDto = restTemplate.getForObject(url, BookDto.class);
    System.out.println(bookDto);
}
7、集成 okhttp
引入 maven 配置
<dependency>
    <groupId>com.squareup.okhttp3</groupId>
    <artifactId>okhttp</artifactId>
    <version>4.3.1</version>
</dependency>
创建 RestTemplate
new RestTemplate(new OkHttp3ClientHttpRequestFactory());8、总结
RestTemplate 使用确实非常容易建议大家去看一下 RestTemplate 的源码debug 跟踪一下过程这样用起来就非常顺手了。
9、SpringMVC 系列目录
10、更多好文章
11、【路人甲 Java】所有系列高清 PDF
领取方式扫码发送yyds
