vue element安装配置项目实践
| 阿里云国内75折 回扣 微信号:monov8 |
| 阿里云国际,腾讯云国际,低至75折。AWS 93折 免费开户实名账号 代冲值 优惠多多 微信号:monov8 飞机:@monov6 |
目录
1.安装element-ui
npm i element-ui -S
//或者
yarn add element-ui
CDN引入
<!-- 引入样式 -->
<link rel="stylesheet" href="https://unpkg.com/element-ui/lib/theme-chalk/index.css">
<!-- 引入组件库 -->
<script src="https://unpkg.com/element-ui/lib/index.js"></script>
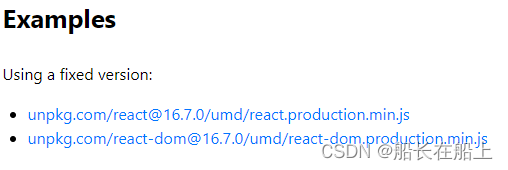
建议使用 CDN 引入 Element 的用户在链接地址上锁定版本以免将来 Element 升级时受到非兼容性更新的影响。锁定版本的方法请查看 unpkg.com。


2.全局、局部引入
main.js全局引用
import Vue from 'vue'
import ElementUI,{MessageBox} from 'element-ui'
import 'element-ui/lib/theme-chalk/index.css'
import App from './App.vue'
Vue.use(ElementUI)
new Vue({
  el: '#app',
  render: h => h(App)
})
按需引入
借助 babel-plugin-component我们可以只引入需要的组件以达到减小项目体积的目的。
首先安装 babel-plugin-component
npm install babel-plugin-component -D然后将 .babelrc 修改为
{
  "presets": [["es2015", { "modules": false }]],
  "plugins": [
    [
      "component",
      {
        "libraryName": "element-ui",
        "styleLibraryName": "theme-chalk"
      }
    ]
  ]
}
引入部分组件需要在 main.js 中配置
import Vue from 'vue';
import { Button, Select } from 'element-ui';
import App from './App.vue';
Vue.use(Button).use(Select)
new Vue({
  el: '#app',
  render: h => h(App)
});
3.自定义主题
推荐最简单的方法推荐使用在线主题生成工具。放心使用。就是有时候打开有点慢。选好颜色之后可下载当前颜色主题。


替换本地文件/node_modules/element-ui/lib/theme-chalk记得不要替换错建议先备份。

5.定义全局变量
import axios from 'axios';
Vue.prototype.$axios = axios;

import * as utils from './utils/utils'
Vue.prototype.$utils = utils;

Vue.prototype.$baseImgUrl = process.env.VUE_APP_IMGAPI+"/";
6.vue自定义指令
// 防重复点击(指令实现)
Vue.directive('throttle', {
  inserted(el, binding) {
      el.addEventListener('click', () => {
          el.style.pointerEvents = 'none';
          if (!el.disabled) {
              setTimeout(() => {
                  el.style.pointerEvents = 'auto';
              }, binding.value || 3000);
          }
      });
  }
});
7.拦截器
//响应拦截器
axios.interceptors.response.use(response => {
  if (response.data.code === 401) {
    hideLoading();
    localStorage.clear();
    MessageBox.alert("登录超时请重新登录", "提示", {
      confirmButtonText: "确定",
      showClose:false,
      callback: () => {
        router.push("/login");
        window.location.reload();
      }
    }).then(r => this.load(false));
  }
  return response;
}, function (error) {
  hideLoading();
  router.push("/login");
  return Promise.reject(error)
});
8.路由拦截处理
router.beforeEach((to, from, next) => {
    document.title = "测试项目";
    if (to.matched.length != 0) {
        if (to.meta.requireAuth) { // 判断该路由是否需要登录权限
            if (localStorage.getItem("token")) { // 通过vuex state获取当前的user是否存在
                next();
            } else {
                next({
                    path: '/login',
                    query: {
                        redirect: to.fullPath
                    } // 将跳转的路由path作为参数登录成功后跳转到该路由
                })
            }
        } else {
            if (localStorage.getItem("token")) { // 判断是否登录
                if (to.path != "/" && to.path != "/login" && to.path != "/register") { //判断是否要跳到登录界面
                    next();
                } else {
                    /**
                     * 防刷新如果登录修改路由跳转到登录页面修改路由为登录后的首页
                     */
                    next({
                        path: '/index'
                    })

                }
            } else {
                next();
            }
        }
    } else {
        next({
            path: '/login',
            query: {
                redirect: to.fullPath
            } // 将跳转的路由path作为参数登录成功后跳转到该路由
        })
    }
});
9.全局配置 loading加载效果
当前以element-ui示例
新建loading.js
import { Loading } from 'element-ui';

let loadingCount = 0;
let loading;

const startLoading = () => {
  loading = Loading.service({
    lock: true,
    text: '加载中……',
    background: 'rgba(0, 0, 0, 0.7)',
    customClass:"loadingModel",//自定义类名
  });
};

const endLoading = () => {
  loading.close();
};

export const showLoading = () => {
  if (loadingCount === 0) {
    startLoading();
  }
  loadingCount += 1;
};

export const hideLoading = () => {
  if (loadingCount <= 0) {
    return;
  }
  loadingCount -= 1;
  if (loadingCount === 0) {
    endLoading();
  }
};
可直接在组件中直接引用使用或者在接口封装中使用
import { showLoading, hideLoading } from '../utils/loading';登录接口封装使用
// 通用公用方法
const req = (method, url, params) => {
  return axios({
    method: method,
    url: url,
    headers: {
      'Content-Type': 'application/json',
      'Authorization': JSON.parse(localStorage.getItem("userdata")).token
    },
    data: params
  }).then(res => {
    hideLoading();
    if(res.data.code===403 || res.data.code===401){
      localStorage.clear();
    }else{
      return res.data;
    }
  }).catch(error => {
    hideLoading();
    localStorage.clear();
    window.location.reload();
  });
};
10.前端调试接口跨域处理
vue.config.js中配置跨域
module.exports = {
    ....
    devServer: {
        /* 本地ip地址 */
        host: "",
        port: "8080",
        hot: true,
        /* 自动打开浏览器 */
        open: false,
        overlay: {
          warning: false,
          error: true
        }, // 错误、警告在页面弹出
        /* 跨域代理 */
        proxy: {
          "/api": {
            /* 目标代理服务器地址 */
            target: process.env.VUE_APP_API,
            // target: "http://192.168.50.2",
            /* 允许跨域 */
            changeOrigin: true,
            ws: true,
            pathRewrite: {
              "^/api": ""
            }
          }
        }
  },
    ....

}
11.element组件使用注意事项
在使用Dialog 对话框里面加入input输入框在用鼠标复制里面的文字时候对话框却会隐藏。
解决办法
增加:close-on-click-modal="false"
<el-dialog title="编辑简介" :visible.sync="editDialog" :close-on-click-modal="false">
      <el-form>
        <el-form-item label="" label-width="0">
          <el-input v-model="userIntroduction" autocomplete="off" type="textarea" :rows="3"></el-input>
        </el-form-item>
      </el-form>
      <div slot="footer" class="dialog-footer">
        <el-button @click="editDialog = false">取 消</el-button>
        <el-button type="primary" @click="handleEditSure(userIntroduction)">确 定</el-button>
      </div>
</el-dialog>
嵌套的 Dialog
解决办法在内层dialog 新增append-to-body属性
<el-dialog title="外层 Dialog" :visible.sync="outerVisible">
    <el-dialog
      width="30%"
      title="内层 Dialog"
      :visible.sync="innerVisible"
      append-to-body>
    </el-dialog>
    <div slot="footer" class="dialog-footer">
      <el-button @click="outerVisible = false">取 消</el-button>
      <el-button type="primary" @click="innerVisible = true">打开内层 Dialog</el-button>
    </div>
</el-dialog>
日期使用范围pickerOptions配置只能选择当前日期及之后的日期
<el-date-picker
              class="datePicker mr20"
              v-model="timeValue"
              type="daterange"
              range-separator="-"
              start-placeholder="开始日期"
              end-placeholder="结束日期"
              value-format="yyyy-MM-dd"
              clearable
              :picker-options="pickerOptions"
              @change="handleChangeTime">
</el-date-picker>
data中定义
// 设置只能选择当前日期及之后的日期
pickerOptions: {
   disabledDate(time) {
    //如果没有后面的-8.64e7就是不可以选择今天的
     return time.getTime() > Date.now();
    }
},
后期会继续更新
⭐ ⭐ ⭐ 作者 船长在船上
🚩 🚩 🚩 主页 来访地址船长在船上的博客
🔨 🔨 🔨 简介 CSDN前端领域博客专家CSDN前端领域优质创作者资深前端开发工程师专注web前端领域开发在CSDN分享工作中遇到的问题以及问题解决方法和对项目开发的实际案例总结以及新技术的认识。
————————————————
版权声明本文为CSDN博主「船长在船上」的原创文章遵循CC 4.0 BY-SA版权协议转载请附上原文出处链接及本声明。

