

Python深度学习实战-基于tensorflow原生代码搭建BP神经网络实现分类任务(附源码和实现效果)-CSDN博客
| 阿里云国内75折 回扣 微信号:monov8 |
| 阿里云国际,腾讯云国际,低至75折。AWS 93折 免费开户实名账号 代冲值 优惠多多 微信号:monov8 飞机:@monov6 |
实现功能
前面两篇文章分别介绍了两种搭建神经网络模型的方法一种是基于tensorflow的keras框架另一种是继承父类自定义class类本篇文章将编写原生代码搭建BP神经网络。
实现代码
import tensorflow as tf
from sklearn.datasets import load_iris
from sklearn.model_selection import train_test_split
from sklearn.preprocessing import StandardScaler
# 加载鸢尾花数据集
iris = load_iris()
X = iris.data
y = iris.target
# 数据预处理
scaler = StandardScaler()
X = scaler.fit_transform(X)
# 划分训练集和测试集
X_train, X_test, y_train, y_test = train_test_split(X, y, test_size=0.2, random_state=42)
# 设置超参数
learning_rate = 0.001
num_epochs = 100
batch_size = 32
# 定义输入和输出的维度
input_dim = X.shape[1]
output_dim = len(set(y))
# 定义权重和偏置项
W1 = tf.Variable(tf.random.normal(shape=(input_dim, 64), dtype=tf.float64))
b1 = tf.Variable(tf.zeros(shape=(64,), dtype=tf.float64))
W2 = tf.Variable(tf.random.normal(shape=(64, 64), dtype=tf.float64))
b2 = tf.Variable(tf.zeros(shape=(64,), dtype=tf.float64))
W3 = tf.Variable(tf.random.normal(shape=(64, output_dim), dtype=tf.float64))
b3 = tf.Variable(tf.zeros(shape=(output_dim,), dtype=tf.float64))
# 定义前向传播函数
def forward_pass(X):
X = tf.cast(X, tf.float64)
h1 = tf.nn.relu(tf.matmul(X, W1) + b1)
h2 = tf.nn.relu(tf.matmul(h1, W2) + b2)
logits = tf.matmul(h2, W3) + b3
return logits
# 定义损失函数
def loss_fn(logits, labels):
return tf.reduce_mean(tf.nn.sparse_softmax_cross_entropy_with_logits(labels=labels, logits=logits))
# 定义优化器
optimizer = tf.optimizers.Adam(learning_rate)
# 定义准确率指标
accuracy_metric = tf.metrics.SparseCategoricalAccuracy()
# 定义训练步骤
def train_step(inputs, labels):
with tf.GradientTape() as tape:
logits = forward_pass(inputs)
loss_value = loss_fn(logits, labels)
gradients = tape.gradient(loss_value, [W1, b1, W2, b2, W3, b3])
optimizer.apply_gradients(zip(gradients, [W1, b1, W2, b2, W3, b3]))
accuracy_metric(labels, logits)
return loss_value
# 进行训练
for epoch in range(num_epochs):
epoch_loss = 0.0
accuracy_metric.reset_states()
for batch_start in range(0, len(X_train), batch_size):
batch_end = batch_start + batch_size
batch_X = X_train[batch_start:batch_end]
batch_y = y_train[batch_start:batch_end]
loss = train_step(batch_X, batch_y)
epoch_loss += loss
train_loss = epoch_loss / (len(X_train) // batch_size)
train_accuracy = accuracy_metric.result()
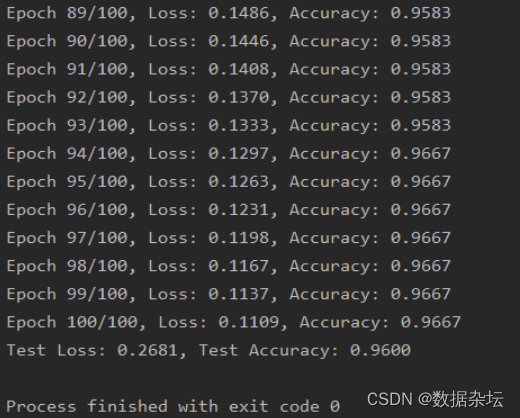
print(f"Epoch {epoch+1}/{num_epochs}, Loss: {train_loss:.4f}, Accuracy: {train_accuracy:.4f}")
# 进行评估
logits = forward_pass(X_test)
test_loss = loss_fn(logits, y_test)
test_accuracy = accuracy_metric(y_test, logits)
print(f"Test Loss: {test_loss:.4f}, Test Accuracy: {test_accuracy:.4f}")实现效果
本人读研期间发表5篇SCI数据挖掘相关论文现在某研究院从事数据挖掘相关科研工作对数据挖掘有一定认知和理解会结合自身科研实践经历不定期分享关于python、机器学习、深度学习基础知识与案例。
致力于只做原创以最简单的方式理解和学习关注我一起交流成长。
邀请三个朋友关注V订阅号数据杂坛即可在后台联系我获取相关数据集和源码送有关数据分析、数据挖掘、机器学习、深度学习相关的电子书籍。