

Unreal学习笔记2-绘制简单三角形
| 阿里云国内75折 回扣 微信号:monov8 |
| 阿里云国际,腾讯云国际,低至75折。AWS 93折 免费开户实名账号 代冲值 优惠多多 微信号:monov8 飞机:@monov6 |
文章目录
1. 概述
之所以写这个绘制简单三角形的实例其实是想知道如何在Unreal中通过代码绘制自定义Mesh如果你会绘制一个三角形那么自然就会绘制复杂的Mesh了。所以这是很多图形工作者的第一课。
2. 详论
2.1. 代码实现
Actor是Unreal的基本显示对象有点类似于Unity中的GameObject或者OSG中的Node。因此我们首先要实现一个继承自AActor的类
头文件CustomMeshActor.h
#pragma once

// clang-format off
#include "CoreMinimal.h"
#include "GameFramework/Actor.h"
#include "CustomMeshActor.generated.h"
// clang-format on

UCLASS()
class UESTUDY_API ACustomMeshActor : public AActor {
  GENERATED_BODY()

 public:
  // Sets default values for this actor's properties
  ACustomMeshActor();

 protected:
  // Called when the game starts or when spawned
  virtual void BeginPlay() override;

  UStaticMesh* CreateMesh();
  void CreateGeometry(FStaticMeshRenderData* RenderData);
  void CreateMaterial(UStaticMesh* mesh);

 public:
  // Called every frame
  virtual void Tick(float DeltaTime) override;

  UPROPERTY(VisibleAnywhere, BlueprintReadOnly)
  UStaticMeshComponent* staticMeshComponent;
};
实现CustomMeshActor.cpp
#include "CustomMeshActor.h"

#include "Output.h"

// Sets default values
ACustomMeshActor::ACustomMeshActor() {
  // Set this actor to call Tick() every frame.  You can turn this off to
  // improve performance if you don't need it.
  PrimaryActorTick.bCanEverTick = true;
}

// Called when the game starts or when spawned
void ACustomMeshActor::BeginPlay() {
  Super::BeginPlay();

  staticMeshComponent = NewObject<UStaticMeshComponent>(this);

  staticMeshComponent->SetMobility(EComponentMobility::Stationary);
  SetRootComponent(staticMeshComponent);
  staticMeshComponent->RegisterComponent();

  UStaticMesh* mesh = CreateMesh();
  if (mesh) {
    staticMeshComponent->SetStaticMesh(mesh);
  }
}

UStaticMesh* ACustomMeshActor::CreateMesh() {
  UStaticMesh* mesh = NewObject<UStaticMesh>(staticMeshComponent);
  mesh->NeverStream = true;
  mesh->SetIsBuiltAtRuntime(true);

  TUniquePtr<FStaticMeshRenderData> RenderData =
      MakeUnique<FStaticMeshRenderData>();

  CreateGeometry(RenderData.Get());

  CreateMaterial(mesh);

  mesh->SetRenderData(MoveTemp(RenderData));
  mesh->InitResources();
  mesh->CalculateExtendedBounds();  //设置包围盒之后调用这个函数起效否则会被视锥体剔除
  return mesh;
}

void ACustomMeshActor::CreateMaterial(UStaticMesh* mesh) {
  UMaterial* material1 = (UMaterial*)StaticLoadObject(
      UMaterial::StaticClass(), nullptr,
      TEXT("Material'/Game/Materials/RedColor.RedColor'"));

  mesh->AddMaterial(material1);

  UMaterial* material2 = (UMaterial*)StaticLoadObject(
      UMaterial::StaticClass(), nullptr,
      TEXT("Material'/Game/Materials/GreenColor.GreenColor'"));

  mesh->AddMaterial(material2);
}

void ACustomMeshActor::CreateGeometry(FStaticMeshRenderData* RenderData) {
  RenderData->AllocateLODResources(1);
  FStaticMeshLODResources& LODResources = RenderData->LODResources[0];

  int vertexNum = 4;

  TArray<FVector> xyzList;
  xyzList.Add(FVector(0, 0, 50));
  xyzList.Add(FVector(100, 0, 50));
  xyzList.Add(FVector(100, 100, 50));
  xyzList.Add(FVector(0, 100, 50));

  TArray<FVector2D> uvList;
  uvList.Add(FVector2D(0, 1));
  uvList.Add(FVector2D(0, 0));
  uvList.Add(FVector2D(1, 0));
  uvList.Add(FVector2D(1, 1));

  // 设置顶点数据
  TArray<FStaticMeshBuildVertex> StaticMeshBuildVertices;
  StaticMeshBuildVertices.SetNum(vertexNum);
  for (int m = 0; m < vertexNum; m++) {
    StaticMeshBuildVertices[m].Position = xyzList[m];
    StaticMeshBuildVertices[m].Color = FColor(255, 0, 0);
    StaticMeshBuildVertices[m].UVs[0] = uvList[m];
    StaticMeshBuildVertices[m].TangentX = FVector(0, 1, 0);  //切线
    StaticMeshBuildVertices[m].TangentY = FVector(1, 0, 0);  //副切线
    StaticMeshBuildVertices[m].TangentZ = FVector(0, 0, 1);  //法向量
  }

  LODResources.bHasColorVertexData = false;

  //顶点buffer
  LODResources.VertexBuffers.PositionVertexBuffer.Init(StaticMeshBuildVertices);

  //法线切线贴图坐标buffer
  LODResources.VertexBuffers.StaticMeshVertexBuffer.Init(
      StaticMeshBuildVertices, 1);

  //设置索引数组
  TArray<uint32> indices;
  int numTriangles = 2;
  int indiceNum = numTriangles * 3;
  indices.SetNum(indiceNum);
  indices[0] = 2;
  indices[1] = 1;
  indices[2] = 0;
  indices[3] = 3;
  indices[4] = 2;
  indices[5] = 0;

  LODResources.IndexBuffer.SetIndices(indices,
                                      EIndexBufferStride::Type::AutoDetect);

  LODResources.bHasDepthOnlyIndices = false;
  LODResources.bHasReversedIndices = false;
  LODResources.bHasReversedDepthOnlyIndices = false;
  // LODResources.bHasAdjacencyInfo = false;

  FStaticMeshLODResources::FStaticMeshSectionArray& Sections =
      LODResources.Sections;
  {
    FStaticMeshSection& section = Sections.AddDefaulted_GetRef();

    section.bEnableCollision = false;
    section.MaterialIndex = 0;
    section.NumTriangles = 1;
    section.FirstIndex = 0;
    section.MinVertexIndex = 0;
    section.MaxVertexIndex = 2;
  }
  {
    FStaticMeshSection& section = Sections.AddDefaulted_GetRef();

    section.bEnableCollision = false;
    section.MaterialIndex = 0;
    section.NumTriangles = 1;
    section.FirstIndex = 3;
    section.MinVertexIndex = 3;
    section.MaxVertexIndex = 5;
  }

  double boundArray[7] = {0, 0, 0, 200, 200, 200, 200};

  //设置包围盒
  FBoxSphereBounds BoundingBoxAndSphere;
  BoundingBoxAndSphere.Origin =
      FVector(boundArray[0], boundArray[1], boundArray[2]);
  BoundingBoxAndSphere.BoxExtent =
      FVector(boundArray[3], boundArray[4], boundArray[5]);
  BoundingBoxAndSphere.SphereRadius = boundArray[6];
  RenderData->Bounds = BoundingBoxAndSphere;
}

// Called every frame
void ACustomMeshActor::Tick(float DeltaTime) { Super::Tick(DeltaTime); }
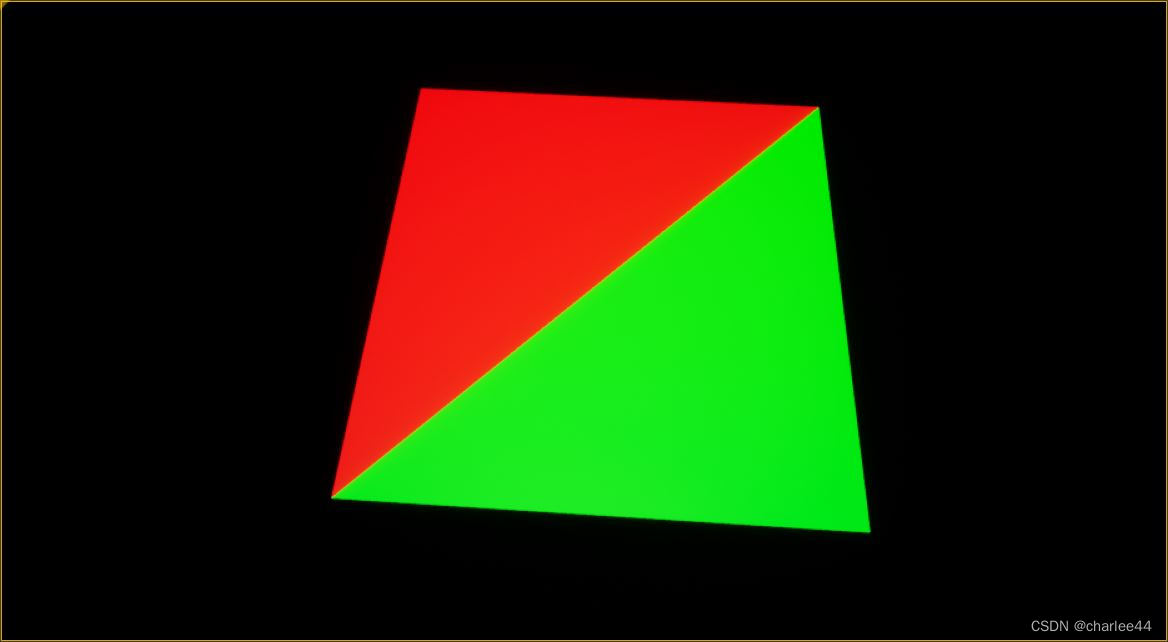
然后将这个类对象ACustomMeshActor拖放到场景中显示结果如下
2.2. 解析Component
-
Actor只是一个空壳具体的功能是通过各种类型的Component实现的这一点与Unity不谋而合这里使用的是UStaticMeshComponent这也是Unreal场景中用的最多的Mesh组件。
-
这里组件初始化是在BeginPlay()中创建的如果在构造函数中创建那么就不能使用NewObject而应该使用如下方法
// Sets default values ACustomMeshActor::ACustomMeshActor() { // Set this actor to call Tick() every frame. You can turn this off to // improve performance if you don't need it. PrimaryActorTick.bCanEverTick = true; staticMeshComponent = CreateDefaultSubobject<UStaticMeshComponent>(TEXT("SceneRoot")); staticMeshComponent->SetMobility(EComponentMobility::Static); SetRootComponent(staticMeshComponent); UStaticMesh* mesh = CreateMesh(); if (mesh) { staticMeshComponent->SetStaticMesh(mesh); } } -
承接2在BeginPlay()中创建和在构造函数中创建的区别就在于前者是运行时创建而后者在程序运行之前就创建了可以在未运行的编辑器状态下看到静态网格体和材质。
-
承接2在构造函数中创建的UStaticMeshComponent移动性被设置成Static了这时运行会提示“光照需要重建”也就是静态对象需要烘焙光照在工具栏"构建"->"仅构建光照"烘培一下即可。这种方式运行时渲染效率最高。
-
对比4运行时创建的UStaticMeshComponent移动性可以设置成Stationary表示这个静态物体不移动启用缓存光照法并且缓存动态阴影。
2.3. 解析材质
-
在UE编辑器分别创建了红色和绿色简单材质注意材质是单面还是双面的C++代码设置的要和材质蓝图中设置的要保持一致。最开始我参考的就是参考文献1中的代码代码中设置成双面但是我自己的材质蓝图中用的单面程序启动直接崩溃了。
-
如果场景中材质显示不正确比如每次浏览场景时的效果都不一样说明可能法向量没有设置我最开始就没有注意这个问题以为是光照的问题。
-
单面材质的话正面是逆时针序还是顺时针序从这个案例来看应该是逆时针。UE是个左手坐标系X轴向前法向量是(0, 0, 1)从法向量的一边看过去顶点顺序是(100, 100, 50)->(100, 0, 50)->(0, 0, 50)明显是逆时针。
2.4. 解析包围盒
-
包围盒参数最好要设置UE似乎默认实现了视景体裁剪不在范围内的物体会不显示。如果在某些视角场景对象突然不显示了可能包围盒参数没有设置正确导致视景体裁剪错误地筛选掉了当前场景对象。
FBoxSphereBounds BoundingBoxAndSphere; //... RenderData->Bounds = BoundingBoxAndSphere; //... mesh->CalculateExtendedBounds(); //设置包围盒之后调用这个函数起效否则会被视锥体剔除 -
即使是一个平面包围盒的三个Size参数之一也不能为0否则还是可能会在某些视角场景对象不显示。
2.5. 解析Section
Mesh内部是可以进行划分的划分成多少个section就使用多少个材质比如这里划分了两个section最后就使用了两个材质。如下代码所示
FStaticMeshLODResources::FStaticMeshSectionArray& Sections =
    LODResources.Sections;
{
  FStaticMeshSection& section = Sections.AddDefaulted_GetRef();

  section.bEnableCollision = false;
  section.MaterialIndex = 0;
  section.NumTriangles = 1;
  section.FirstIndex = 0;
  section.MinVertexIndex = 0;
  section.MaxVertexIndex = 2;
}
{
  FStaticMeshSection& section = Sections.AddDefaulted_GetRef();

  section.bEnableCollision = false;
  section.MaterialIndex = 0;
  section.NumTriangles = 1;
  section.FirstIndex = 3;
  section.MinVertexIndex = 3;
  section.MaxVertexIndex = 5;
}
3. 其他
除了本文介绍的方法之外也有其他的实现办法具体可以参考文献3-5。实在是没有时间进行进一步的研究了因此记录备份一下。另外文献6-7可能对了解UE关于Mesh的内部实现有所帮助笔者反正是看麻了。不得不说这么一个微小的功能涉及到的内容还真不少看来有的研究了。