Hadoop-Hbase

阿里云国内75折 回扣 微信号:monov8
阿里云国际,腾讯云国际,低至75折。AWS 93折 免费开户实名账号 代冲值 优惠多多 微信号:monov8 飞机:@monov6

1. Hbase安装

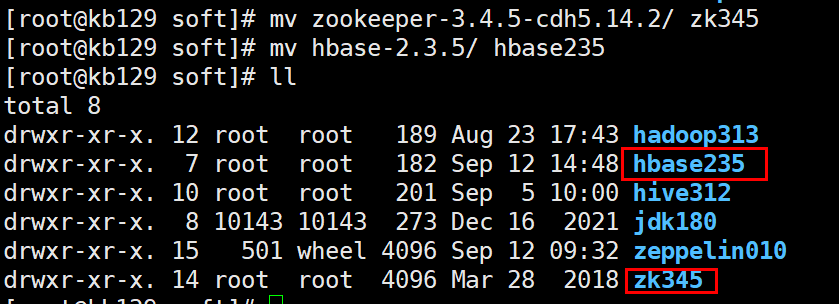
1.1  安装zookeeper、 hbase

解压至/opt/soft并分别改名

配置环境变量并source生效

#ZK

export ZOOKEEPER_HOME=/opt/soft/zk345

export PATH=$ZOOKEEPER_HOME/bin:$PATH

#HBASE_HOME

export HBASE_HOME=/opt/soft/hbase235

export PATH=$HBASE_HOME/bin:$PATH

hbase235/conf目录下的

编辑hbase-env.sh[root@kb129 conf]# vim ./hbase-env.sh

export JAVA_HOME=/opt/soft/jdk180

编辑hbase-site.xml

[root@kb129 conf]# vim ./hbase-site.xml

<property>

    <name>hbase.rootdir</name>

    <value>hdfs://192.168.142.129:9000/hbase</value>

  </property>

  <property>

    <name>hbase.cluster.distributed</name>

    <value>true</value>

  </property>

  <property>

    <name>hbase.zookeeper.property.dataDir</name>

    <value>/opt/soft/zk345/zkdata</value>

  </property>

  <property>

    <name>hbase.zookeeper.property.clientPort</name>

    <value>2181</value>

  </property>

拷贝配置文件准备配置zookeeper

[root@kb129 conf]# pwd

/opt/soft/zk345/conf

[root@kb129 conf]# cp zoo_sample.cfg zoo.cfg

创建目录

[root@kb129 conf]# mkdir /opt/soft/zk345/logs

[root@kb129 conf]# mkdir /opt/soft/zk345/zkdata

编辑配置文件增加目录指向

[root@kb129 conf]# vim  ./zoo.cfg

dataDir=/opt/soft/zk345/zkdata

dataLogDir=/opt/soft/zk345/logs

server.0=192.168.142.129:2287:3387

追加节点id

[root@kb129 conf]# cd ../zkdata/

[root@kb129 zkdata]# echo "0">myid

启动zookeeper

[root@kb129 zkdata]# zkServer.sh start

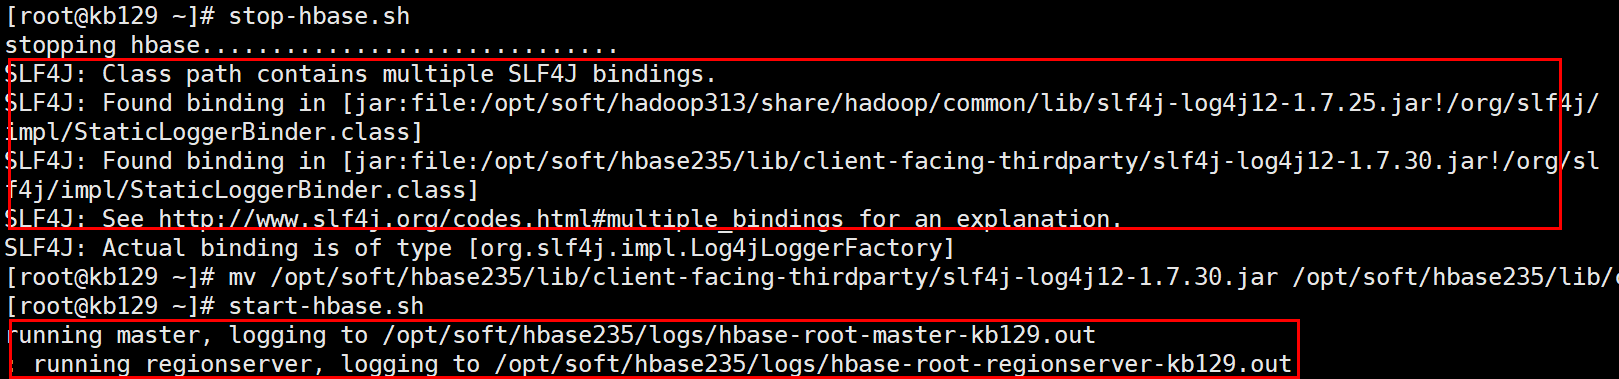
启动hbase

启动前解决Hbase和hadoop中log4j的jar包冲突报错问题将Hbase中的jar包改名就不会读取解决掉冲突报错mv /opt/soft/hbase235/lib/client-facing-thirdparty/slf4j-log4j12-1.7.30.jar /opt/soft/hbase235/lib/client-facing-thirdparty/slf4j-log4j12-1.7.30.jar.bak

[root@kb129 zkdata]# start-hbase.sh

网页访问http://kb129:16010/

hbase宕机恢复操作此操作会删除hbase中数据慎用
1执行stop-hbase.sh关闭hbase进程或通过kill杀死进程
2确保hadoop和zookeeper正常运行状态下进入zookeeper客户端zkCli.sh
3删除hbasermr /hbase删除后ls / 查看是否已经删除
4进入hdfs系统删除hbase指向目录/hbase
5执行start-hbase.sh成功恢复hbase

2.Hbase shell相关操作

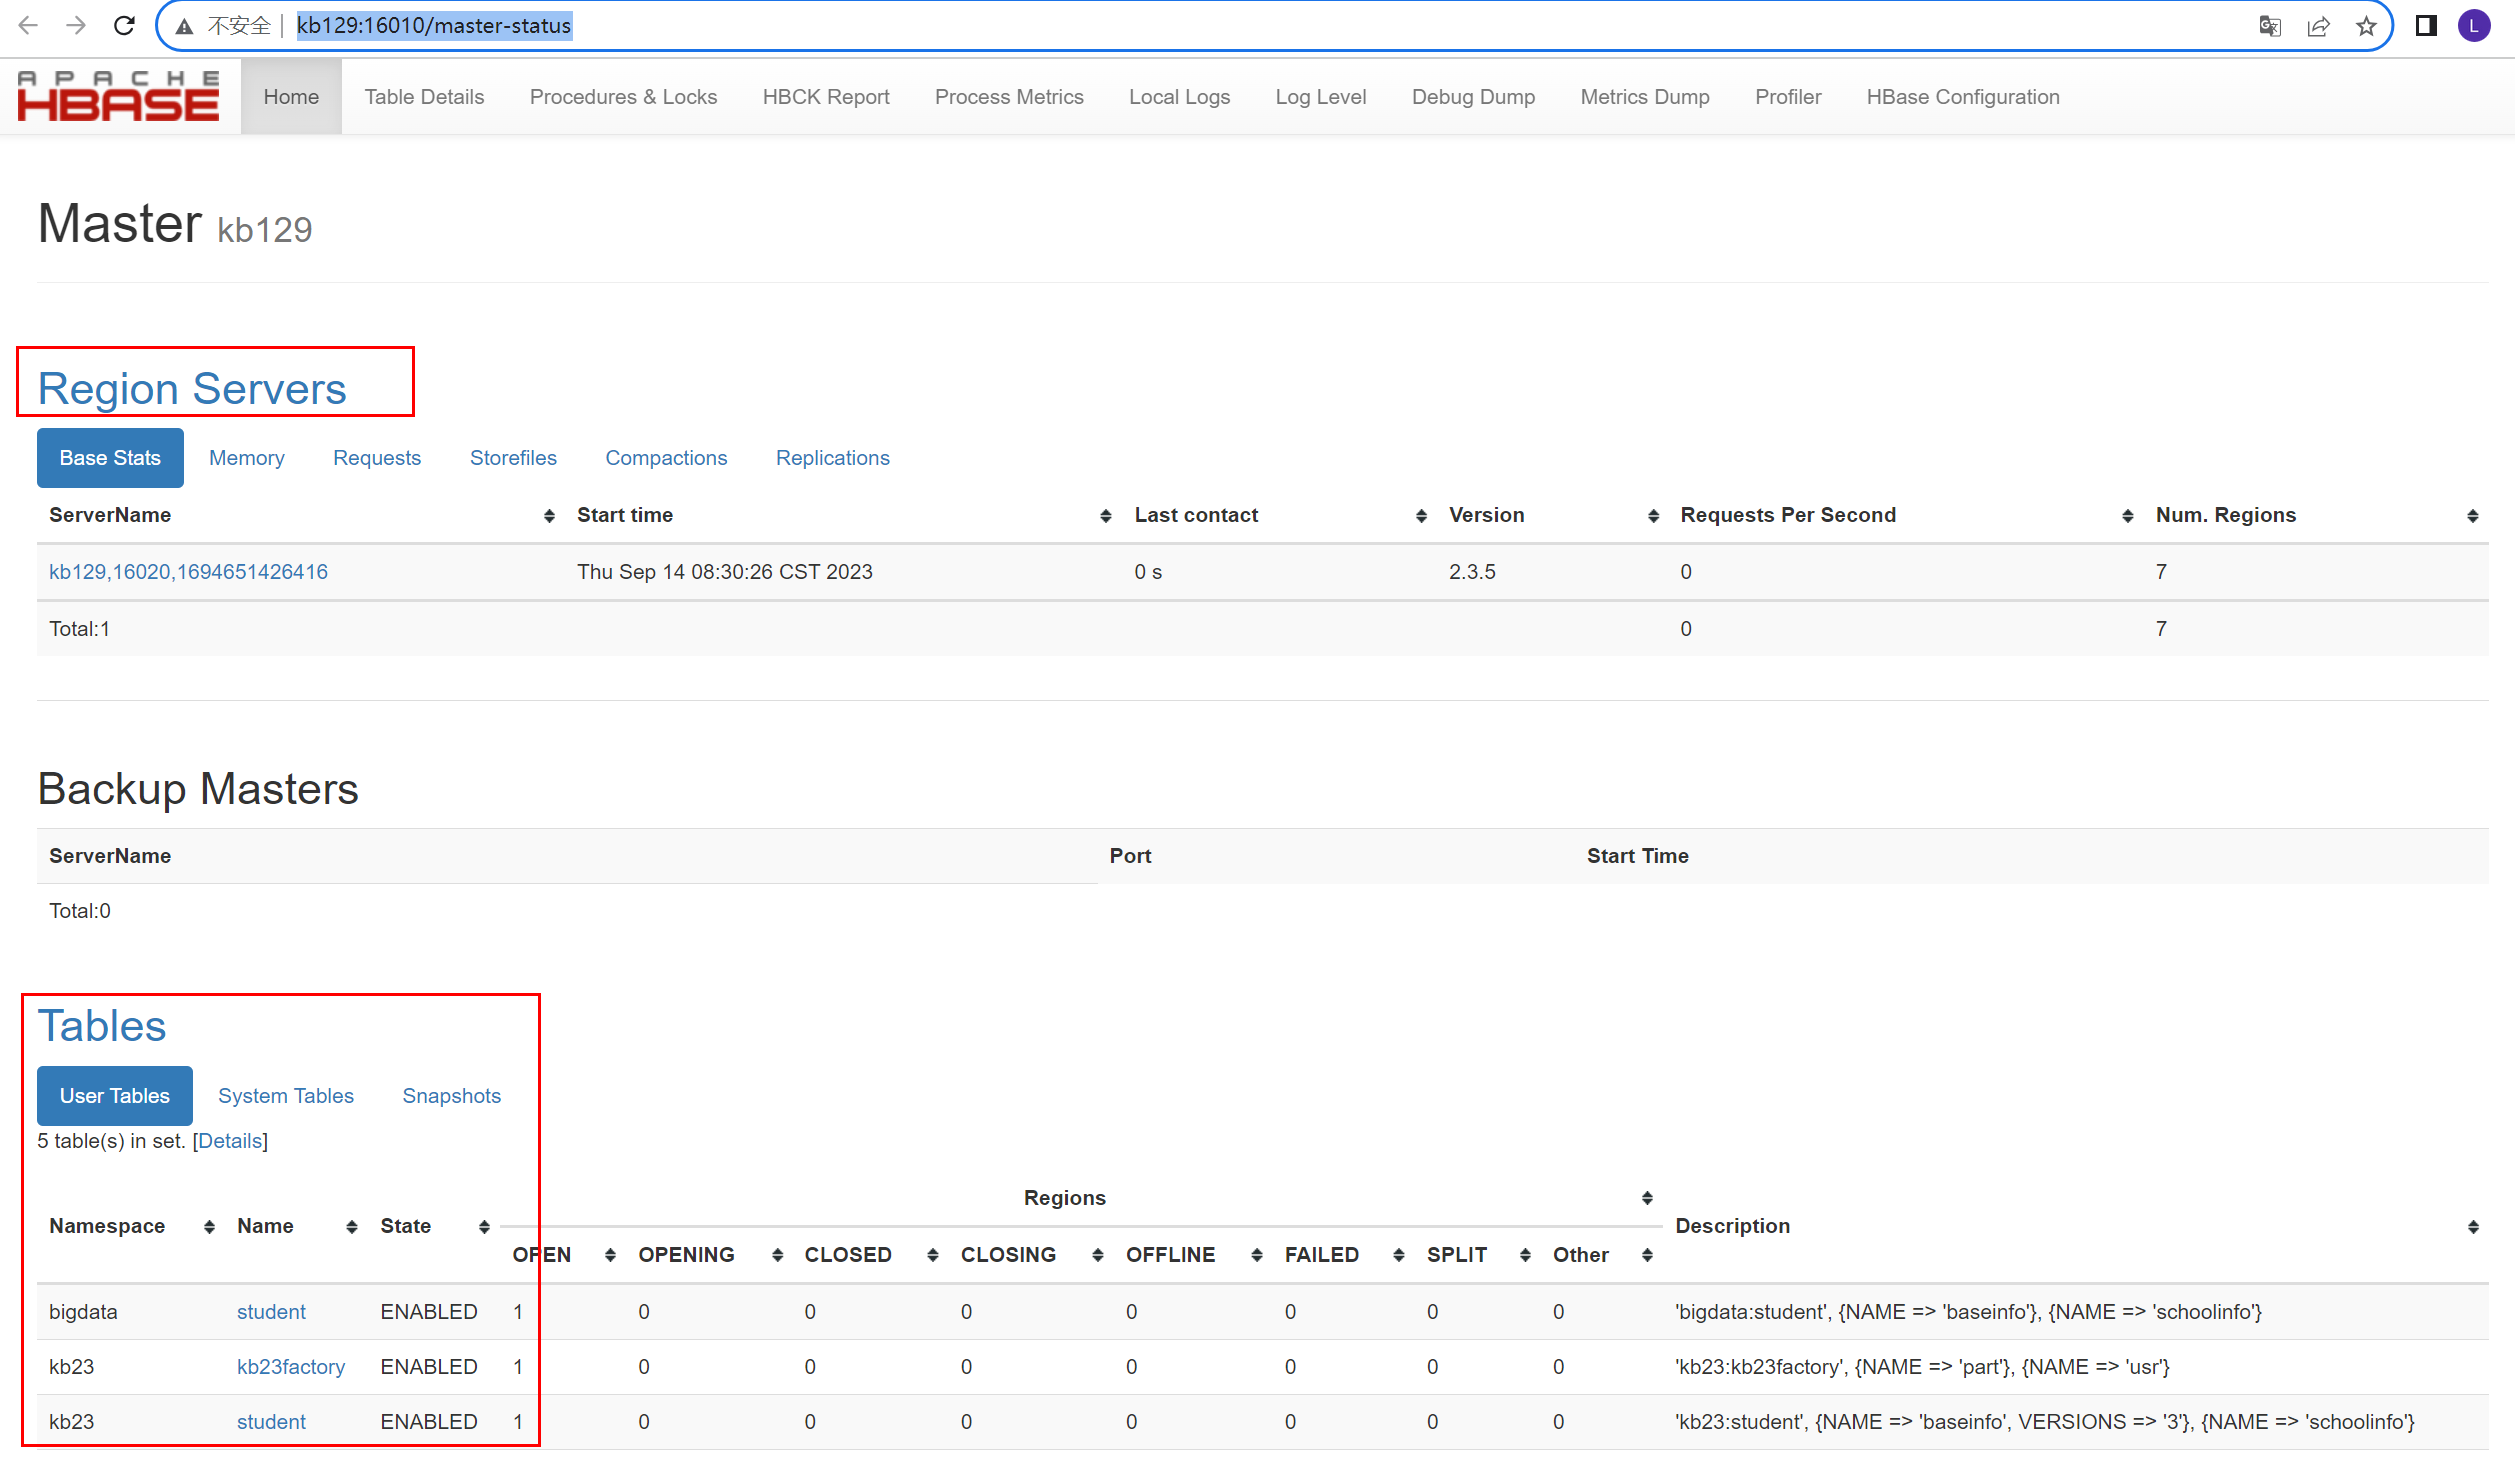
[root@kb129 conf]# hbase shell

创建命名空间

hbase(main):001:0> create_namespace 'kb23'

查看命名空间

hbase(main):001:0>list _namespace


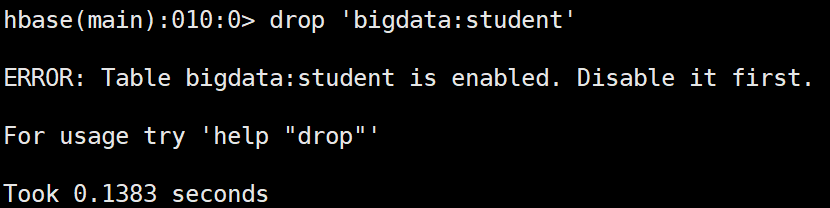
创建表

hbase(main):007:0> create 'bigdata:student','baseinfo','schoolinfo'

查看表

hbase(main):008:0> list_namespace_tables 'bigdata'

查看描述

hbase(main):009:0> desc 'bigdata:student'

删除表之前先禁用表

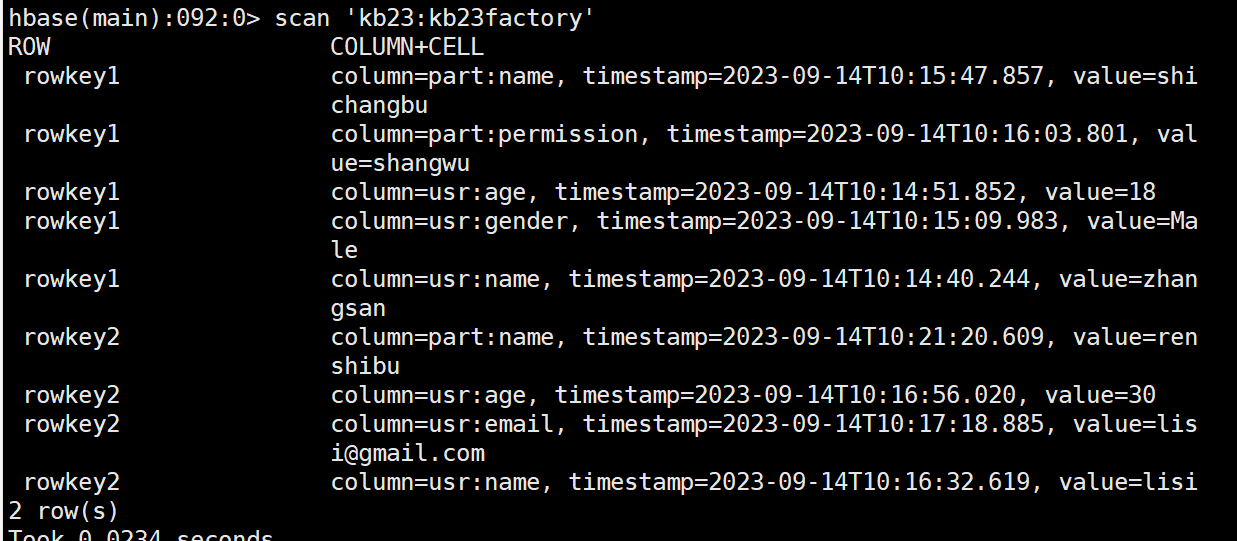
禁用表

hbase(main):011:0> disable 'bigdata:student'

查看是否禁用/启用

hbase(main):011:0> is_disabled/is_enabled 'bigdata:student'

启用表

hbase(main):011:0> enable 'bigdata:student'

插入数据原有数据的话会覆盖

hbase(main):006:0> put 'bigdata:student','rowkey1','baseinfo:name','tom'

查看指定rowkey的所有数据

hbase(main):008:0> get 'bigdata:student','rowkey1'

COLUMN                        CELL                                                                               

 baseinfo:age                 timestamp=2023-09-13T14:21:26.095, value=30                                        

 baseinfo:name                timestamp=2023-09-13T14:21:22.385, value=tom    

查看指定列族数据

hbase(main):011:0> get 'bigdata:student','rowkey1','baseinfo'

COLUMN                        CELL                                                                               

 baseinfo:age                 timestamp=2023-09-13T14:21:26.095, value=30                                        

 baseinfo:name                timestamp=2023-09-13T14:21:22.385, value=tom   

查看指定列族中某列数据

hbase(main):012:0> get 'bigdata:student','rowkey1','baseinfo:name'

COLUMN                        CELL                                                                               

 baseinfo:name                timestamp=2023-09-13T14:21:22.385, value=tom

添加列族

hbase(main):021:0> alter 'kb23:student','teacherinfo'

删除列族

hbase(main):023:0> alter 'kb23:student',{NAME=>'teacherinfo',METHOD=>'delete'}

更改版本个数VERSIONS默认为1

hbase(main):026:0> alter 'kb23:student',{NAME=>'baseinfo',VERSIONS=>3}

全表扫描

hbase(main):027:0> scan 'kb23:student'

删除指定列族中的列

hbase(main):055:0> delete 'kb23:student','rowkey2','baseinfo:name'

删除所有rowkey2信息

hbase(main):060:0> deleteall 'kb23:student','rowkey2'

查看不同版本信息

hbase(main):070:0> get 'kb23:student','rowkey1',COLUMN=>'baseinfo:name',VERSIONS=>3

查看范围内rowkey的数据左闭右开

hbase(main):094:0> scan 'kb23:student', {COLUMNS => 'baseinfo:name', STARTROW => 'rowkey',STOPROW=> 'rowkey3'}

查看时使用limit

hbase(main):096:0> scan 'kb23:student', {COLUMNS => 'baseinfo:name', STARTROW => 'rowkey',STOPROW=> 'rowkey3', VERSIONS=> 3, LIMIT=> 1}

过滤查找value包含11开头的信息可查到多个版本

hbase(main):099:0> scan 'kb23:student',FILTER=>"ValueFilter(=,'binary:11')"

过滤查找value包含andemen开头的信息可查到多个版本

hbase(main):102:0> scan 'kb23:student',FILTER=>"ValueFilter(=,'substring:andemen')"

过滤查找列名birth开头的信息可查到多个版本

hbase(main):104:0> scan 'kb23:student',FILTER=>"ColumnPrefixFilter('birth')"

多条件AND查询

hbase(main):110:0> scan 'kb23:student',FILTER=>"ColumnPrefixFilter('birth') AND ValueFilter(=,'substring:200')"

AND或OR查询

hbase(main):005:0>scan 'kb23:student',FILTER=>"ColumnPrefixFilter('birth') AND (ValueFilter(=,'substring:200')) OR ValueFilter(=,'substring:20')"

3.Hbase运行原理

3.1  HBase物理架构

1StoreFile

保存实际数据的物理文件StoreFile以Hfile的形式存储在HDFS上。每个Store会有一个或多个StoreFileHFile数据在每个StoreFile中都是有序的。

2MemStore

写缓存由于HFile中的数据要求是有序的所以数据是先存储在MemStore中排好序后等到达刷写时机才会刷写到HFile每次刷写都会形成一个新的HFile。

3WAL

由于数据要经MemStore排序后才能刷写到HFile但把数据保存在内存中会有很高的概率导致数据丢失为了解决这个问题数据会先写在一个叫做Write-Ahead logfile的文件中然后再写入MemStore中。所以在系统出现故障的时候数据可以通过这个日志文件重建。

4BlockCache

读缓存每次查询出的数据会缓存在BlockCache中方便下次查询。

3.2  写流程

1Client先访问zookeeper获取hbase:meta表位于哪个Region Server。

2访问对应的Region Server获取hbase:meta表根据写请求的namespace:table/rowkey查询出目标数据位于哪个Region Server中的哪个Region中。并将该table的region信息以及meta表的位置信息缓存在客户端的meta cache方便下次访问。

3与目标Region Server进行通讯

4将数据顺序写入追加到WAL

5将数据写入对应的MemStore数据会在MemStore进行排序

6向客户端发送ack

7等达到MemStore的刷写时机后将数据刷写到HFile。

3.3  MemStore Flush

MemStore刷写时机

1.当某个memstroe的大小达到了hbase.hregion.memstore.flush.size默认值128M其所在region的所有memstore都会刷写。

当memstore的大小达到了

hbase.hregion.memstore.flush.size默认值128M* hbase.hregion.memstore.block.multiplier默认值4时会阻止继续往该memstore写数据。

2.当region server中memstore的总大小达到

java_heapsize*hbase.regionserver.global.memstore.size默认值0.4*hbase.regionserver.global.memstore.size.lower.limit默认值0.95

region会按照其所有memstore的大小顺序由大到小依次进行刷写。直到region server中所有memstore的总大小减小到上述值以下。

当region server中memstore的总大小达到

java_heapsize*hbase.regionserver.global.memstore.size默认值0.4时会阻止继续往所有的memstore写数据。

3. 到达自动刷写的时间也会触发memstore flush。自动刷新的时间间隔由该属性进行配置hbase.regionserver.optionalcacheflushinterval默认1小时。

4.当WAL文件的数量超过hbase.regionserver.max.logsregion会按照时间顺序依次进行刷写直到WAL文件数量减小到hbase.regionserver.max.log以下该属性名已经废弃现无需手动设置最大值为32。

3.4  读流程

1Client先访问zookeeper获取hbase:meta表位于哪个Region Server。

2访问对应的Region Server获取hbase:meta表根据读请求的namespace:table/rowkey查询出目标数据位于哪个Region Server中的哪个Region中。并将该table的region信息以及meta表的位置信息缓存在客户端的meta cache方便下次访问。

3与目标Region Server进行通讯

4分别在MemStore和Store FileHFile中查询目标数据并将查到的所有数据进行合并。此处所有数据是指同一条数据的不同版本time stamp或者不同的类型Put/Delete。

5将查询到的新的数据块BlockHFile数据存储单元默认大小为64KB缓存到Block Cache。

6将合并后的最终结果返回给客户端。

3.5  StoreFile Compaction

由于memstore每次刷写都会生成一个新的HFile且同一个字段的不同版本timestamp和不同类型Put/Delete有可能会分布在不同的HFile中因此查询时需要遍历所有的HFile。为了减少HFile的个数以及清理掉过期和删除的数据会进行StoreFile Compaction。

Compaction分为两种分别是Minor Compaction和Major Compaction。Minor Compaction会将临近的若干个较小的HFile合并成一个较大的HFile并清理掉部分过期和删除的数据。Major Compaction会将一个Store下的所有的HFile合并成一个大HFile并且会清理掉所有过期和删除的数据。

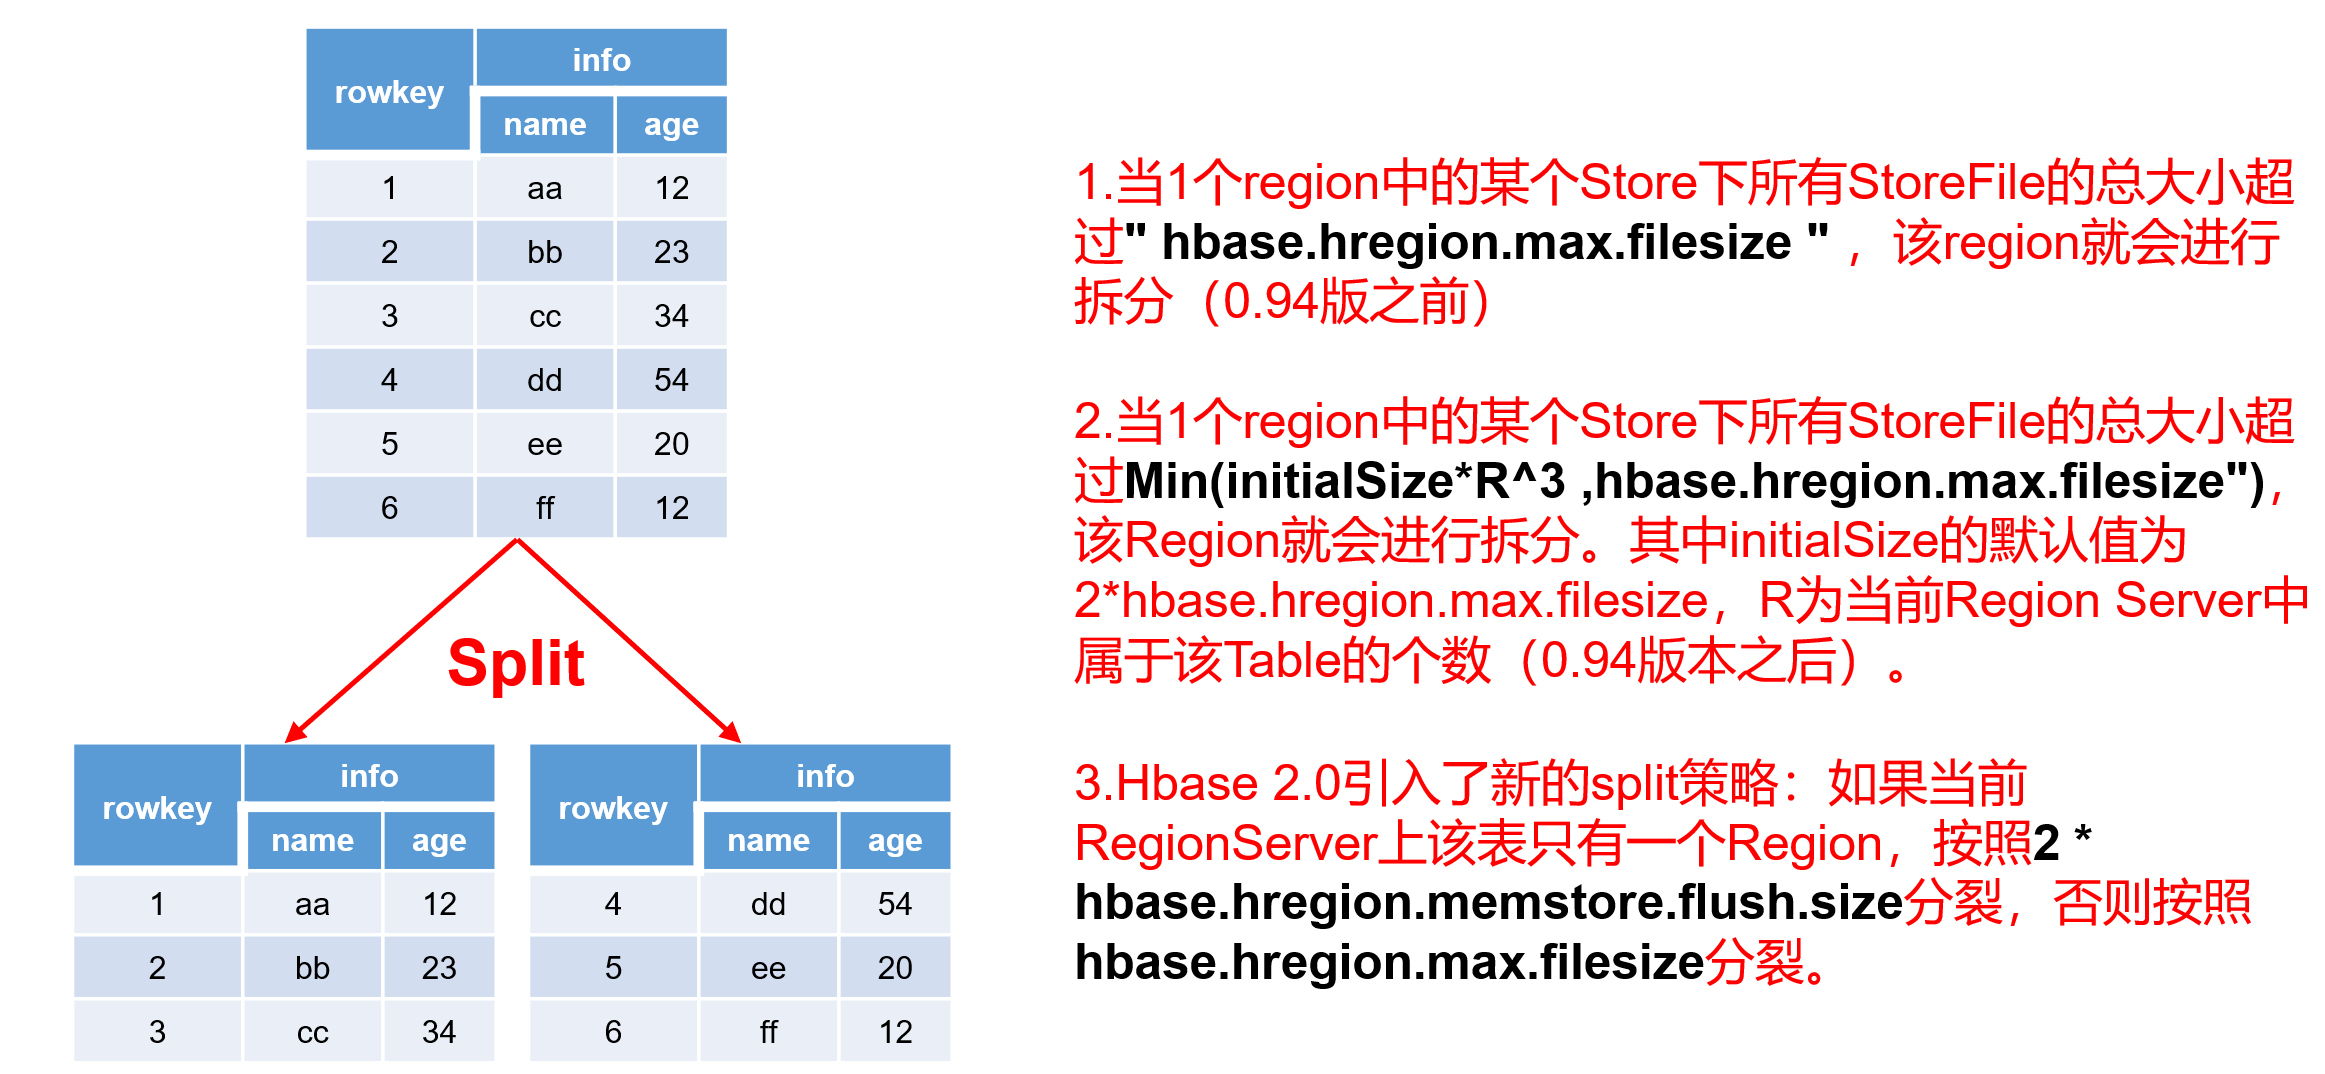
3.6  Region Split

默认情况下每个Table起初只有一个Region随着数据的不断写入Region会自动进行拆分。刚拆分时两个子Region都位于当前的Region Server但处于负载均衡的考虑HMaster有可能会将某个Region转移给其他的Region Server。

Region Split时机

1.当1个region中的某个Store下所有StoreFile的总大小超过hbase.hregion.max.filesize 10G该Region就会进行拆分0.94版本之前。

2.当1个region中的某个Store下所有StoreFile的总大小超过Min(initialSize*R^3 ,hbase.hregion.max.filesize")该Region就会进行拆分。其中initialSize的默认值为2*hbase.hregion.memstore.flush.sizeR为当前Region Server中属于该Table的Region个数0.94版本之后。

具体的切分策略为

第一次split1^3 * 256 = 256MB

第二次split2^3 * 256 = 2048MB

第三次split3^3 * 256 = 6912MB

第四次split4^3 * 256 = 16384MB > 10GB因此取较小的值10GB

后面每次split的size都是10GB了。

3.Hbase 2.0引入了新的split策略如果当前RegionServer上该表只有一个Region按照2 * hbase.hregion.memstore.flush.size分裂否则按照hbase.hregion.max.filesize分裂。

4.hive映射hbase

hive中创建表格关联hbase中的表

1

create external table student(
    id string,
    stuname string,
    birthdate string,
    age int,
    schoolname string,
    location string
)
stored by 'org.apache.hadoop.hive.hbase.HBaseStorageHandler' with
    serdeproperties
('hbase.columns.mapping'=':key,baseinfo:name,baseinfo:birthday,baseinfo:age,schoolinfo:name,schoolinfo:location')
tblproperties ('hbase.table.name'='kb23:student');

select * from student;

2rowkey之间不同字段

create external table kb23factory(

    id string,

    usrname string,

    age string,

    gender string,

    email string,

    partname string,

    permission string

  )

  stored by 'org.apache.hadoop.hive.hbase.HBaseStorageHandler' with

    serdeproperties

        ('hbase.columns.mapping'=':key,usr:name,usr:age,usr:gender,usr:email,part:name,part:permission')

  tblproperties ('hbase.table.name'='kb23:kb23factory');


  select * from kb23factory;

5.Hbase API

5.1   pom依赖

<dependency>
  <groupId>org.apache.hbase</groupId>
  <artifactId>hbase-client</artifactId>
  <version>2.3.5</version>
</dependency>
<dependency>
  <groupId>org.apache.hbase</groupId>
  <artifactId>hbase-common</artifactId>
  <version>2.3.5</version>
</dependency>

5.2  增删改查等具体操作

import org.apache.hadoop.conf.Configuration;
import org.apache.hadoop.hbase.HBaseConfiguration;
import org.apache.hadoop.hbase.HColumnDescriptor;
import org.apache.hadoop.hbase.HTableDescriptor;
import org.apache.hadoop.hbase.TableName;
import org.apache.hadoop.hbase.client.*;
import org.apache.hadoop.hbase.filter.BinaryComparator;
import org.apache.hadoop.hbase.filter.CompareFilter;
import org.apache.hadoop.hbase.filter.FamilyFilter;
import org.apache.hadoop.hbase.util.Bytes;
import org.junit.After;
import org.junit.Before;
import org.junit.Test;

import java.io.IOException;
import java.util.ArrayList;

/**
 * Unit test for simple App.
 */
public class AppTest {

    private Connection connection = null;

    // 获取配置类
    private Configuration config = HBaseConfiguration.create();

    //创建连接
    @Before
    public void init() throws IOException {
        // 给配置类添加配置
        config.set("hbase.zookeeper.quorum", "kb129");
        config.set("hbase.zookeeper.property.clientPort", "2181");
        // 获取连接
        connection = ConnectionFactory.createConnection(config);
    }

    //打印连接测试连接
    @Test
    public void testConnection() throws IOException {
        System.out.println(connection);
    }

    //创建表
    @Test
    public void createTable() throws IOException {
        // 获取admin
        Admin admin = connection.getAdmin();
        TableName tableName = TableName.valueOf("kb23:test2");
        /*HTableDescriptor desc = new HTableDescriptor(tableName);
        HColumnDescriptor family1 = new HColumnDescriptor("info");
        HColumnDescriptor family2 = new HColumnDescriptor("info2");
        desc.addFamily(family1);
        desc.addFamily(family2);*/

        // 获取descriptor的builder
        TableDescriptorBuilder tableDescriptorBuilder = TableDescriptorBuilder.newBuilder(tableName);

        // 添加列族
        ColumnFamilyDescriptor columnFamilyDescriptor1 = ColumnFamilyDescriptorBuilder.of("baseinfo");
        ColumnFamilyDescriptor columnFamilyDescriptor2 = ColumnFamilyDescriptorBuilder.of("schoolinfo");

        // 将单个列族的descriptor添加到builder中
        tableDescriptorBuilder.setColumnFamily(columnFamilyDescriptor1);
        tableDescriptorBuilder.setColumnFamily(columnFamilyDescriptor2);
        TableDescriptor descriptor = tableDescriptorBuilder.build();

        //创建表
        admin.createTable(descriptor);

    }

    //插入数据
    @Test
    public void putValue() throws IOException {
        // 1.获取table
        Table table = connection.getTable(TableName.valueOf("kb23:test1"));
        // 2.创建Put对象
        Put put = new Put(Bytes.toBytes("liuxin"));
        // 3.添加put属性
        put.addColumn(Bytes.toBytes("info"), Bytes.toBytes("name"), Bytes.toBytes("刘鑫"));
        put.addColumn(Bytes.toBytes("info"), Bytes.toBytes("gender"), Bytes.toBytes("Male"));
        put.addColumn(Bytes.toBytes("info"), Bytes.toBytes("height"), Bytes.toBytes("180"));
        // 4.put数据
        table.put(put);
        // 5.关闭资源
        table.close();
    }

    //通过集合插入多条数据
    @Test
    public void putValueList() throws IOException {
        // 1.获取table
        Table table = connection.getTable(TableName.valueOf("kb23:test1"));
        // 2.创建Put对象
        Put zs = new Put(Bytes.toBytes("zhangsan"));
        // 3.添加put属性
        zs.addColumn(Bytes.toBytes("info"), Bytes.toBytes("name"), Bytes.toBytes("张三"));
        zs.addColumn(Bytes.toBytes("info"), Bytes.toBytes("gender"), Bytes.toBytes("Female"));
        zs.addColumn(Bytes.toBytes("info"), Bytes.toBytes("height"), Bytes.toBytes("160"));

        Put ls = new Put(Bytes.toBytes("lisi"));
        // 3.添加put属性
        ls.addColumn(Bytes.toBytes("info"), Bytes.toBytes("name"), Bytes.toBytes("李四"));
        ls.addColumn(Bytes.toBytes("info"), Bytes.toBytes("gender"), Bytes.toBytes("Male"));
        ls.addColumn(Bytes.toBytes("info"), Bytes.toBytes("height"), Bytes.toBytes("180"));
        // 4.put数据
        ArrayList<Put> puts = new ArrayList<Put>();
        puts.add(zs);
        puts.add(ls);
        table.put(puts);
        // 5.关闭资源
        table.close();
    }


    @Test
    public void putValueMutator() throws IOException {
        BufferedMutatorParams bufferedMutatorParams = new BufferedMutatorParams(TableName.valueOf("kb23:test1 "));
        bufferedMutatorParams.setWriteBufferPeriodicFlushTimeoutMs(10000);//设置超时flush时间最大值
        bufferedMutatorParams.writeBufferSize(10*1024*1024);//设置缓存大小flush
        BufferedMutator bufferedMutator = connection.getBufferedMutator(bufferedMutatorParams) ;
        /*// 3.添加put属性
        Put zs = new Put(Bytes.toBytes("zhangsan"));
        zs.addColumn(Bytes.toBytes("info"), Bytes.toBytes("name"), Bytes.toBytes("张三"));
        zs.addColumn(Bytes.toBytes("info"), Bytes.toBytes("gender"), Bytes.toBytes("Female"));
        zs.addColumn(Bytes.toBytes("info"), Bytes.toBytes("height"), Bytes.toBytes("160"));

        Put ls = new Put(Bytes.toBytes("lisi"));
        // 3.添加put属性
        ls.addColumn(Bytes.toBytes("info"), Bytes.toBytes("name"), Bytes.toBytes("李四"));
        ls.addColumn(Bytes.toBytes("info"), Bytes.toBytes("gender"), Bytes.toBytes("Male"));
        ls.addColumn(Bytes.toBytes("info"), Bytes.toBytes("height"), Bytes.toBytes("180"));*/
        // 4.put数据
        ArrayList<Put> puts = new ArrayList<Put>();
        //puts.add(zs);
        //puts.add(ls);
        bufferedMutator.mutate(puts);
    }

    //删除数据
    @Test
    public void delete() throws IOException {
        // 1.获取table
        Table table = connection.getTable(TableName.valueOf("kb23:test1"));
        //删除具体的列
        /*Delete delname = new Delete(Bytes.toBytes("lisi"));
        delname.addColumn(Bytes.toBytes("info"),Bytes.toBytes("name"));
        table.delete(delname);*/

        //通过rowkey整个删除
        Delete lisi = new Delete(Bytes.toBytes("lisi"));
        table.delete(lisi);
    }

    //查询数据
    @Test
    public void getValue() throws IOException {
        // 1.获取table
        Table table = connection.getTable(TableName.valueOf("kb23:test1"));

        // 2.获取Get对象
        Get zhangsan = new Get(Bytes.toBytes("zhangsan"));

        // 3. 获取result
        Result result = table.get(zhangsan);
        byte[] name = result.getValue(Bytes.toBytes("info"), Bytes.toBytes("name"));
        byte[] gender = result.getValue(Bytes.toBytes("info"), Bytes.toBytes("gender"));
        byte[] height = result.getValue(Bytes.toBytes("info"), Bytes.toBytes("height"));
        System.out.println(Bytes.toString(name) + Bytes.toString(gender) + Bytes.toString(height));
    }

    //扫描数据
    @Test
    public void scanValue() throws IOException {
        // 1.获取table
        Table table = connection.getTable(TableName.valueOf("kb23:test1"));

        // 2.创建Scan对象
        Scan scan = new Scan();

        // 3.扫描数据
        scan.addColumn(Bytes.toBytes("info"), Bytes.toBytes("name"));
        scan.addColumn(Bytes.toBytes("info"), Bytes.toBytes("gender"));
        scan.addColumn(Bytes.toBytes("info"), Bytes.toBytes("height"));
        ResultScanner scanner = table.getScanner(scan);

        // 4.获取结果
        for (Result result : scanner) {
            byte[] name = result.getValue(Bytes.toBytes("info"), Bytes.toBytes("name"));
            byte[] gender = result.getValue(Bytes.toBytes("info"), Bytes.toBytes("gender"));
            byte[] height = result.getValue(Bytes.toBytes("info"), Bytes.toBytes("height"));
            System.out.println(Bytes.toString(name) + Bytes.toString(gender) + Bytes.toString(height));
        }
    }

    //过滤器查找数据
    @Test
    public void getFilterRowKey() throws IOException {
        TableName tableName = TableName.valueOf("kb23:student");
        Table table = connection.getTable(tableName);
        FamilyFilter familyFilter =
                new FamilyFilter(CompareFilter.CompareOp.EQUAL, new BinaryComparator(Bytes.toBytes("baseinfo")));
        Scan scan = new Scan();
        scan.setFilter(familyFilter);
        ResultScanner scanner = table.getScanner(scan);
        for (Result result : scanner) {
            byte[] name = result.getValue(Bytes.toBytes("baseinfo"), Bytes.toBytes("name"));
            byte[] age = result.getValue(Bytes.toBytes("baseinfo"), Bytes.toBytes("age"));
            byte[] birthday = result.getValue(Bytes.toBytes("baseinfo"), Bytes.toBytes("birthday"));
            System.out.println(Bytes.toString(name) + "\t" + Bytes.toString(age) + "\t" + Bytes.toString(birthday));
            System.out.println("----------------------");
        }
    }
   
    //关闭连接
    @After
    public void closeConnection() throws IOException {
        if (connection != null) {
            // 关闭连接
            connection.close();
        }
    }
}

5.3  写缓存  HBase客户端的批量写缓存BufferedMutator

HBase的每一个put操作实际上是一个RPC操作将客户端的数据传输到服务器再返回结果这只适用于小数据量的操作如果数据量多的话每次put都需要建立一次RPC的连接TCP连接而建立连接传输数据是需要时间的因此减少RPC的调用可以提高数据传输的效率减少建立连接的时间和IO消耗。

HBase的客户端API提供了写缓存区put的数据一开始放在缓存区内当数量到达指定的容量或者用户强制提交是才将数据一次性提交到HBase的服务器。这个缓冲区可以通过调用 HTable.setAutoFlush(false) 来开启。而新版HBbase的API中使用了BufferedMutator替换了老版的缓冲区通过BufferedMutator对象提交的数据自动存放在缓冲区中。

BufferedMutator

通过获取 BufferedMutator 对象并调用 mutator.mutate(List<Mutation> mutations) 方法来进行批量插入数据。可以使用 Put 类型的对象列表作为 mutations 参数进行插入。BufferedMutator 提供了自动管理缓冲区和写入操作的功能可以提高插入数据的性能。

@Test
public void putValueMutator() throws IOException {
    BufferedMutatorParams bufferedMutatorParams = new BufferedMutatorParams(TableName.valueOf("kb23:test1 "));
    bufferedMutatorParams.setWriteBufferPeriodicFlushTimeoutMs(10000);//设置超时flush时间最大值
    bufferedMutatorParams.writeBufferSize(10*1024*1024);//设置缓存大小flush
    BufferedMutator bufferedMutator = connection.getBufferedMutator(bufferedMutatorParams) ;
    /*// 3.添加put属性
    Put zs = new Put(Bytes.toBytes("zhangsan"));
    zs.addColumn(Bytes.toBytes("info"), Bytes.toBytes("name"), Bytes.toBytes("张三"));
    zs.addColumn(Bytes.toBytes("info"), Bytes.toBytes("gender"), Bytes.toBytes("Female"));
    zs.addColumn(Bytes.toBytes("info"), Bytes.toBytes("height"), Bytes.toBytes("160"));

    Put ls = new Put(Bytes.toBytes("lisi"));
    // 3.添加put属性
    ls.addColumn(Bytes.toBytes("info"), Bytes.toBytes("name"), Bytes.toBytes("李四"));
    ls.addColumn(Bytes.toBytes("info"), Bytes.toBytes("gender"), Bytes.toBytes("Male"));
    ls.addColumn(Bytes.toBytes("info"), Bytes.toBytes("height"), Bytes.toBytes("180"));*/
    // 4.put数据
    ArrayList<Put> puts = new ArrayList<Put>();
    //puts.add(zs);
    //puts.add(ls);
    bufferedMutator.mutate(puts);
}

阿里云国内75折 回扣 微信号:monov8
阿里云国际,腾讯云国际,低至75折。AWS 93折 免费开户实名账号 代冲值 优惠多多 微信号:monov8 飞机:@monov6
标签: Hadoop