SpringBoot+vue 实现监控视频rtsp播放(java+Nginx+ffmpeg+flv.js)
| 阿里云国内75折 回扣 微信号:monov8 |
| 阿里云国际,腾讯云国际,低至75折。AWS 93折 免费开户实名账号 代冲值 优惠多多 微信号:monov8 飞机:@monov6 |
其实原理就是: 将监控通过FFMPEG,推送给Nginx,前端通过Nginx地址拉取视频就可以播放了。
1:安装FFMPEG.
2:下载并且配置nginx.
3:使用java代码实现调用cmd或者linux窗口,并且运行操作FFMPEG的命令进行监控视频rtsp格式的推送推送给nginx.
4:前端写一个video标签就可以,Src写nginx的固定地址就可以。
windows url: 【在上面3:中提到的通过ffmeg推送给nginx的命令如下】
ffmpeg -rtsp_transport tcp -i 你的rtsp地址 -c:v libx264 -c:a aac -f flv -an rtmp://你的nginx地址nginx配置的拉取端口号/myapp/room
linuxurl
ffmpeg -f rtsp -rtsp_transport tcp -i ' 你的rtsp地址监控视频' -codec copy -f flv -an 'rtmp://你的nginx地址nginx配置的拉取端口号/myapp/room'
环境
- 本地系统 win10
- centos7Nginx
- 开源程序ffmpeg
- 前端Vue
- 后端SpringBoot
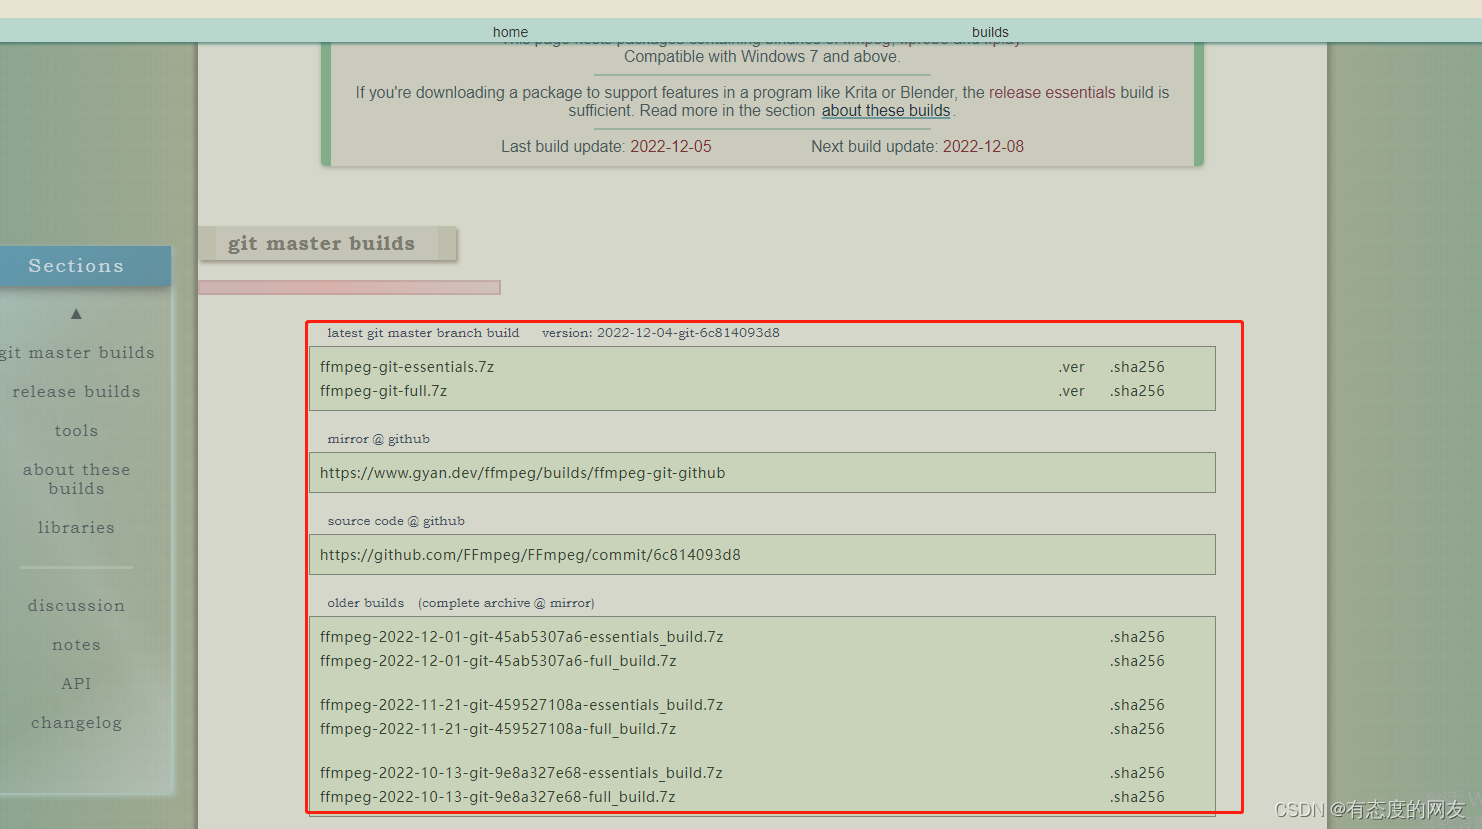
一、下载所需要的FFMPEG安装包
- windows下载FFmpeg FFMpeg windows版本
-https://www.gyan.dev/ffmpeg/builds/
将此文件解压到你喜欢的的文件夹【比如这样】
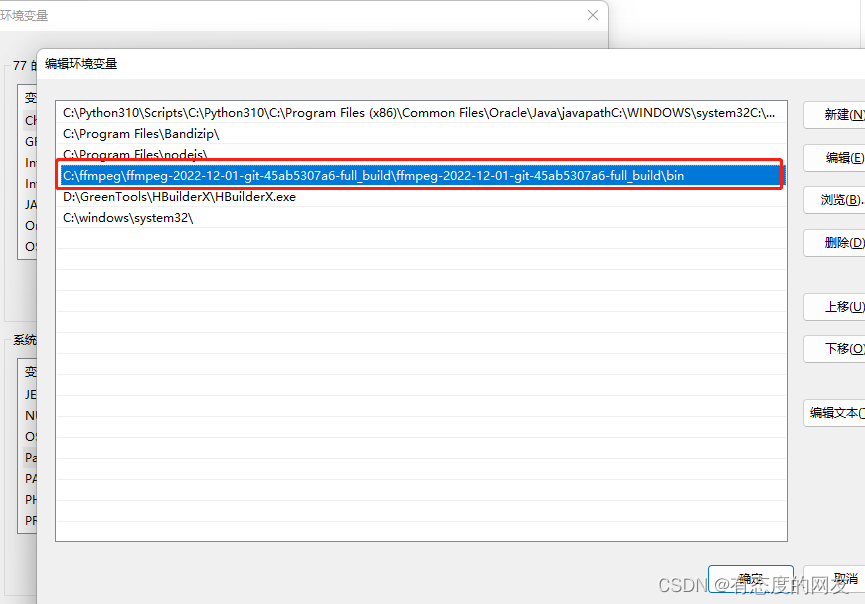
接着配置环境变量
进入到解压后的目录找到bin 、复制bin目录路径----然后配置系统环境变量【下图所示】
cmd查看一下是否成功
ffmpeg
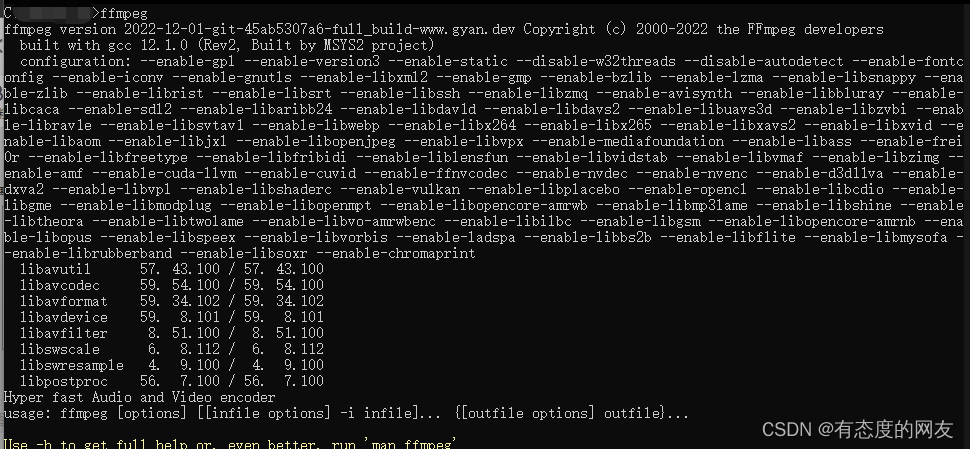
至此这个这个玩意就安装完成了
安装nginx
依照你喜欢的方式安装nginx 可以使用docker、yum、安装包 等等方式都可以
我使用直接解压的方式
可以去nginx官网下载喜欢的nginx版本 上传到服务器

解压然后编译这个应该不难可以使用 make make install
安装完成之后长这样
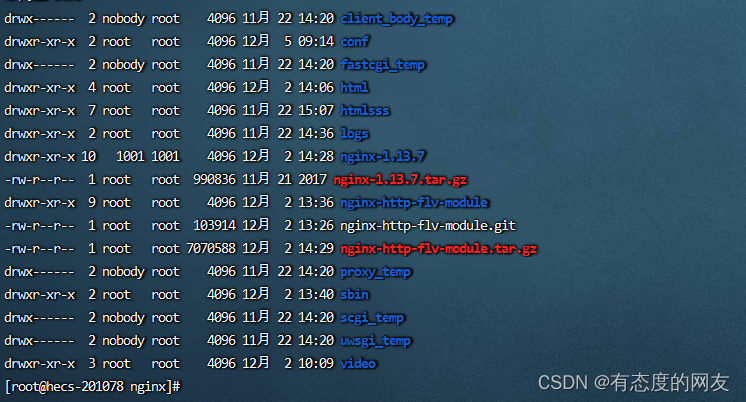
可以看到我这个截图上多了一个 nginx-http-flv-module 这个目录这个是必要安装的一个模块
否则无法实现正常的监控视频播放
给Nginx安装 nginx-http-flv-module模块
建议直接下载到nginx的目录下、我安装到了 /user/loacl/nginx/ 文件夹下了
下载地址https://github.com/winshining/nginx-http-flv-module
安装依赖项
yum -y install unzip
yum -y install gcc-c++
yum -y install pcre pcre-devel
yum -y install zlib zlib-devel
yum -y install openssl openssl-devel
将nginx-http-flv-module模板添加到nginx中生成make文件 并安装nginx
./configure --prefix=/usr/local/nginx  --add-module=/usr/local/nginx/nginx-http-flv-module
make && make install
检查是否安装成功
nginx -V

出现这个就是代表安装成功了
安装基本已经成形---------接下来配置nginx的配置文件
nginx配置文件
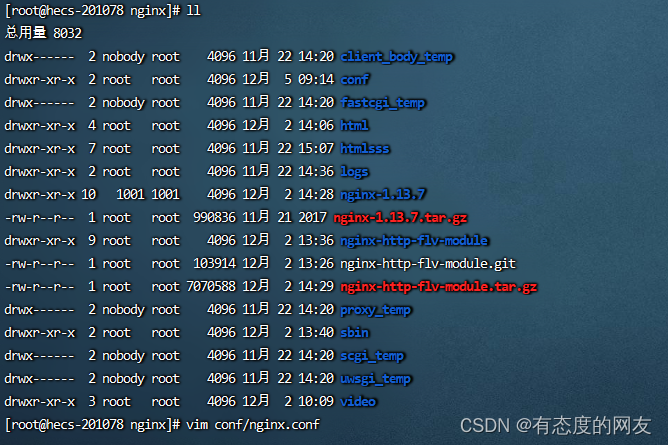
## 编辑nginx配置文件
vim conf/nginx.conf
nginx的配置文件大概就是这样的完成的nginx配置文件 我也会在下面附上可以直接复制* 嗷对 需要修改成你的ip 或者域名
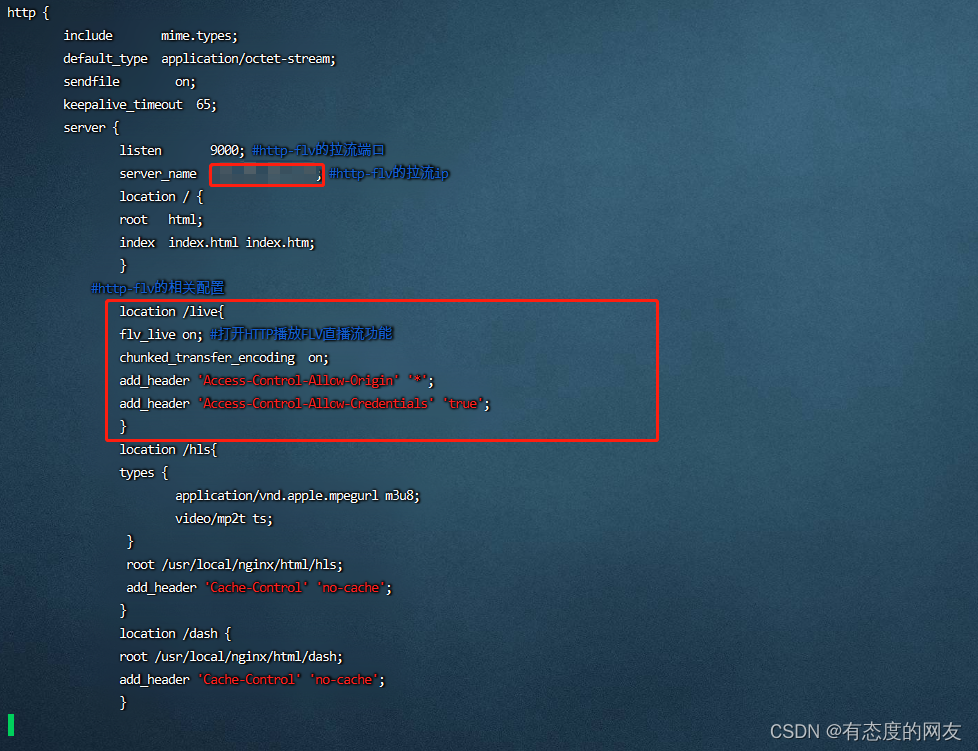
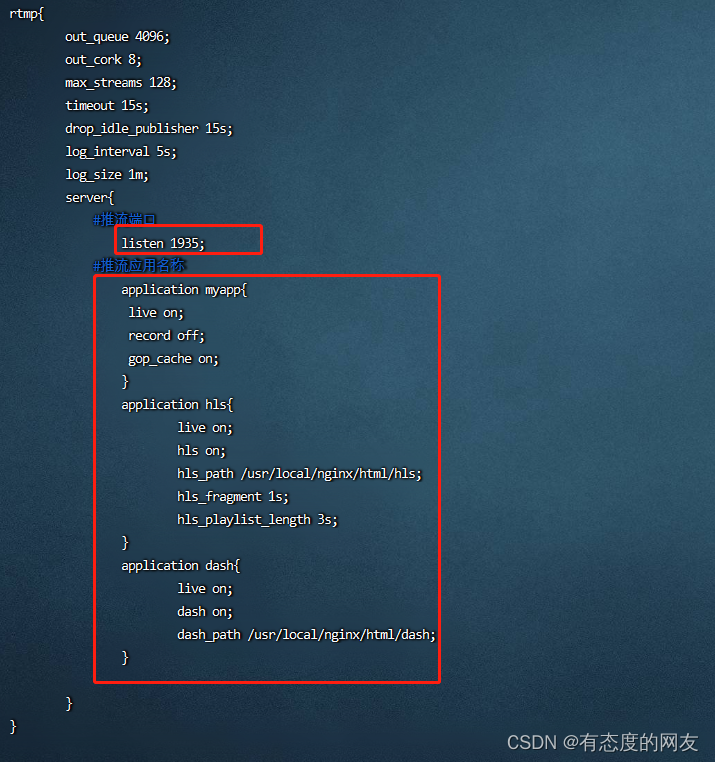
下面是完整的ngin配置文件
worker_processes  10; #should be 1 for Windows, for it doesn't support Unix domain socket
#worker_processes  auto; #from versions 1.3.8 and 1.2.5

#worker_cpu_affinity  0001 0010 0100 1000; #only available on FreeBSD and Linux
#worker_cpu_affinity  auto; #from version 1.9.10

error_log logs/error.log error;

#if the module is compiled as a dynamic module and features relevant
#to RTMP are needed, the command below MUST be specified and MUST be
#located before events directive, otherwise the module won't be loaded
#or will be loaded unsuccessfully when NGINX is started

#load_module modules/ngx_http_flv_live_module.so;

events {
    worker_connections  10240;
}

http {
    	include       mime.types;
    	default_type  application/octet-stream;
    	sendfile        on;
   	keepalive_timeout  65;
    	server {
        	listen       9000; #http-flv的拉流端口
        	server_name  【这个地方写你的ip、或者说是域名都是可以的--】; #http-flv的拉流ip
        	location / {
            	root   html;
            	index  index.html index.htm;
       		}
            #http-flv的相关配置
        	location /live{
                flv_live on; #打开HTTP播放FLV直播流功能
                chunked_transfer_encoding  on;
                add_header 'Access-Control-Allow-Origin' '*';
                add_header 'Access-Control-Allow-Credentials' 'true';
        	}
        	location /hls{
                types {
                	application/vnd.apple.mpegurl m3u8;
			video/mp2t ts;
                 }
                 root /usr/local/nginx/html/hls;
                 add_header 'Cache-Control' 'no-cache';
        	}
         	location /dash {
            	root /usr/local/nginx/html/dash;
            	add_header 'Cache-Control' 'no-cache';
        	}

         	location /stat {
            	#configuration of push & pull status
              	rtmp_stat all;
              	rtmp_stat_stylesheet stat.xsl;
         	}
        	location /stat.xsl {
          		root /usr/local/nginx/nginx-http-flv-module;
        	}

         	location /control {
            	rtmp_control all; #configuration of control module of rtmp
			}

        	error_page   500 502 503 504  /50x.html;
        	location = /50x.html {
            	root   html;
        	}
    	}

}

rtmp_auto_push on;
rtmp_auto_push_reconnect 1s;
rtmp_socket_dir /tmp;


rtmp{
        out_queue 4096;
        out_cork 8;
        max_streams 128;
        timeout 15s;
        drop_idle_publisher 15s;
        log_interval 5s;
        log_size 1m;
        server{
            #推流端口
        	listen 1935;
            #推流应用名称
         	application myapp{
                 live on;
	 	 record off;
                 gop_cache on;
          	}
         	application hls{
          		live on;
          		hls on;
          		hls_path /usr/local/nginx/html/hls;
          		hls_fragment 1s;
                        hls_playlist_length 3s;
        	}
         	application dash{
           		live on;
           		dash on;
           		dash_path /usr/local/nginx/html/dash;
         	}

        }
}
测试一下是否可以使用准备一个可播放的rtsp地址例如海康、大华、。。。。。都可以试试
打开cmd 开始调用 ffmpeg
ffmpeg -rtsp_transport tcp -i rtsp://user:pwd@ip:31554/h264/ch1/main/av_stream -c:v libx264 -c:a aac -f flv -an rtmp://nginx的ip:nginx所配的端口/myapp/room
如果出现如下有速度就代表可以成功

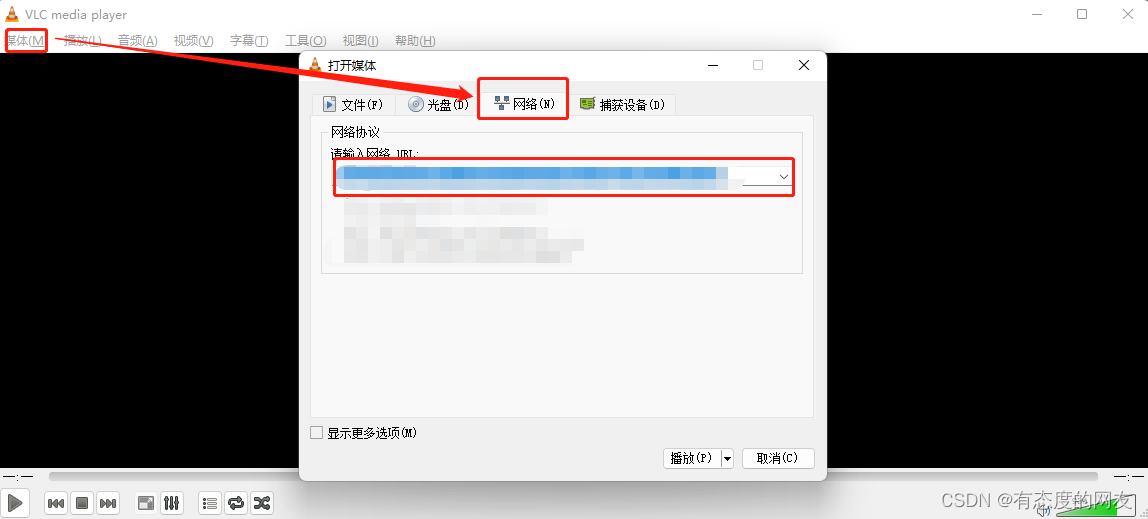
可以使用地址本地测试一下有没有画面
'http://nginx的ip:nginx访问的端口9000/live?port=1935&app=myapp&stream=room'
打开VLC media player

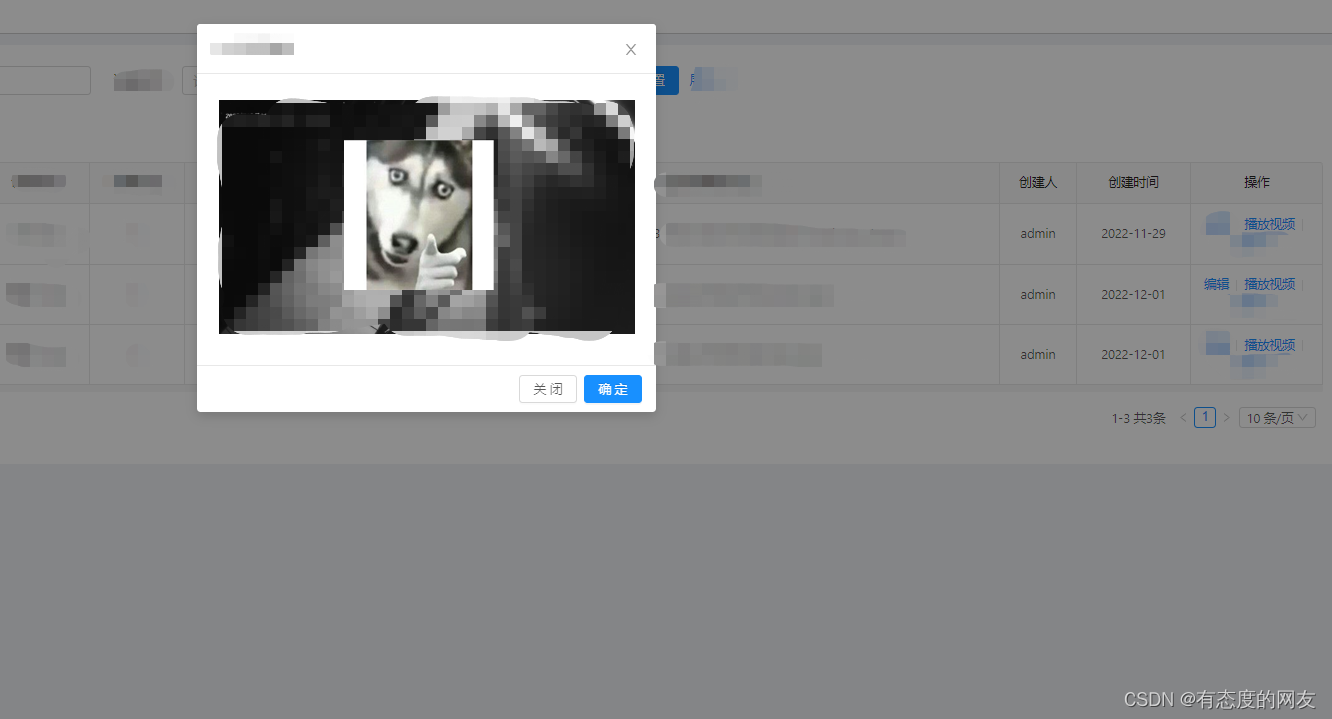
前端 (vue)
引入Flv.js
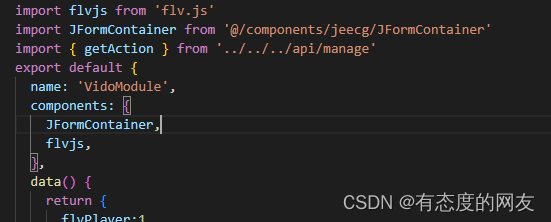
然后接下来就这么写【如下图】会附上全代码

<template>
<a-modal
:title="title"
:width="510"
:visible="visible"
switchFullscreen
@ok="handleOk"
@cancel="handleCancel"
cancelText="关闭"
>
<a-spin :spinning="confirmLoading">
<j-form-container>
<a-form :form="form" slot="detail">
<a-row>
<video autoplay controls width="100%" height="270" id="videoElement"></video>
</a-row>
</a-form>
</j-form-container>
</a-spin>
</a-modal>
</template>
<script>
import flvjs from 'flv.js'
import JFormContainer from '@/components/jeecg/JFormContainer'
import { getAction } from '../../../api/manage'
export default {
name: 'VidoModule',
components: {
JFormContainer,
flvjs,
},
data() {
return {
flvPlayer:1,
title: '监控',
//源视频地址
videoPath:'',
videoStream: '',
confirmLoading: false,
visible: false,
form: this.$form.createForm(this),
url: {
//开启视频
list: '自己的请求地址',
//关闭视频输出
list1:'。。。'
},
}
},
mounted() {
},
methods: {
// 开启页面
show(record) {
this.visible = true
this.videoPath = record.videoPath
this.VideoData(this.videoPath);
this.createVideo()
},
VideoData(videoPath){
getAction(this.url.list,{videoPath:videoPath}).then((res) => {
})
},
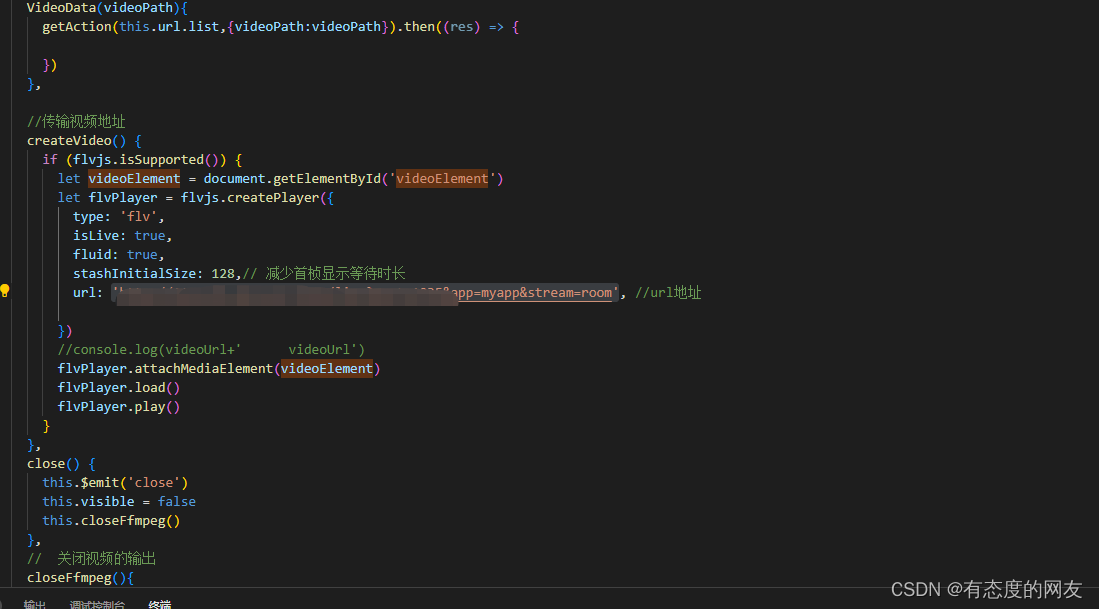
//传输视频地址
createVideo() {
if (flvjs.isSupported()) {
let videoElement = document.getElementById('videoElement')
let flvPlayer = flvjs.createPlayer({
type: 'flv',
isLive: true,
fluid: true,
stashInitialSize: 128,// 减少首桢显示等待时长
url: 'http://xxx.xxx.xxx.xxx:9000/live?port=1935&app=myapp&stream=room', //url地址
})
//console.log(videoUrl+' videoUrl')
flvPlayer.attachMediaElement(videoElement)
flvPlayer.load()
flvPlayer.play()
}
},
close() {
this.$emit('close')
this.visible = false
this.closeFfmpeg()
},
// 关闭视频的输出
closeFfmpeg(){
getAction(this.url.list1).then((res) => {
})
},
handleOk() {
this.submitForm()
},
submitCallback() {
this.$emit('ok')
this.visible = false
},
handleCancel() {
this.close()
},
},
}
</script>
<style lang="less" scoped>
</style>
后端 SpringBoot
后端其实就是通过java 去调用本地或者服务器上的FFMPEG使用cmd 或者 shell的方式都可以
其实就是执行一下命令而已
CommandUtil.java
package common.util;

import java.io.BufferedReader;
import java.io.IOException;
import java.io.InputStreamReader;

/**
 * @Description: 调用命令 【windows&Linux】 @Author: cq @Date: 2022/12/20 @Version: V1.0
 * 用于启动ffmpeg 随之将rtsp 转化为rtmp 返回给Flv.js使用
 */

public class CommandUtil {

  /** 调用linux命令* */
  public String linuxExec(String cmd) {
    System.out.println("执行命令[ " + cmd + "]");
    Runtime run = Runtime.getRuntime();
    try {
      Process process = run.exec(cmd);
      String line;
      BufferedReader stdoutReader =
          new BufferedReader(new InputStreamReader(process.getInputStream()));
      StringBuffer out = new StringBuffer();
      while ((line = stdoutReader.readLine()) != null) {
        out.append(line);
      }
      try {
        process.waitFor();
      } catch (InterruptedException e) {
        e.printStackTrace();
      }
      process.destroy();
      return out.toString();
    } catch (IOException e) {
      e.printStackTrace();
    }
    return null;
  }
  /** 调用windwos命令* */
  public String winExec(String cmd) {
    Runtime runtime = Runtime.getRuntime();
    String command =cmd;
    try {
      Process process = runtime.exec(command);
      new InputStreamReader(process.getInputStream());
      return "成功";
    } catch (IOException e) {
      e.printStackTrace();
      return "请检查摄像头地址";
    }
  }
}
package org.ept.modules.solidwaste.controller;

import io.swagger.annotations.Api;
import lombok.AllArgsConstructor;
import lombok.extern.slf4j.Slf4j;
import org.ept.common.api.vo.Result;
import org.ept.common.util.CommandUtil;
import org.springframework.web.bind.annotation.GetMapping;
import org.springframework.web.bind.annotation.RequestMapping;
import org.springframework.web.bind.annotation.RequestParam;
import org.springframework.web.bind.annotation.RestController;

import java.io.BufferedReader;
import java.io.IOException;
import java.io.InputStream;
import java.io.InputStreamReader;

/**
 * @Description: 视频输出 @Author: cq @Date: 2022/11/30 @Version: V1.0
 */
@Api(tags = "视频格式转换---windows-->cmd---linux")
@RestController
@RequestMapping("/video/videos")
@AllArgsConstructor
@Slf4j
public class videoTestController {
  /** Windows系统* */
  private static final boolean IS_WINDOWS = System.getProperty("os.name").toLowerCase().contains("win");
  /** Linux系统* */
  private static final boolean IS_LINUX = System.getProperty("os.name").toLowerCase().contains("Linux");


  /** 视频播放指令执行 rtsp地址【源播放地址】通过ffmpeg程序进行转化成rtmp将地址传给flv.js进行播放 */
  @GetMapping("/videoStart")
  public void videoPreview(@RequestParam(name = "videoPath", required = false) String videoPath) {
    CommandUtil commandUtil = new CommandUtil();
    /*如果是winodws系统**/
    if (IS_WINDOWS) {
      String cmd ="cmd /k start ffmpeg -rtsp_transport tcp -i"
                      + " "
                      + videoPath
                      + " "
                      + "-c:v libx264 -c:a aac -f flv -an rtmp://xxx.xxx.xxx.xxx:1935/myapp/room";
      commandUtil.winExec(cmd);
    }
    /*如果是Linux系统**/
    if (IS_LINUX){
      System.out.println("linux");
      String cmd = "ffmpeg -f rtsp -rtsp_transport tcp -i '"
              + ""
              + videoPath
              + "'"
              + ""
              + " -codec copy -f flv -an 'rtmp://xxx.xxx.xxx.xxx:1935/myapp/room'";
      commandUtil.linuxExec(cmd);
    }
  }

  /** 关闭ffmpeg.exe程序 */
  @GetMapping("/videoClose")
  public Result<?> close() {
    closeHistoryProgram("ffmpeg.exe");
    return Result.ok("已成功停止");
  }

  public void closeHistoryProgram(String processName) {
    String cmd = "taskkill /f /t /im " + processName;
    try {
      // exec执行cmd命令
      Process process = Runtime.getRuntime().exec(cmd);
      // 获取CMD命令结果的输出流
      InputStream fis = process.getInputStream();
      InputStreamReader isr = new InputStreamReader(fis, "GBK");
      // 使用缓冲器读取
      BufferedReader br = new BufferedReader(isr);
      String line = null;
      // 全部读取完成为止一行一行读取
      while ((line = br.readLine()) != null) {
        // 输出读取的内容
        System.out.println(line);
      }
    } catch (IOException e) {
      e.printStackTrace();
    }
  }

}
大概就是这么个意思