

虚拟主机3种方式nginx/apache+跨域知识点整理
| 阿里云国内75折 回扣 微信号:monov8 |
| 阿里云国际,腾讯云国际,低至75折。AWS 93折 免费开户实名账号 代冲值 优惠多多 微信号:monov8 飞机:@monov6 |
一、Apache基于多IP、多端口、多域名访问
Apache基于IP、多端口、多域名访问
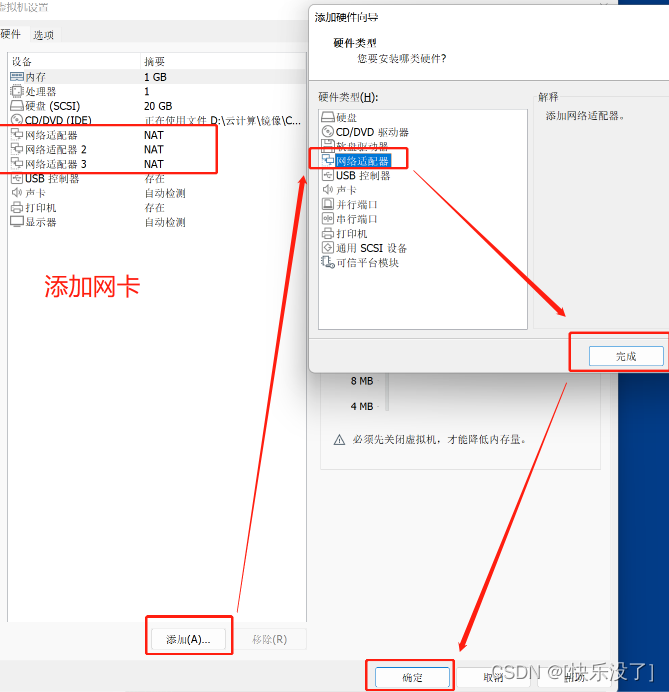
添加网卡三种方法
1、虚拟机添加网络适配器
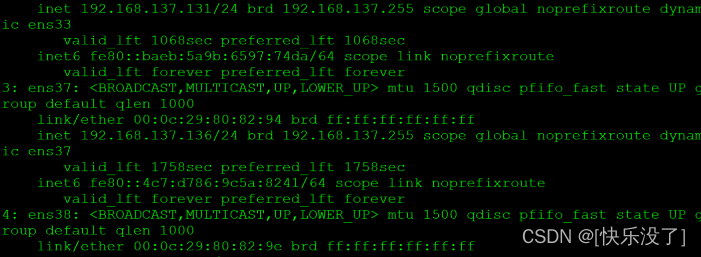
2、命令添加
设置两个端口
1.nmcli connection add con-name ens37 ifname ens37 type ethernet
2.nmcli connection add con-name ens38 ifname ens38 type ethernet
配置地址
1.nmcli connection modify ens37 ipv4.addresses 192.168.137.136/24  ipv4.dns 192.168.137.2 ipv4.gateway 192.168.137.2 ipv4.method manual autoconnect yes
2.nmcli connection modify ens38 ipv4.addresses 192.168.137.137/24  ipv4.dns 192.168.137.2 ipv4.gateway 192.168.137.2 ipv4.method manual autoconnect yes
3、用nmtui添加IP地址
输入nmtui进入会话
在ADD后面添加IP然后一直回车
添加配置文件、本地域名解析
1、添加配置文件
cd /etc/httpd/conf.d
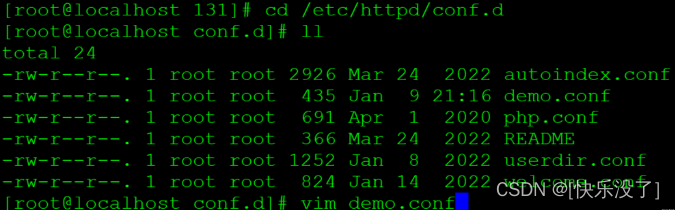
添加配置文件,可以去主配置文件/etc/httpd/conf/httpd.conf复制粘贴
2、本地域名解析
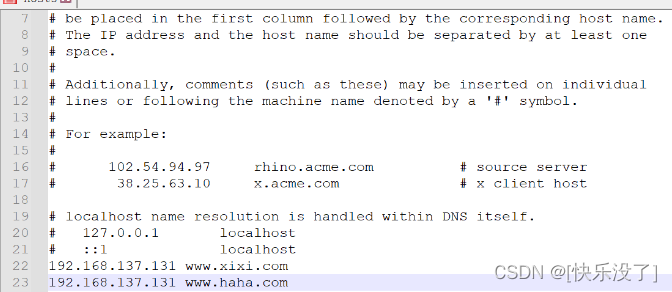
Linux本地解析
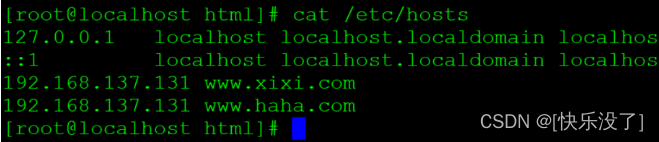
Windows本地域名解析
创建所需目录文件内容
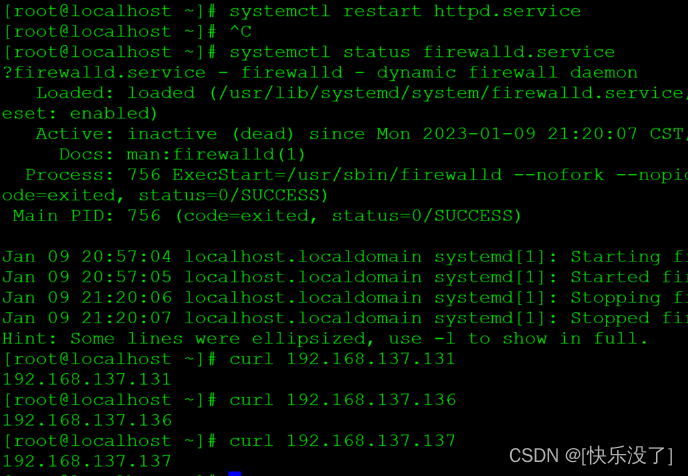
关闭防火墙、开启httpd服务
二、nginx基于多IP、多端口、多域名访问
添加配置文件
# 131
server {
    listen 80;
    server_name 192.168.137.131;
    location / {
        root /usr/local/nginx/html/136;
        index index.html;
    }
}
# 136
server {
    listen 80;
    server_name 192.168.137.136;
    location / {
        root /usr/local/nginx/html/136;
        index index.html;
    }
}
# 137
server {
    listen 80;
    server_name 192.168.137.137;
    location / {
        root /usr/local/nginx/html/137;
        index index.html;
    }
}
# port:100
server {
    listen 100;
    server_name 192.168.137.131;
    location / {
        root /usr/local/nginx/html/100;
        index index.html;
    }
}
# port:200
server {
    listen 200;
    server_name 192.168.137.131;
    location / {
        root /usr/local/nginx/html/200;
        index index.html;
    }
}
# www.xixi.com
server {
    listen 80;
    server_name www.xixi.com;
    location / {
        root /usr/local/nginx/html/xixi;
        index index.html;
    }
}
# www.haha.com
server {
    listen 80;
    server_name www.haha.com;
    location / {
        root /usr/local/nginx/html/haha;
        index index.html;
    }
}
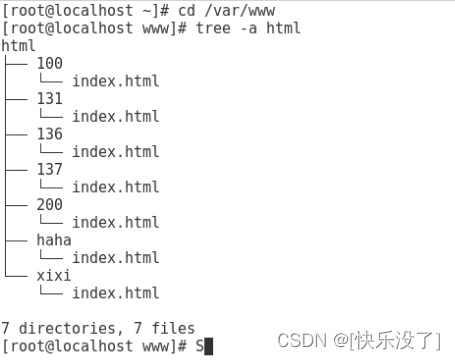
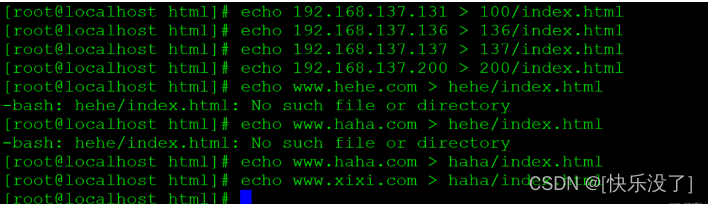
创建所需目录文件内容
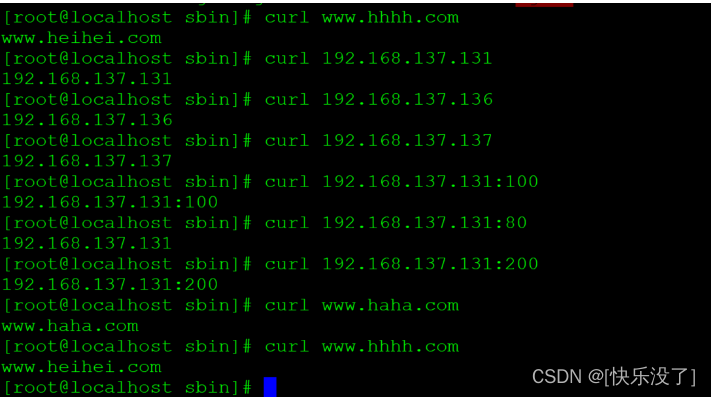
CURL测试、浏览器测试
三、跨域知识点整理
降域
对于主域相同而子域不同的情况下可以通过设置document.domain的办法来解决
#master
<iframe id="iFrame" src="http://slave.security.com"></iframe>
<script>
document.domain = 'security.com';
    let ifr = document.getElementById('iFrame');
    ifr.onload = function () {
        let win = ifr.contentWindow;
        console.info(win);
        alert(win.data);
    }
</script>
contentWindow 属性返回当前 HTMLIFrameElement 的 Window 对象。 你可以使用这个 Window 对象去访问这个 iframe 的文档和它内部的 DOM.
#slave
<script>
    document.domain = 'security.com';
    window.data = 'data:111';
</script>
HASH

#cs1
<script>
    let ifr = document.createElement('iframe');
    ifr.style.display = 'none';
    ifr.src = "http://localhost:8081/cs2.html#data";
    document.body.appendChild(ifr);

    function checkHash() {
        try {
        let data = location.hash ? location.hash.substring(1) : ' ';
        console.log('获得到的数据是', data);
        }catch(e) {

        }
    }
    window.addEventListener('hashchange', function(e) {
        console.log('获得的数据是', location.hash.substring(1));
        });
    </script>
#cs2
</head>
<body>
    <script>
    switch(location.hash) {
        case "#data":
        callback();
        break;
    }
    function callback() {
    const data = "some number: 1111"
    try {
        parent.location.hash = data;
    }catch(e) {
        var ifrproxy = document.createElement('iframe');
        ifrproxy.style.display = 'none';
        ifrproxy.src = 'http://localhost:8080/cs3.html#' + data;     // 该文件在请求域名的域下
        document.body.appendChild(ifrproxy);
        }
       }
    </script>
</body>
</html>
#cs3
<script>
    parent.parent.location.hash = self.location.hash.substring(1)
</script>
Window.Name
Window.Name的值不是一个普通的全局变量而是当前窗口的名字要注意的是每个iframe都有包裹它的window而这个window是top window的子窗口而它自然也有window.name的属性window.name属性的神奇之处在于name值在不同的页面甚至不同域名加载后依旧存在如果没有修改则值不会变化并且可以支持非常长的name值
举个简单的例子你在某个页面的控制台输入
window.name = "hello world"
window.location = "http://www.baidu.com"
页面跳转到了百度首页但是window.name却被保存下来了还是hello world。
PostMessage
postMessage 是 HTML5 新增加的一项功能跨文档消息传输(Cross Document Messaging)目前Chrome 2.0+、Internet Explorer 8.0+, Firefox 3.0+, Opera 9.6+, 和 Safari 4.0+ 都支持这项功能。
首先创建 a.html 文件
<!DOCTYPE html>
<html lang="en">
<head>
    <meta charset="UTF-8">
    <title>a.html</title>
</head>
<body>
    <iframe src="http://localhost:8081/b.html" style='display: none;'></iframe>
    <script>
    window.onload = function() {
        let targetOrigin = 'http://localhost:8081';
        window.frames[0].postMessage('我要给你发消息了!', targetOrigin);
    }
    window.addEventListener('message', function(e) {
        console.log('a.html 接收到的消息:', e.data);
    });
    </script>
</body>
</html>
创建一个 iframe使用 iframe 的一个方法 postMessage 可以向http://localhost:8081/b.html发送消息然后监听 message可以获得其他文档发来的消息。
同样的 b.html 文件
<script>
window.addEventListener('message', function(e) {
    if(e.source != window.parent) {
        return;
    }
    let data = e.data;
    console.log('b.html 接收到的消息:', data);
    parent.postMessage('我已经接收到消息了!', e.origin);
})
</script>