

Spring Boot中配置多个数据源-CSDN博客
| 阿里云国内75折 回扣 微信号:monov8 |
| 阿里云国际,腾讯云国际,低至75折。AWS 93折 免费开户实名账号 代冲值 优惠多多 微信号:monov8 飞机:@monov6 |
配置数据源实际上就是配置多个数据库在一个配置文件中配置多个数据库这样做主要的好处有以下几点
- 数据库隔离通过配置多个数据源可以将不同的业务数据存储在不同的数据库中实现数据的隔离。这样可以提高系统的安全性和稳定性避免不同业务之间的数据相互干扰。
- 性能优化通过配置多个数据源可以将读写操作分离到不同的数据库中从而提高系统的并发性能。例如将读操作集中在一个主数据库中将写操作分散到多个从数据库中可以有效地减轻数据库的读写压力提高系统的响应速度。
- 扩展性当系统需要扩展到多个地理位置或多个数据中心时配置多个数据源可以更好地支持分布式部署。每个地理位置或数据中心可以配置一个独立的数据源使得数据访问更加高效和可靠。
- 多租户支持对于多租户的系统配置多个数据源可以实现不同租户的数据隔离。每个租户可以拥有自己独立的数据库从而保证数据的安全性和隐私性。
- 数据库版本升级在进行数据库版本升级时可以通过配置多个数据源将新版本的数据库与旧版本的数据库并行使用。这样可以在升级过程中保证系统的正常运行减少升级带来的风险。
我们目前常用的三种数据访问方法方式
- JDBCTemplate
- Spring Data JPA
- MyBatis
接下来我们将围绕这种数据访问方法进行配置
JDBCTemplate
实际上这种方式主要还是在application.properties中设置我们需要链接的数据库配置比如我A数据库用来存储用户信息B数据库用来存储业务数据。
spring.datasource.primary.jdbc-url=jdbc:mysql://localhost:3306/test?useUnicode=true&characterEncoding=utf-8&useSSL=true&serverTimezone=UTC
spring.datasource.primary.username=root
spring.datasource.primary.password=123456
spring.datasource.primary.driver-class-name=com.mysql.cj.jdbc.Driver

spring.datasource.secondary.jdbc-url=jdbc:mysql://localhost:3306/test2?useUnicode=true&characterEncoding=utf-8&useSSL=true&serverTimezone=UTC
spring.datasource.secondary.username=root
spring.datasource.secondary.password=123456
spring.datasource.secondary.driver-class-name=com.mysql.cj.jdbc.Driver
ok我们继续配置完毕后数据源后我们就通过配置类来完成加载这些配置信息初始话数据源以及初始化每个数据源的时候要用的JDBCTemplate。你只需要在你的Spring Boot中应用下面的配置类就可以完成。
@Configuration
public class DataSourceConfiguration {

    @Primary
    @Bean
    @ConfigurationProperties(prefix = "spring.datasource.primary")
    public DataSource primaryDataSource() {
        return DataSourceBuilder.create().build();
    }

    @Bean
    @ConfigurationProperties(prefix = "spring.datasource.secondary")
    public DataSource secondaryDataSource() {
        return DataSourceBuilder.create().build();
    }

    @Bean
    public JdbcTemplate primaryJdbcTemplate(@Qualifier("primaryDataSource") DataSource primaryDataSource) {
        return new JdbcTemplate(primaryDataSource);
    }

    @Bean
    public JdbcTemplate secondaryJdbcTemplate(@Qualifier("secondaryDataSource") DataSource secondaryDataSource) {
        return new JdbcTemplate(secondaryDataSource);
    }

}
	<dependencies>
		<dependency>
			<groupId>org.springframework.boot</groupId>
			<artifactId>spring-boot-starter-web</artifactId>
		</dependency>

		<dependency>
			<groupId>org.springframework.boot</groupId>
			<artifactId>spring-boot-starter-jdbc</artifactId>
		</dependency>

		<dependency>
			<groupId>mysql</groupId>
			<artifactId>mysql-connector-java</artifactId>
		</dependency>

		<dependency>
			<groupId>org.projectlombok</groupId>
			<artifactId>lombok</artifactId>
		</dependency>

		<dependency>
			<groupId>org.springframework.boot</groupId>
			<artifactId>spring-boot-starter-test</artifactId>
			<scope>test</scope>
		</dependency>
	</dependencies>
单元测试类
@RunWith(SpringRunner.class)
@SpringBootTest
public class ApplicationTests {

    @Autowired
    protected JdbcTemplate primaryJdbcTemplate;

    @Autowired
    protected JdbcTemplate secondaryJdbcTemplate;

    @Before
    public void setUp() {
        primaryJdbcTemplate.update("DELETE  FROM  USER ");
        secondaryJdbcTemplate.update("DELETE  FROM  USER ");
    }

    @Test
    public void test() throws Exception {
        // 往第一个数据源中插入 2 条数据
        primaryJdbcTemplate.update("insert into user(name,age) values(?, ?)", "aaa", 20);
        primaryJdbcTemplate.update("insert into user(name,age) values(?, ?)", "bbb", 30);

        // 往第二个数据源中插入 1 条数据若插入的是第一个数据源则会主键冲突报错
        secondaryJdbcTemplate.update("insert into user(name,age) values(?, ?)", "ccc", 20);

        // 查一下第一个数据源中是否有 2 条数据验证插入是否成功
        Assert.assertEquals("2", primaryJdbcTemplate.queryForObject("select count(1) from user", String.class));

        // 查一下第一个数据源中是否有 1 条数据验证插入是否成功
        Assert.assertEquals("1", secondaryJdbcTemplate.queryForObject("select count(1) from user", String.class));
    }
}
有两个JdbcTemplate为什么不用@Qualifier指定这里顺带说个小知识点当我们不指定的时候会采用参数的名字来查找Bean存在的话就注入。
这两个JdbcTemplate创建的时候我们也没指定名字它们是如何匹配上的这里也是一个小知识点当我们创建Bean的时候默认会使用方法名称来作为Bean的名称所以这里就对应上了。读者不妨回头看看两个名称是不是一致的。
Spring Data JPA
和上边那种方式基本上类似所做的操作会有细微的区别。
		<dependency>
			<groupId>org.springframework.boot</groupId>
			<artifactId>spring-boot-starter-web</artifactId>
		</dependency>

		<dependency>
			<groupId>org.springframework.boot</groupId>
			<artifactId>spring-boot-starter-data-jpa</artifactId>
		</dependency>

		<dependency>
			<groupId>org.springframework.boot</groupId>
			<artifactId>spring-boot-starter-actuator</artifactId>
		</dependency>

		<dependency>
			<groupId>mysql</groupId>
			<artifactId>mysql-connector-java</artifactId>
		</dependency>

		<dependency>
			<groupId>org.projectlombok</groupId>
			<artifactId>lombok</artifactId>
			<scope>provided</scope>
		</dependency>

		<dependency>
			<groupId>org.springframework.boot</groupId>
			<artifactId>spring-boot-starter-test</artifactId>
			<scope>test</scope>
		</dependency>
配置application.properties文件
# pring boot 1.x的配置spring.datasource.primary.url=jdbc:mysql://localhost:3306/test1?useUnicode=true&characterEncoding=utf-8&useSSL=true&serverTimezone=UTC
spring.datasource.primary.jdbc-url=jdbc:mysql://localhost:3306/test1
spring.datasource.primary.username=root
spring.datasource.primary.password=123456
spring.datasource.primary.driver-class-name=com.mysql.cj.jdbc.Driver

# spring boot 1.x的配置spring.datasource.secondary.url=jdbc:mysql://localhost:3306/test2?useUnicode=true&characterEncoding=utf-8&useSSL=true&serverTimezone=UTC
spring.datasource.secondary.jdbc-url=jdbc:mysql://localhost:3306/test2
spring.datasource.secondary.username=root
spring.datasource.secondary.password=123456
spring.datasource.secondary.driver-class-name=com.mysql.cj.jdbc.Driver

# 日志打印执行的SQL
spring.jpa.show-sql=true
# Hibernate的DDL策略
spring.jpa.hibernate.ddl-auto=create-drop
创建实体类
@Entity
//@Data
//@NoArgsConstructor
public class User {

    @Id
    @GeneratedValue
    private Long id;

    private String name;
    private Integer age;

    public User(String name, Integer age) {
        this.name = name;
        this.age = age;
    }

    public Long getId() {
        return id;
    }

    public void setId(Long id) {
        this.id = id;
    }

    public String getName() {
        return name;
    }

    public void setName(String name) {
        this.name = name;
    }

    public Integer getAge() {
        return age;
    }

    public void setAge(Integer age) {
        this.age = age;
    }

    public User() {
    }
}
public interface UserRepository extends JpaRepository<User, Long> {

}
@Entity
//@Data
//@NoArgsConstructor
public class Message {

    @Id
    @GeneratedValue
    private Long id;

    private String title;
    private String message;

    public Message(String title, String message) {
        this.title = title;
        this.message = message;
    }

    public Long getId() {
        return id;
    }

    public void setId(Long id) {
        this.id = id;
    }

    public String getTitle() {
        return title;
    }

    public void setTitle(String title) {
        this.title = title;
    }

    public String getMessage() {
        return message;
    }

    public void setMessage(String message) {
        this.message = message;
    }

    public Message() {
    }
}
public interface MessageRepository extends JpaRepository<Message, Long> {


}
多数据源配置类
@Configuration
public class DataSourceConfiguration {

    @Primary
    @Bean
    @ConfigurationProperties(prefix = "spring.datasource.primary")
    public DataSource primaryDataSource() {
        return DataSourceBuilder.create().build();
    }

    @Bean
    @ConfigurationProperties(prefix = "spring.datasource.secondary")
    public DataSource secondaryDataSource() {
        return DataSourceBuilder.create().build();
    }

}
主数据源配置类
@Configuration
@EnableTransactionManagement
@EnableJpaRepositories(
        entityManagerFactoryRef="entityManagerFactoryPrimary",
        transactionManagerRef="transactionManagerPrimary",
        basePackages= { "com.miaow.demo.p" }) //设置Repository所在位置
public class PrimaryConfig {

    @Autowired
    @Qualifier("primaryDataSource")
    private DataSource primaryDataSource;

    @Autowired
    private JpaProperties jpaProperties;
    @Autowired
    private HibernateProperties hibernateProperties;

    private Map<String, Object> getVendorProperties() {
        return hibernateProperties.determineHibernateProperties(jpaProperties.getProperties(), new HibernateSettings());
    }

    @Primary
    @Bean(name = "entityManagerPrimary")
    public EntityManager entityManager(EntityManagerFactoryBuilder builder) {
        return entityManagerFactoryPrimary(builder).getObject().createEntityManager();
    }

    @Primary
    @Bean(name = "entityManagerFactoryPrimary")
    public LocalContainerEntityManagerFactoryBean entityManagerFactoryPrimary (EntityManagerFactoryBuilder builder) {
//        HibernateJpaVendorAdapter jpaVendorAdapter = new HibernateJpaVendorAdapter();
//        jpaVendorAdapter.setGenerateDdl(true);
        return builder
                .dataSource(primaryDataSource)
                .packages("com.miaow.demo.p") //设置实体类所在位置
                .persistenceUnit("primaryPersistenceUnit")
                .properties(getVendorProperties())
                .build();
    }

    @Primary
    @Bean(name = "transactionManagerPrimary")
    public PlatformTransactionManager transactionManagerPrimary(EntityManagerFactoryBuilder builder) {
        return new JpaTransactionManager(entityManagerFactoryPrimary(builder).getObject());
    }
}
设置从数据库配置类
@Configuration
@EnableTransactionManagement
@EnableJpaRepositories(
        entityManagerFactoryRef="entityManagerFactorySecondary",
        transactionManagerRef="transactionManagerSecondary",
        basePackages= { "com.miaow.demo.s" }) //设置Repository所在位置
public class SecondaryConfig {

    @Autowired
    @Qualifier("secondaryDataSource")
    private DataSource secondaryDataSource;

    @Autowired
    private JpaProperties jpaProperties;
    @Autowired
    private HibernateProperties hibernateProperties;

    private Map<String, Object> getVendorProperties() {
        return hibernateProperties.determineHibernateProperties(jpaProperties.getProperties(), new HibernateSettings());
    }

    @Bean(name = "entityManagerSecondary")
    public EntityManager entityManager(EntityManagerFactoryBuilder builder) {
        return entityManagerFactorySecondary(builder).getObject().createEntityManager();
    }

    @Bean(name = "entityManagerFactorySecondary")
    public LocalContainerEntityManagerFactoryBean entityManagerFactorySecondary (EntityManagerFactoryBuilder builder) {
        return builder
                .dataSource(secondaryDataSource)
                .packages("com.miaow.demo.s") //设置实体类所在位置
                .persistenceUnit("secondaryPersistenceUnit")
                .properties(getVendorProperties())
                .build();
    }

    @Bean(name = "transactionManagerSecondary")
    PlatformTransactionManager transactionManagerSecondary(EntityManagerFactoryBuilder builder) {
        return new JpaTransactionManager(entityManagerFactorySecondary(builder).getObject());
    }

}
创建的单元测试
@Slf4j
@RunWith(SpringRunner.class)
@SpringBootTest
public class ApplicationTests {

    @Autowired
    private UserRepository userRepository;
    @Autowired
    private MessageRepository messageRepository;

    @Test
    public void test() throws Exception {
        userRepository.save(new User("aaa", 10));
        userRepository.save(new User("bbb", 20));
        userRepository.save(new User("ccc", 30));
        userRepository.save(new User("ddd", 40));
        userRepository.save(new User("eee", 50));

        Assert.assertEquals(5, userRepository.findAll().size());

        messageRepository.save(new Message("o1", "aaaaaaaaaa"));
        messageRepository.save(new Message("o2", "bbbbbbbbbb"));
        messageRepository.save(new Message("o3", "cccccccccc"));

        Assert.assertEquals(3, messageRepository.findAll().size());
    }

}
MyBatis
在Spring Boot的配置文件application.properties中设置我们需要的两个连接的数据库配置
# pring boot 1.x的配置spring.datasource.primary.url=jdbc:mysql://localhost:3306/test1?useUnicode=true&characterEncoding=utf-8&useSSL=true&serverTimezone=UTC
spring.datasource.primary.jdbc-url=jdbc:mysql://localhost:3306/test1
spring.datasource.primary.username=root
spring.datasource.primary.password=123456
spring.datasource.primary.driver-class-name=com.mysql.cj.jdbc.Driver

# spring boot 1.x的配置spring.datasource.secondary.url=jdbc:mysql://localhost:3306/test2?useUnicode=true&characterEncoding=utf-8&useSSL=true&serverTimezone=UTC
spring.datasource.secondary.jdbc-url=jdbc:mysql://localhost:3306/test2
spring.datasource.secondary.username=root
spring.datasource.secondary.password=123456
spring.datasource.secondary.driver-class-name=com.mysql.cj.jdbc.Driver

#mybatis.mapper-locations=classpath:mapper/*.xml
创建一个初始化多数据源和MyBatis配置
@Configuration
public class DataSourceConfiguration {

    @Primary
    @Bean
    @ConfigurationProperties(prefix = "spring.datasource.primary")
    public DataSource primaryDataSource() {
        return DataSourceBuilder.create().build();
    }

    @Bean
    @ConfigurationProperties(prefix = "spring.datasource.secondary")
    public DataSource secondaryDataSource() {
        return DataSourceBuilder.create().build();
    }

}
可以看到内容跟JdbcTemplate、Spring Data JPA的时候是一模一样的。通过@ConfigurationProperties可以知道这两个数据源分别加载了spring.datasource.primary.*和spring.datasource.secondary.*的配置。@Primary注解指定了主数据源就是当我们不特别指定哪个数据源的时候就会使用这个Bean真正差异部分在下面的JPA配置上。
分别创建这两个数据源的MyBatis配置文件
Private 数据源的JPA的配置文件
@Configuration
@MapperScan(
        basePackages = "com.miaow.demo.p",
        sqlSessionFactoryRef = "sqlSessionFactoryPrimary",
        sqlSessionTemplateRef = "sqlSessionTemplatePrimary")
public class PrimaryConfig {

    private DataSource primaryDataSource;

    public PrimaryConfig(@Qualifier("primaryDataSource") DataSource primaryDataSource) {
        this.primaryDataSource = primaryDataSource;
    }

    @Bean
    public SqlSessionFactory sqlSessionFactoryPrimary() throws Exception {
        SqlSessionFactoryBean bean = new SqlSessionFactoryBean();
        bean.setDataSource(primaryDataSource);
        return bean.getObject();
    }

    @Bean
    public SqlSessionTemplate sqlSessionTemplatePrimary() throws Exception {
        return new SqlSessionTemplate(sqlSessionFactoryPrimary());
    }

}
Secondary的数据源JPA配置
@Configuration
@MapperScan(
        basePackages = "com.miaow.demo.s",
        sqlSessionFactoryRef = "sqlSessionFactorySecondary",
        sqlSessionTemplateRef = "sqlSessionTemplateSecondary")
public class SecondaryConfig {

    private DataSource secondaryDataSource;

    public SecondaryConfig(@Qualifier("secondaryDataSource") DataSource secondaryDataSource) {
        this.secondaryDataSource = secondaryDataSource;
    }

    @Bean
    public SqlSessionFactory sqlSessionFactorySecondary() throws Exception {
        SqlSessionFactoryBean bean = new SqlSessionFactoryBean();
        bean.setDataSource(secondaryDataSource);
        return bean.getObject();
    }

    @Bean
    public SqlSessionTemplate sqlSessionTemplateSecondary() throws Exception {
        return new SqlSessionTemplate(sqlSessionFactorySecondary());
    }

}
注意在此说明一下配置类上使用@MapperScan注解来指定当前数据源下定义的Entity和Mapper的包路径
另外需要指定sqlSessionFactory和sqlSessionTemplate这两个具体实现在该配置类中类中初始化。
配置类的构造函数中通过@Qualifier注解来指定具体要用哪个数据源其名字对应在DataSourceConfiguration配置类中的数据源定义的函数名。
配置类中定义SqlSessionFactory和SqlSessionTemplate的实现注意具体使用的数据源正确。
创建一个UserPrimary实体类:
public class UserPrimary {

    private Long id;


    private String name;
    private Integer age;

    public UserPrimary(String name, Integer age) {
        this.name = name;
        this.age = age;
    }

    public Long getId() {
        return id;
    }

    public void setId(Long id) {
        this.id = id;
    }

    public String getName() {
        return name;
    }

    public void setName(String name) {
        this.name = name;
    }

    public Integer getAge() {
        return age;
    }

    public void setAge(Integer age) {
        this.age = age;
    }

    public UserPrimary() {
    }
}
创建一个UserMapperPrimary用来作为填写SQL语句的接口
public interface UserMapperPrimary {

    @Select("SELECT * FROM USER WHERE NAME = #{name}")
    UserPrimary findByName(@Param("name") String name);

    @Insert("INSERT INTO USER(NAME, AGE) VALUES(#{name}, #{age})")
    int insert(@Param("name") String name, @Param("age") Integer age);

    @Delete("DELETE FROM USER")
    int deleteAll();

}
创建一个UserSecondary实体类
public class UserSecondary {

    private Long id;

    private String name;
    private Integer age;

    public Long getId() {
        return id;
    }

    public void setId(Long id) {
        this.id = id;
    }

    public String getName() {
        return name;
    }

    public void setName(String name) {
        this.name = name;
    }

    public Integer getAge() {
        return age;
    }

    public void setAge(Integer age) {
        this.age = age;
    }

    public UserSecondary() {
    }

    public UserSecondary(String name, Integer age) {
        this.name = name;
        this.age = age;
    }
}
public interface UserMapperSecondary {

    @Select("SELECT * FROM USER WHERE NAME = #{name}")
    UserSecondary findByName(@Param("name") String name);

    @Insert("INSERT INTO USER(NAME, AGE) VALUES(#{name}, #{age})")
    int insert(@Param("name") String name, @Param("age") Integer age);

    @Delete("DELETE FROM USER")
    int deleteAll();
}
之后也是最关键的一步我们需要在MyBatis的配置文件中使用Mapper.xml
在Resources目录下创建一个mapper文件夹之后再mapper文件夹下边分别创建primary和secondary文件夹
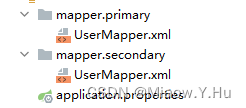
UserMapper.xml
<?xml version="1.0" encoding="UTF-8" ?>
<!DOCTYPE mapper
        PUBLIC "-//mybatis.org//DTD Mapper 3.0//EN"
        "http://mybatis.org/dtd/mybatis-3-mapper.dtd">

<mapper namespace="com.miaow.demo.p.mapper.UserMapperPrimary">
    <select id="findByName" resultType="com.miaow.demo.p.entity.UserPrimary">
        SELECT * FROM USER WHERE NAME = #{name}
    </select>

    <insert id="insert">
        INSERT INTO USER(NAME, AGE) VALUES(#{name}, #{age})
    </insert>

</mapper>
与上边这个几乎一样只是两者指向的接口位置不一样
<?xml version="1.0" encoding="UTF-8" ?>
<!DOCTYPE mapper
        PUBLIC "-//mybatis.org//DTD Mapper 3.0//EN"
        "http://mybatis.org/dtd/mybatis-3-mapper.dtd">

<mapper namespace="com.miaow.demo.s.mapper.UserMapperSecondary">

    <select id="findByName" resultType="com.miaow.demo.s.entity.UserSecondary">
        SELECT * FROM USER WHERE NAME = #{name}
    </select>

    <insert id="insert">
        INSERT INTO USER(NAME, AGE) VALUES(#{name}, #{age})
    </insert>

</mapper>
最后我们可以通过一个测试类进行测试
@Slf4j
@RunWith(SpringRunner.class)
@SpringBootTest
@Transactional
public class ApplicationTests {

//第一数据库配置类
    @Autowired
    private UserMapperPrimary userMapperPrimary;
    //第二数据库配置文件
    @Autowired
    private UserMapperSecondary userMapperSecondary;

    @Before
    public void setUp() {
        // 清空测试表保证每次结果一样
        userMapperPrimary.deleteAll();
        userMapperSecondary.deleteAll();
    }

    @Test
    public void test() throws Exception {
        // 往Primary数据源插入一条数据
        userMapperPrimary.insert("AAA", 20);

        // 从Primary数据源查询刚才插入的数据配置正确就可以查询到
        UserPrimary userPrimary = userMapperPrimary.findByName("AAA");
        Assert.assertEquals(20, userPrimary.getAge().intValue());

        // 从Secondary数据源查询刚才插入的数据配置正确应该是查询不到的
        UserSecondary userSecondary = userMapperSecondary.findByName("AAA");
        Assert.assertNull(userSecondary);

        // 往Secondary数据源插入一条数据
        userMapperSecondary.insert("BBB", 20);

        // 从Primary数据源查询刚才插入的数据配置正确应该是查询不到的
        userPrimary = userMapperPrimary.findByName("BBB");
        Assert.assertNull(userPrimary);

        // 从Secondary数据源查询刚才插入的数据配置正确就可以查询到
        userSecondary = userMapperSecondary.findByName("BBB");
        Assert.assertEquals(20, userSecondary.getAge().intValue());
    }

}
| 阿里云国内75折 回扣 微信号:monov8 |
| 阿里云国际,腾讯云国际,低至75折。AWS 93折 免费开户实名账号 代冲值 优惠多多 微信号:monov8 飞机:@monov6 |