

Java框架之springboot starter
| 阿里云国内75折 回扣 微信号:monov8 |
| 阿里云国际,腾讯云国际,低至75折。AWS 93折 免费开户实名账号 代冲值 优惠多多 微信号:monov8 飞机:@monov6 |
写在前面
本文一起看下springboot starter相关的内容。
1官方提供的starter
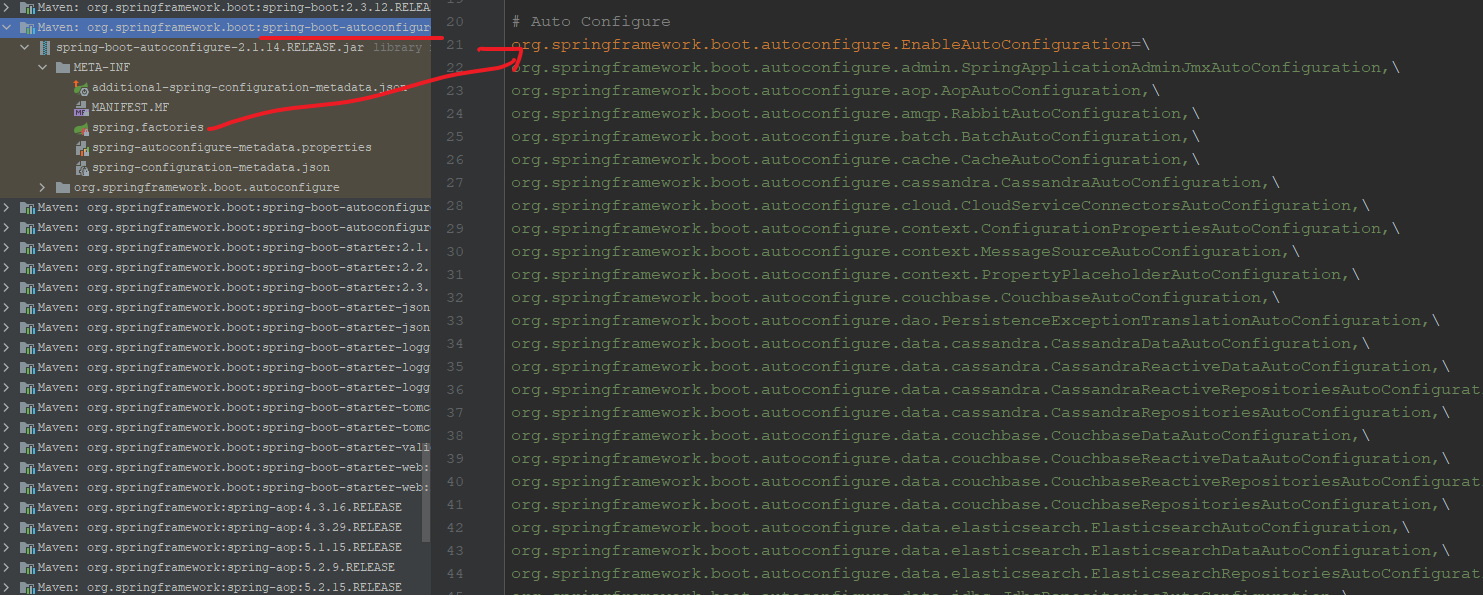
在spring-boot-autocongure包中定义了官方提供的一百多个starter如下
2框架是如何定义starter的
因为springboot的普及度逐步提高一些没有被官方实现提供为starter的框架也会自己实现一个starter供用户使用这里以shardingsphere clone之后使用操作git checkout -b 5.0.0-alpha-local 5.0.0-alpha创建分支然后在如下目录查看starter配置
$ pwd
/d/test/sharding-sphere/shardingsphere-jdbc/shardingsphere-jdbc-spring/shardingsphere-jdbc-core-spring/shardingsphere-jdbc-core-spring-boot-starter
截图如下
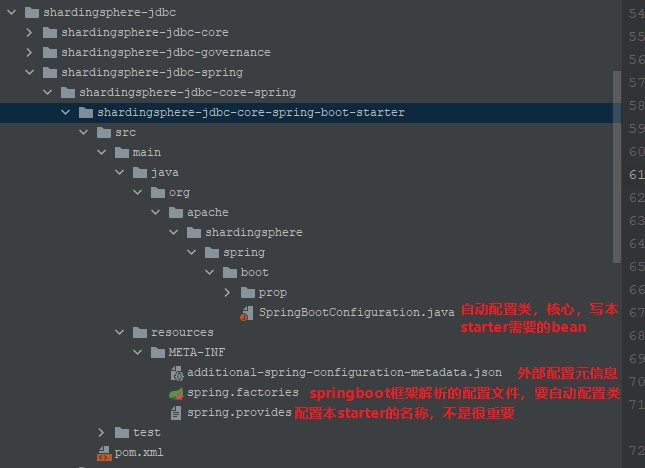
spring.provider内容如下
provides: shardingsphere-jdbc-spring-boot-starter
additional-spring-configuration-metadata.json内容如下
{
  "groups": [
    {
      "name": "spring.shardingsphere.datasource",
      "type": "org.apache.shardingsphere.spring.boot.SpringBootConfiguration"
    },
    ...
}
其中比较重要的是spring.factories和自动配置类SpringBootConfigurationspring.factories如下
org.springframework.boot.autoconfigure.EnableAutoConfiguration=\
org.apache.shardingsphere.spring.boot.SpringBootConfiguration
其中只定义了自动配置类自动配置类如下
@Configuration // 代表是一个Java config类
@ComponentScan("org.apache.shardingsphere.spring.boot.converter") // 配置扫描路径会扫描并注册相关spring bean
@EnableConfigurationProperties(SpringBootPropertiesConfiguration.class) // 启用属性类封装了外部配置文件信息
@ConditionalOnProperty(prefix = "spring.shardingsphere", name = "enabled", havingValue = "true", matchIfMissing = true) // 当spring.shardingsphere.enabled 配置项等于true时加载该自动配置类
@AutoConfigureBefore(DataSourceAutoConfiguration.class) // 在DataSourceAutoConfiguration自动配置类之前配置
@RequiredArgsConstructor // lombok注解
public class SpringBootConfiguration implements EnvironmentAware {
    // 属性类会自动注入进来
    private final SpringBootPropertiesConfiguration props;

    private final Map<String, DataSource> dataSourceMap = new LinkedHashMap<>();

    // 核心创建shardingsphere
    @Bean
    @Autowired(required = false)
    public DataSource shardingSphereDataSource(final ObjectProvider<List<RuleConfiguration>> rules) throws SQLException {
        Collection<RuleConfiguration> ruleConfigurations = Optional.ofNullable(rules.getIfAvailable()).orElse(Collections.emptyList());
        return ShardingSphereDataSourceFactory.createDataSource(dataSourceMap, ruleConfigurations, props.getProps());
    }

    // 创建spring bean ShardingTransactionTypeScanner
    @Bean
    public ShardingTransactionTypeScanner shardingTransactionTypeScanner() {
        return new ShardingTransactionTypeScanner();
    }

    // 感知上下文对象因为自动配置类本身也是一个spring bean所以这里可以这样子用
    @Override
    public final void setEnvironment(final Environment environment) {
        dataSourceMap.putAll(DataSourceMapSetter.getDataSourceMap(environment));
    }
}
使用也比较简单和引入普通的jar包相同在需要的项目里引入其GAV即可最终springboot会扫描到spring.facatories并加载其中的组件当然最重要的自然是自动配置类了接下来我们仿照shardingsphere 的starter来自定义一个starter。
3自定义starter
3.1自定义starter
源码 。
首先我们来定义属性类如下
@ConfigurationProperties(prefix = "info")
@Getter
@Setter
public class HelloProperties {
//    private Properties prop = new Properties();

    private String name;
}
即接收的配置的前缀是info这里的name属性配置中就可能是info.name=xxxx,接着我们来定义一个我们的starter能够提供的类Spokesman该类的功能就是会说话因此使用了我们starter就能拥有一个会spoke的man如下
@AllArgsConstructor
public class Spokesman {
    private String name;

    public String speak() {
        System.out.println("你好向大家介绍" + name);
        return name;
    }
}
接着就可以定义最重要的自动配置类了如下
@Configuration
@EnableConfigurationProperties(HelloProperties.class)
@ConditionalOnExpression // 默认为true即默认加载
@AllArgsConstructor
public class HelloAutoConfiguration implements InitializingBean {
    private final HelloProperties props;

    // 创建 Spokesman 的 spring bean
    @Bean
    public Spokesman createSpokesman() {
        return new Spokesman(props.getName());
    }

    // 仅仅为了打印props没有其他特殊用途
    @Override
    public void afterPropertiesSet() throws Exception {
        System.out.println("props isss: " + props.getName());
    }
}
但此时我们的自动配置类还不能加入到springboot的体系中还需要在META-INF下创建spring.factories文件如下

3.2使用自定义starter
starter其实也就是一个普通的maven依赖所以我们想要使用的话首先需要引入其对应的GAV这里如下
<dependency>
    <groupId>dongshi.daddy</groupId>
    <artifactId>hello-starter</artifactId>
    <version>1.0-SNAPSHOT</version>
</dependency>
接着我们提供starter需要的配置信息如下
info:
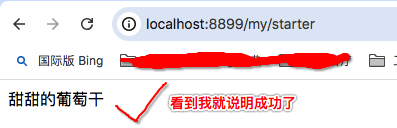
name: 甜甜的葡萄干
接着我们就可以获取starter提供的SpokeMan来spoke了如下
@Resource
private Spokesman spokesman;

@RequestMapping("/starter")
@ResponseBody
public String starter() {
    System.out.println("starter ...");
    return spokesman.speak();
}
运行main如果是在console看到如下输出则说明starter已经使用成功了
2023-07-03 21:01:56.508  INFO 3011 --- [           main] w.s.c.ServletWebServerApplicationContext : Root WebApplicationContext: initialization completed in 2355 ms
props isss: 甜甜的葡萄干
...
接着我们就可以访问http://localhost:8899/my/starter了
写在后面
参考文章列表
| 阿里云国内75折 回扣 微信号:monov8 |
| 阿里云国际,腾讯云国际,低至75折。AWS 93折 免费开户实名账号 代冲值 优惠多多 微信号:monov8 飞机:@monov6 |