

3. Pytorch中数据预处理和加载
| 阿里云国内75折 回扣 微信号:monov8 |
| 阿里云国际,腾讯云国际,低至75折。AWS 93折 免费开户实名账号 代冲值 优惠多多 微信号:monov8 飞机:@monov6 |
目录
3.1 图片的输入输出
3.1.1 Python: PIL.Image 基本使用
引入库
from PIL import Image1. 图片加载、灰度图、 显示和保存
# 1.从路径打开图像
img_A = Image.open('images/cat.jpg')

# 2.从数组中打开图像
import numpy as np
imgarray = np.array(Image.open('images/cat.jpg')) #把Image图片转为数组再打开主要了解一下如何Image图片转为数组
img_B = Image.fromarray(imgarray) #从numpy数组中打开图像
#将图像转为灰度
# PIL中有九种不同模式。分别为1LPRGBRGBACMYKYCbCrIF。
imgGrey = img_B.convert('L')
# img_A.show(),img_B.show(),imgGrey.show()  显示图片
display(img_A,img_B,imgGrey) #display函数可以在jupyter notebook中显示PIL图片
#img_A.save("images/02.jpg") save函数可以保存图片 
2. 图片宽、高、通道模式、平均值获取
from PIL import Image
import numpy as np

img = Image.open('images/cat.jpg')

width, height = img.size
channel_mode = img.mode
mean_value = np.mean(img)

print("图像的宽为",width)
print("图像的高为",height)
print("图像的模式为",channel_mode)
print("图像的平均值为",mean_value)
图像的宽为 250
图像的高为 188
图像的模式为 RGB
图像的平均值为 97.94999290780142
3. 创建指定大小指定通道类型的空图像
from PIL import Image
width = 200
height = 100

img_white = Image.new('RGB', (width,height), (255,255,255))
img_black = Image.new('RGB', (width,height), (0,0,0))
img_L = Image.new('L', (width, height), (155))

#img_white.show(),img_black.show(),img_L.show()
display(img_white,img_black,img_L)


4. 访问和操作图像像素
from PIL import Image

img = Image.open('images/cat.jpg')

width, height = img.size

# 获取指定坐标位置像素值
pixel_value = img.getpixel((width/2, height/2))
print(pixel_value)

# 或者使用load方法
pim = img.load()
pixel_value1 = pim[width/2, height/2]
print(pixel_value1)

# 设置指定坐标位置像素的值
pim[width/2, height/2] = (0, 0, 0)

# 或使用putpixel方法
img.putpixel((width//2, height//2), (255,255,255))

# 设置指定区域像素的值
for w in range(int(width/2) - 40, int(width/2) + 40):
    for h in range(int(height/2) - 20, int(height/2) + 20):
        pim[w, h] = (255, 0, 0)
        # img.putpixel((w, h), (255,255,255))
#img.show()
display(img)
(152, 109, 93) (152, 109, 93)

5. 图像通道分离和合并
from PIL import Image

img = Image.open('images/cat.jpg')

# 通道分离
R, G, B = img.split()
#R.show(),G.show(),B.show()
display(R,G,B)

# 通道合并
img_RGB = Image.merge('RGB', (R, G, B))
img_BGR = Image.merge('RGB', (B, G, R))
#img_RGB.show(),img_BGR.show()
display(img_RGB,img_BGR)
6. 在图像上输出文字与画框
from PIL import Image, ImageDraw, ImageFont

img = Image.open('images/cat.jpg')

# 创建Draw对象:
draw = ImageDraw.Draw(img)
# 字体颜色
fillColor = (255, 0, 0)
text = 'print text on PIL Image'
position = (110,10)
draw.text(position, text, fill=fillColor,stroke_width=2)

#12020起点画到200和90的图形填充无色边框红色边框像素为2
draw.rectangle((120,20,200,90),fill =None,outline =fillColor,width =2)
#img.show()
display(img)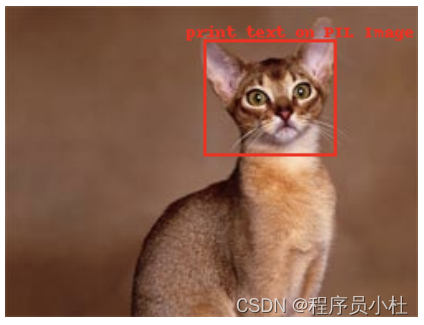
7. 图像缩放
from PIL import Image
img = Image.open('images/cat.jpg')
width, height = img.size
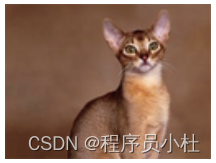
img_NEARESET = img.resize((width//2, height//2)) # 缩放默认模式是NEARESET(最近邻插值)
img_BILINEAR = img.resize((width//2, height//2), Image.BILINEAR) # BILINEAR 2x2区域的双线性插值
img_BICUBIC = img.resize((width//2, height//2), Image.BICUBIC) # BICUBIC 4x4区域的双三次插值
img_ANTIALIAS = img.resize((width//2, height//2), Image.ANTIALIAS) # ANTIALIAS 高质量下采样滤波
display(img_NEARESET,img_BILINEAR,img_BICUBIC,img_ANTIALIAS)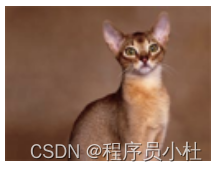


8. 图像遍历操作
from PIL import Image

img = Image.open('images/cat.jpg').convert('L')

width, height = img.size

pim = img.load() #打开一个图片文件同时创建一个相同大小的图片然后将原始图片的数据逐像素的拷贝到新的图片中

for w in range(width):
    for h in range(height):
        if pim[w, h] > 100:
            img.putpixel((w, h), 255)
            # pim[w, h] = 255
        else:
            img.putpixel((w, h), 0)
            # pim[w, h] = 0
display(img)

9. 图像阈值分割、 二值化
from PIL import Image

img = Image.open('images/cat.jpg').convert('L')

width, height = img.size

threshold = 125

for w in range(width):
    for h in range(height):
        if img.getpixel((w, h)) > threshold:
            img.putpixel((w, h), 255)
        else:
            img.putpixel((w, h), 0)

display(img)
10. 图像裁剪
from PIL import Image

img = Image.open('images/cat.jpg')

width, height = img.size

# 前两个坐标点是左上角坐标
# 后两个坐标点是右下角坐标
# width在前 height在后
box = (100, 100, 550, 350)

region = img.crop(box)

display(region)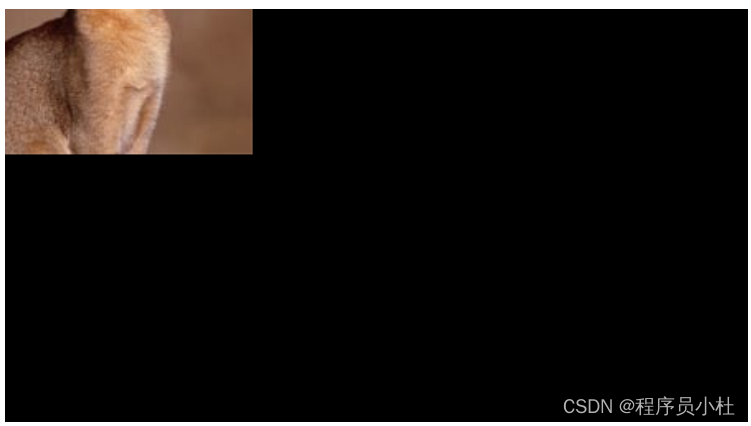
11. 图像边界扩展
# 边界扩展
from PIL import Image

img = Image.open('images/cat.jpg')

width, height = img.size
channel_mode = img.mode

img_makeBorder_full = Image.new(channel_mode, (2*width, height))
img_makeBorder_part = Image.new(channel_mode, (width+200, height))

# 图像水平扩展整个图像
img_makeBorder_full.paste(img, (0, 0, width, height))
img_makeBorder_full.paste(img, (width, 0, 2*width, height))

# 前两个坐标点是左上角坐标
# 后两个坐标点是右下角坐标
# width在前 height在后
box = (width-200, 0, width, height)
region = img.crop(box)

# 图像水平右侧扩展一个ROI
img_makeBorder_part.paste(img, (0, 0, width, height))
img_makeBorder_part.paste(region, (width, 0, width+200, height))
#img_makeBorder_part.show(),img_makeBorder_full.show()
display(img_makeBorder_part,img_makeBorder_full)

12. PIL.Image 和 NP相互转换
from PIL import Image
import numpy as np
import cv2 as cv2
img = Image.open('images/cat.jpg')

array = np.array(img)  # PIL.Image 转 numpy

img1 = Image.fromarray(array)  # numpy转 PIL.Image
img1 = Image.fromarray(array.astype('uint8'))
3.1.2 cv2基本使用
1. 图片加载、显示和保存
## 从opencv图片读取其实等同与从numpy数组中读取因为opencv图片保存在numpy数组内
import cv2
import numpy as np
# imread
#参数
#filepath读入imge的完整路径
#flags标志位{cv2.IMREAD_COLORcv2.IMREAD_GRAYSCALEcv2.IMREAD_UNCHANGED}
#cv2.IMREAD_COLOR默认参数读入一副彩色图片忽略alpha通道可用1作为实参替代
#cv2.IMREAD_GRAYSCALE读入灰度图片可用0作为实参替代
#cv2.IMREAD_UNCHANGED顾名思义读入完整图片包括alpha通道可用-1作为实参替代

img = cv2.imread('images/cat.jpg', 1) # 以灰度的方式读取图片
imgGrey = cv2.imread("images/cat.jpg",1)

cv2.imshow("img",img)
cv2.imshow("imgGrey",imgGrey)
cv2.waitKey()
cv2.imwrite("Copy.jpg",img) #写入保存
# 注意想要将opencv读取的图像显示到jupyter notebook 请使用from matplotlib import pyplot as plt
2. 获取图片属性
import cv2
img = cv2.imread('images/cat.jpg') #OpenCV是以BGR模式读入彩色图片如果想要正常显示彩色图片则需要改成RGB格式
print(img.shape)
print(img.size)
print(img.dtype)
# 在debug的时候dtype很重要
(188, 250, 3) 141000 uint8
3.图像变换
# 1.图像缩放
import cv2
import numpy as np
#缩放使用cv2.resize()函数resize函数里的size第一个是宽列第二个是高行。

img = cv2.imread("images/cat.jpg")
cv2.imshow("img",img)

height, width = img.shape[:2]
imgg = cv2.resize(img,(300,100))
imgg =img[0:int(height/2),0:int(width/2)]  #前面是高后面宽
img_ex = cv2.resize(img, (2*width, 2*height), interpolation=cv2.INTER_CUBIC)
cv2.imshow("img",imgg)
cv2.waitKey()

#2.图像平移
img = cv2.imread('images/cat.jpg',1)
rows,cols = img.shape[:2]

M = np.float32([[1,0,100],[0,1,50]])
dst = cv2.warpAffine(img,M,(cols,rows))

cv2.imshow('img',dst)
cv2.waitKey(0)
cv2.destroyAllWindows()

#3.图像旋转
img = cv2.imread('images/cat.jpg',1)
rows,cols = img.shape[:2]

M = cv2.getRotationMatrix2D((cols/2,rows/2),90,1) #旋转90度
dst = cv2.warpAffine(img,M,(cols,rows))
cv2.imshow('img',dst)
cv2.waitKey(0)
cv2.destroyAllWindows()

#4.仿射变换
import cv2
import numpy as np

img = cv2.imread('images/cat.jpg')
rows,cols,ch = img.shape

pts1 = np.float32([[50,50],[200,50],[50,200]])
pts2 = np.float32([[10,100],[200,50],[100,250]])

M = cv2.getAffineTransform(pts1,pts2)
dst = cv2.warpAffine(img,M,(cols,rows))

cv2.imshow('image',dst)
cv2.waitKey(0)

#5.颜色变换
import cv2
import numpy as np

bgr = cv2.imread('images/cat.jpg')  # bgr

# 对比灰度图、BGR和HSV下的图像
gray = cv2.cvtColor(bgr, cv2.COLOR_BGR2GRAY)
hsv = cv2.cvtColor(bgr, cv2.COLOR_BGR2HSV)
rgb = cv2.cvtColor(bgr,cv2.COLOR_BGR2RGB) #BGR转RGB ****
cv2.namedWindow('Gray Image', cv2.WINDOW_AUTOSIZE)
cv2.imshow('Gray Image', gray)
cv2.imshow('BGR Image', bgr)
cv2.imshow('HSV Image', hsv)
cv2.imshow('RGB Image', rgb)
cv2.waitKey(0)
cv2.destroyAllWindows()
4. 通道的拆分/合并处理
import cv2
img = cv2.imread('images/cat.jpg')
b,g,r = cv2.split(img)
img = cv2.merge((b,g,r))
5. 生成指定大小的空图像
import cv2

import numpy as np

img = cv2.imread("images/cat.jpg")
imgZero = np.zeros(img.shape,np.uint8)
imgFix = np.zeros((300,500,3),np.uint8)
# imgFix = np.zeros((300,500),np.uint8)
cv2.imshow("img",img)
cv2.imshow("imgZero",imgZero)
cv2.imshow("imgFix",imgFix)
cv2.waitKey()
6. 在图像上输出文字和画框
import cv2

img = cv2.imread("images/cat.jpg")
cv2.putText(img,"Print some text to img",(100,15),cv2.FONT_HERSHEY_SIMPLEX,0.35,(0,0,255))
#(bbox.left, bbox.top), (bbox.right, bbox.bottom)
cv2.rectangle(img, (120,20), (200,90), (0,0,255), 2)
cv2.imshow("img",img)
cv2.waitKey()
7.与PIL图像相互转换
#cv2.imread()返回numpy.darray可直接用Image.fromarray()转换成PIL.Image
import cv2
import numpy as np
import PIL.Image as Image
img = cv2.imread("images/cat.jpg")
img = cv2.cvtColor(img,cv2.COLOR_BGR2RGB) #注意BGR转RGB
img = Image.fromarray(img,mode="RGB")
img.show()

img = Image.open("images/cat.jpg")
img = cv2.cvtColor(np.asarray(img),cv2.COLOR_RGB2BGR)   #注意RGB转BGR
cv2.imshow("OpenCV",img)
cv2.waitKey()
3.2 数据加载
在PyTorch中torch.utils.data模块包含着一些常用的数据预处理的操作主要用于数据的读取、切分、准备等。常用的函数类如表所示

使用这些类能够对高维数组、图像等各种类型的数据进行预处理以便深度学习模型的使用。 针对文本数据的处理可以使用torchtext库进行相关的数据准备操作。
3.2.1 高维数组
为了展示全连接神经网络模型下面使用sklearn中提供的数据集load_boston和load_iris来进行回归和分类的数据准备。
一、回归数据的准备
##加载相应的模块
import torch
import torch.utils.data as Data
from sklearn.datasets import load_boston,load_iris
import numpy as np

## 读取波士顿回归数据
boston_x,boston_y = load_boston(return_X_y = True)
print("boston_X.dtype:",boston_x.dtype)
print("boston_X.dtype:",boston_y.dtype)
# boston_X.dtype: float64
# boston_X.dtype: float64


## 将数据集转化为32位浮点型张量
train_xt = torch.from_numpy(boston_x.astype(np.float32))
train_yt = torch.from_numpy(boston_y.astype(np.float32))
print("train_xy.dtype:",train_xt.dtype)
print("train_xy.dtype:",train_yt.dtype)
# train_xy.dtype: torch.float32
# train_xy.dtype: torch.float32


## 将训练集转化位张量后使用TensorDataset将X和Y整理到一起
train_data = Data.TensorDataset(train_xt,train_yt)
## 定义一个数据加载器将训练数据集进行批量处理
train_loader = Data.DataLoader(
    dataset = train_data, ##使用的数据集
    batch_size = 64,  ##批处理样本大小
    shuffle = True,  #每次迭代前打乱数据
    num_workers = 2, ##使用两个进程
)
## 检查训练数据集的一个batch的样本的维度是否正确
for step, (b_x,b_y) in enumerate(train_loader):
    if step > 0:
        break

## 输出训练图像的尺寸和标签的尺寸及数据类型
print("b_x.shape:",b_x.shape)
print("b_y.shape:",b_y.shape)
print("b_x.dtype:",b_x.dtype)
print("b_y.dtype:",b_y.dtype)
# b_x.shape: torch.Size([64, 13])
# b_y.shape: torch.Size([64])
# b_x.dtype: torch.float32
# b_y.dtype: torch.float32
boston_X.dtype: float64 boston_X.dtype: float64 train_xy.dtype: torch.float32 train_xy.dtype: torch.float32 b_x.shape: torch.Size([64, 13]) b_y.shape: torch.Size([64]) b_x.dtype: torch.float32 b_y.dtype: torch.float32
二、分类数据的准备
##加载相应的模块
import torch
import torch.utils.data as Data
from sklearn.datasets import load_boston,load_iris
import numpy as np

##处理分类数据
iris_x,irisy = load_iris(return_X_y = True)
print("iris_x.dtype:",iris_x.dtype)
print("iris_y.dtype:",irisy.dtype)
# iris_x.dtype: float64
# iris_y.dtype: int64


##训练集X转化为张量训练集y转化为张量
train_xt = torch.from_numpy(iris_x.astype(np.float32))
train_yt = torch.from_numpy(irisy.astype(np.int64))
print("train_xt.dtype:",train_xt.dtype)
print("train_yt.dtype:",train_yt.dtype)
# train_xt.dtype: torch.float32
# train_yt.dtype: torch.int64

##将训练集转化为张张量后使用TensorDataset将X和Y整理在一起
train_data = Data.TensorDataset(train_xt,train_yt)
##定义一个数据加载器将训练数据集进行批量处理
train_loader = Data.DataLoader(
    dataset = train_data,
    batch_size = 10,
    shuffle = True,
    num_workers = 1,
)
#检查训练数据集的一个batch样本的维度是否正确
for step,(b_x,b_y) in enumerate(train_loader):
    if step > 0:
        break

##输出训练图像的尺寸和标签的尺寸与数据类型
print("b_x.shape:",b_x.shape)
print("b_y.shape:",b_y.shape)
print("b_x.dtype:",b_x.dtype)
print("b_y.dtype:",b_y.dtype)
# b_x.shape: torch.Size([10, 4])
# b_y.shape: torch.Size([10])
# b_x.dtype: torch.float32
# b_y.dtype: torch.int64
iris_x.dtype: float64 iris_y.dtype: int32 train_xt.dtype: torch.float32 train_yt.dtype: torch.int64 b_x.shape: torch.Size([10, 4]) b_y.shape: torch.Size([10]) b_x.dtype: torch.float32 b_y.dtype: torch.int64
3.2.2 图像数据的加载
- torchvision中的datasets模块包含多种常用的分类数据集下载及导入函数可以很方便地导入数据以及验证所建立的模型效果。
- torchvision中的transforms模块可以针对每张图像进行预处理操作。
- torchvision的datasets模块中包含有ImageFolder()函数该函数可以读取文件夹中的图片数据。
以下代码以实际的数据集为例结合torchvision中的相关模块的使用展示图像数据的预处理操作。一种是从torchvision中的datasets模块中导入数据并预处理另一种是从文件夹中导入数据并进行预处理。
一、从torchvision中的datasets模块中导入数据并预处理
import torch
import torch.utils.data as Data
from torchvision.datasets import FashionMNIST
import torchvision.transforms as transforms
from torchvision.datasets import ImageFolder
import torch
import torch.utils.data as Data
from torchvision.datasets import FashionMNIST
import torchvision.transforms as transforms
from torchvision.datasets import ImageFolder


##使用并下载FashionMNIST数据准备训练数据集
train_data = FashionMNIST(
    root = "./data/FashionMNIST", ##数据的路径
    train = True, ##只使用训练数据集
    transform = transforms.ToTensor(),
    download = True
)

##定义一个数据加载器
train_loader = Data.DataLoader(
    dataset = train_data,
    batch_size = 64,
    shuffle = True,
    num_workers = 2,  ##使用两个进程
)

##计算train_loader有多少个batch
print("train_loader的batch数量为",len(train_loader))
# train_loader的batch数量为 938

##对测试集进行处理
test_data = FashionMNIST(
    root = "./data/FashionMNIST",
    train = False, ##不使用训练数据集
    download = False
)

##为数据添加一个通道维度并且取值范围缩放到0~1之间
test_data_x = test_data.data.type(torch.FloatTensor)/255.0
test_data_x = torch.unsqueeze(test_data_x,dim = 1)
test_data_y = test_data.targets ##测试集的标签
print("test_data_x.shape:",test_data_x.shape)
print("test_data_y.shape:",test_data_y.shape)
# test_data_x.shape: torch.Size([10000, 1, 28, 28])
# test_data_y.shape: torch.Size([10000])
二、从文件夹中导入数据并进行预处理
import torch
import torch.utils.data as Data
from torchvision.datasets import FashionMNIST
import torchvision.transforms as transforms
from torchvision.datasets import ImageFolder


##对训练集的预处理
train_data_transforms = transforms.Compose([  #将多个变换操作组合在一起
    transforms.RandomResizedCrop(224),  ##随机长宽比裁剪为224*224
    transforms.RandomHorizontalFlip(), ##依概率p = 0.5水平翻转
    transforms.ToTensor(),  ##转化为张量并归一化至【0-1】
    transforms.Normalize([0.485,0.456,0.406],
                         [0.229,0.224,0.225])  ##图像标准化处理
])

##读取图像
train_data_dir = "/kaggle/input/jiangnan2020/train/"
train_data = ImageFolder(train_data_dir,transform = train_data_transforms)
train_data_loader = Data.DataLoader(train_data,batch_size=4,
                                   shuffle = True,num_workers = 1)
print("数据集的label:",train_data.targets)  ##因为只有一个文件夹所以targets都是0啦
# 数据集的label: [0, 0, 0, .............]

##获得一个batch的数据
for step,(b_x,b_y) in enumerate(train_data_loader):
    if step > 0:
        break

print(b_x.shape)
print(b_y.shape)
print("图像的取值范围为",b_x.min(),"~",b_x.max())
# torch.Size([4, 3, 224, 224])
# torch.Size([4])
# 图像的取值范围为 tensor(-2.0665) ~ tensor(2.2489)
3.2.3 文本数据的加载
可以利用trochtext库中的相关函数对文本数据进行数据预处理
import torch
import torch.utils.data as Data
from torchvision.datasets import FashionMNIST
import torchvision.transforms as transforms
from torchvision.datasets import ImageFolder

from torchtext import data
##定义文本切分方法使用空格切分即可
mytokenize = lambda x: x.split()
##定义将文本转化为张量的相关操作
TEXT = data.Field(sequential = True, #表明输入的文本是字符
                 tokenize = mytokenize, #使用自定义的分词方法
                  use_vocab = True, #创建一个词汇表
                  batch_first = True, #batch优先的数据方式
                  fix_length = 200  #每个句子固定长度为200
                 )

##定义将标签转化为张量的相关操作
LABEL = data.Field(sequential = False, #表明输入的标签是数字
                  use_vocab = False, #不创建词汇表
                  pad_token = None, #不进行填充
                  unk_token = None #没有无法识别的字符
                  )
#对所要读取的数据集的每列进行处理
text_data_fields = [
    ("label",LABEL), ##对标签的操作
    ("text",TEXT) #对文本的操作
]

#读取数据
traindata,testdata = data.TabularDataset.splits(
    path = "../input/train-test",format = "csv",
    train = "train.csv",fields = text_data_fields,
    test = "test.csv",skip_header = True
)
len(traindata),len(testdata)
# (2, 1)
#输出结果表示训练集中有2个样本测试集中1个样本

##使用训练集构建单词表并不指定预训练好的词向量
TEXT.build_vocab(traindata,max_size = 1000,vectors = None)
##将训练数据集定义为数据加载器便于对模型进行优化
train_iter = data.BucketIterator(traindata,batch_size = 4)
test_iter = data.BucketIterator(testdata,batch_size = 4)
for step,batch in enumerate(train_iter):
    if step > 0:
        break

##针对一个batch的数据可以使用batch.label获得数据的类别标签
print("数据的类别标签",batch.label)
##batch.text是文本对应的编码向量
print("数据的尺寸",batch.text.shape)
# 数据的类别标签 tensor([1, 1])
# 数据的尺寸 torch.Size([2, 200])
3.3 自定义数据集(Dataset对象)和调用类加载器
之前是使用Imagefolder方式读取文件 缺点是每一类要放在同一个文件夹我们更多的是继承data.Dataset。
一般pytorch的数据加载到模型的操作顺序如下
1、创建一个 Dataset 对象必须实现 len() getitem() 两个方法会用到 transform 对数据进行扩充
2、创建一个 DataLoader 对象对Dataset 对象进行迭代的一般不需要事先实现里面其他方法了
3、循环遍历DataLoader 对象将imglabel 加载到模型中训练。
代码框架
from torch.utils.data.dataset import Dataset
from torch.utils.data.dataloader import DataLoader

dataset = MyDataset() # 第一步构建 Dataset 对象
dataloader = DataLoader(dataset) # 第二步通过Dataloader来构建迭代对象

num_epoches = 100
for epoch in range(num_epoches):
    for i, data in enumerate(dataloader):
        # 训练代码
3.3.1 自定义数据类
from torch.utils.data.dataset import Dataset
from torch.utils.data.dataloader import DataLoader
import torch
from PIL import Image
#1.继承data.Dataset
#torch.utils.data.Dataset是一个抽象类用户想要加载自定义的数据只需要继承这个类并且覆写其中的两个方法即可
#必须创建实现 __getitem__魔术方法 那么这个类就可以切片    python字典实现该魔术方法
#必须实现 __len__方法 定义了len 可以使用len() 返回数据集的长度  pyhton列表实现了该方法
#注意不覆写这两个方法会直接返回错误。
#还要创建__init__(self) 初始化方法

#现在以语义分割为例子
class MyDataSet(Dataset):
    def __init__(self,img_path,anno_path,transform):
        self.imgs = img_path
        self.annos = anno_path
        self.trans = transform
    def __getitem__(self,index):
        img = self.imgs[index]
        anno = self.annos[index]
        pil_img = Image.open(img)
        pil_img = pil_img.convert('RGB')#假如图像中有黑白图片会被转化为彩图 channel = 3
        #建议都加上这一步
        img_tensor = self.trans(pil_img)
        #标注图的处理
        pil_anno = Image.open(anno)
        pil_anno = pil_anno.resize((256,256))
        anno_tensor = torch.tensor(np.array(pil_anno),dtype=torch.int64) #torch.long
        return img_tensor,anno_tensor - 1
    def __len__(self):
        return len(self.imgs)
from torchvision import transforms
transform = transforms.Compose([
transforms.Resize((256,256)),
transforms.ToTensor()
])3.3.2 测试数据图像与标签
import matplotlib.pylab as plt
import numpy as np
plt.figure(figsize=(12,8))
img = Image.open(r'dataset/cat/images/Abyssinian_2.jpg')
anno = Image.open(r'dataset/cat/annotations/trimaps/Abyssinian_2.png')
plt.subplot(1,2,1)
plt.imshow(np.array(img))
plt.subplot(1,2,2)
plt.imshow(np.array(anno))
#查看标注图像类型
print(np.unique(np.array(anno)))  # 0,1,2  三值图像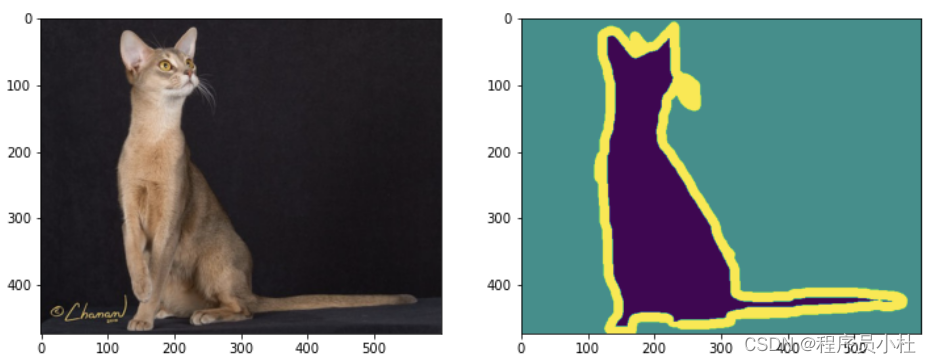
3.3.3 读取本地数据并划分数据集
import glob
#读取本地图像数据与标签数据
all_images = glob.glob(r'dataset/cat/images/*.jpg')
all_annos = glob.glob(r'dataset/cat/annotations/trimaps/*.png')
#查看部分数据是否匹配上
print(all_images[-3:],all_annos[-3:])
print(len(all_images),len(all_images))

#划分数据集
np.random.seed(2023)  #seed里面的数字可以随机设若下个位置再使用同样的数字则随机生成的会一样
index = np.random.permutation(len(all_images)) #打乱索引顺序
images = np.array(all_images)[index]
annotations = np.array(all_annos)[index]
sep = int(len(images)*0.8) #划分标志位 前80%是训练集 后20%为测试集
train_imgs = images[:sep]
train_annos = annotations[:sep]
test_imgs = images[sep:]
test_annos = annotations[sep:]

train_dataset = MyDataSet(train_imgs,train_annos,transform)
test_dataset = MyDataSet(test_imgs,test_annos,transform)
['dataset/cat/images\\yorkshire_terrier_97.jpg', 'dataset/cat/images\\yorkshire_terrier_98.jpg', 'dataset/cat/images\\yorkshire_terrier_99.jpg'] ['dataset/cat/annotations/trimaps\\yorkshire_terrier_97.png', 'dataset/cat/annotations/trimaps\\yorkshire_terrier_98.png', 'dataset/cat/annotations/trimaps\\yorkshire_terrier_99.png'] 7390 7390
3.3.4 调用数据加载器并测试
from torch.utils import data
#数据加载器
BATCHSIZE = 32  #一个批次数据量
train_dl = data.DataLoader(train_dataset,
                          batch_size = BATCHSIZE,
                          shuffle = True) #训练集数据要打乱
test_dl = data.DataLoader(test_dataset,
                          batch_size = BATCHSIZE,
                          ) #测试集则不需要

#读取一个批次的数据测试
img_batch,anno_batch = next(iter(train_dl))
print("图像批次的形状",img_batch.shape) # [batch,channel,width,height]
print("标签批次的形状",anno_batch.shape)# [batch,width,height]
图像批次的形状 torch.Size([32, 3, 256, 256]) 标签批次的形状 torch.Size([32, 256, 256])