

【鸟哥杂谈】腾讯云 CentOS8 Linux环境搭建docker
| 阿里云国内75折 回扣 微信号:monov8 |
| 阿里云国际,腾讯云国际,低至75折。AWS 93折 免费开户实名账号 代冲值 优惠多多 微信号:monov8 飞机:@monov6 |
忘记过去超越自己
- ❤️ 博客主页 单片机菜鸟哥一个野生非专业硬件IOT爱好者 ❤️
- ❤️ 本篇创建记录 2023-01-15 ❤️
- ❤️ 本篇更新记录 2023-01-15 ❤️
- 🎉 欢迎关注 🔎点赞 👍收藏 ⭐️留言📝
- 🙏 此博客均由博主单独编写不存在任何商业团队运营如发现错误请留言轰炸哦及时修正感谢支持
- 🔥 Arduino ESP8266教程累计帮助过超过1W+同学入门学习硬件网络编程入选过选修课程刊登过无线电杂志 🔥
目录
1. 前言
之前在树莓派上搭建了docker顺便也在腾讯云服务器上也搭建使用。
【树莓派不吃灰】基础篇⑱ 从0到1搭建docker环境顺便安装一下emqx MQTT Broker、HomeAssistant、portainer 建议读一下里面还是有很多概念本篇不会重复。
2. 搭建过程
2.1 添加 yum 源
依次执行以下命令
yum update
yum install epel-release -y
yum clean all
yum list
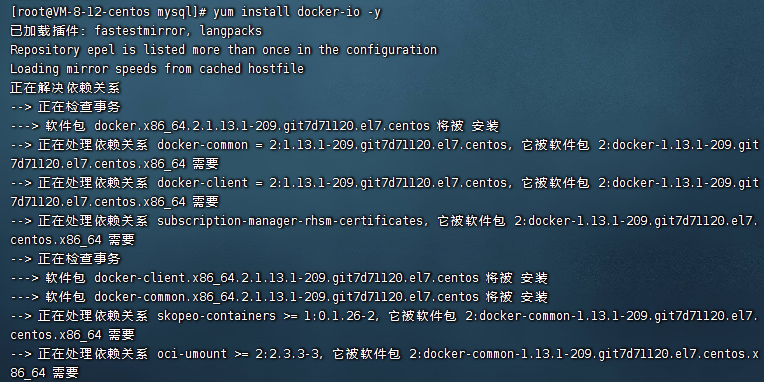
2.2 安装 Docker
yum install docker-io -y
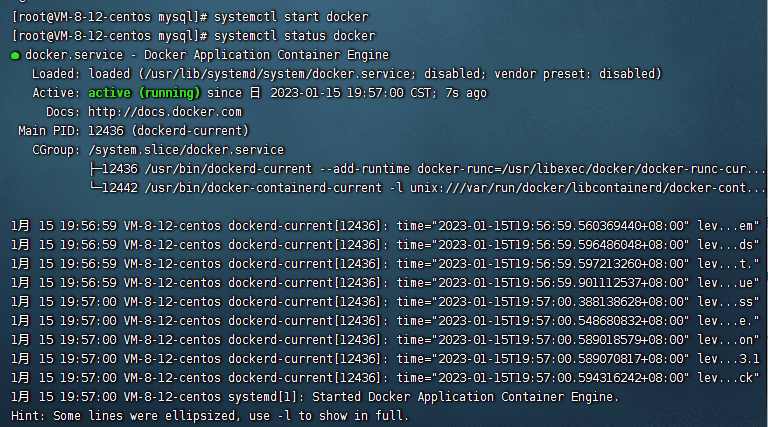
2.3 运行 Docker
systemctl start docker
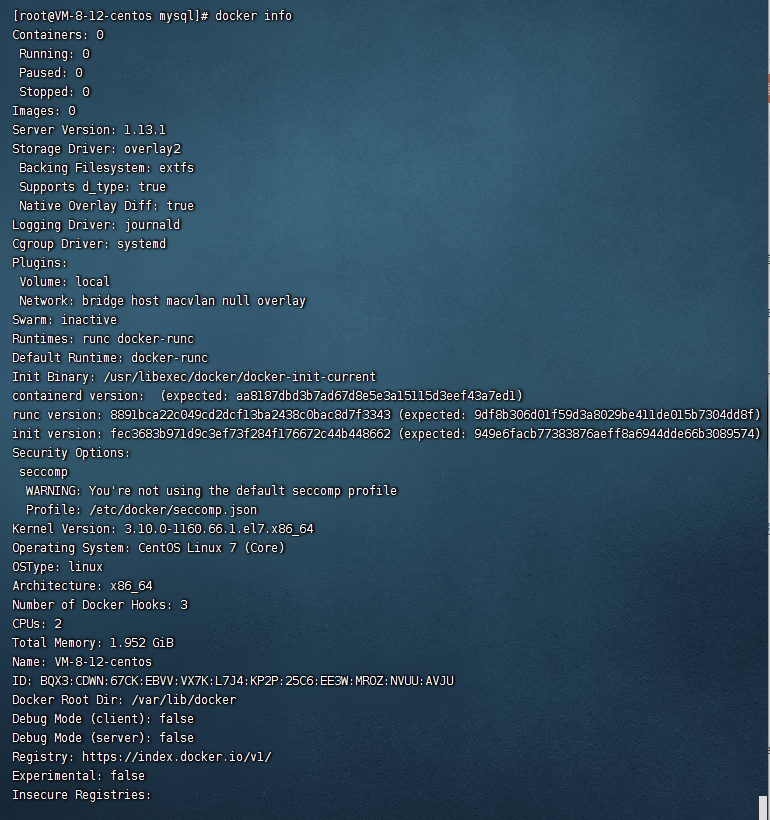
2.4 检查docker信息
docker info
3. 配置腾讯云 Docker 镜像源加速镜像下载
3.1 打开 /etc/docker/daemon.json 配置文件
nano /etc/docker/daemon.json
3.2 添加配置内容并保存
{
"registry-mirrors": [
 "https://mirror.ccs.tencentyun.com"
]
}
3.3 重启 Docker
sudo systemctl restart docker

4. docker常用命令
#查看 Docker 版本
docker -v
sudo docker pull 仓库/镜像:版本留空的话默认为 latest
sudo docker run 加参数用来创建容器
#查看运行容器
sudo docker ps
#查看所有下载的镜像
sudo docker images
#进入容器终端
sudo docker exec -i -t ha /bin/bash
#实时查看10行的 ha 日志
sudo docker logs -f -t --tail 10 ha
#重启 systemctl 守护进程
sudo systemctl daemon-reload
#设置 Docker 开机启动
sudo systemctl enable docker
#开启 Docker 服务
sudo systemctl start docker
命令帮助文档地址
https://docs.docker.com/engine/reference/commandline/docker/
根据命令用途分为几类
- 基础命令
- 镜像命令
- 容器命令
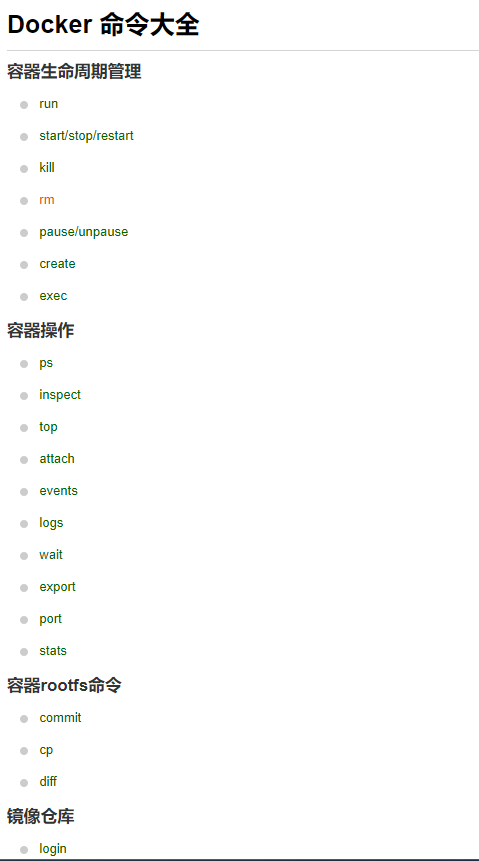
当然还有贴心的docker命令大全中文版本
4.1 基础命令
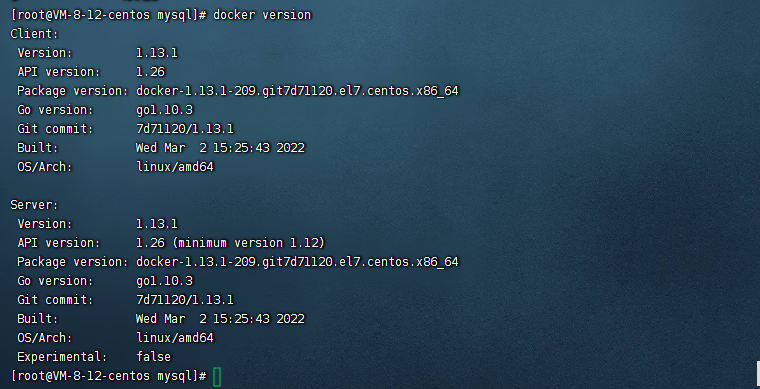
- 查看docker的版本信息
docker version
- 查看docker的系统信息,包括镜像和容器的数量
docker info

- 帮助命令(可查看可选的参数)
docker --help
```c
[root@VM-8-12-centos mysql]# docker --help

Usage:  docker COMMAND

A self-sufficient runtime for containers

Options:
      --config string      Location of client config files (default "/root/.docker")
  -D, --debug              Enable debug mode
      --help               Print usage
  -H, --host list          Daemon socket(s) to connect to (default [])
  -l, --log-level string   Set the logging level ("debug", "info", "warn", "error", "fatal") (default "info")
      --tls                Use TLS; implied by --tlsverify
      --tlscacert string   Trust certs signed only by this CA (default "/root/.docker/ca.pem")
      --tlscert string     Path to TLS certificate file (default "/root/.docker/cert.pem")
      --tlskey string      Path to TLS key file (default "/root/.docker/key.pem")
      --tlsverify          Use TLS and verify the remote
  -v, --version            Print version information and quit

Management Commands:
  container   Manage containers
  image       Manage images
  network     Manage networks
  node        Manage Swarm nodes
  plugin      Manage plugins
  secret      Manage Docker secrets
  service     Manage services
  stack       Manage Docker stacks
  swarm       Manage Swarm
  system      Manage Docker
  volume      Manage volumes

Commands:
  attach      Attach to a running container
  build       Build an image from a Dockerfile
  commit      Create a new image from a container's changes
  cp          Copy files/folders between a container and the local filesystem
  create      Create a new container
  diff        Inspect changes on a container's filesystem
  events      Get real time events from the server
  exec        Run a command in a running container
  export      Export a container's filesystem as a tar archive
  history     Show the history of an image
  images      List images
  import      Import the contents from a tarball to create a filesystem image
  info        Display system-wide information
  inspect     Return low-level information on Docker objects
  kill        Kill one or more running containers
  load        Load an image from a tar archive or STDIN
  login       Log in to a Docker registry
  logout      Log out from a Docker registry
  logs        Fetch the logs of a container
  pause       Pause all processes within one or more containers
  port        List port mappings or a specific mapping for the container
  ps          List containers
  pull        Pull an image or a repository from a registry
  push        Push an image or a repository to a registry
  rename      Rename a container
  restart     Restart one or more containers
  rm          Remove one or more containers
  rmi         Remove one or more images
  run         Run a command in a new container
  save        Save one or more images to a tar archive (streamed to STDOUT by default)
  search      Search the Docker Hub for images
  start       Start one or more stopped containers
  stats       Display a live stream of container(s) resource usage statistics
  stop        Stop one or more running containers
  tag         Create a tag TARGET_IMAGE that refers to SOURCE_IMAGE
  top         Display the running processes of a container
  unpause     Unpause all processes within one or more containers
  update      Update configuration of one or more containers
  version     Show the Docker version information
  wait        Block until one or more containers stop, then print their exit codes

Run 'docker COMMAND --help' for more information on a command.
[root@VM-8-12-centos mysql]#
官方更推荐我们加上某一个特别的COMMAND。
- 某条命令对应帮助命令(可查看可选的参数) ——
非常重要
docker COMMAND --help
这条命令可以说非常重要一般我们也不会死记硬背命令那么帮助说明文档就显得非常重要。特别我们接下来学习新命令的时候都可以先执行帮助文档。
4.2 镜像命令
说到镜像肯定要了解镜像商店 —— dockerhub类似于github。

找镜像的时候也可以到上面去找然后点击对应的镜像链接里面会有详细说明如何使用该镜像。
4.2.1 查看本地主机的所有镜像 —— docker images
命令详细说明 https://docs.docker.com/engine/reference/commandline/images/
[root@VM-8-12-centos mysql]# docker pull --help

Usage:  docker pull [OPTIONS] NAME[:TAG|@DIGEST]

Pull an image or a repository from a registry

Options:
  -a, --all-tags                Download all tagged images in the repository
      --disable-content-trust   Skip image verification (default true)
      --help                    Print usage
[root@VM-8-12-centos mysql]# docker images --help

Usage:  docker images [OPTIONS] [REPOSITORY[:TAG]]

List images

Options:
  -a, --all             Show all images (default hides intermediate images)
      --digests         Show digests
  -f, --filter filter   Filter output based on conditions provided
      --format string   Pretty-print images using a Go template
      --help            Print usage
      --no-trunc        Don't truncate output
  -q, --quiet           Only show numeric IDs
[root@VM-8-12-centos mysql]#
试试 --all参数
[root@VM-8-12-centos mysql]# docker images --all
REPOSITORY          TAG                 IMAGE ID            CREATED             SIZE
[root@VM-8-12-centos mysql]#
#解释:
1.REPOSITORY镜像的仓库源
2.TAG镜像的标签
3.IMAGE ID镜像的id
4.CREATED镜像的创建时间
5.SIZE镜像的大小
4.2.2 搜索镜像 —— docker search
命令详细说明 https://docs.docker.com/engine/reference/commandline/search/
[root@VM-8-12-centos mysql]# docker search --help

Usage:  docker search [OPTIONS] TERM

Search the Docker Hub for images

Options:
  -f, --filter filter   Filter output based on conditions provided
      --help            Print usage
      --limit int       Max number of search results (default 25)
      --no-index        Don't truncate output
      --no-trunc        Don't truncate output
[root@VM-8-12-centos mysql]#
- 查找所有名字带emqx的镜像
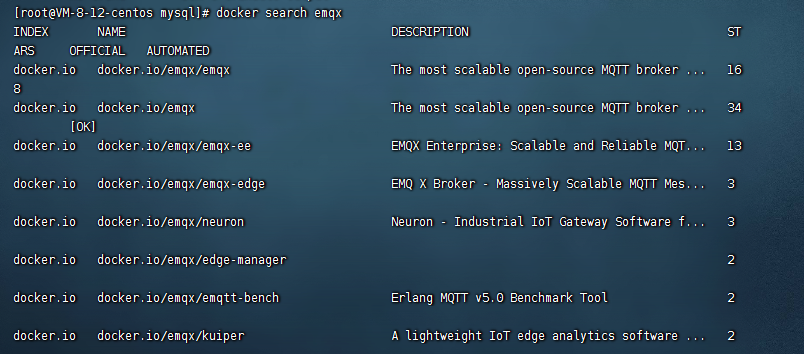
一般我们也是使用stars最多的镜像。
- 查找名字中带emqx的镜像并且它的星星要不少于3并且官方标记
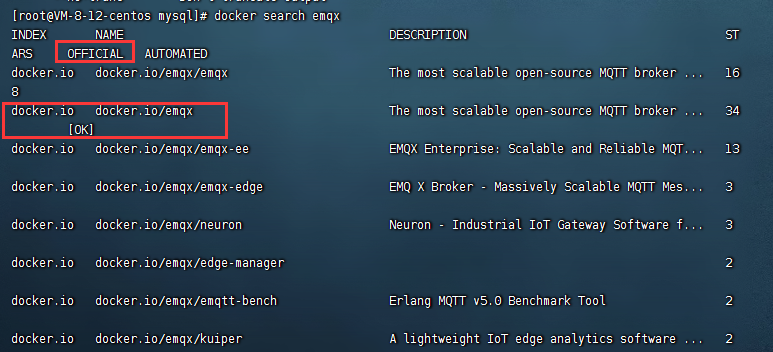
当然我们也可以直接在dockerhub里面搜索
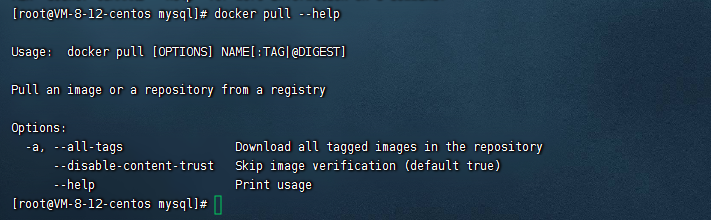
4.2.3 下载镜像 —— docker pull重要
命令详细说明 https://docs.docker.com/engine/reference/commandline/pull/
[root@VM-8-12-centos mysql]# docker pull --help

Usage:  docker pull [OPTIONS] NAME[:TAG|@DIGEST]

Pull an image or a repository from a registry

Options:
  -a, --all-tags                Download all tagged images in the repository
      --disable-content-trust   Skip image verification (default true)
      --help                    Print usage
[root@VM-8-12-centos mysql]#
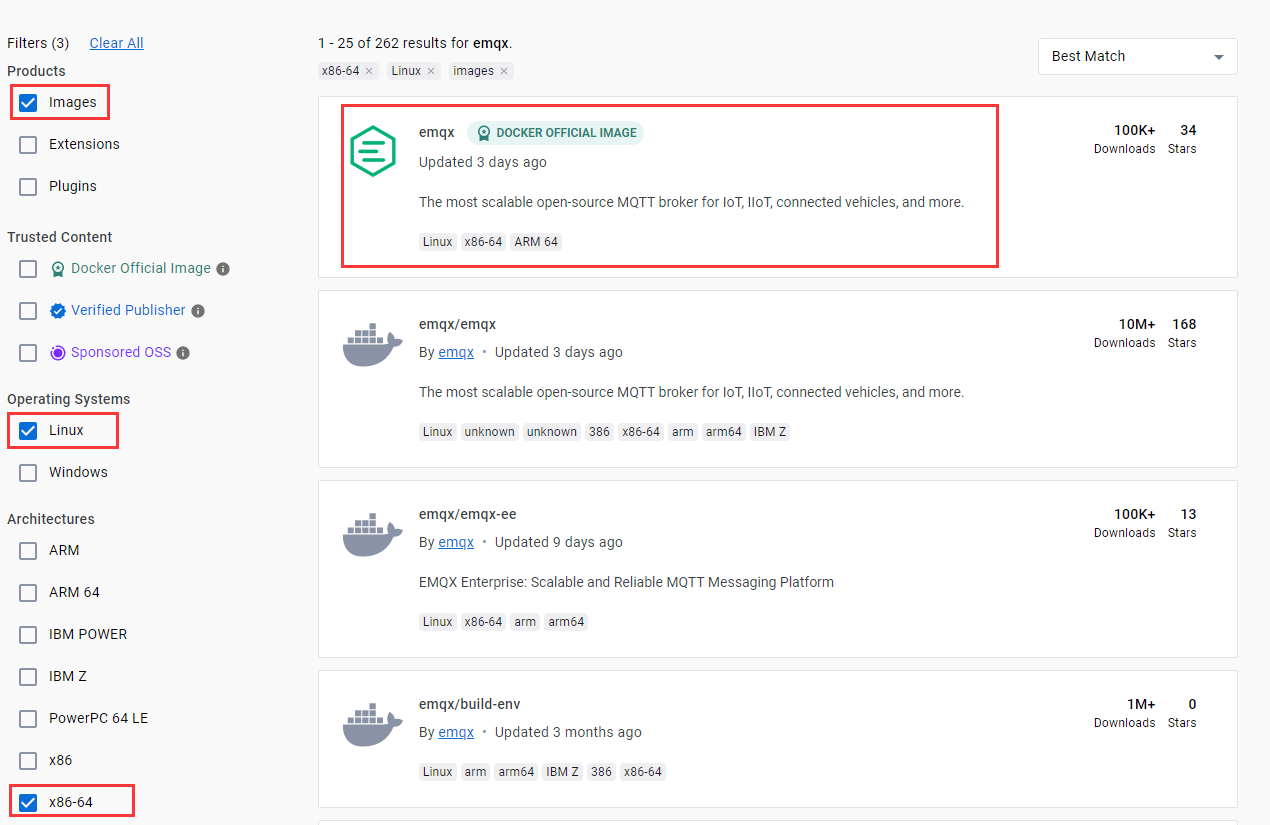
如何下载到合适的适合当前系统的镜像呢以emqx为例子
https://hub.docker.com/search?q=emqx&type=image&operating_system=linux&architecture=amd64
我们需要过滤出OS/ARCH: linux/amd64架构。
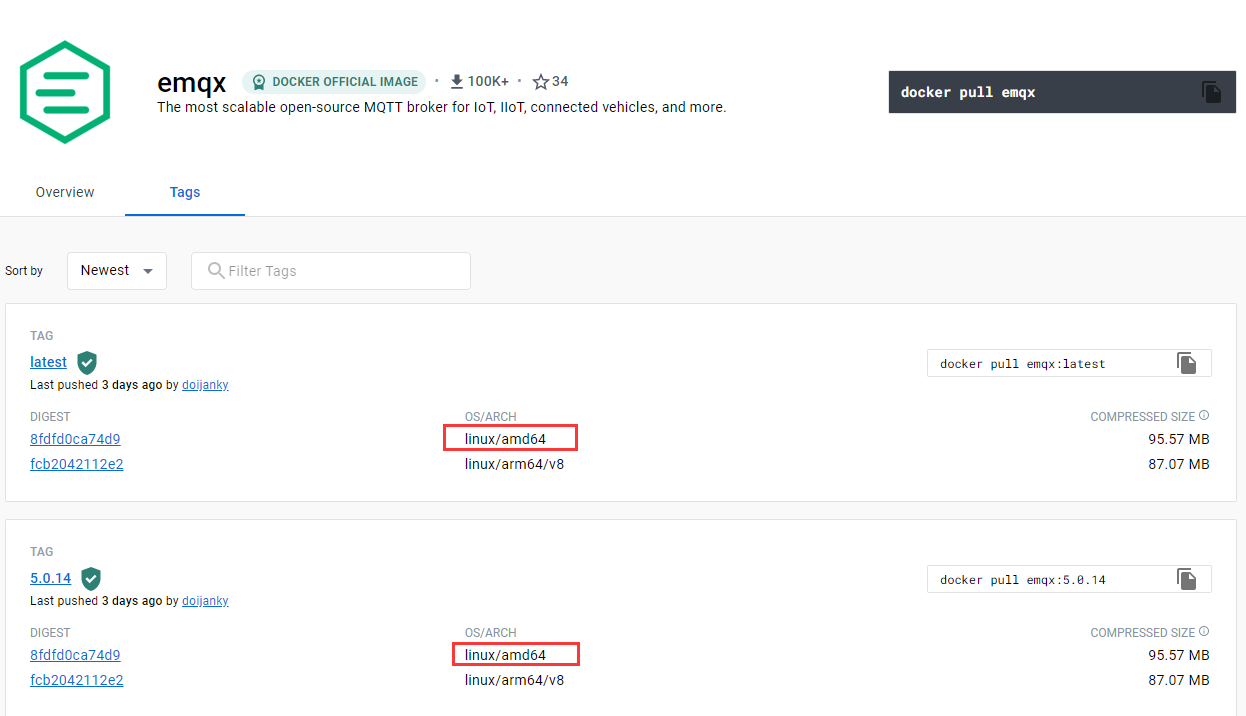
这里列举了很多版本我们直接安装最新版本。

[root@VM-8-12-centos mysql]# docker pull emqx:latest
Trying to pull repository docker.io/library/emqx ...
latest: Pulling from docker.io/library/emqx
8740c948ffd4: Pull complete
1226f5729eee: Pull complete
a786684ff862: Pull complete
d5bef4235e4b: Pull complete
0277fbd542e5: Pull complete
Digest: sha256:a3722d82866c1d648a6890f51cbd0a0839158eb7c343e01b471301b6a530160b
Status: Downloaded newer image for docker.io/emqx:latest
[root@VM-8-12-centos mysql]# docker images
REPOSITORY          TAG                 IMAGE ID            CREATED             SIZE
docker.io/emqx      latest              3498af707410        2 days ago          236 MB
[root@VM-8-12-centos mysql]#
4.2.4 移除镜像 —— docker rmi
命令详细说明 https://docs.docker.com/engine/reference/commandline/rmi/
[root@VM-8-12-centos mysql]# docker rmi --help

Usage:  docker rmi [OPTIONS] IMAGE [IMAGE...]

Remove one or more images

Options:
  -f, --force      Force removal of the image
      --help       Print usage
      --no-prune   Do not delete untagged parents
[root@VM-8-12-centos mysql]#
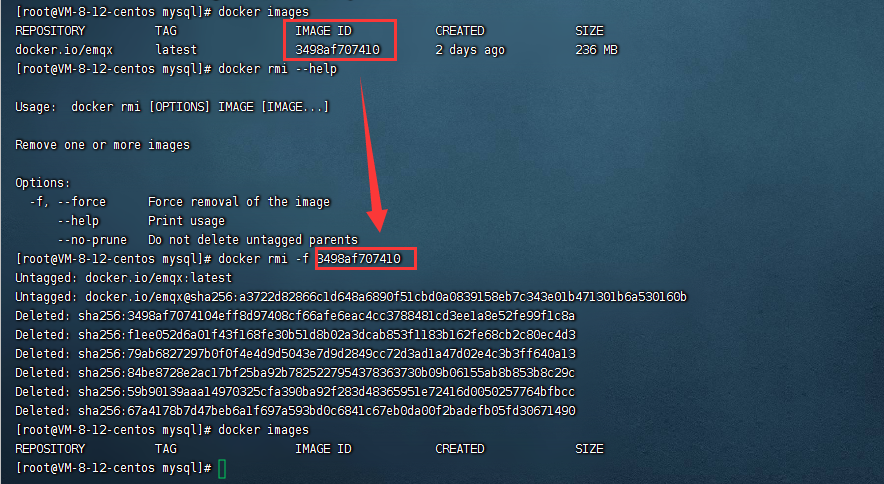
习惯性加上 -f参数表示强制移除。
4.3 容器命令
有了镜像之后我们就可以开始创建容器了类模板创建对象实例。
4.3.1 新建容器并启动 —— docker run重中之重
命令详细说明 https://docs.docker.com/engine/reference/commandline/run/
[root@VM-8-12-centos mysql]# docker run --help

Usage:  docker run [OPTIONS] IMAGE [COMMAND] [ARG...]

Run a command in a new container

Options:
      --add-host list                         Add a custom host-to-IP mapping (host:ip) (default [])
  -a, --attach list                           Attach to STDIN, STDOUT or STDERR (default [])
      --blkio-weight uint16                   Block IO (relative weight), between 10 and 1000, or 0 to disable (default 0)
      --blkio-weight-device weighted-device   Block IO weight (relative device weight) (default [])
      --cap-add list                          Add Linux capabilities (default [])
      --cap-drop list                         Drop Linux capabilities (default [])
      --cgroup-parent string                  Optional parent cgroup for the container
      --cidfile string                        Write the container ID to the file
      --cpu-count int                         CPU count (Windows only)
      --cpu-percent int                       CPU percent (Windows only)
      --cpu-period int                        Limit CPU CFS (Completely Fair Scheduler) period
      --cpu-quota int                         Limit CPU CFS (Completely Fair Scheduler) quota
      --cpu-rt-period int                     Limit CPU real-time period in microseconds
      --cpu-rt-runtime int                    Limit CPU real-time runtime in microseconds
  -c, --cpu-shares int                        CPU shares (relative weight)
      --cpus decimal                          Number of CPUs (default 0.000)
      --cpuset-cpus string                    CPUs in which to allow execution (0-3, 0,1)
      --cpuset-mems string                    MEMs in which to allow execution (0-3, 0,1)
      --credentialspec string                 Credential spec for managed service account (Windows only)
  -d, --detach                                Run container in background and print container ID
      --detach-keys string                    Override the key sequence for detaching a container
      --device list                           Add a host device to the container (default [])
      --device-read-bps throttled-device      Limit read rate (bytes per second) from a device (default [])
      --device-read-iops throttled-device     Limit read rate (IO per second) from a device (default [])
      --device-write-bps throttled-device     Limit write rate (bytes per second) to a device (default [])
      --device-write-iops throttled-device    Limit write rate (IO per second) to a device (default [])
      --disable-content-trust                 Skip image verification (default true)
      --dns list                              Set custom DNS servers (default [])
      --dns-option list                       Set DNS options (default [])
      --dns-search list                       Set custom DNS search domains (default [])
      --entrypoint string                     Overwrite the default ENTRYPOINT of the image
  -e, --env list                              Set environment variables (default [])
      --env-file list                         Read in a file of environment variables (default [])
      --expose list                           Expose a port or a range of ports (default [])
      --group-add list                        Add additional groups to join (default [])
      --health-cmd string                     Command to run to check health
      --health-interval duration              Time between running the check (ns|us|ms|s|m|h) (default 0s)
      --health-retries int                    Consecutive failures needed to report unhealthy
      --health-timeout duration               Maximum time to allow one check to run (ns|us|ms|s|m|h) (default 0s)
      --help                                  Print usage
  -h, --hostname string                       Container host name
      --init                                  Run an init inside the container that forwards signals and reaps processes
      --init-path string                      Path to the docker-init binary
  -i, --interactive                           Keep STDIN open even if not attached
      --io-maxbandwidth string                Maximum IO bandwidth limit for the system drive (Windows only)
      --io-maxiops uint                       Maximum IOps limit for the system drive (Windows only)
      --ip string                             Container IPv4 address (e.g. 172.30.100.104)
      --ip6 string                            Container IPv6 address (e.g. 2001:db8::33)
      --ipc string                            IPC namespace to use
      --isolation string                      Container isolation technology
      --kernel-memory string                  Kernel memory limit
  -l, --label list                            Set meta data on a container (default [])
      --label-file list                       Read in a line delimited file of labels (default [])
      --link list                             Add link to another container (default [])
      --link-local-ip list                    Container IPv4/IPv6 link-local addresses (default [])
      --log-driver string                     Logging driver for the container
      --log-opt list                          Log driver options (default [])
      --mac-address string                    Container MAC address (e.g. 92:d0:c6:0a:29:33)
  -m, --memory string                         Memory limit
      --memory-reservation string             Memory soft limit
      --memory-swap string                    Swap limit equal to memory plus swap: '-1' to enable unlimited swap
      --memory-swappiness int                 Tune container memory swappiness (0 to 100) (default -1)
      --name string                           Assign a name to the container
      --network string                        Connect a container to a network (default "default")
      --network-alias list                    Add network-scoped alias for the container (default [])
      --no-healthcheck                        Disable any container-specified HEALTHCHECK
      --oom-kill-disable                      Disable OOM Killer
      --oom-score-adj int                     Tune host's OOM preferences (-1000 to 1000)
      --pid string                            PID namespace to use
      --pids-limit int                        Tune container pids limit (set -1 for unlimited)
      --privileged                            Give extended privileges to this container
  -p, --publish list                          Publish a container's port(s) to the host (default [])
  -P, --publish-all                           Publish all exposed ports to random ports
      --read-only                             Mount the container's root filesystem as read only
      --restart string                        Restart policy to apply when a container exits (default "no")
      --rm                                    Automatically remove the container when it exits
      --runtime string                        Runtime to use for this container
      --security-opt list                     Security Options (default [])
      --shm-size string                       Size of /dev/shm, default value is 64MB
      --sig-proxy                             Proxy received signals to the process (default true)
      --stop-signal string                    Signal to stop a container, SIGTERM by default (default "SIGTERM")
      --stop-timeout int                      Timeout (in seconds) to stop a container
      --storage-opt list                      Storage driver options for the container (default [])
      --sysctl map                            Sysctl options (default map[])
      --tmpfs list                            Mount a tmpfs directory (default [])
  -t, --tty                                   Allocate a pseudo-TTY
      --ulimit ulimit                         Ulimit options (default [])
  -u, --user string                           Username or UID (format: <name|uid>[:<group|gid>])
      --userns string                         User namespace to use
      --uts string                            UTS namespace to use
  -v, --volume list                           Bind mount a volume (default [])
      --volume-driver string                  Optional volume driver for the container
      --volumes-from list                     Mount volumes from the specified container(s) (default [])
  -w, --workdir string                        Working directory inside the container
[root@VM-8-12-centos mysql]#
这条命令参数说明最多也是最重要的一条命令。
点击查看常用参数说明
docker run [可选参数] image

#参数说明
--name="名字"           指定容器名字
-d                     后台方式运行
-i: 以交互模式运行容器通常与 -t 同时使用进入容器查看内容
-t: 为容器重新分配一个伪输入终端通常与 -i 同时使用
-P: 大写P随机端口映射容器内部端口随机映射到主机的端口
-p: 小写p指定端口映射格式为主机(宿主)端口:容器端口
-P                     随机指定端口(大写的P)
-dns 8.8.8.8: 指定容器使用的DNS服务器默认和宿主一致
-h "mars": 指定容器的hostname
-m :设置容器使用内存最大值
--net="bridge": 指定容器的网络连接类型支持 bridge/host/none/container: 四种类型
--link=[]: 添加链接到另一个容器基本上弃用
-e username="ritchie": 设置环境变量
--expose=[]: 开放一个端口或一组端口
--volume , -v: 绑定一个卷
--env-file=[]: 从指定文件读入环境变量
--cpuset="0-2" or --cpuset="0,1,2": 绑定容器到指定CPU运行
--privileged: privileged启动的容器可以看到很多host上的设备并且可以执行mount。甚至允许你在docker容器中启动docker容器。
- 使用docker镜像emqx/emqx:latest以
后台模式启动一个容器,并将容器命名为emqx。
对应命令docker run -d --name emqx emqx/emqx:latest。
[root@VM-8-12-centos mysql]# docker run -d --name emqx emqx/emqx:latest
Unable to find image 'emqx/emqx:latest' locally
Trying to pull repository docker.io/emqx/emqx ...
latest: Pulling from docker.io/emqx/emqx
8740c948ffd4: Pull complete
b79f857ac7ce: Pull complete
78622757d9a3: Pull complete
fb3ef5aa4340: Pull complete
329dff58511b: Pull complete
4f4fb700ef54: Pull complete
836a9c69fcc4: Pull complete
Digest: sha256:33d15fd770f4376a2d76169231fecb6062ed19c3ea3b521c3f774c70713cada3
Status: Downloaded newer image for docker.io/emqx/emqx:latest
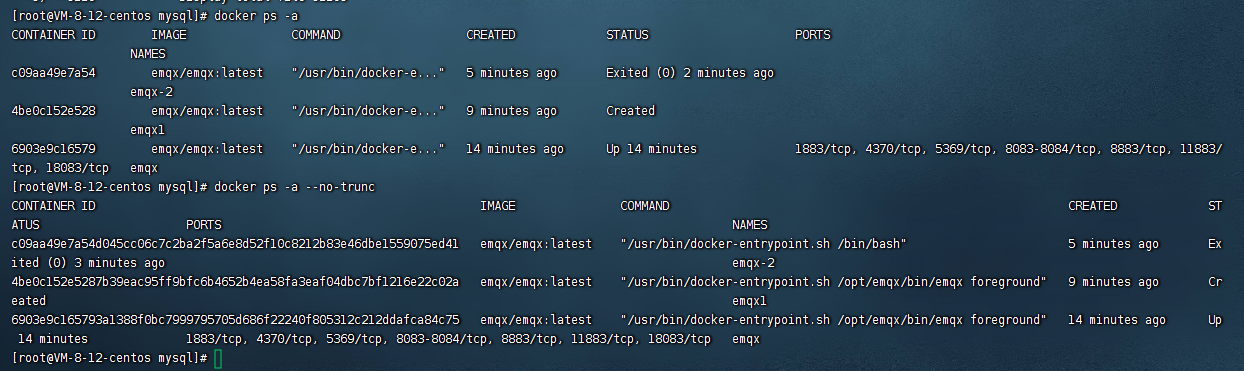
6903e9c165793a1388f0bc7999795705d686f22240f805312c212ddafca84c75
[root@VM-8-12-centos mysql]# docker ps -a
CONTAINER ID IMAGE COMMAND CREATED STATUS PORTS NAMES
6903e9c16579 emqx/emqx:latest "/usr/bin/docker-e..." About a minute ago Up About a minute 1883/tcp, 4370/tcp, 5369/tcp, 8083-8084/tcp, 8883/tcp, 11883/tcp, 18083/tcp emqx
[root@VM-8-12-centos mysql]#
-
使用docker镜像emqx/emqx:latest以
后台模式启动一个容器,并将容器命名为emqx1。将容器的1883端口映射到主机的1883容器8081端口映射到主机8081端口 容器8083端口映射到主机8083端口容器8084端口映射到主机8084端口容器8883端口映射到主机8883容器18083端口映射到主机18083端口。
对应命令docker run -d --name emqx1 -p 1883:1883 -p 8081:8081 -p 8083:8083 -p 8084:8084 -p 8883:8883 -p 18083:18083 emqx/emqx:latest
浏览器访问ip地址加上18083端口就可以访问emqx后台。 -
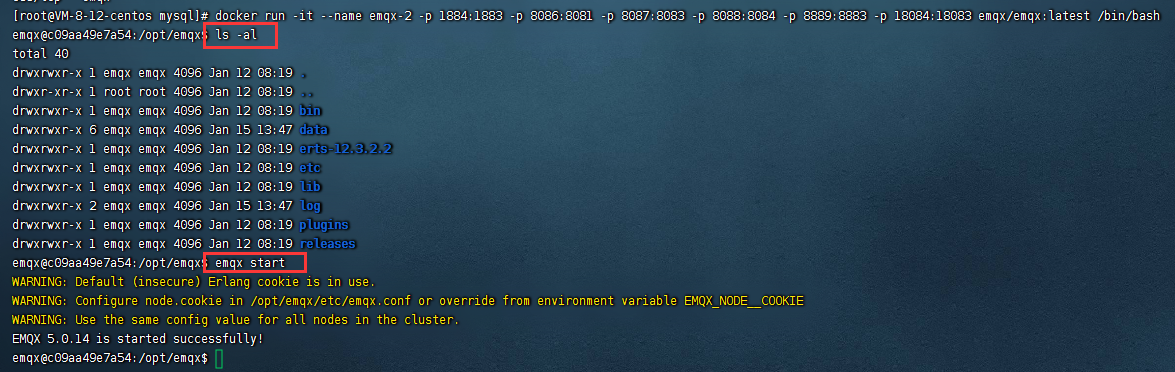
使用docker镜像emqx/emqx:latest 以
交互模式启动一个容器,并将容器命名为emqx3。将容器的1883端口映射到主机的1884容器8081端口映射到主机8086端口 容器8083端口映射到主机8087端口容器8084端口映射到主机8088端口容器8883端口映射到主机8889容器18083端口映射到主机18084端口避免冲突。在容器内执行/bin/bash命令。
对应命令docker run -it --name emqx-2 -p 1884:1883 -p 8086:8081 -p 8087:8083 -p 8088:8084 -p 8889:8883 -p 18084:18083 emqx/emqx:latest /bin/bash

docker的端口映射并不是在docker技术中实现的而是通过宿主机的iptables来实现。通过控制网桥来做端口映射类似路由器中设置路由端口映射。
sudo iptables -t nat -vnL。
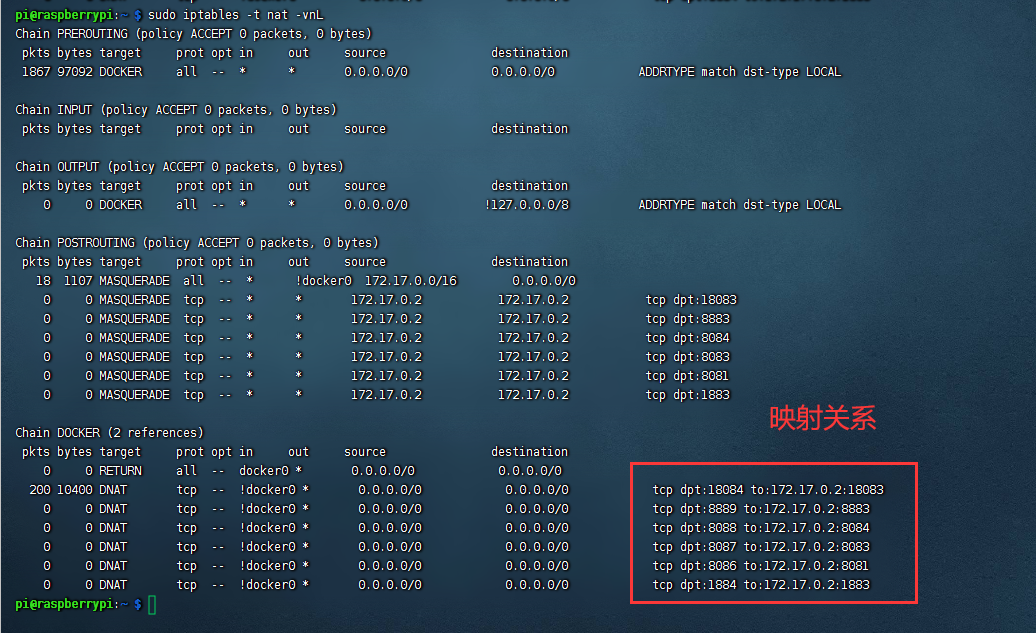
浏览器访问树莓派ip地址加上18084端口也可以访问emqx后台是不是很美妙
注意点
在容器内执行/bin/bash命令的这种方式不会自动启动emqx服务需要人工再去启动emqx服务。
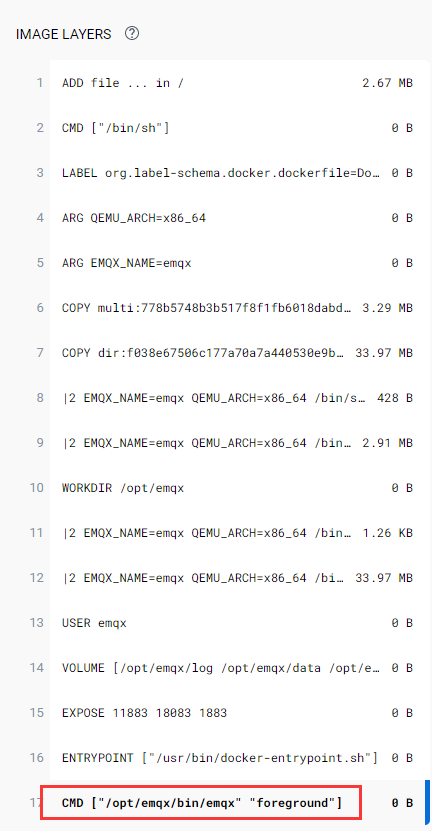
原因我们直接查看emqx的DockerFile构建过程。
CMD用来指定启动容器时执行的命令每个 Dockerfile 只能有一条 CMD 命令。如果指定了多条命令只有最后一条会被执行。而我们这里的最后一条 是CMD ["/opt/emqx/bin/emqx" "foreground"]。如果用户启动容器时候指定了运行的命令则会覆盖掉 CMD 指定的命令。所以这种情况下就覆盖了我们原来的命令。
4.3.2 查看容器 —— docker ps
命令详细说明 https://docs.docker.com/engine/reference/commandline/ps/
[root@VM-8-12-centos mysql]# docker ps --help

Usage:  docker ps [OPTIONS]

List containers

Options:
  -a, --all             Show all containers (default shows just running)
  -f, --filter filter   Filter output based on conditions provided
      --format string   Pretty-print containers using a Go template
      --help            Print usage
  -n, --last int        Show n last created containers (includes all states) (default -1)
  -l, --latest          Show the latest created container (includes all states)
      --no-trunc        Don't truncate output
  -q, --quiet           Only display numeric IDs
  -s, --size            Display total file sizes
[root@VM-8-12-centos mysql]#
docker ps [可选参数]

#常用参数说明
无参    默认显示正在运行的容器
-a     显示所有的容器包括未运行的
-f     根据条件过滤显示的内容
-n     列出最近创建的n个容器
--no-trunc 不截断输出 (建议加上这个)
-q     静默模式只显示容器ID
-s     显示总的文件大小
-
查找所有运行过的容器
-
查找所有运行过的容器id

-
查找名字存在emqx-1的容器

结果解析
CONTAINER IDcontainer id 顾名思义 ,容器ID的意思可以通过这id找到唯一的对应容器IMAGEimage该容器所使用的镜像COMMANDcommand启动容器时运行的命令可以查看DockerFileCREATEDcreated容器的创建时间显示格式为”**时间之前创建“STATUSstatus容器现在的状态状态有7种created已创建|restarting重启中|running(Up)运行中|removing迁移中|paused暂停|exited停止|deadPORTSports:容器的端口信息和使用的连接类型tcp\udpNAMESnames:镜像自动为容器创建的名字也唯一代表一个容器
4.3.3 删除容器 —— docker rm
命令详细说明 https://docs.docker.com/engine/reference/commandline/rm/
[root@VM-8-12-centos mysql]# docker rm --help

Usage:  docker rm [OPTIONS] CONTAINER [CONTAINER...]

Remove one or more containers

Options:
  -f, --force     Force the removal of a running container (uses SIGKILL)
      --help      Print usage
  -l, --link      Remove the specified link
  -v, --volumes   Remove the volumes associated with the container
[root@VM-8-12-centos mysql]#
docker rm [可选参数]

#常用参数说明
-f :通过 SIGKILL 信号强制删除一个运行中的容器。
-l :移除容器间的网络连接而非容器本身。这个比较特殊
-v :删除与容器关联的数据卷。这里涉及到宿主机容器的共享。
- 强制移除一个容器
[root@VM-8-12-centos mysql]# docker rm c09aa49e7a54
c09aa49e7a54
[root@VM-8-12-centos mysql]# docker rm 4be0c152e528
4be0c152e528
[root@VM-8-12-centos mysql]# docker rm 6903e9c16579
Error response from daemon: You cannot remove a running container 6903e9c165793a1388f0bc7999795705d686f22240f805312c212ddafca84c75. Stop the container before attempting removal or use -f
[root@VM-8-12-centos mysql]# docker stop 6903e9c16579
6903e9c16579
[root@VM-8-12-centos mysql]# docker rm 6903e9c16579
6903e9c16579
[root@VM-8-12-centos mysql]# docker ps -a
CONTAINER ID        IMAGE               COMMAND             CREATED             STATUS              PORTS               NAMES
[root@VM-8-12-centos mysql]#
删除指定的容器,不能删除正在运行的容器,强制删除使用 rm -f
- 也可以移除通过
docker ps过滤出来的容器。比如移除状态是退出的容器
方式1docker rm $(docker ps --filter status=exited -q)
方式2docker ps --filter status=exited -q | xargs docker rm
4.3.4 启动、重启、停止 —— docker start/stop/restart
命令详细说明 https://docs.docker.com/engine/reference/commandline/start/
命令详细说明 https://docs.docker.com/engine/reference/commandline/restart/
命令详细说明 https://docs.docker.com/engine/reference/commandline/stop/
这三个命令没太多要讲的内容。
- docker start :启动一个或多个已经被停止的容器
- docker stop :停止一个运行中的容器
- docker restart :重启容器
[root@VM-8-12-centos mysql]# docker start --help

Usage:  docker start [OPTIONS] CONTAINER [CONTAINER...]

Start one or more stopped containers

Options:
  -a, --attach               Attach STDOUT/STDERR and forward signals
      --detach-keys string   Override the key sequence for detaching a container
      --help                 Print usage
  -i, --interactive          Attach container's STDIN
[root@VM-8-12-centos mysql]# docker stop --help

Usage:  docker stop [OPTIONS] CONTAINER [CONTAINER...]

Stop one or more running containers

Options:
      --help       Print usage
  -t, --time int   Seconds to wait for stop before killing it (default 10)
[root@VM-8-12-centos mysql]# docker restart --help

Usage:  docker restart [OPTIONS] CONTAINER [CONTAINER...]

Restart one or more containers

Options:
      --help       Print usage
  -t, --time int   Seconds to wait for stop before killing the container (default 10)
[root@VM-8-12-centos mysql]#
4.3.5 查看容器/镜像详细信息 —— docker inspect
命令详细说明 https://docs.docker.com/engine/reference/commandline/inspect/
[root@VM-8-12-centos mysql]# docker inspect --help

Usage:  docker inspect [OPTIONS] NAME|ID [NAME|ID...]

Return low-level information on Docker objects

Options:
  -f, --format string   Format the output using the given Go template
      --help            Print usage
  -s, --size            Display total file sizes if the type is container
      --type string     Return JSON for specified type
[root@VM-8-12-centos mysql]#
docker inspect [可选参数] 容器id|镜像

#常用参数说明
-f :指定返回值的模板文件。
-s :显示总的文件大小。
--type :为指定类型返回JSON。
- 查看镜像emqx:latest的元信息
[root@VM-8-12-centos mysql]# docker inspect  emqx/emqx:latest
[
    {
        "Id": "sha256:1e36f4e5e13001727b02eb16b05f17011ccf97e3903e36a39fa136a1a3539e60",
        "RepoTags": [
            "docker.io/emqx/emqx:latest"
        ],
        "RepoDigests": [
            "docker.io/emqx/emqx@sha256:33d15fd770f4376a2d76169231fecb6062ed19c3ea3b521c3f774c70713cada3"
        ],
        "Parent": "",
        "Comment": "buildkit.dockerfile.v0",
        "Created": "2023-01-12T08:20:04.075626084Z",
        "Container": "",
        "ContainerConfig": {
            "Hostname": "",
            "Domainname": "",
            "User": "",
            "AttachStdin": false,
            "AttachStdout": false,
            "AttachStderr": false,
            "Tty": false,
            "OpenStdin": false,
            "StdinOnce": false,
            "Env": null,
            "Cmd": null,
            "Image": "",
            "Volumes": null,
            "WorkingDir": "",
            "Entrypoint": null,
            "OnBuild": null,
            "Labels": null
        },
        "DockerVersion": "",
        "Author": "",
        "Config": {
            "Hostname": "",
            "Domainname": "",
            "User": "emqx",
            "AttachStdin": false,
            "AttachStdout": false,
            "AttachStderr": false,
            "ExposedPorts": {
                "11883/tcp": {},
                "18083/tcp": {},
                "1883/tcp": {},
                "4370/tcp": {},
                "5369/tcp": {},
                "8083/tcp": {},
                "8084/tcp": {},
                "8883/tcp": {}
            },
            "Tty": false,
            "OpenStdin": false,
            "StdinOnce": false,
            "Env": [
                "PATH=/usr/local/sbin:/usr/local/bin:/usr/sbin:/usr/bin:/sbin:/bin",
                "LC_ALL=C.UTF-8",
                "LANG=C.UTF-8"
            ],
            "Cmd": [
                "/opt/emqx/bin/emqx",
                "foreground"
            ],
            "ArgsEscaped": true,
            "Image": "",
            "Volumes": {
                "/opt/emqx/data": {},
                "/opt/emqx/log": {}
            },
            "WorkingDir": "/opt/emqx",
            "Entrypoint": [
                "/usr/bin/docker-entrypoint.sh"
            ],
            "OnBuild": null,
            "Labels": {
                "org.opencontainers.image.created": "2023-01-12T08:16:02.511Z",
                "org.opencontainers.image.description": "The most scalable open-source MQTT broker for IoT, IIoT, and connected vehicles",
                "org.opencontainers.image.edition": "Opensource",
                "org.opencontainers.image.licenses": "NOASSERTION",
                "org.opencontainers.image.otp.version": "24.3.4.2-1",
                "org.opencontainers.image.revision": "bdb4798d621823a4ede6f404936e7e0a5956dcf2",
                "org.opencontainers.image.source": "https://github.com/emqx/emqx",
                "org.opencontainers.image.title": "emqx",
                "org.opencontainers.image.url": "https://github.com/emqx/emqx",
                "org.opencontainers.image.version": "5.0.14"
            }
        },
        "Architecture": "amd64",
        "Os": "linux",
        "Size": 379385337,
        "VirtualSize": 379385337,
        "GraphDriver": {
            "Name": "overlay2",
            "Data": {
                "LowerDir": "/var/lib/docker/overlay2/28d289eaa35df37776ec68aebeba4281b6b4b4dd7f7563af2e6bf689774988f0/diff:/var/lib/docker/overlay2/7ecc2b7b2657524c98395c40833f20cace02120f8f30d9f70ddc885891029b40/diff:/var/lib/docker/overlay2/ce8a69539811bee3f85c7b8096d33131e064526726c21bc8288c068dd3b949f8/diff:/var/lib/docker/overlay2/fe5aed1a1f6142a6c26cd9dbed85988fd18c85c519750b555c86c7d8f97e0408/diff:/var/lib/docker/overlay2/788474bec7e3a6cdb3d86f5de4f74cc31768559202a4cf58d36bfdc971afb9e6/diff:/var/lib/docker/overlay2/17cecbddb8ebe1e5c4af5b2dd7c91c1e2a9948a8897d26555de6f730814a038f/diff",
                "MergedDir": "/var/lib/docker/overlay2/264ef8cdec5cb14939637994e8cfaebfcd08ff2ec9dfc9d05544c8f5631cfd67/merged",
                "UpperDir": "/var/lib/docker/overlay2/264ef8cdec5cb14939637994e8cfaebfcd08ff2ec9dfc9d05544c8f5631cfd67/diff",
                "WorkDir": "/var/lib/docker/overlay2/264ef8cdec5cb14939637994e8cfaebfcd08ff2ec9dfc9d05544c8f5631cfd67/work"
            }
        },
        "RootFS": {
            "Type": "layers",
            "Layers": [
                "sha256:67a4178b7d47beb6a1f697a593bd0c6841c67eb0da00f2badefb05fd30671490",
                "sha256:23325f95381497ddf84d88100ea4fb0a5b098982b1cbc11161659824ec416aa1",
                "sha256:8b291d8cc55c29616592398859c69649b0c060810b68bee150e31b0d05082974",
                "sha256:90ea24bef90724a46310a8a363c5ef42545bae7e5db283bc787054ed896690e6",
                "sha256:e8b7a55b641076b34e0b828f2453daad17b8ad91e33b8e4ff04213704b97b4ed",
                "sha256:5f70bf18a086007016e948b04aed3b82103a36bea41755b6cddfaf10ace3c6ef",
                "sha256:09d6e46a8b556f355f9543b48e80c47a87c4f132bc51e3fd58d140c9a008f697"
            ]
        }
    }
]
[root@VM-8-12-centos mysql]#
上面是直接过滤整个镜像或者容器的所有信息一般情况下我们也可以过滤我们需要的信息。这里利用了json属性。我们把上面的全部信息折叠一下。
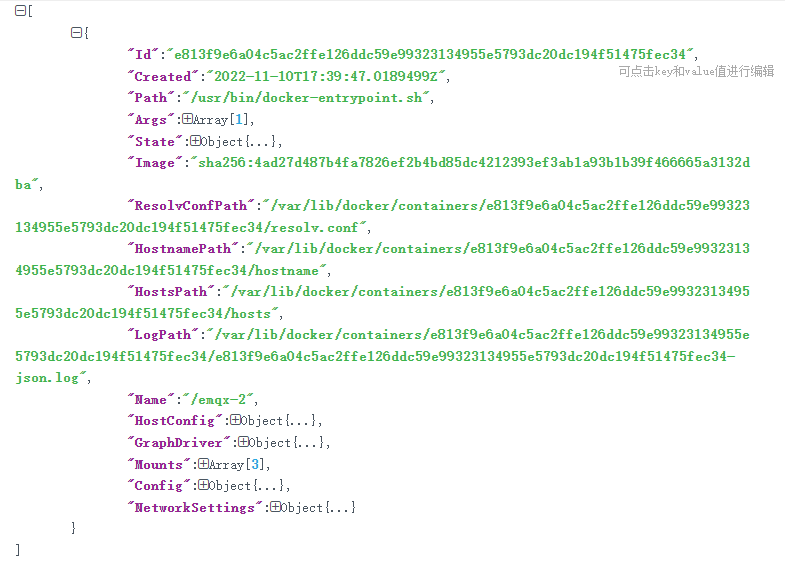
- 查看正在运行的emqx容器的镜像信息

- 查看正在运行的emqx容器的IP地址

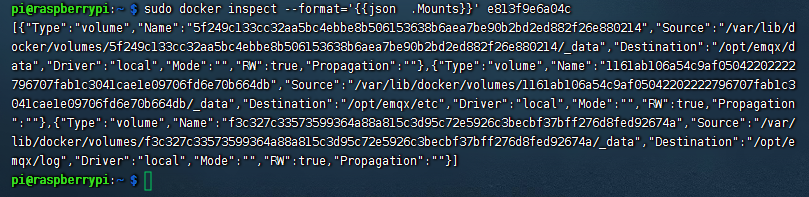
- 查看正在运行的emqx容器的容器卷
关于元信息的详解在网上找到一份参考以mysql容器为例子
[
    {
        "Id": "572219d3a0ca25a37623a1113f3c8faa6b48d3ab42ae668eac64fcb39cb4dd84", #完整容器id
        "Created": "2022-06-08T08:29:58.542781937Z", #容器创建时间
        "Path": "docker-entrypoint.sh", #启动容器时通过shell脚本执行些预处理逻辑中shell脚本的名称
        "Args": [
            "mysqld"
        ],
        "State": {
            "Status": "running", #容器状态
            "Running": true, #是否运行
            "Paused": false, #是否暂停
            "Restarting": false, #是否重启中
            "OOMKilled": false, #进程被杀死
            "Dead": false, # 已死亡
            "Pid": 136172, # 容器进程id
            "ExitCode": 0, # 退出状态码
            "Error": "", #错误信息
            "StartedAt": "2022-07-16T01:47:33.598196195Z", #开始启动时间
            "FinishedAt": "2022-07-16T01:47:26.919749746Z" # 上一次结束时间
        },
        "Image": "sha256:3218b38490cec8d31976a40b92e09d61377359eab878db49f025e5d464367f3b", #镜像的sha256算法id
        "ResolvConfPath": "/var/lib/docker/containers/572219d3a0ca25a37623a1113f3c8faa6b48d3ab42ae668eac64fcb39cb4dd84/resolv.conf", # resolv.conf域名系统解析器DNS Resolver的配置文件路径
        "HostnamePath": "/var/lib/docker/containers/572219d3a0ca25a37623a1113f3c8faa6b48d3ab42ae668eac64fcb39cb4dd84/hostname", #当前容器所在的位置
        "HostsPath": "/var/lib/docker/containers/572219d3a0ca25a37623a1113f3c8faa6b48d3ab42ae668eac64fcb39cb4dd84/hosts", #容器host文件域名、IP配置文件路径
        "LogPath": "/var/lib/docker/containers/572219d3a0ca25a37623a1113f3c8faa6b48d3ab42ae668eac64fcb39cb4dd84/572219d3a0ca25a37623a1113f3c8faa6b48d3ab42ae668eac64fcb39cb4dd84-json.log",#容器运行日志文件路径
        "Name": "/mysql9", #镜像名称
        "RestartCount": 0, #重启个数
        "Driver": "overlay2", #存储驱动联合文件系统
        "Platform": "linux", # 运行平台
        "MountLabel": "",#挂载标签
        "ProcessLabel": "",#进程标签
        "AppArmorProfile": "", #Linux内核中的强制访问控制系统配置文件
        "ExecIDs": null, #当前容器正在执行 exec的 ID多个用数组展示
		#主机配置
        "HostConfig": {
			#容器宿主目录绑定
            "Binds": [
                "/home/mysql8/conf/my.cnf:/etc/mysql/my.cnf",
                "/home/mysql8/logs:/logs",
                "/home/mysql8/data:/var/lib/mysql",
                "/etc/localtime:/etc/localtime"
            ],
            "ContainerIDFile": "", #
			#日志配置
            "LogConfig": {
                "Type": "json-file", #文件类型 json
                "Config": {}
            },
            "NetworkMode": "default", #网络模式
			#端口绑定信息
            "PortBindings": {
                "3306/tcp": [
                    {
                        "HostIp": "",
                        "HostPort": "3306"
                    }
                ]
            },
			#重启策略
            "RestartPolicy": {
                "Name": "unless-stopped",#自动重启类似always
                "MaximumRetryCount": 0 #最大重试次数
            },
            "AutoRemove": false, #自动移除
            "VolumeDriver": "",
            "VolumesFrom": null,
            "CapAdd": null,
            "CapDrop": null,
            "CgroupnsMode": "host",
            "Dns": [],
            "DnsOptions": [],
            "DnsSearch": [],
            "ExtraHosts": null,
            "GroupAdd": null,
            "IpcMode": "private",
            "Cgroup": "",
            "Links": null,
            "OomScoreAdj": 0,
            "PidMode": "",
            "Privileged": true,
            "PublishAllPorts": false,
            "ReadonlyRootfs": false,
            "SecurityOpt": [
                "label=disable"
            ],
            "UTSMode": "",
            "UsernsMode": "",
            "ShmSize": 67108864,
            "Runtime": "runc",
            "ConsoleSize": [
                0,
                0
            ],
            "Isolation": "",
            "CpuShares": 0,
            "Memory": 0,
            "NanoCpus": 0,
            "CgroupParent": "",
            "BlkioWeight": 0,
            "BlkioWeightDevice": [],
            "BlkioDeviceReadBps": null,
            "BlkioDeviceWriteBps": null,
            "BlkioDeviceReadIOps": null,
            "BlkioDeviceWriteIOps": null,
            "CpuPeriod": 0,
            "CpuQuota": 0,
            "CpuRealtimePeriod": 0,
            "CpuRealtimeRuntime": 0,
            "CpusetCpus": "",
            "CpusetMems": "",
            "Devices": [],
            "DeviceCgroupRules": null,
            "DeviceRequests": null,
            "KernelMemory": 0,
            "KernelMemoryTCP": 0,
            "MemoryReservation": 0,
            "MemorySwap": 0,
            "MemorySwappiness": null,
            "OomKillDisable": false,
            "PidsLimit": null,
            "Ulimits": null,
            "CpuCount": 0,
            "CpuPercent": 0,
            "IOMaximumIOps": 0,
            "IOMaximumBandwidth": 0,
            "MaskedPaths": null,
            "ReadonlyPaths": null
        },
        #镜像管理驱动
        "GraphDriver": {
        #联合系统分层信息
            "Data": {
            #镜像层目录或者文件是只读的
                "LowerDir":  "/var/lib/docker/overlay2/77f1db351358d953cb1fe55a79e84597d3cbc3844c2dd249a2acdfa15e402627-init/diff:/var/lib/docker/overlay2/b261e67d747a7a769d143f6d4bc9492684b17680256cdf5962f8145acb6b3dab/diff:/var/lib/docker/overlay2/e88c8d60eec4dee423f121636d8b7a560fe2b4739c6c2361d90e290799989120/diff:/var/lib/docker/overlay2/d8f81e30c57461476828fa01d7faad6cc96f893e55684fabf02bf804f76ca2e8/diff:/var/lib/docker/overlay2/b04b2325906657684ef7914d1834a0e510fc7065c78287ce066b0dd5667273c3/diff:/var/lib/docker/overlay2/f09dec6179a52989205fd2931b31996515e06b8048b139f7cc87982df2f497ad/diff:/var/lib/docker/overlay2/c0eab9ee7da29584d4583dd66199346582f1036f69f9989b7da5f8e72f0fa992/diff:/var/lib/docker/overlay2/2a28cd4140717faa03275c600bae785a8a4b0131337bf04267e000f8569aa0f7/diff:/var/lib/docker/overlay2/733a014a49863d79ffb0d86655d8e3b3ceb4a515266e50c09b6cf02d8f81c9c3/diff:/var/lib/docker/overlay2/5da96f62c2672a8590cb920cf541bc3ac636f1aca7babb540d49316c72e7d74a/diff:/var/lib/docker/overlay2/cdf557bd933d8f3809eb2a4b493f376d81e64ee14d0adbd8a74b57d071f63fd6/diff:/var/lib/docker/overlay2/80e0b0ba180d6736e659f56192c214c95d433e59f0aa6d79bfe66d52fb3c7b73/diff:/var/lib/docker/overlay2/4935d32e3ec461a85af88a19fef5872312b4c43a5adf43848b1f3e25353b7ac8/diff",
                #容器的挂载点
                "MergedDir": "/var/lib/docker/overlay2/77f1db351358d953cb1fe55a79e84597d3cbc3844c2dd249a2acdfa15e402627/merged",
                #读写层在启动一个容器时候会进行创建所有的对容器数据更改都发生在这里层upperdir是可读可写的
                "UpperDir": "/var/lib/docker/overlay2/77f1db351358d953cb1fe55a79e84597d3cbc3844c2dd249a2acdfa15e402627/diff",
                #工作目录
                "WorkDir": "/var/lib/docker/overlay2/77f1db351358d953cb1fe55a79e84597d3cbc3844c2dd249a2acdfa15e402627/work"
            },
            "Name": "overlay2"
        },
        #挂载配置
        "Mounts": [
            {
                "Type": "bind", #类型
                "Source": "/home/mysql8/logs", #来源目录
                "Destination": "/logs", #容器目录
                "Mode": "", #模式
                "RW": true, #读写权限
                "Propagation": "rprivate"
                 #挂载目录实时更新模式 shared、slave、private、rshared、rslave、rprivate
            },
            {
                "Type": "bind",
                "Source": "/home/mysql8/data",
                "Destination": "/var/lib/mysql",
                "Mode": "",
                "RW": true,
                "Propagation": "rprivate"
            },
            {
                "Type": "bind",
                "Source": "/etc/localtime",
                "Destination": "/etc/localtime",
                "Mode": "",
                "RW": true,
                "Propagation": "rprivate"
            },
            {
                "Type": "bind",
                "Source": "/home/mysql8/conf/my.cnf",
                "Destination": "/etc/mysql/my.cnf",
                "Mode": "",
                "RW": true,
                "Propagation": "rprivate"
            }
        ],
        "Config": {
            "Hostname": "572219d3a0ca", #容器缩写id
            "Domainname": "",
            "User": "",
            "AttachStdin": false,
            "AttachStdout": false,
            "AttachStderr": false,
             #暴露端口
            "ExposedPorts": {
                "3306/tcp": {},
                "33060/tcp": {}
            },
            "Tty": false,
            "OpenStdin": false,
            "StdinOnce": false,
             #环境变量配置
            "Env": [
                "MYSQL_ROOT_PASSWORD=431557313",
                "PATH=/usr/local/sbin:/usr/local/bin:/usr/sbin:/usr/bin:/sbin:/bin",
                "GOSU_VERSION=1.12",
                "MYSQL_MAJOR=8.0",
                "MYSQL_VERSION=8.0.27-1debian10"
            ],
            #设置容器的默认执行的命令不可以追加命令
            "Cmd": [
                "mysqld"
            ],
            #镜像名 服务名+tag版本
            "Image": "mysql:8.0.27",
            "Volumes": {
                "/var/lib/mysql": {}
            },
            #工作目录
            "WorkingDir": "",
            #设置容器的默认执行的命令可以追加命令
            "Entrypoint": [
                "docker-entrypoint.sh"
            ],
            "OnBuild": null,#Dockerfile文件构建
            "Labels": {}
        },
       	#网络设置
 	    "NetworkSettings": {
            "Bridge": "", #网桥
            "SandboxID": "9d8795184ee28e903bb503b42519d5f56a622977f49e4255e771dfcb1c8bdaf3",#沙箱id
            "HairpinMode": false, #是否开启发卡模式
            "LinkLocalIPv6Address": "",
            "LinkLocalIPv6PrefixLen": 0,
            #端口映射配置
            "Ports": {
                "3306/tcp": [
                    {
                        "HostIp": "0.0.0.0",
                        "HostPort": "3306"
                    },
                    {
                        "HostIp": "::", #外网访问
                        "HostPort": "3306" #暴露端口
                    }
                ],
                "33060/tcp": null
            },
            "SandboxKey": "/var/run/docker/netns/9d8795184ee2", #沙盒密钥路径
            "SecondaryIPAddresses": null,
            "SecondaryIPv6Addresses": null,
            "EndpointID": "826898658eec96e305763ce63e6505c4c0e5d152872bf8ae517f73371a8d015e",
            "Gateway": "172.17.0.1", #网关地址
            "GlobalIPv6Address": "",
            "GlobalIPv6PrefixLen": 0,
            "IPAddress": "172.17.0.3",
            "IPPrefixLen": 16,
            "IPv6Gateway": "",
            "MacAddress": "02:42:ac:11:00:03", #MAC地址
            "Networks": {
                "bridge": {
                    "IPAMConfig": null,
                    "Links": null,
                    "Aliases": null,
                    "NetworkID": "376cfaed3501614c09972655643d3d974e434548773d140c0040d9c268294e51",
                    "EndpointID": "826898658eec96e305763ce63e6505c4c0e5d152872bf8ae517f73371a8d015e",
                    "Gateway": "172.17.0.1",
                    "IPAddress": "172.17.0.3",
                    "IPPrefixLen": 16,
                    "IPv6Gateway": "",
                    "GlobalIPv6Address": "",
                    "GlobalIPv6PrefixLen": 0,
                    "MacAddress": "02:42:ac:11:00:03",
                    "DriverOpts": null
                }
            }
        }
    }
]
上面这份配置信息还是可以看到不少内容的建议认真看看。
4.3.6 连接到正在运行中的容器 —— docker attch
命令详细说明 https://docs.docker.com/engine/reference/commandline/attach/
我们通常容器都是使用后台方式运行的需要进入容器修改一些配置。
[root@VM-8-12-centos mysql]# docker attach --help

Usage:  docker attach [OPTIONS] CONTAINER

Attach to a running container

Options:
      --detach-keys string   Override the key sequence for detaching a container
      --help                 Print usage
      --no-stdin             Do not attach STDIN
      --sig-proxy            Proxy all received signals to the process (default true)
[root@VM-8-12-centos mysql]#
进入了容器内部空间。退出容器终端使用命令 ctrl + P + Q。如果输入exit直接停止容器运行。
4.3.7 在运行的容器中执行命令 —— docker exec
使用docker exec命令可以在运行的容器中执行一条命令通常COMMAND只能是一条语句为了支持多个命令的执行需要将多个命令连接起来交给Shell。
命令详细说明 https://docs.docker.com/engine/reference/commandline/exec/
我们通常容器都是使用后台方式运行的需要进入容器修改一些配置。
[root@VM-8-12-centos mysql]# docker exec --help

Usage:  docker exec [OPTIONS] CONTAINER COMMAND [ARG...]

Run a command in a running container

Options:
  -d, --detach               Detached mode: run command in the background
      --detach-keys string   Override the key sequence for detaching a container
  -e, --env list             Set environment variables (default [])
      --help                 Print usage
  -i, --interactive          Keep STDIN open even if not attached
      --privileged           Give extended privileges to the command
  -t, --tty                  Allocate a pseudo-TTY
  -u, --user string          Username or UID (format: <name|uid>[:<group|gid>])
[root@VM-8-12-centos mysql]#
4.3.8 容器与主机之间的数据拷贝 —— docker cp
命令详细说明 https://docs.docker.com/engine/reference/commandline/cp/
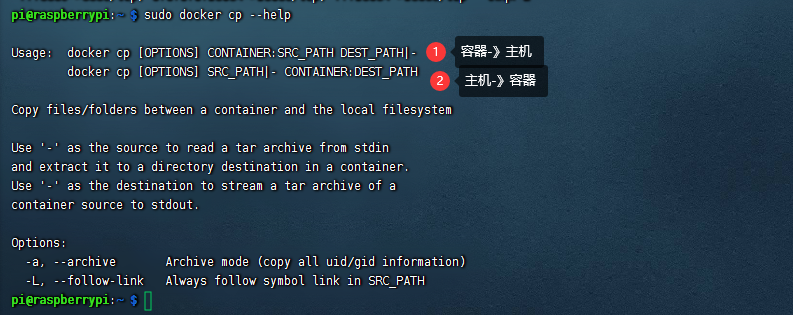
- 把一个
hostFile.txt文件从主机拷贝到容器内
pi@raspberrypi:~ $ sudo touch hostFile.txt
pi@raspberrypi:~ $ ls -al
total 112
drwxr-xr-x 18 pi   pi   4096 Nov 11 04:44 .
drwxr-xr-x  3 root root 4096 Sep 22 02:02 ..
-rw-r--r--  1 pi   pi      0 Nov 10 12:29 100
-rw-------  1 pi   pi   9864 Nov 11 04:26 .bash_history
-rw-r--r--  1 pi   pi    220 Sep 22 01:05 .bash_logout
-rw-r--r--  1 pi   pi   3523 Sep 22 01:05 .bashrc
drwxr-xr-x  2 pi   pi   4096 Sep 22 01:14 Bookshelf
drwxr-xr-x  5 pi   pi   4096 Nov  5 01:14 .cache
drwx------ 10 pi   pi   4096 Nov  8 14:24 .config
drwx------  2 pi   pi   4096 Nov  5 01:11 .cups
drwxr-xr-x  2 pi   pi   4096 Sep 22 02:02 Desktop
drwxr-xr-x  2 pi   pi   4096 Sep 22 02:02 Documents
drwxr-xr-x  2 pi   pi   4096 Sep 22 02:02 Downloads
drwxr-xr-x  2 pi   pi   4096 Nov  8 15:44 frp_0.45.0_linux_arm
-rw-r--r--  1 root root    0 Nov 11 04:44 hostFile.txt
drwxr-xr-x  3 pi   pi   4096 Sep 22 01:14 .local
drwxr-xr-x  2 pi   pi   4096 Sep 22 02:02 Music
drwxr-xr-x  2 pi   pi   4096 Sep 22 02:02 Pictures
-rw-r--r--  1 pi   pi    807 Sep 22 01:05 .profile
drwxr-xr-x  2 pi   pi   4096 Sep 22 02:02 Public
drwx------  2 pi   pi   4096 Nov  8 15:54 .ssh
drwxr-xr-x  2 pi   pi   4096 Sep 22 02:02 Templates
drwxr-xr-x  2 pi   pi   4096 Sep 22 02:02 Videos
drwx------  3 pi   pi   4096 Nov  5 01:10 .vnc
-rw-r--r--  1 pi   pi    165 Nov  8 15:13 .wget-hsts
-rw-------  1 pi   pi     56 Nov 10 15:22 .Xauthority
-rw-------  1 pi   pi   2358 Nov 10 15:22 .xsession-errors
-rw-------  1 pi   pi   2358 Nov  8 16:18 .xsession-errors.old
pi@raspberrypi:~ $ sudo docker ps -a
CONTAINER ID   IMAGE              COMMAND                  CREATED        STATUS          PORTS                                                                                                                                                                                                                                                                                                                     NAMES
e813f9e6a04c   emqx/emqx:4.3.10   "/usr/bin/docker-ent…"   11 hours ago   Up 46 minutes   4369-4370/tcp, 5369/tcp, 6369-6370/tcp, 11883/tcp, 0.0.0.0:1884->1883/tcp, :::1884->1883/tcp, 0.0.0.0:8086->8081/tcp, :::8086->8081/tcp, 0.0.0.0:8087->8083/tcp, :::8087->8083/tcp, 0.0.0.0:8088->8084/tcp, :::8088->8084/tcp, 0.0.0.0:8889->8883/tcp, :::8889->8883/tcp, 0.0.0.0:18084->18083/tcp, :::18084->18083/tcp   emqx-2
pi@raspberrypi:~ $ sudo docker cp hostFile.txt e813f9e6a04c:/
pi@raspberrypi:~ $ sudo docker attach e813f9e6a04c
/opt/emqx $ cd /
/ $ ls -al
total 68
drwxr-xr-x    1 root     root          4096 Nov 11 04:46 .
drwxr-xr-x    1 root     root          4096 Nov 11 04:46 ..
-rwxr-xr-x    1 root     root             0 Nov 10 17:39 .dockerenv
drwxr-xr-x    1 root     root          4096 Nov 12  2021 bin
drwxr-xr-x    5 root     root           340 Nov 11 03:58 dev
drwxr-xr-x    1 root     root          4096 Nov 10 17:39 etc
drwxr-xr-x    1 root     root          4096 Nov 12  2021 home
-rw-r--r--    1 root     root             0 Nov 11 04:44 hostFile.txt
drwxr-xr-x    1 root     root          4096 Aug 31  2021 lib
drwxr-xr-x    5 root     root          4096 Aug 31  2021 media
drwxr-xr-x    2 root     root          4096 Aug 31  2021 mnt
drwxr-xr-x    1 root     root          4096 Nov 12  2021 opt
dr-xr-xr-x  263 root     root             0 Nov 11 03:58 proc
drwx------    2 root     root          4096 Aug 31  2021 root
drwxr-xr-x    1 root     root          4096 Nov 12  2021 run
drwxr-xr-x    2 root     root          4096 Aug 31  2021 sbin
drwxr-xr-x    2 root     root          4096 Aug 31  2021 srv
dr-xr-xr-x   12 root     root             0 Nov 11 03:58 sys
drwxrwxrwt    2 root     root          4096 Aug 31  2021 tmp
drwxr-xr-x    1 root     root          4096 Aug 31  2021 usr
drwxr-xr-x    1 root     root          4096 Nov 12  2021 var
/ $
- 把一个emqxFile.txt文件从容器内拷贝到主机
pi@raspberrypi:~ $ sudo docker cp e813f9e6a04c:/emqxFile.txt /
pi@raspberrypi:~ $ ls -al
total 112
drwxr-xr-x 18 pi   pi   4096 Nov 11 04:44 .
drwxr-xr-x  3 root root 4096 Sep 22 02:02 ..
-rw-r--r--  1 pi   pi      0 Nov 10 12:29 100
-rw-------  1 pi   pi   9864 Nov 11 04:26 .bash_history
-rw-r--r--  1 pi   pi    220 Sep 22 01:05 .bash_logout
-rw-r--r--  1 pi   pi   3523 Sep 22 01:05 .bashrc
drwxr-xr-x  2 pi   pi   4096 Sep 22 01:14 Bookshelf
drwxr-xr-x  5 pi   pi   4096 Nov  5 01:14 .cache
drwx------ 10 pi   pi   4096 Nov  8 14:24 .config
drwx------  2 pi   pi   4096 Nov  5 01:11 .cups
drwxr-xr-x  2 pi   pi   4096 Sep 22 02:02 Desktop
drwxr-xr-x  2 pi   pi   4096 Sep 22 02:02 Documents
drwxr-xr-x  2 pi   pi   4096 Sep 22 02:02 Downloads
drwxr-xr-x  2 pi   pi   4096 Nov  8 15:44 frp_0.45.0_linux_arm
-rw-r--r--  1 root root    0 Nov 11 04:44 hostFile.txt
drwxr-xr-x  3 pi   pi   4096 Sep 22 01:14 .local
drwxr-xr-x  2 pi   pi   4096 Sep 22 02:02 Music
drwxr-xr-x  2 pi   pi   4096 Sep 22 02:02 Pictures
-rw-r--r--  1 pi   pi    807 Sep 22 01:05 .profile
drwxr-xr-x  2 pi   pi   4096 Sep 22 02:02 Public
drwx------  2 pi   pi   4096 Nov  8 15:54 .ssh
drwxr-xr-x  2 pi   pi   4096 Sep 22 02:02 Templates
drwxr-xr-x  2 pi   pi   4096 Sep 22 02:02 Videos
drwx------  3 pi   pi   4096 Nov  5 01:10 .vnc
-rw-r--r--  1 pi   pi    165 Nov  8 15:13 .wget-hsts
-rw-------  1 pi   pi     56 Nov 10 15:22 .Xauthority
-rw-------  1 pi   pi   2358 Nov 10 15:22 .xsession-errors
-rw-------  1 pi   pi   2358 Nov  8 16:18 .xsession-errors.old
pi@raspberrypi:~ $ cd /
pi@raspberrypi:/ $ ls -al
total 76
drwxr-xr-x  18 root root  4096 Nov 11 04:49 .
drwxr-xr-x  18 root root  4096 Nov 11 04:49 ..
lrwxrwxrwx   1 root root     7 Sep 22 01:02 bin -> usr/bin
drwxr-xr-x   4 root root  4096 Jan  1  1970 boot
drwxr-xr-x  16 root root  3900 Nov 10 15:22 dev
-rw-r--r--   1 root root     0 Nov 11 04:48 emqxFile.txt
drwxr-xr-x 133 root root 12288 Nov 10 15:07 etc
drwxr-xr-x   3 root root  4096 Sep 22 02:02 home
lrwxrwxrwx   1 root root     7 Sep 22 01:02 lib -> usr/lib
drwx------   2 root root 16384 Sep 22 01:59 lost+found
drwxr-xr-x   3 root root  4096 Nov  5 03:00 media
drwxr-xr-x   2 root root  4096 Sep 22 01:02 mnt
drwxr-xr-x   6 root root  4096 Nov  9 15:03 opt
dr-xr-xr-x 261 root root     0 Jan  1  1970 proc
drwx------   5 root root  4096 Nov  8 14:41 root
drwxr-xr-x  31 root root   940 Nov 11 01:11 run
lrwxrwxrwx   1 root root     8 Sep 22 01:02 sbin -> usr/sbin
drwxr-xr-x   2 root root  4096 Sep 22 01:02 srv
dr-xr-xr-x  12 root root     0 Jan  1  1970 sys
drwxrwxrwt  16 root root  4096 Nov 11 04:26 tmp
drwxr-xr-x  11 root root  4096 Sep 22 01:02 usr
drwxr-xr-x  11 root root  4096 Sep 22 02:02 var
pi@raspberrypi:/ $
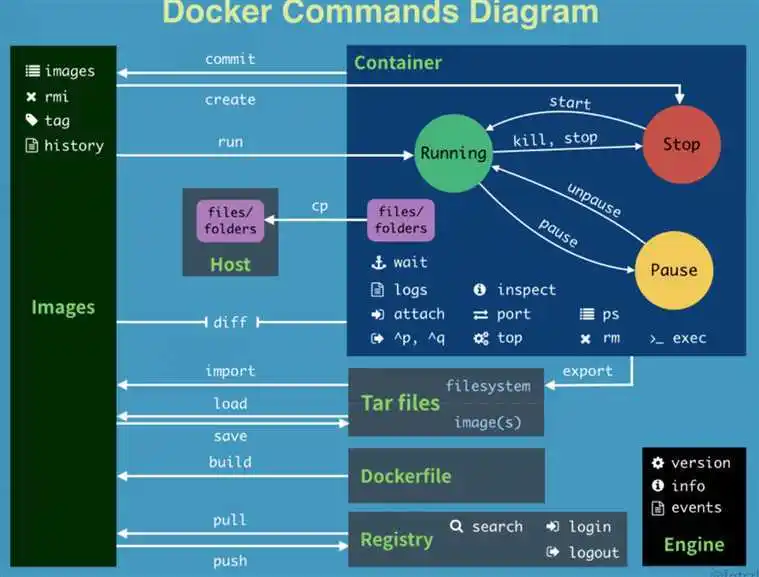
4.4 命令小结
除了一些常用命令以外docker还有不少其他命令这里引用一个网上图片。
5. 开机自启动docker
- 设置开机自启动
sudo systemctl enable docker
[root@VM-8-12-centos mysql]# systemctl enable docker
Created symlink from /etc/systemd/system/multi-user.target.wants/docker.service to /usr/lib/systemd/system/docker.service.
[root@VM-8-12-centos mysql]#
6. 容器网络 —— docker run --net
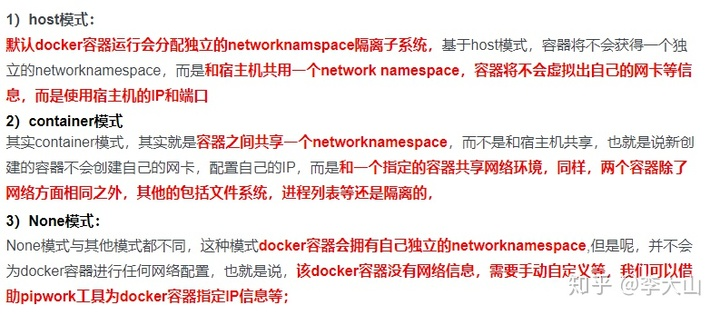
docker run创建Docker容器时可以用 --net 选项指定容器的网络模式
host模式使用 --net=host 指定。
none模式使用 --net=none 指定。
bridge模式使用 --net=bridge 指定默认设置。host模式不能使用端口映射和自定义路由规则这些都与主机一致-p 与-icc 参数是无效的。
container模式使用 --net=container:NAME_or_ID 指定
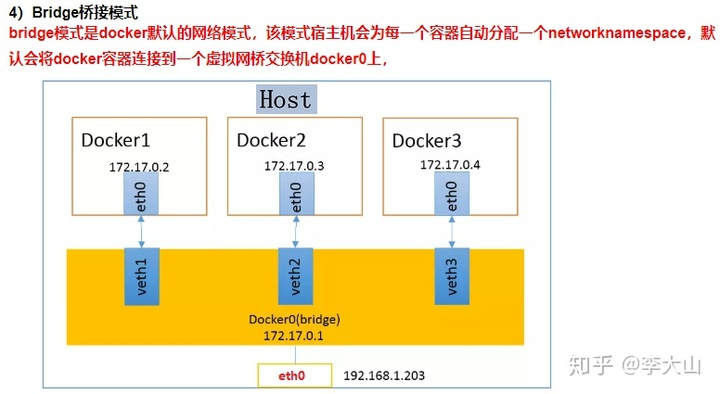
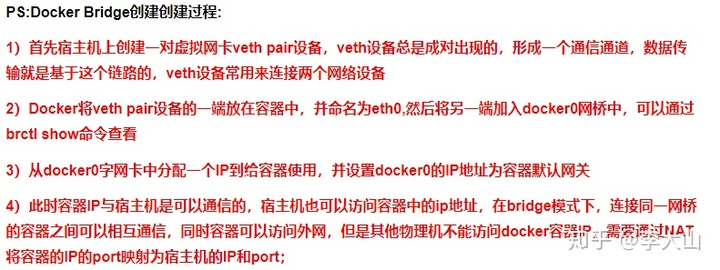
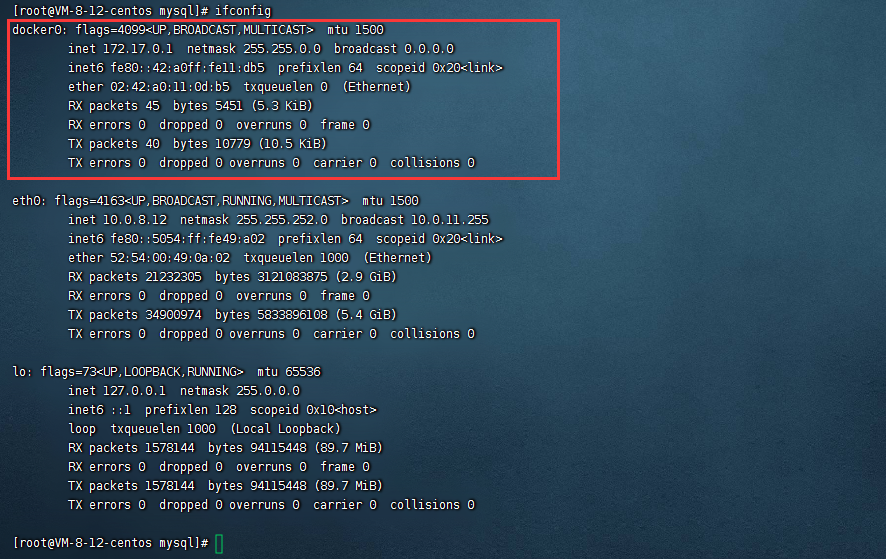
启动docker engine后会在主机上创建一个名为docker0的虚拟网桥此主机上启动的Docker容器会连接到这个虚拟网桥上。虚拟网桥的工作方式和物理交换机类似这样主机上的所有容器就通过交换机连在了一个二层网络中。
从docker0子网中分配一个IP给容器使用并设置docker0的IP地址为容器的默认网关。在主机上创建一对虚拟网卡veth pair设备Docker将veth pair设备的一端放在新创建的容器中并命名为eth0容器的网卡另一端放在主机中以vethxxx这样类似的名字命名并将这个网络设备加入到docker0网桥中。
为了实现上述功能docker主要用到了linux的Bridge、Network Namespace、VETH (虚拟网卡的接口对 Virtual Enternet device)。
- docker0网关就是通过Bridge实现的。
- Network Namespace是网络命名空间通过Network Namespace可以建立一些完全隔离的网络栈。
比如通过docker network create xxx就是在建立一个Network Namespace。 - VETH是虚拟网卡的接口对可以把两端分别接在两个不同的Network Namespace中实现两个原本隔离的Network Namespace的通信。
所以总结起来就是
Network Namespace做了容器和宿主机的网络隔离
Bridge分别在容器和宿主机建立一个网关
然后再用VETH将容器和宿主机两个网络空间连接起来。
这里也有参考文档
Linux network namespace veth birdge与路由
- Network namespace允许你在Linux中创建相互隔离的网络视图每个网络名字空间都有自己独立的网络配置包括网络设备、路由表、IPTables规则路由表、网络协议栈等。新建的网络名字空间与主机默认网络名字空间之间是隔离的。我们平时默认操作的是主机的默认网络名字空间。由于network namespace隔离了网络相关的全局资源因此从网络角度来看一个network namespace可以看做一个独立的虚机即使在同一个主机上创建的两个network namespace相互之间缺省也是不能进行网络通信的。
- veth和tap/tun类似也是linux提供的一种虚拟网络设备但与tap/tun不同的是veth总是成对出现的从一端进入的数据包将会在另一端出现因此又常常称为veth pair。我们可以把veth pair看成一条网线两端连接的两张以太网卡。veth提供了一种连接两个network namespace的方法。如果我们把上图中网线两端的网卡分别放入两个不同的network namespace就可以把这两个network namespace连起来形成一个点对点的二层网络。
- veth实现了点对点的虚拟连接可以通过veth连接两个namespace如果我们需要将3个或者多个namespace接入同一个二层网络时就不能只使用veth了。在物理网络中如果需要连接多个主机我们会使用网桥或者又称为交换机。Linux也提供了网桥的虚拟实现。
+---------------------------------------------------------------------------------------+
|                                       Linux Host                                      |
|                                                                                       |
|  +--------------------------------------+   +--------------------------------------+  |
|  |  network namespace1                  |   |  network namespace1                  |  |
|  | +---------------+  +---------------+ |   | +---------------+  +---------------+ |  |
|  | |network devices|  |  route table  | |   | |network devices|  |  route table  | |  |
|  | +---------------+  +---------------+ |   | +---------------+  +---------------+ |  |
|  | +---------------+  +---------------+ |   | +---------------+  +---------------+ |  |
|  | |    iptables   |  |protocol stack | |   | |    iptables   |  |protocol stack | |  |
|  | +---------------+  +---------------+ |   | +---------------+  +---------------+ |  |
|  +--------------------------------------+   +--------------------------------------+  |
|                                                                                       |
|                       +--------------------------------------+                        |
|                       |        default network namespace     |                        |
|                       | +---------------+  +---------------+ |                        |
|                       | |network devices|  |  route table  | |                        |
|                       | +---------------+  +---------------+ |                        |
|                       | +---------------+  +---------------+ |                        |
|                       | |    iptables   |  |protocol stack | |                        |
|                       | +---------------+  +---------------+ |                        |
|                       +--------------------------------------+                        |
|                                                                                       |
+---------------------------------------------------------------------------------------+
+------------------+              +------------------+
|        ns1       |              |      ns2         |
|                  |  veth pair   |                  |
|                +-+              +-+                |
| 192.168.1.1/24 | +--------------+ | 192.168.1.2/24 |
|   (veth-ns1)   +-+              +-+   (veth-ns2)   |
|                  |              |                  |
|                  |              |                  |
|                  |              |                  |
+------------------+              +------------------+
+------------------+     +------------------+     +------------------+
|                  |     |                  |     |                  |
|                  |     |                  |     |                  |
|                  |     |                  |     |                  |
|       ns1        |     |       ns2        |     |       ns3        |
|                  |     |                  |     |                  |
|                  |     |                  |     |                  |
|                  |     |                  |     |                  |
|  192.168.1.1/24  |     |  192.168.1.2/24  |     |  192.168.1.3/24  |
+----(veth-ns1)----+     +----(veth-ns2)----+     +----(veth-ns3)----+
        +                          +                        +
        |                          |                        |
        |                          |                        |
        +                          +                        +
+--(veth-ns1-br)-------------(veth-ns2-br)------------(veth-ns3-br)--+
|                                                                    |
|                           linux-bridge                             |
|                                                                    |
+--------------------------------------------------------------------+
7. 实战1docker安装 HomeAssistant —— 智能控制
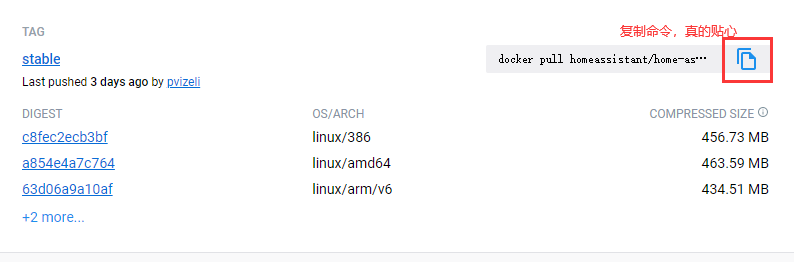
目标镜像https://hub.docker.com/r/homeassistant/home-assistant/tags

7.1 下载镜像
这里我们挑选一个stable稳定版本。
pi@raspberrypi:~ $ sudo docker pull homeassistant/home-assistant:stable
stable: Pulling from homeassistant/home-assistant
c6556b3b6858: Pull complete
985a6d05ce0a: Pull complete
f2c4a4de1e04: Pull complete
9589c15cda36: Pull complete
9b9814a4c4e2: Pull complete
50d309160e30: Pull complete
029da9f8d762: Waiting
20d619833a50: Download complete
3fe0a80a017c: Waiting
32ad3e20ad79: Download complete
4f4fb700ef54: Downloading
92a4ad932391: Waiting
5acd8c703a15: Waiting
74f4dda5b878: Waiting
94038e451e91: Waiting
1fbbfa337b2e: Waiting
eb5e59cf8164: Waiting
defc880aaafc: Waiting
ec47bcda73cf: Waiting
e1c0f6097382: Waiting
85e78e4d4ab0: Waiting
cf621c15cfc8: Waiting
5bd681e8bc73: Waiting
286cffa1f2c1: Waiting
182504b1686c: Waiting
de061c9c972f: Waiting
114297378fee: Waiting
3ebc4990b899: Waiting
stable: Pulling from homeassistant/home-assistant
c6556b3b6858: Pull complete
985a6d05ce0a: Pull complete
f2c4a4de1e04: Pull complete
9589c15cda36: Pull complete
9b9814a4c4e2: Pull complete
50d309160e30: Pull complete
029da9f8d762: Pull complete
20d619833a50: Pull complete
3fe0a80a017c: Pull complete
32ad3e20ad79: Pull complete
4f4fb700ef54: Pull complete
92a4ad932391: Pull complete
5acd8c703a15: Pull complete
74f4dda5b878: Pull complete
94038e451e91: Pull complete
1fbbfa337b2e: Pull complete
eb5e59cf8164: Pull complete
defc880aaafc: Pull complete
ec47bcda73cf: Pull complete
e1c0f6097382: Pull complete
85e78e4d4ab0: Pull complete
cf621c15cfc8: Pull complete
5bd681e8bc73: Pull complete
286cffa1f2c1: Pull complete
182504b1686c: Pull complete
de061c9c972f: Pull complete
114297378fee: Pull complete
3ebc4990b899: Pull complete
Digest: sha256:5e3d2dde141812a4a54c140f3cbf52b9c74168bf25e8560978f499578902a363
Status: Downloaded newer image for homeassistant/home-assistant:stable
docker.io/homeassistant/home-assistant:stable
pi@raspberrypi:~ $
7.2 /home/pi/目录下创建一个homeassistant文件夹挂载容器卷
sudo mkdir homeassistant
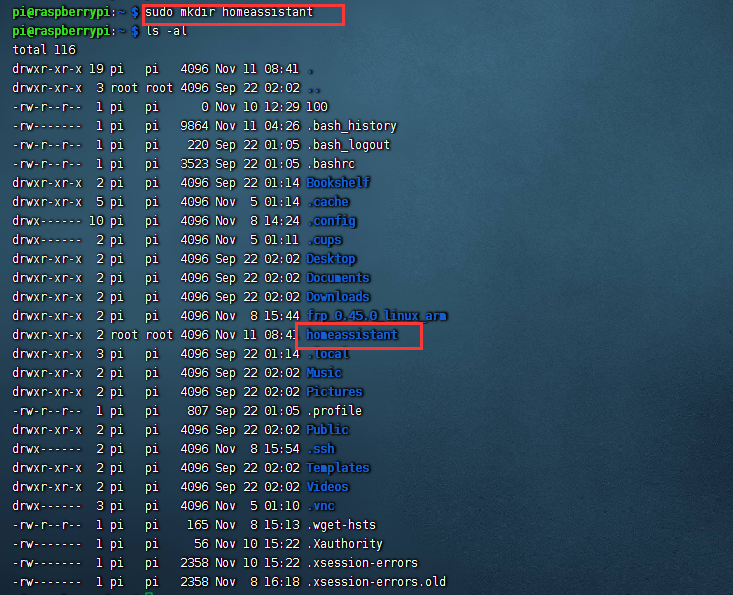
为了方便修改镜像中的配置文件然后我们就可以直接在宿主机上修改配置不需要进入到容器里面。
7.3 启动容器
输入命令
docker run -d
–name homeassistant
–privileged
–restart=unless-stopped
-e TZ=Asia/Shanghai
-v /home/pi/homeassistant:/config
–network=host
homeassistant/home-assistant:stable
这里直接使用host网络模式。
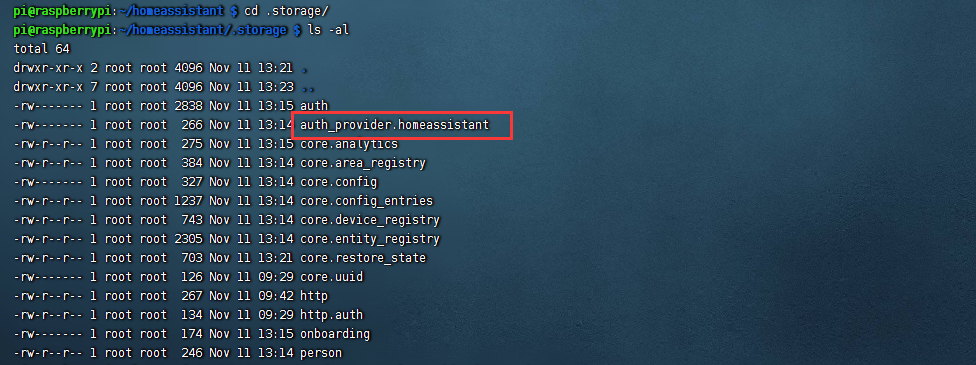
7.4 打开http://树莓派ip:8123/
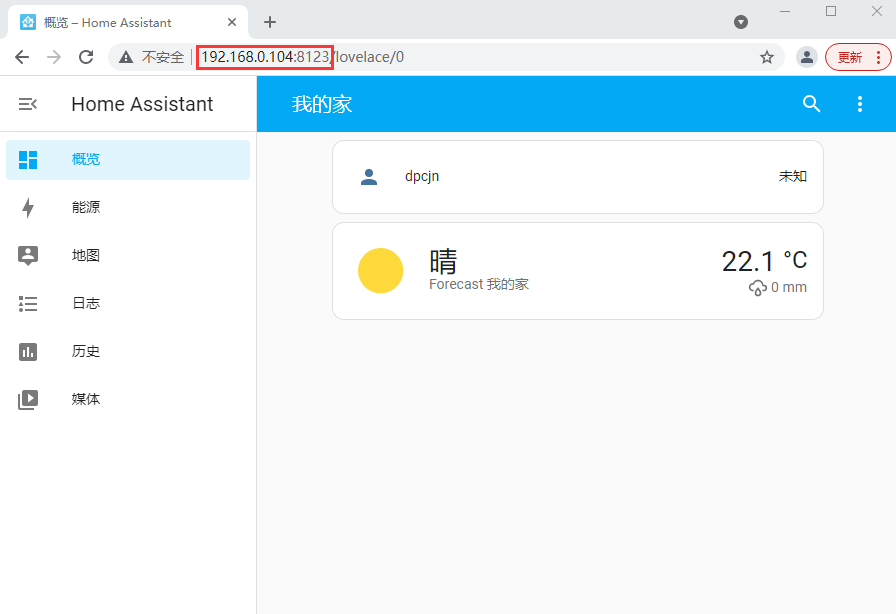
如果忘记账号可以查看
8. 实战2docker安装 portainer —— 可视化管理Docker镜像容器
Portainer 是一款轻量级的应用它提供了图形化界面用于方便地管理Docker环境包括单机环境和集群环境。
目标镜像https://hub.docker.com/r/portainer/portainer-ce/tags 社区版本
8.1 下载镜像
docker命令
sudo docker pull portainer/portainer-ce:linux-arm
pi@raspberrypi:~/homeassistant/.storage $ sudo docker pull portainer/portainer-ce:linux-arm
linux-arm: Pulling from portainer/portainer-ce
772227786281: Downloading
96fd13befc87: Downloading
3199d8e66404: Download complete
69ad73a13c4b: Download complete
linux-arm: Pulling from portainer/portainer-ce
772227786281: Pull complete
96fd13befc87: Pull complete
3199d8e66404: Pull complete
69ad73a13c4b: Pull complete
Digest: sha256:6d20b5b53c6edcf2594eb01ee1e68cddc172b864ede84a3bd48b6bcf3b9e7cbf
Status: Downloaded newer image for portainer/portainer-ce:linux-arm
docker.io/portainer/portainer-ce:linux-arm
pi@raspberrypi:~/homeassistant/.storage $
8.2 /home/pi/目录下创建一个portainer文件夹挂载容器卷
sudo mkdir portainer

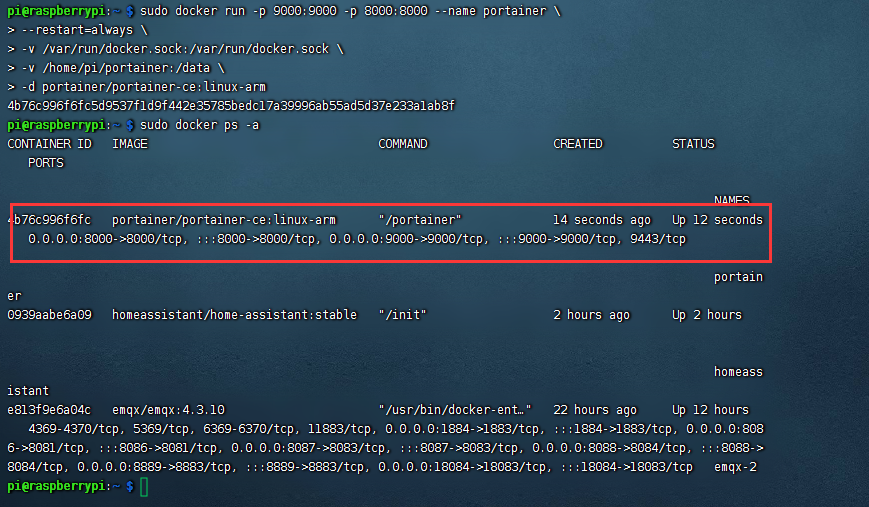
8.3 启动容器
docker命令
sudo docker run -p 9000:9000 -p 8000:8000 --name portainer \
--restart=always \
-v /var/run/docker.sock:/var/run/docker.sock \
-v /home/pi/portainer:/data \
-d portainer/portainer-ce:linux-arm
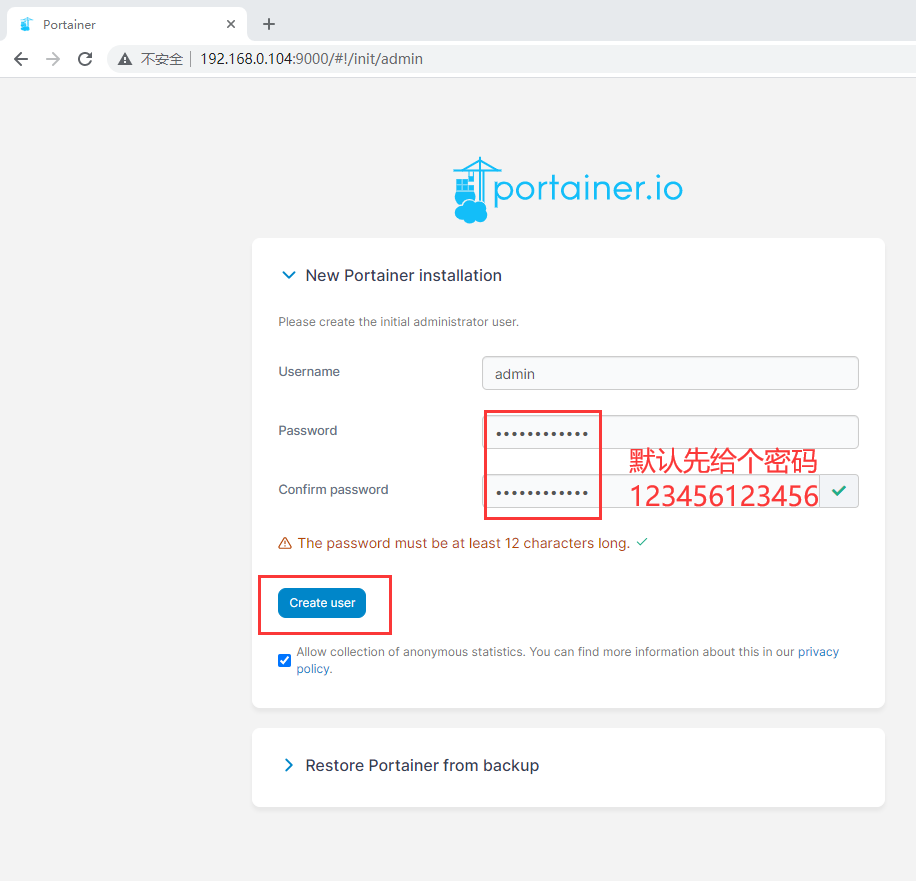
8.4 打开http://树莓派ip:9000/
第一次登录的时候需要创建管理员账号。
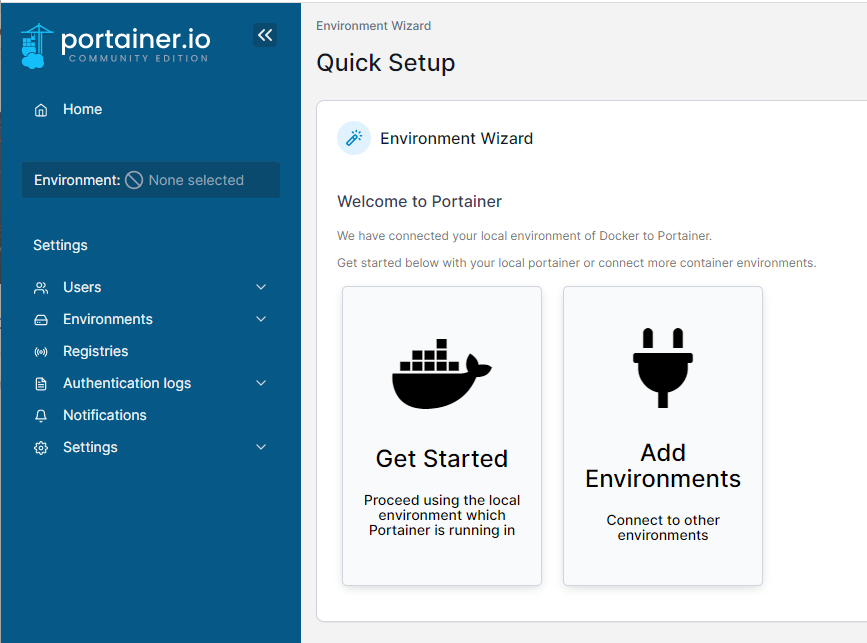
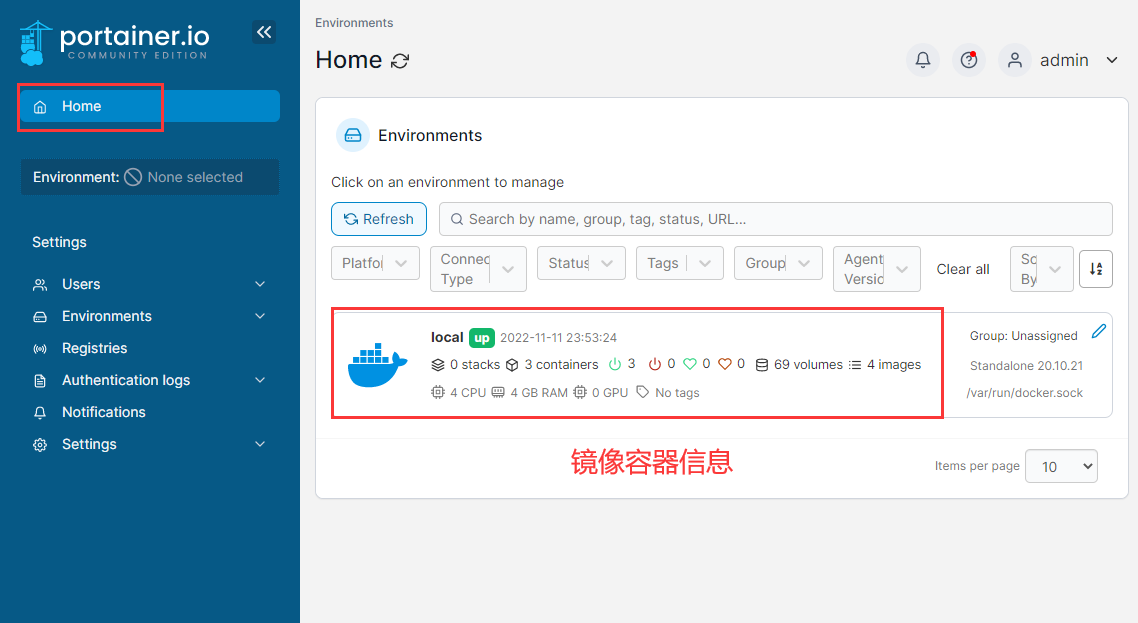
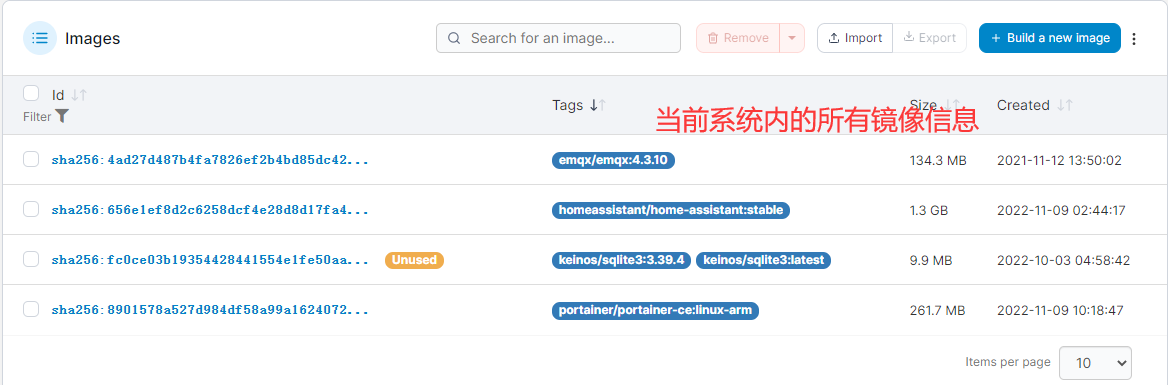
有一个本地的Docker环境可以看到Docker环境的概览信息比如运行了几个容器有多少个镜像等
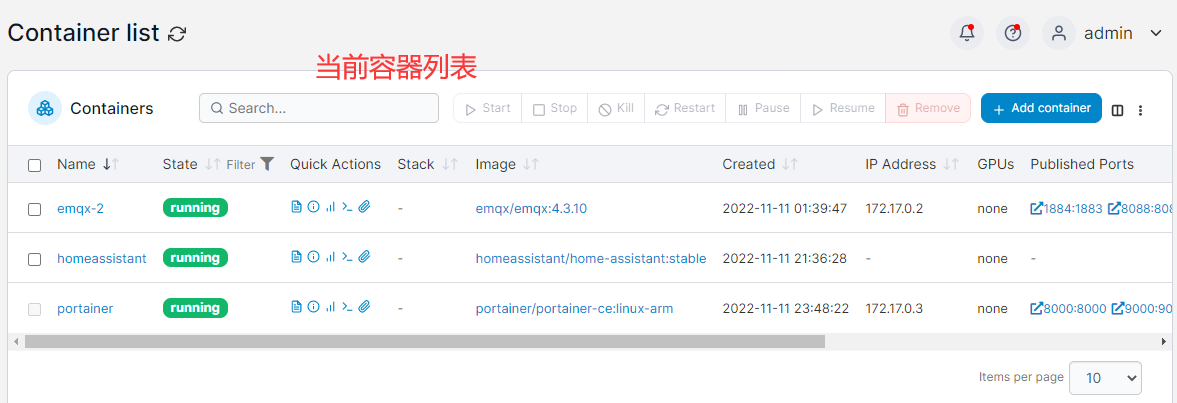
打开Containers菜单可以看到当前创建的容器我们可以对容器进行运行、暂停、删除等操作
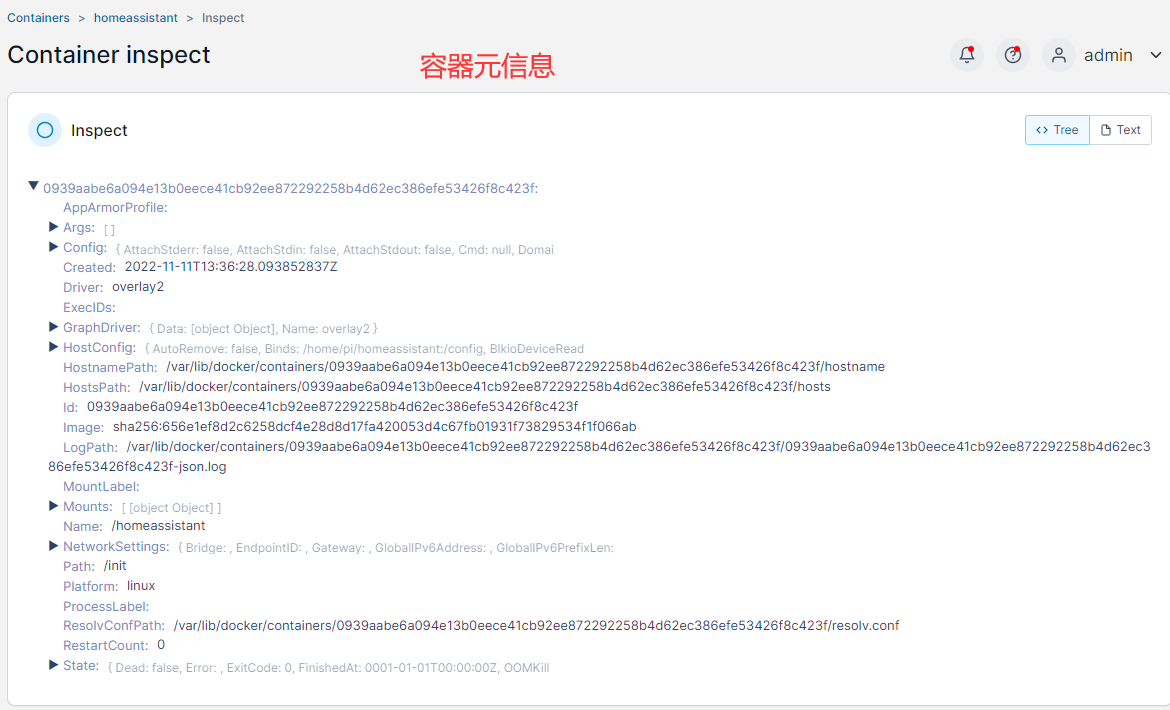
还可以看到容器元信息
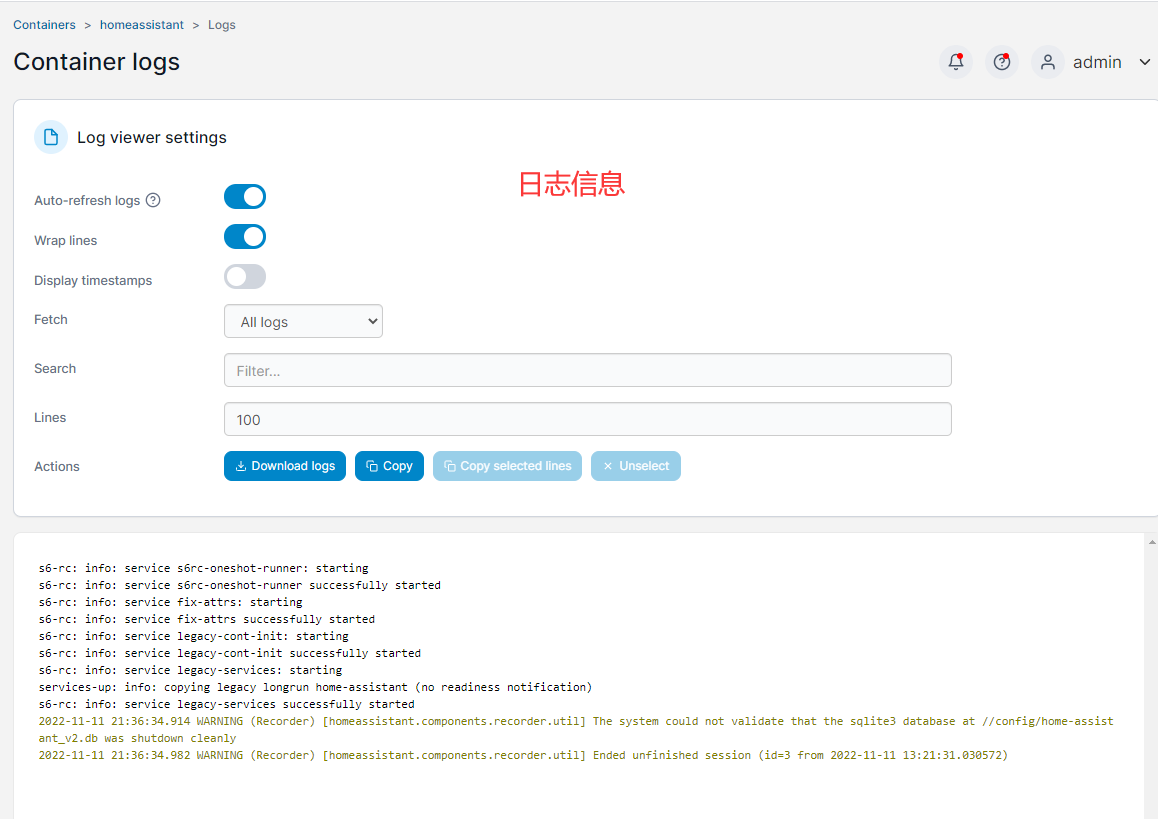
当然还可以看到日志信息
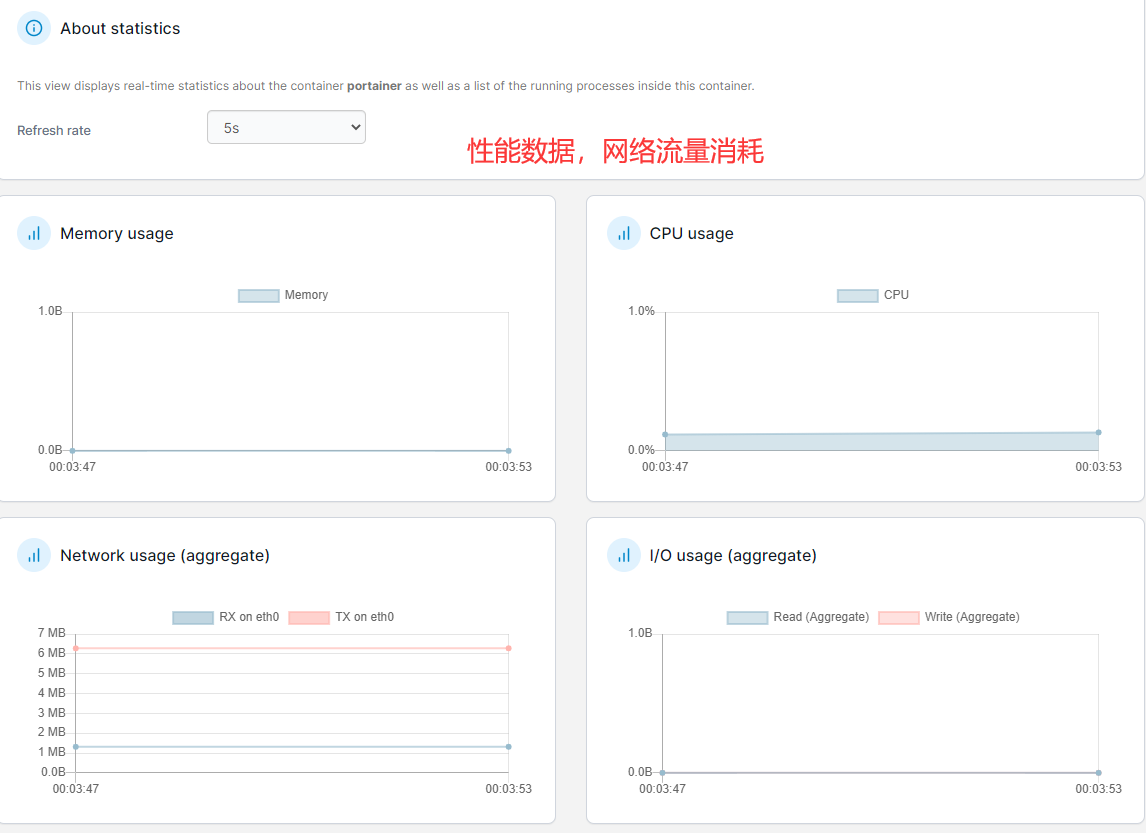
点击Stats按钮可以查看容器的内存、CPU及网络的使用情况性能分析。
9. 总结
从0到1搭建docker环境顺便安装一下emqx MQTT Broker、HomeAssistant、portainer。把docker的一些好的特性应用到实际开发中。