

使用element ui的el-upload组件上传图片
| 阿里云国内75折 回扣 微信号:monov8 |
| 阿里云国际,腾讯云国际,低至75折。AWS 93折 免费开户实名账号 代冲值 优惠多多 微信号:monov8 飞机:@monov6 |
使用element ui的el-upload组件上传图片
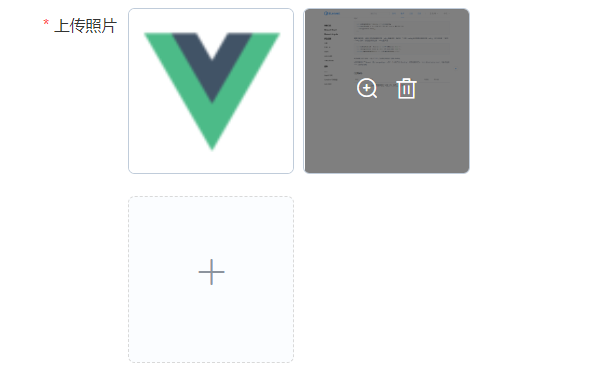
效果预览
下面是实现效果接口方面是把有两个接口一个接口上传图片传参是图片和路径返回值是路径。另一个接口是上传表单内容(用户地址照片)照片是传一个路径。
具体实现
html
<el-form-item label="上传照片" prop="imagePath">
  <el-upload
    ref="upload"
    class="avatar-uploader"
    list-type="picture-card"
    action
    :file-list="fileList"
    :show-file-list="true"
    :limit="uploadLimit"
    :before-upload="beforeUpload"
    :http-request="uploadPicture"
    :class="{ hide: hideUploadEdit }"
  >
    <i slot="default" class="el-icon-plus"></i>
    <div slot="file" slot-scope="{ file }">
      <img class="el-upload-list__item-thumbnail" :src="file.url" alt="" />
      <span class="el-upload-list__item-actions">
        <span
          class="el-upload-list__item-preview"
          @click="handlePictureCardPreview(file)"
        >
          <i class="el-icon-zoom-in"></i>
        </span>
        <span
          v-if="!disabled"
          class="el-upload-list__item-delete"
          @click="handleRemove(file)"
        >
          <i class="el-icon-delete"></i>
        </span>
      </span>
    </div>
  </el-upload>
</el-form-item>
下面是预览
<el-dialog :visible.sync="dialogVisible" :width="dialogWidth">
  <img :src="dialogImageUrl" @load="onLoadImg" :width="imgWidth" alt="" />
</el-dialog>
js
文件上传前的过滤如文件格式文件大小
beforeUpload(file) {
  // console.log('beforeUpload:');
  // console.log(file);
  // 1MB=1024*1024(1MB=1024KB 1KB=1024B)
  const isAllowSize = file.size / 1024 / 1024 < 10;
  const allowType = ['jpeg', 'jpg', 'png'];
  const isAllowType = allowType.some(e => 'image/' + e === file.type);
  if (!isAllowType) {
    this.$notify({
      message: `上传图片只能是 ${allowType} 格式!`,
      type: 'warning'
    });
    // 不能直接return 空值不然就算格式不符合也会生成缩略图
    return Promise.reject();
  }
  if (!isAllowSize) {
    this.$notify({
      message: `上传图片大小不能超过 2MB!`,
      type: 'warning'
    });
    return Promise.reject();
  }
  this.fileChange(file);
  return isAllowType && isAllowSize;
},
文件上传后的显示这里为了省事不做回显了后端现成的接口也不支持文件上传失败再删除或者显示在那个图片上显示一个error的样式吧。照片墙需要的参数url参数是必选的做显示用uid是为了删除等操作文件的uid每次上传都不一样不是按照文件哈希值来的这一点确保了能精确地进行删除操作比如照片墙允许4张图第一张图和第三种图上传的是同一个图片如果使用文件名或者哈希值就可能出现删除了错误位置的图片的情况。
fileChange(file) {
  console.log('fileChange:');
  // 单个图片直接赋值如果需要多个图片改为对象数组
  this.fileInfo = file;
  const url = URL.createObjectURL(file);
  // console.log(url);
  this.fileList.push({ uid: file.uid, url });
  // 文件到达上限后隐藏上传按钮
  this.hideUploadEdit = this.fileList.length >= this.uploadLimit;
},
删除和预览操作,这个是网上找了一些博客后参考实现的不过原本找到的还挺多坑的经过一番找Bug后实现了下面的方法。坑点删除要根据uid来而不是文件名不然会照片墙出现同名图片时想删后一张实际删前一张的情况。onLoadImg图片的原始宽度要用img.naturalWidth获取如果使用width获取是获取到当前宽度会固定显示第一次预览的宽度。
handleRemove(file) {
  console.log(file);
  for (let i = 0; i < this.fileList.length; i++) {
    if (this.fileList[i]['uid'] === file.uid) {
      this.fileList.splice(i, 1);
      break;
    }
  }
  if (this.fileList.length <= 0) {
    this.formData.imagePath = '';
  }
  // 文件未到达上限后显示上传按钮
  this.hideUploadEdit = this.fileList.length > this.uploadLimit - 1;
  console.log('handleRemove:', this.hideUploadEdit);
},
handlePictureCardPreview(file) {
  this.dialogImageUrl = file.url;
  this.dialogVisible = true;
},
onLoadImg(e) {
  const img = e.target;
  let width = 0;
  if (img.fileSize > 0 || (img.naturalWidth > 1 && img.naturalHeight > 1)) {
    width = img.naturalWidth;
  }
  console.log('图片大小:', img.naturalWidth, img.naturalHeight);
  if (img.naturalWidth < 200) {
    width = 200;
  } else if (img.naturalHeight > img.naturalWidth && width > 370) {
    width = 370;
  } else if (width > 1000) {
    width = 1000;
  }
  this.imgWidth = width + 'px';
  this.dialogWidth = width + 40 + 'px';
  console.log('imgWidth:', this.imgWidth);
  console.log('dialogWidth:', this.dialogWidth);
},
文件上传到服务器这里是用了http-request钩子,改成手动触发也行的如果按照本案例的后端接口的话大概就是点发送按钮后先发送图片如果发送异常就直接弹错误信息正常就把返回的图片路径作为发送表单所需要的图片路径。
这个路径值得说一下如果每次上传图片都进行单独的存储的话那么使用uuid是最好的但是这样容易存储冗余文件。在经过一些考虑后包括用户量项目应用场景等决定当文件名并且文件修改时间一致时认为这是同一张图片。
ps: 听说云盘一般是按照哈希值来存储的即哈希值一致即认为是同一份文件不进行额外的存储不过我查了一下如果哈希值计算是前端处理的话性能不好也不安全。至于后端现成的接口又没有那么大的需求感觉也没有必要。折衷一下就按照文件修改时间/文件名来存储吧
async uploadPicture(param) {
  // http-request钩子参数名只能用param
  // console.log('param:', param);
  const fileInfo = this.fileInfo;
  // 缺少一个id使用文件修改时间来减少被其他同名文件覆盖的可能
  const path = `xxxr/${fileInfo.lastModified}`;
  console.log('path:', path);
  const formData = new FormData();
  formData.append(fileInfo.name, fileInfo);
  const res = await commonUploadFiles(path, formData);
  if (res) {
    this.formData.imagePath = res[0];
  }
},
css
.avatar-uploader {
  /deep/ .el-upload {
    border: 1px dashed #d9d9d9 !important;
    border-radius: 6px !important;
    cursor: pointer;
    position: relative;
    overflow: hidden;
  }
}
/deep/ .el-upload--picture-card:hover {
  border-color: #409eff !important;
}
.avatar-uploader-icon {
  font-size: 28px;
  color: #8c939d;
  width: 178px;
  height: 178px;
  line-height: 178px;
  text-align: center;
}
.avatar {
  width: 178px;
  height: 178px;
  display: block;
}
.hide {
  /deep/ .el-upload {
    display: none;
  }
}
踩坑
- 文件上传格式不熟悉大量log输出后理解了
- el-upload组件的action属性必须要有。
- 如果想让http-request绑定的函数生效不能设置:auto-upload=“false”
- 钩子的执行顺序问题on-change发送在before-upload之前这会导致如果在on-change处理图片显示的话会发生不通过验证的图片依然会生成缩略图。所以before-upload要放在最前面执行。这个问题应该是因为el-upload组件内部有一套数据。
| 阿里云国内75折 回扣 微信号:monov8 |
| 阿里云国际,腾讯云国际,低至75折。AWS 93折 免费开户实名账号 代冲值 优惠多多 微信号:monov8 飞机:@monov6 |